Table of Contents
You can create continuous falling snow in Scratch with one Snowflake sprite and its clones. The original sprite stays hidden, creates a clone at a controlled interval, and each clone chooses its own size, horizontal position, and falling speed before deleting itself.
The important final step is clone cleanup. Without it, old snowflakes continue accumulating and can make the project stop creating new clones or run poorly.
What the project teaches
- Creating and deleting clones
- Random numbers for natural variation
- Scratch Stage coordinates
- Controlling animation with waits and loops
- Balancing visual density with performance
1. Choose a winter backdrop
Create a new Scratch project, select the Stage, and choose or draw a winter backdrop. Remove the default cat if it is not part of the scene.
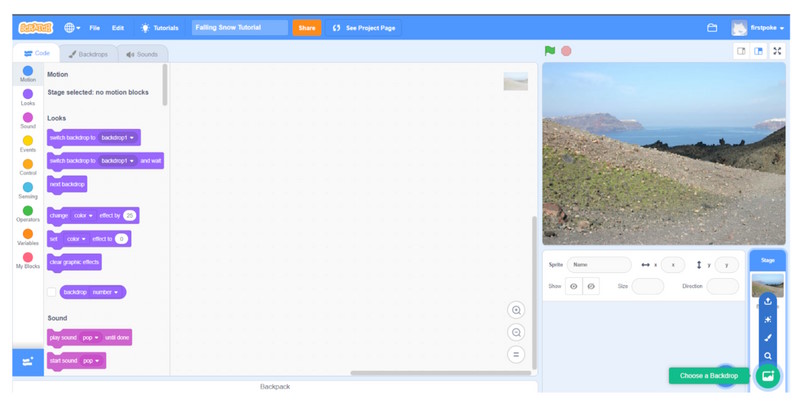
A dark or medium-toned backdrop makes white snowflakes easier to see. Keep important text and controls away from the busiest part of the effect.
2. Add one Snowflake sprite
Select Choose a Sprite and search for a snowflake, or draw a simple one. Rename it Snowflake. The sprite can be large in the editor because each clone will choose a smaller displayed size.
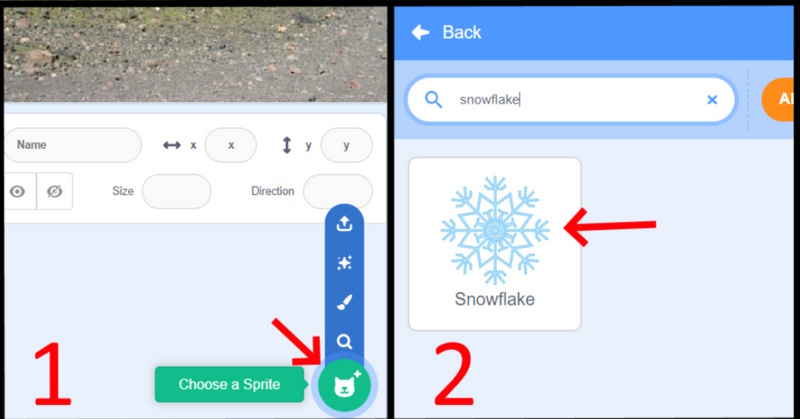
Set the costume center near the visual center of the snowflake so rotation and placement look natural.
3. Create snowflake clones
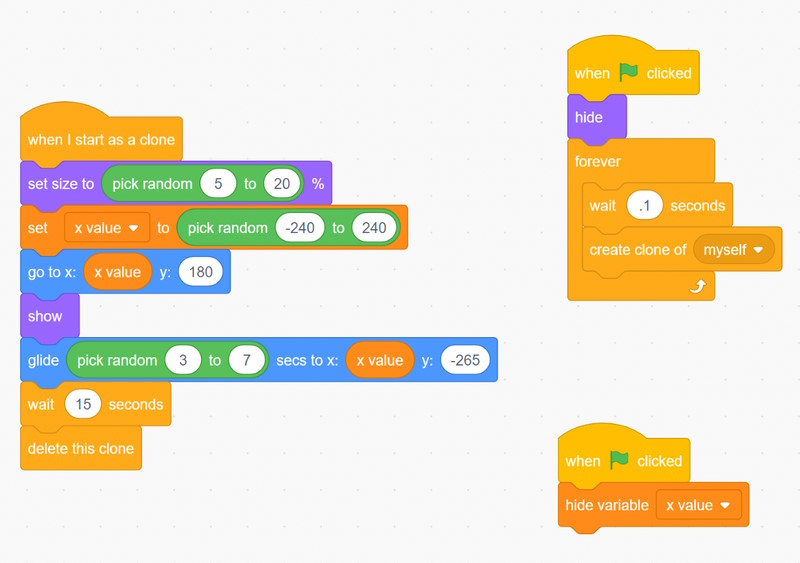
On the Snowflake sprite, build this script:
- when green flag clicked
- hide
- forever
- create clone of [myself]
- wait (pick random 5 to 20) / 100 seconds
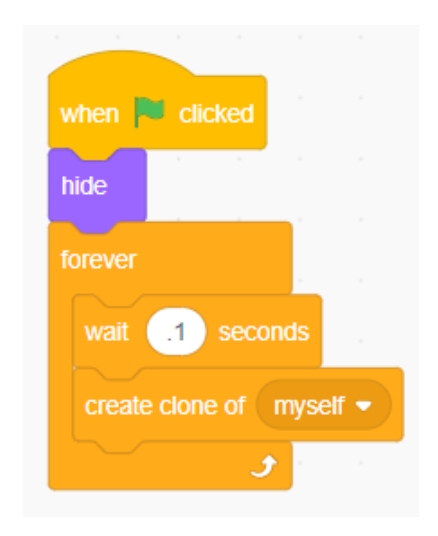
The original sprite remains a hidden template. A shorter wait creates denser snow, but setting the delay to zero creates clones as fast as Scratch can run and is unnecessary. Start with 0.1 to 0.2 seconds and adjust after the full effect works.
4. Give each clone a random position and size
Create a second script:
- when I start as a clone
- set size to (pick random 8 to 24)%
- go to x: (pick random -235 to 235) y: 180
- show
Scratch's Stage is approximately x = -240 to 240 and y = -180 to 180. Keeping the x range slightly inside the edge prevents part of a larger clone from starting offscreen.
5. Make the snow fall and delete the clone
For the simplest version, continue the clone script with:
- glide (pick random 3 to 7) seconds to x: (x position) y: -190
- delete this clone
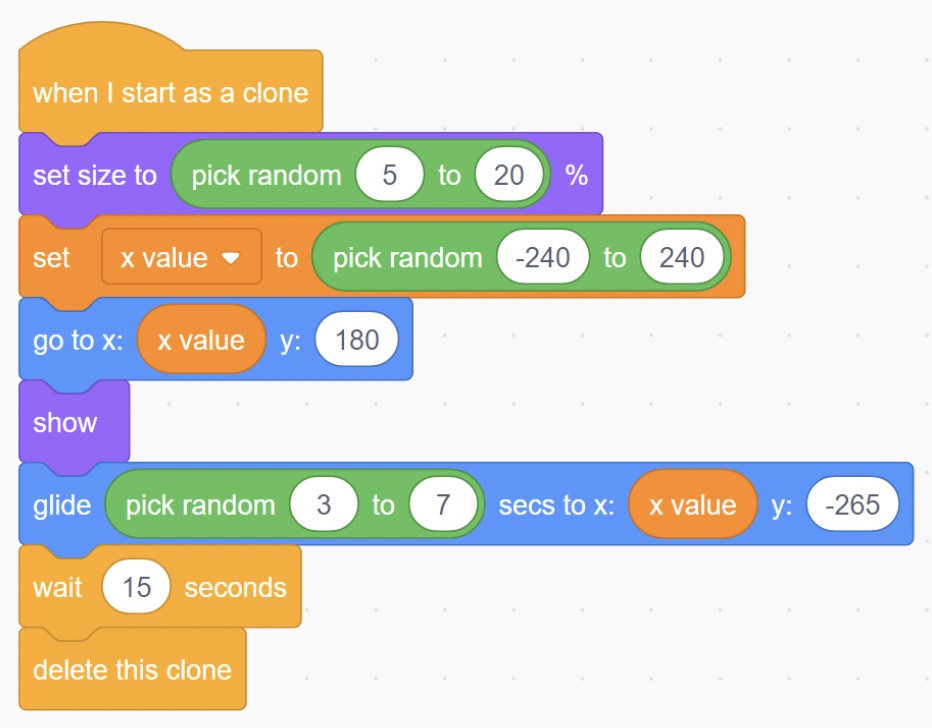
Using the clone's current x position makes it fall vertically. A longer glide time produces a slower flake. Y = -190 moves it just below the visible Stage before deletion.
Do you need an X Position variable?
No. You can place a clone with go to x: pick random … y: 180 and use the built-in x position reporter in the glide block. An X Position variable is useful only if a later script needs to remember a separate starting value.
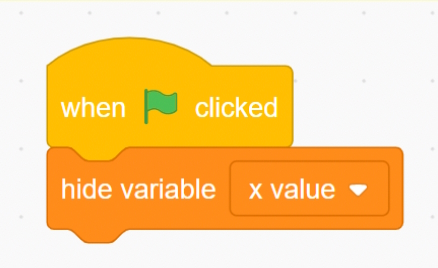
If you keep the variable from an older version of the project, hide its Stage monitor after testing by clearing the checkbox beside the variable.
Add gentle sideways drift
A glide moves in a straight line. For more natural motion, replace the glide with a short loop:
- repeat until <y position < -185>
- change y by (pick random -5 to -2)
- change x by (pick random -1 to 1)
- turn clockwise 2 degrees
- wait 0.03 seconds
- delete this clone
This version creates a small wobble. If the motion is too shaky, change x less often or use a Wind variable shared by all flakes.
Create depth with size and speed
Larger flakes can fall slightly faster while small flakes move slowly, which suggests foreground and background layers. A beginner-friendly method is to choose between two cases:
| Clone type | Size | Fall behavior |
|---|---|---|
| Background | 8–14% | Smaller vertical steps or 6–8 second glide |
| Foreground | 18–28% | Larger vertical steps or 3–5 second glide |
Keep the ranges close enough that the scene still looks coherent.
Let snow appear to collect
If a flake should rest briefly at the bottom, wait one or two seconds before deleting it. Long waits leave many invisible or stationary clones alive, so avoid using a 15-second pause with a rapid spawn rate.
For persistent snow buildup, draw or stamp a controlled number of flakes onto a separate sprite or use several fixed snowbank costumes. That is more predictable than keeping hundreds of clones indefinitely.
Reset the effect cleanly
Clicking the stop button ends clone scripts, and restarting removes existing clones. The original Snowflake should hide immediately on the green flag. If other visual variables or effects are used, reset them in the same green-flag script.
Troubleshooting
No snow appears
- Confirm that show is in the clone script, not only on the hidden original.
- Check that the starting y position is near 180.
- Make sure the costume is visible against the backdrop.
The original snowflake stays on screen
Add hide immediately after when green flag clicked. The clone will inherit the hidden state, so its own script must call show.
The project becomes slow
- Increase the delay between clones.
- Delete each clone as soon as it leaves the Stage.
- Remove long waits after landing.
- Reduce visual effects and unnecessary scripts on every clone.
All snowflakes look identical
Randomize two or three properties—size, x position, fall duration, rotation, or costume—but keep reasonable limits. Too much randomness can look like confetti instead of snow.
Optional extensions
- Add a Wind variable controlled with the left and right arrows.
- Use two snowflake costumes and choose one randomly for each clone.
- Fade flakes near the bottom with a ghost effect before deletion.
- Stop spawning snow when a Weather variable changes.
- Add a slider-like sprite to control the spawn delay.
Related Articles
 Points to Know About the New Scratch 3.0 Version7 minutes read
 The Most Detailed Way to Make Games on Scratch 3.04 minutes read
 Basic Scratch Tutorial for Beginners5 minutes read
 How to Create a Virtual Pet Game in Scratch10 minutes read
 Link Download Scratch 4616 minutes read
 Create Snow Effect When Moving Mouse on Windows3 minutes read
Reader Comments 0
Sign in with email or Google to join the discussion.