Table of Contents
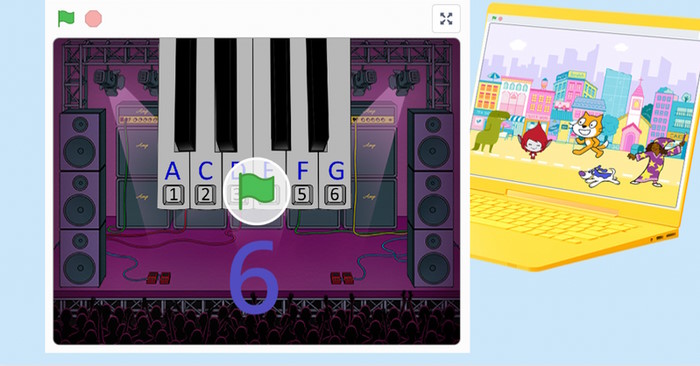
You can make a playable piano in Scratch by adding note sounds to one sprite and connecting each computer key to a sound event. This beginner version uses six notes—C, D, E, F, G, and A—so it can play simple melodies such as “Twinkle, Twinkle, Little Star.”
What the project teaches
- Keyboard events
- Adding and renaming sounds
- Mapping one input to one output
- Choosing between start sound and play sound until done
- Adding costumes or effects as visual feedback
1. Start the project and choose a backdrop
- Create a new Scratch project.
- Remove the default cat if it is not part of your design.
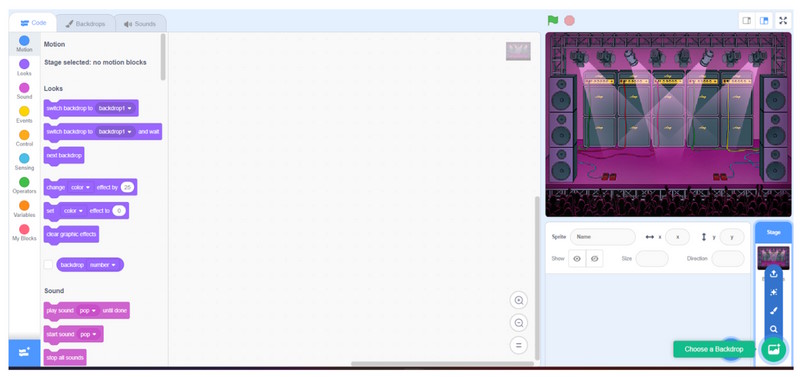
- Select Choose a Backdrop and pick a stage, concert, studio, or simple plain background.
- Rename the project so you can find it later.
2. Add a piano sprite
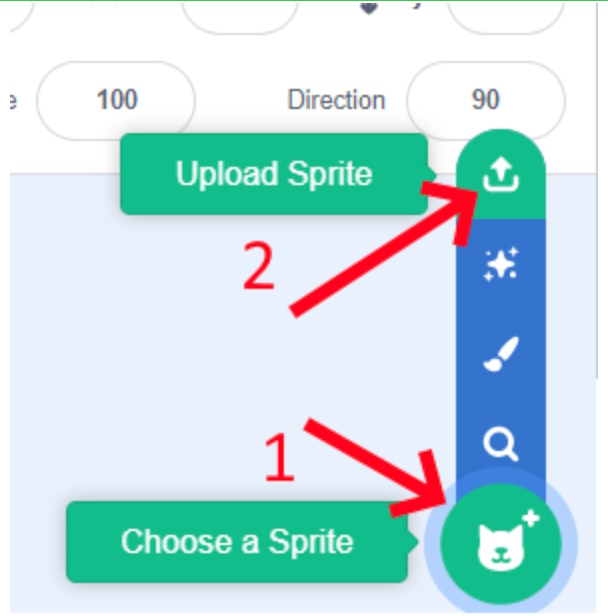
You can draw a keyboard in the Costume editor, choose a suitable library sprite, or upload artwork you created or are allowed to reuse. Do not assume an image found through web search is free to publish in a shared project.
Select Upload Sprite for an authorized image. A transparent PNG is convenient because the backdrop remains visible around the keyboard.
3. Resize and position the piano
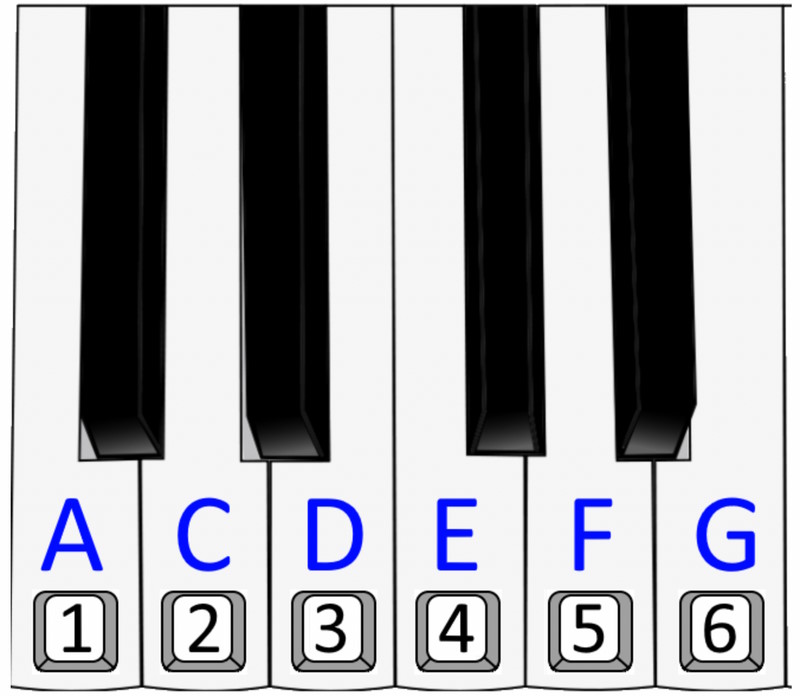
Select the Piano sprite and adjust Size until it fits the Stage. The original example uses 70%, but the correct value depends on the source image. Place the keyboard where labels and later animations will not cover important keys.
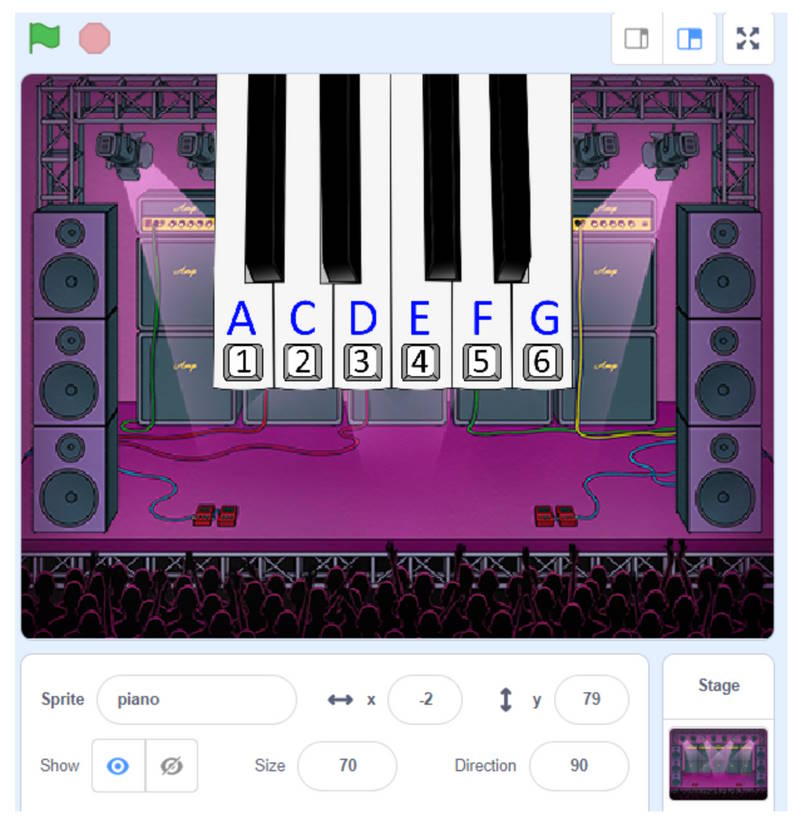
On when green flag clicked, add go to x: y:, set size to, and clear graphic effects. These blocks give every run the same starting state.
4. Add six piano-note sounds
With the Piano sprite selected, open Sounds and choose note samples from the Scratch sound library. Add C, D, E, F, G, and A piano sounds. Rename each sound clearly if the library names are hard to scan.
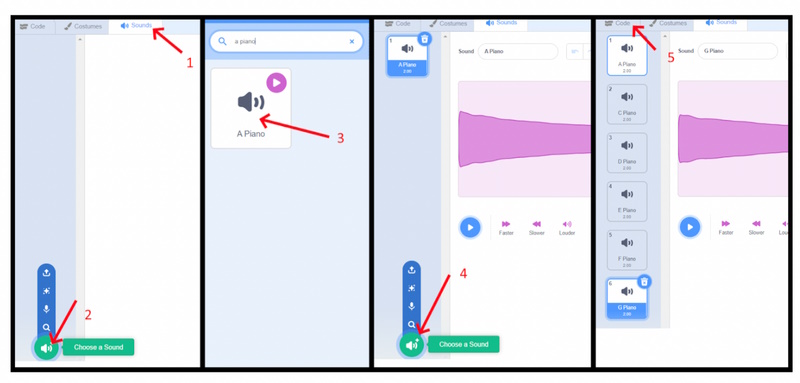
Listen to every sample. The notes should come from the same instrument family and octave so the scale sounds consistent. Trim long silence in the Sound editor if a note responds late.
5. Map number keys to notes
| Computer key | Note | Scratch script |
|---|---|---|
| 1 | C | when [1] key pressed → start sound [C Piano] |
| 2 | D | when [2] key pressed → start sound [D Piano] |
| 3 | E | when [3] key pressed → start sound [E Piano] |
| 4 | F | when [4] key pressed → start sound [F Piano] |
| 5 | G | when [5] key pressed → start sound [G Piano] |
| 6 | A | when [6] key pressed → start sound [A Piano] |
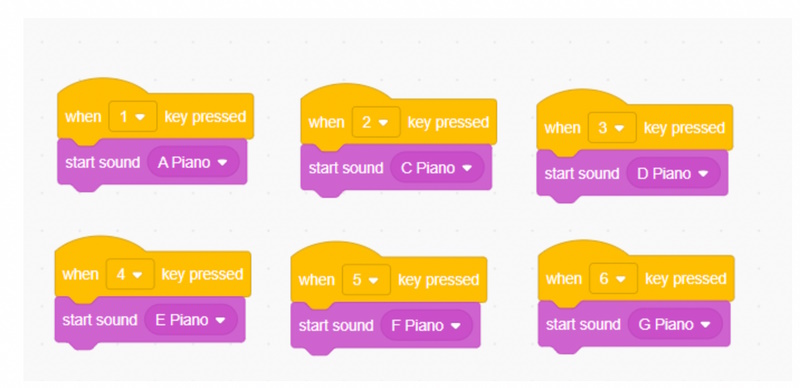
Use start sound when the player should be able to press another note before the previous sample finishes. Use play sound until done when later blocks must wait for the sound, although that can make rapid playing feel less responsive.
6. Add visual feedback
A sound-only piano is difficult to follow without audio. Add at least one visual response:
- Show the current note in a speech bubble.
- Change the Piano's brightness effect briefly.
- Create separate key sprites that switch to a pressed costume.
- Display the computer-key labels above the keyboard.
For a simple effect, add change brightness effect by 25, wait 0.05 seconds, then set brightness effect to 0 after each sound event. If quick presses cause scripts to overlap, use separate key sprites or a costume-based design.
7. Test the instrument
- Press each key once and confirm the expected pitch.
- Press two keys quickly and listen for clipping or a delayed sample.
- Start the project again and check that position, size, and effects reset.
- Try the project on the keyboard that students will use; number-row and keypad behavior may differ.
- Confirm that players can understand the controls without sound alone.
Play a simple melody
With the mapping above, the opening of “Twinkle, Twinkle, Little Star” becomes:
1 1 5 5 6 6 5
4 4 3 3 2 2 1
Play slowly first, then add a Beat variable or on-screen prompts for a rhythm challenge.
Alternative: use Scratch's Music extension
Select Add Extension and choose Music. The extension provides instrument and numbered-note blocks, which are useful when you need a larger keyboard without importing a separate sample for every note.
Set the instrument to piano, then map keys to play note blocks. This approach gives consistent pitches and adjustable duration. Sound samples may feel more natural, while the Music extension is easier to expand across octaves.
Turn the piano into a game
- Copy the sequence: show a short list of notes, then let the player repeat it.
- Score: compare each key press with the next item in a Note List.
- Timed challenge: count correct notes during 30 seconds.
- Song mode: highlight the next required note and advance after the correct key.
- Free play: let the player switch instruments or octaves.
Build the six-note instrument first and confirm that every input plays the correct sound. Add scoring only after the basic mapping and reset behavior are reliable.
Related Articles
 Scientific Proof: the Piano Players Brain Is Very Different'6 minutes read
 The Simplest Way to Install and Use Everyone Piano on Your Computer5 minutes read
 How to Create a Virtual Pet Game in Scratch10 minutes read
 Basic Scratch Tutorial for Beginners5 minutes read
 How to Create a Maze Game in Scratch6 minutes read
 How to Create a Jumping Game in Scratch7 minutes read
Reader Comments 0
Sign in with email or Google to join the discussion.