Table of Contents
A storyboard gives Google Flow a visual plan for characters, composition, locations, and shot order. The most reliable workflow is to generate one short clip per panel or shot, review consistency, and assemble the approved clips. Uploading one large storyboard sheet and asking for a complete narrated film gives the model too many decisions at once.
Flow's interface and model names change over time. Current versions include Flow planning tools, Storyboard Studio, Gemini Omni for multimodal creation and editing, and Veo models for video generation. The screenshots below show an earlier interface, but the preparation and shot-by-shot method still applies.
1. Prepare a production-ready storyboard
Write a short shot list before generating images. For each shot, specify:
- Character identity, clothing, and important props.
- Location, time of day, and lighting.
- Framing and camera angle.
- The action that begins and ends the shot.
- Any dialogue, narration, or sound cue.
- Target duration and transition to the next shot.
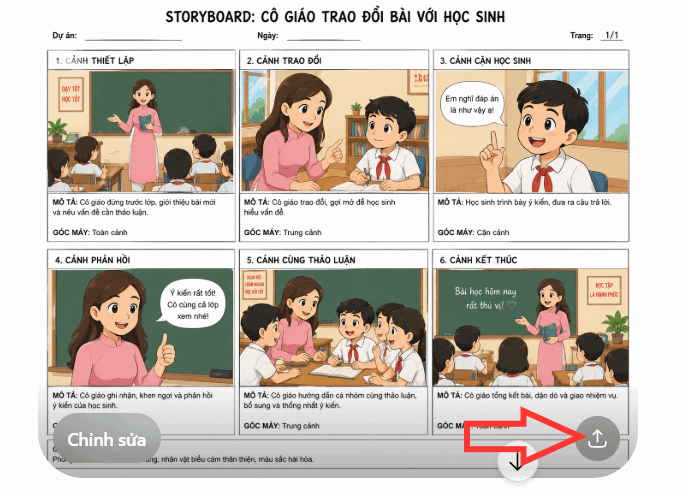
You can create storyboard panels in Flow's current Storyboard Studio, an image editor, or another image generator. If using ChatGPT or another service, request a clearly separated grid and keep the character description identical across panels. Use only images and likenesses you have the right to upload.
Create a six-panel 16:9 storyboard in a clean animated style.
Characters: a teacher in a navy cardigan and a student in a yellow shirt.
Location: the same bright classroom in every panel.
Story: the teacher reviews an exercise, the student asks a question,
the teacher explains with a diagram, and the student understands.
Keep faces, clothing, desk position, and color palette consistent.
Label each panel with shot number and camera framing.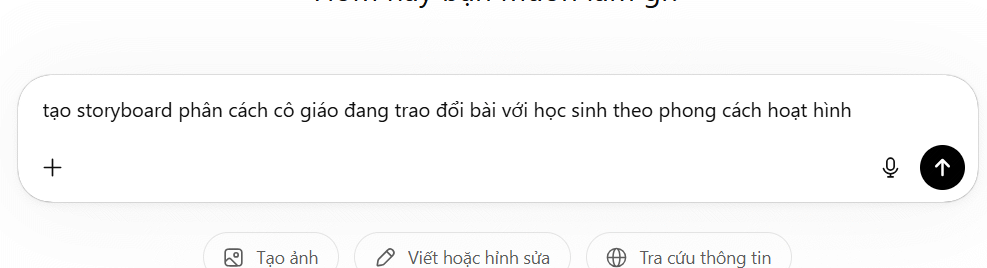
2. Split the storyboard into individual panels
Export each panel as a separate image when possible. A single sheet is useful as a continuity reference, but an individual panel gives the video model a clearer composition for the current shot. Keep the original sheet so you can compare character and set details throughout the sequence.
Check for malformed hands, inconsistent props, unreadable text, or a character whose clothing changes between panels. Correct those problems before animation; video generation often preserves or amplifies errors in the source frame.
3. Create a Flow project and choose video generation
Open the official Google Flow studio, create a project, and choose a video creation workflow. Available models, mobile features, aspect ratios, clip lengths, and audio controls depend on region, platform, subscription, and current product rollout.
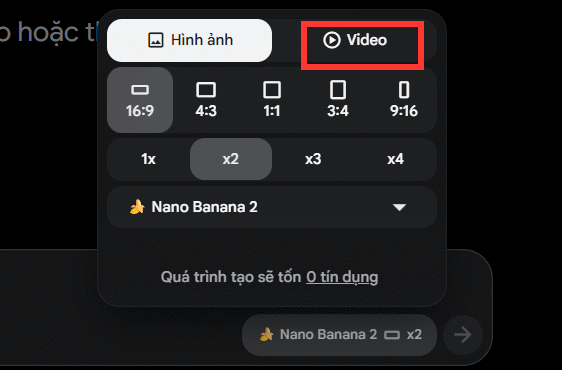
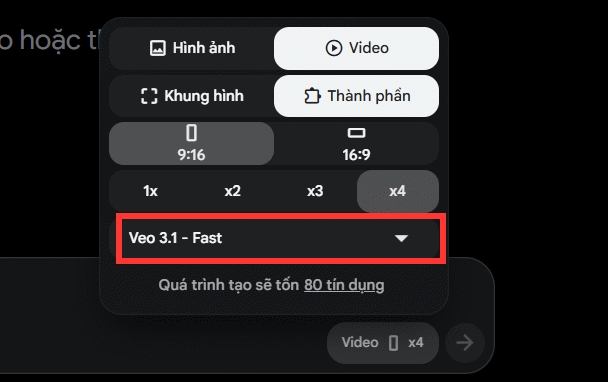
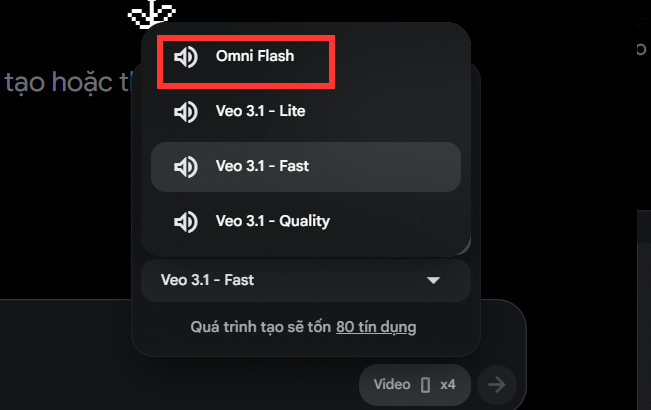
The older “Omni Flash” label in these screenshots may now appear as a different model or tool. Choose a current option that accepts image references or the first/last frames you need. Do not select a model solely because it costs fewer credits; run a small test and compare adherence, motion, audio, and consistency.
4. Set the format before generating
Choose the aspect ratio for the final destination—such as landscape for YouTube or vertical for short-form platforms—and keep it consistent across all shots. Select one output first instead of several variations, because each generation consumes credits and more options create more clips to review.
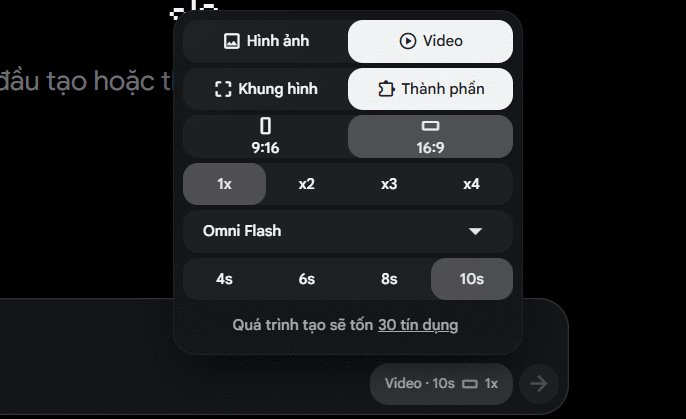
Credit costs vary by model and settings. Check the number displayed in Flow before submitting rather than relying on an older fixed price.
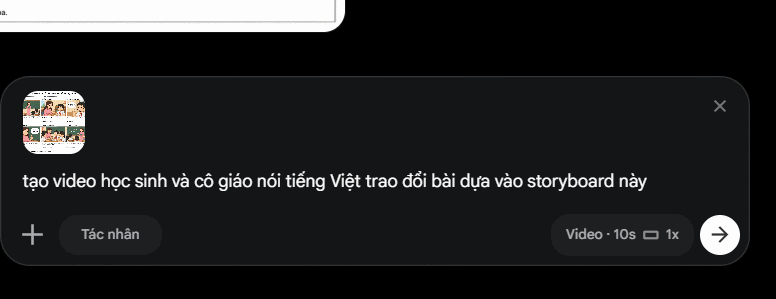
5. Upload the reference and prompt one shot
Add the individual panel for the first shot. If Flow supports multiple references, include the full storyboard or a separate character reference only when it improves identity consistency. Too many conflicting images can weaken the result.
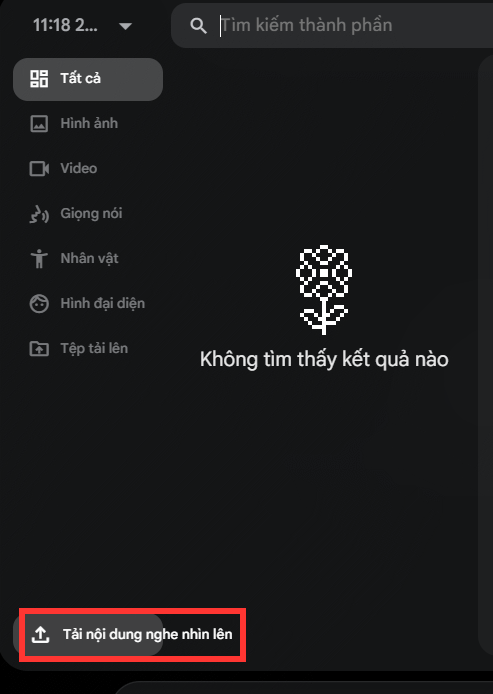
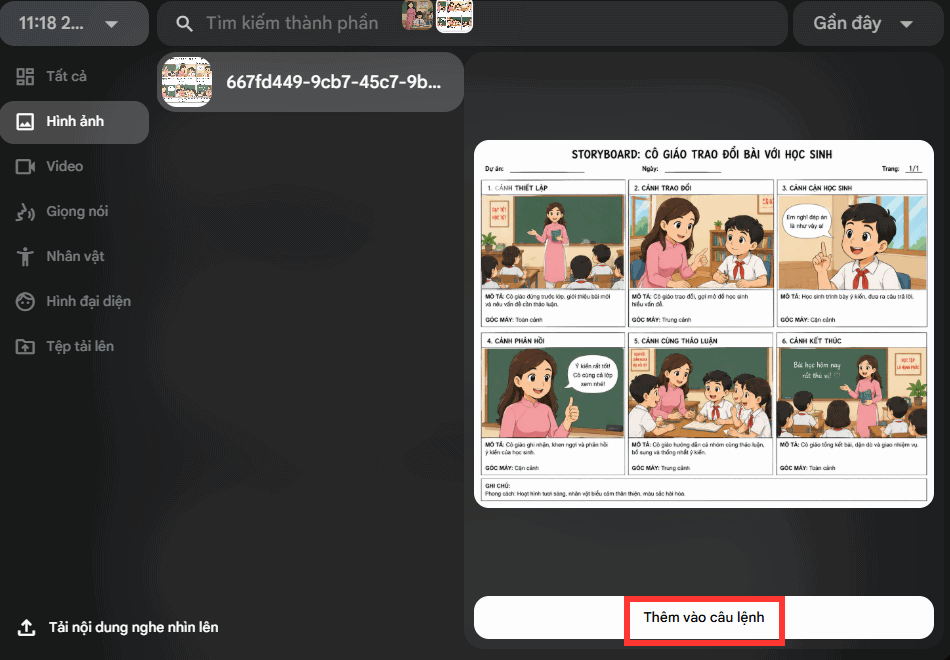
Describe only the motion that should happen during the clip. Keep the identity and environment constraints short and explicit:
Use this panel as the opening frame. Medium two-shot in the same classroom.
The teacher calmly points to one line in the workbook while the student looks
from the page to the teacher. Subtle natural hand and eye movement.
Slow, steady camera push-in. Keep faces, clothing, desk, and lighting unchanged.
No new people, no on-screen text, no camera cut.
If spoken dialogue is needed, add the exact line and language, but test it separately from the visual motion. Generated speech and lip synchronization may vary by model and language. For precise wording, consider adding recorded narration or dialogue during editing.
6. Review, revise, and continue shot by shot
Check the first output at normal speed and frame by frame. Look for face changes, extra fingers, drifting props, text mutations, abrupt camera movement, mismatched eye lines, and audio artifacts. Change one instruction at a time so you can tell what improved the result.
After approving the shot, generate the next panel with the same identity and style description. Where Flow offers frame extension or first/last-frame controls, use the final frame of the previous clip to create a smoother transition.
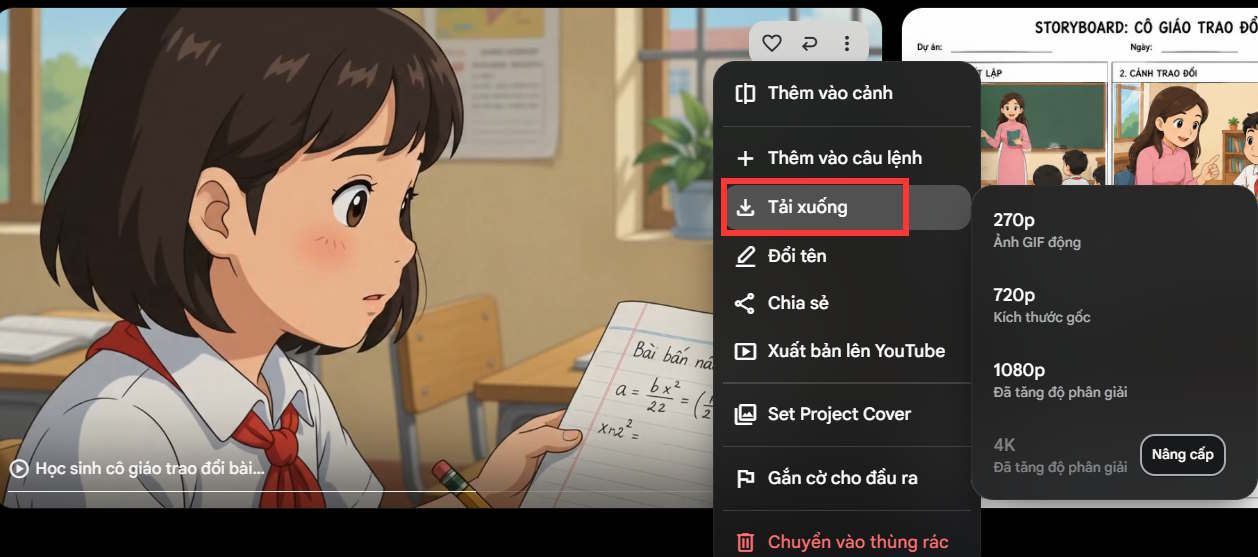
7. Download and assemble the sequence
Use Flow's download control to save the selected clip at the available quality, then repeat for each shot. Keep filenames in sequence, such as 01_teacher_opens.mp4 and 02_student_question.mp4.
Assemble the clips in a video editor, trim weak beginnings and endings, balance audio, add captions, and check the final pacing. The removed embedded examples used a non-YouTube host and were not retained.
Consistency checklist
- Use the same character reference and exact identity description.
- Keep aspect ratio, style, lighting, and color palette fixed.
- Give each clip one clear action and one camera move.
- Avoid asking the model to invent long conversations and complex blocking at once.
- Test the first shot before spending credits on the full sequence.
- Review rights, consent, and disclosure requirements before publishing synthetic media.
For a commercial variation, see TipsMake's Flow product-advertising video workflow. To compare tools before committing credits, use the guide to AI video creation platforms.
Related Articles
 How to Create a Storyboard on Google Flow4 minutes read
 How to Create a Video from a Single Image Using Google Flow3 minutes read
 How to Create a Dialogue Video from Just Two Images Using Google Flow6 minutes read
 How to Create AI Videos Shot with Drones on Google Flow: Step-by-Step Guide5 minutes read
 How to Combine Videos on Flow into a Single-Page Video3 minutes read
 How to Create Your Own Video Editing Tools Directly on Flow?4 minutes read
Reader Comments 0
Sign in with email or Google to join the discussion.