Table of Contents
Google Flow can build reusable creative tools from a natural-language description. For a short-video workflow, you can ask Flow to create inputs for a topic, style, aspect ratio, duration, and source media, then connect those inputs to script, scene, caption, and video-generation steps.
This is a custom workflow builder, not a replacement for a full timeline editor. The generated tool still needs testing, and access to tool creation or particular models may depend on your Google AI plan, region, platform, and available credits.
Build a custom video tool in Google Flow
1. Start a new tool
Open Google Flow, create or open a project, and select Tools in the left navigation.
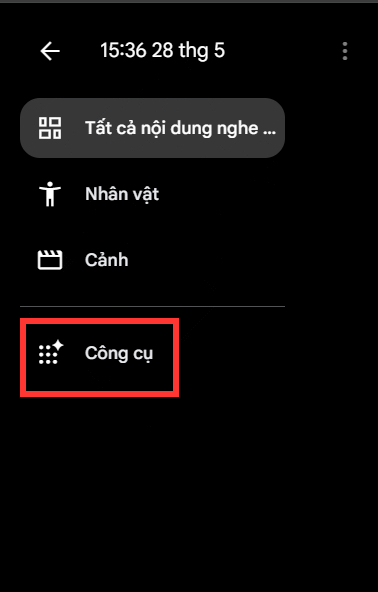
Select Create new tool. If that option is missing, confirm that custom tool creation is included for your account.
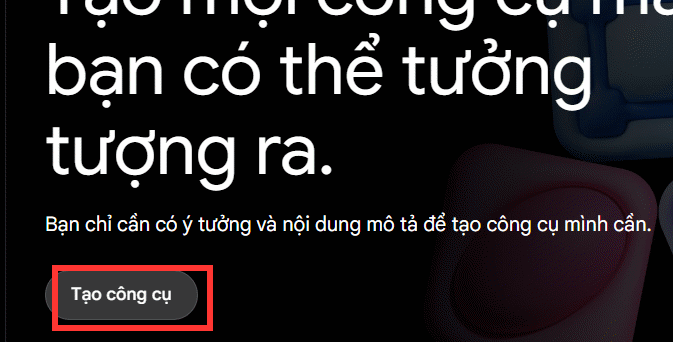
2. Describe the workflow and its controls
Tell Flow what the tool should accept, what steps it should run, and what it should return. Define the minimum useful controls first; a request containing every possible feature is harder to test and more likely to produce a confusing interface.
The following template creates a practical first version:
Create a short-video production tool for useful everyday tips.

User inputs:
- Topic or short brief
- Target audience
- Tone: practical, humorous, minimal, cinematic, energetic, or inspiring
- Aspect ratio: 9:16, 1:1, or 16:9
- Target duration
- Number of scenes
- Optional reference images or video clips

Workflow:
1. Turn the topic into a factual, concise script.
2. Write a clear opening hook without exaggerated claims.
3. Divide the script into scenes with a visual description for each scene.
4. Generate or use uploaded media for each scene with the available Flow models.
5. Add narration text, on-screen captions, and sensible transitions.
6. Assemble a preview video in the selected aspect ratio.
7. Return the script, scene list, caption, title suggestions, and export control.

Requirements:
- Preserve uploaded media unless the user chooses to replace it.
- Keep text inside safe margins for vertical video.
- Ask for missing information instead of inventing facts.
- Let the user revise the script and individual scenes before final generation.
Adjust the template for your actual format. A product-ad tool, tutorial tool, and travel-summary tool need different inputs and safeguards. For another Flow workflow, see this guide to product advertising videos in Flow.
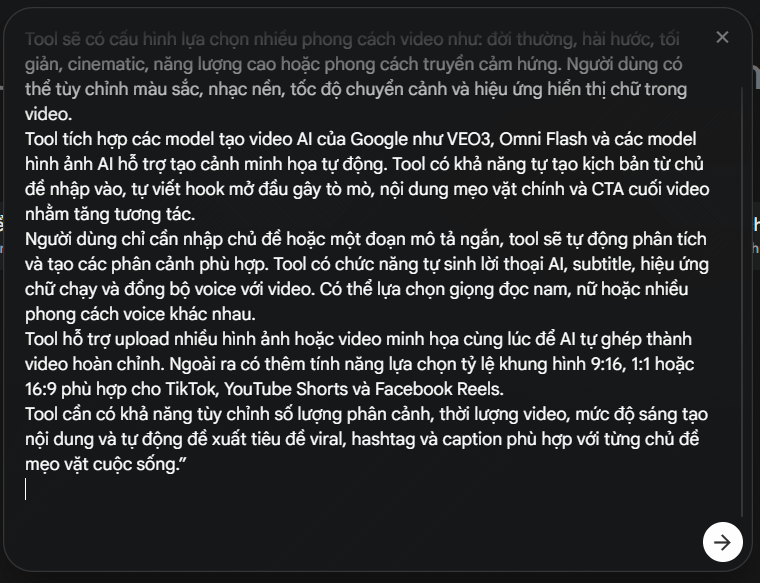
3. Inspect and refine the generated tool
Wait for Flow to build the interface, then check every field and action. Confirm that required inputs are clearly labeled, choices have sensible defaults, and the output sequence matches the description. If a control is missing, request one precise change at a time—for example, “Add a 9:16, 1:1, and 16:9 aspect-ratio selector before generation.”
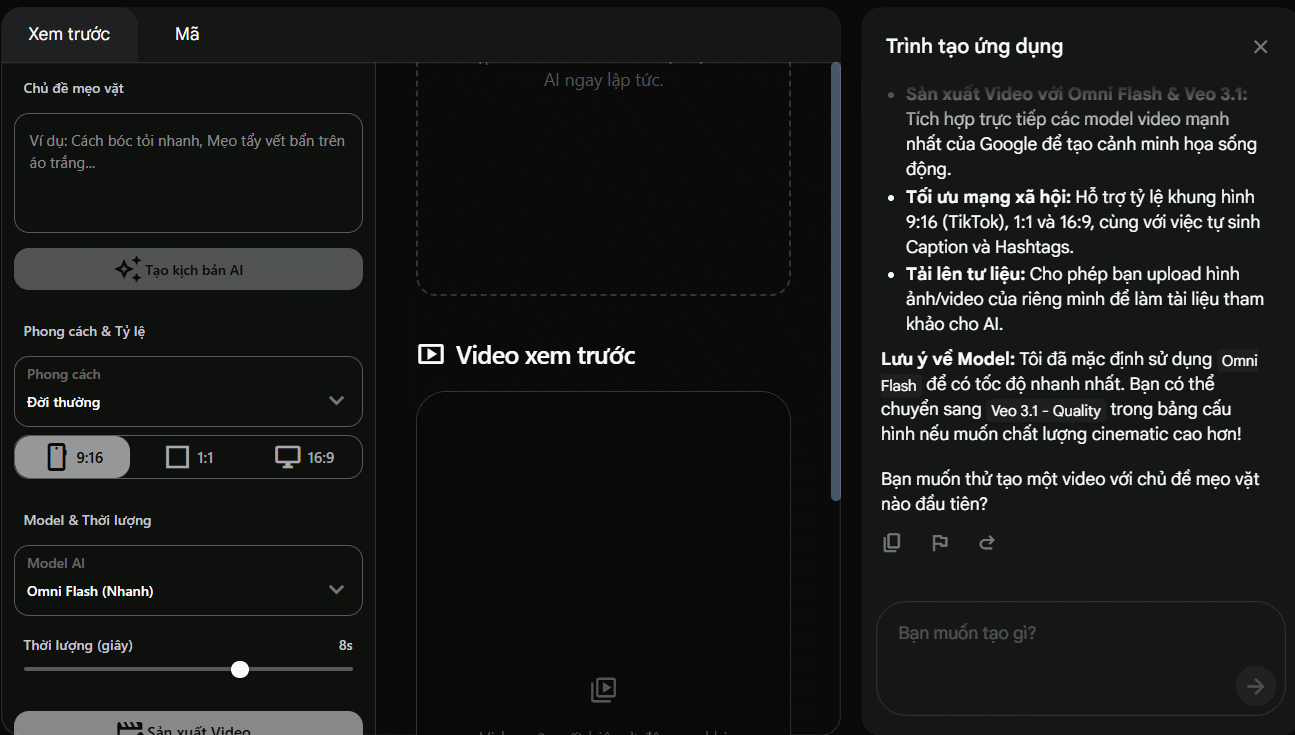
4. Test the script stage
Use a small, low-cost test topic before uploading final media. Complete the available controls and run the script action; its label may differ from the example Create AI Script shown below.
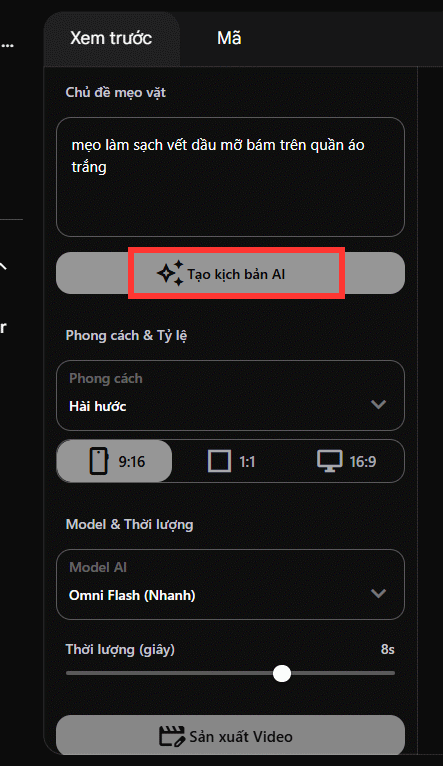
Review the hook, claims, scene order, captions, and suggested tags. Correct factual errors and remove generic promotional language before generating visuals. AI-generated titles and hashtags are suggestions, not evidence that a video will perform well.
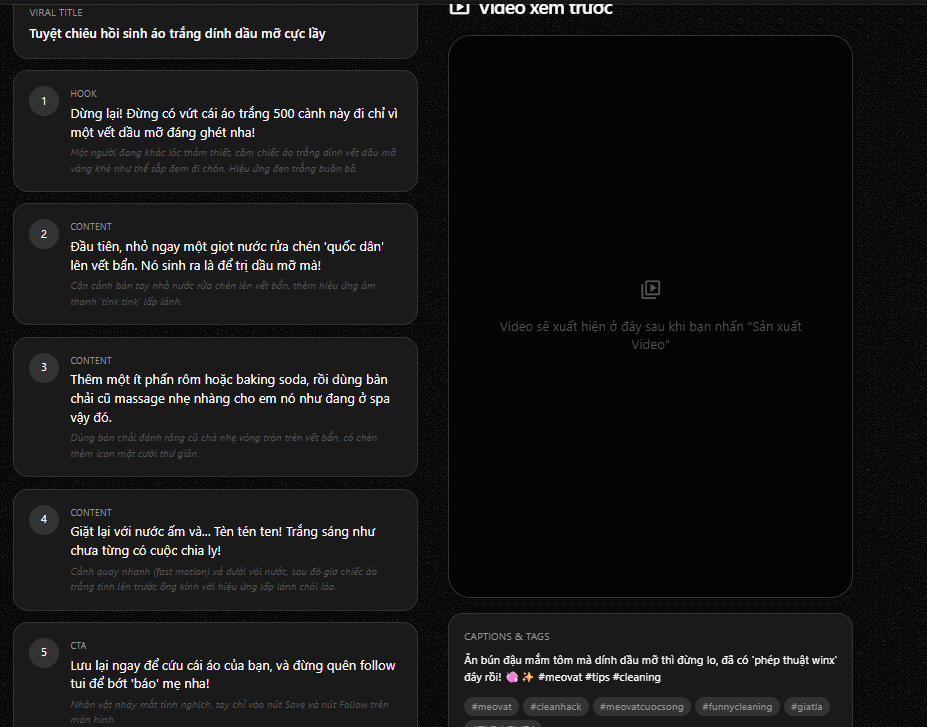
5. Add media and generate a preview
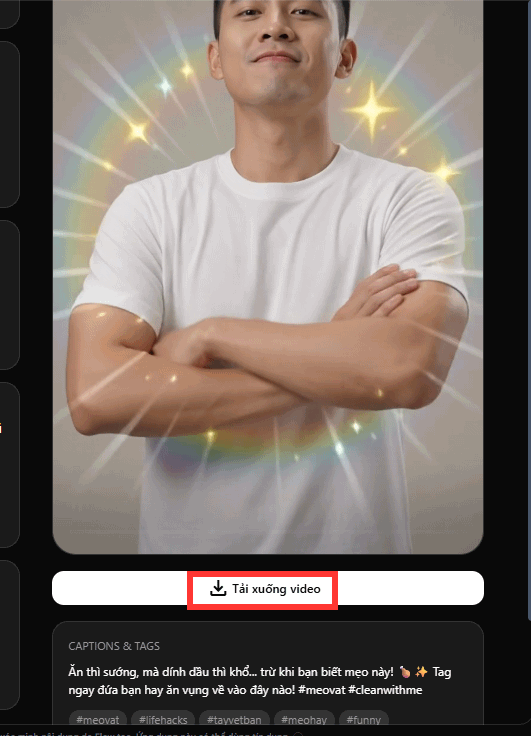
Upload only media that you own or have permission to use. Run the video-generation action—called Produce Video in this example—and wait for the preview. Generation may consume credits, so verify the script and scene plan first.
Watch the complete preview and check framing, caption placement, pronunciation, transitions, music rights, and continuity between scenes. If the tool lacks an export control, ask Flow to add one and specify the desired output format instead of assuming that every generated tool includes download support.
What to test before reusing the tool
- Empty input: the tool should ask for a topic rather than invent one.
- Long input: the script should fit the selected duration.
- Different aspect ratios: captions and subjects should remain inside safe areas.
- Uploaded media: the tool should not silently replace required source assets.
- Factual topics: unsupported claims should be flagged for review.
- Export: the result should play correctly and match the requested dimensions.
When to use another video editor
Use the Flow tool for repeatable ideation and generation. Move the exported result to a conventional editor when you need frame-accurate cuts, complex audio mixing, color correction, keyframes, or detailed subtitle timing. TipsMake's comparison of AI video creation tools can help identify alternatives for those workflows.
Related Articles
 How to Combine Videos on Flow into a Single-Page Video3 minutes read
 How to Create a Video from Photos Using a Storyboard on Flow4 minutes read
 How to Create AI Videos Shot with Drones on Google Flow: Step-by-Step Guide5 minutes read
 How to Create a Video from a Single Image Using Google Flow3 minutes read
 How to Create a Dialogue Video from Just Two Images Using Google Flow6 minutes read
 Top Best Video Editing Software on Computer13 minutes read
Reader Comments 0
Sign in with email or Google to join the discussion.