How to create a table in Word 2007
Creating tables in Word is a basic and frequently encountered operation when we are compiling data or editing document content. Microsoft Word provides users with a full range of tools and various ways to create and insert tables into Word documents..
Creating tables in Word is a basic and frequently encountered operation when compiling data or editing document content. Microsoft Word provides users with a full range of tools and various ways to create tables, insert tables into Word documents, and format tables to make them easier to read, more visually appealing, and more artistic. Creating tables in Word is very simple and there are many different ways to do it. This article will guide you on how to create tables in Word 2007.
Video tutorial on creating tables in Word 2007
1. Create a table in Word
To create tables in Word, users have three different methods.
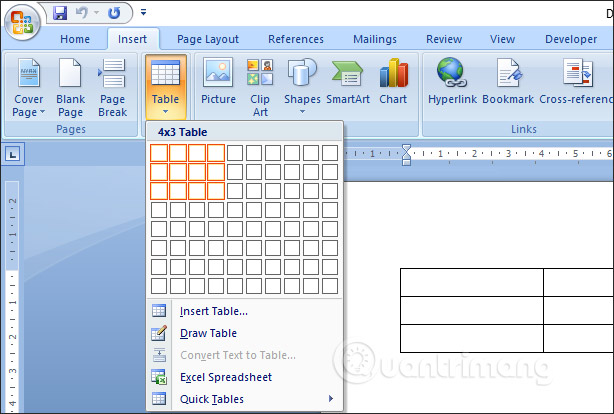
Method 1:
We click on the Insert tab in the Ribbon and then click on Table . Then, the user holds the mouse and drags to select the number of columns and rows in the given cell.
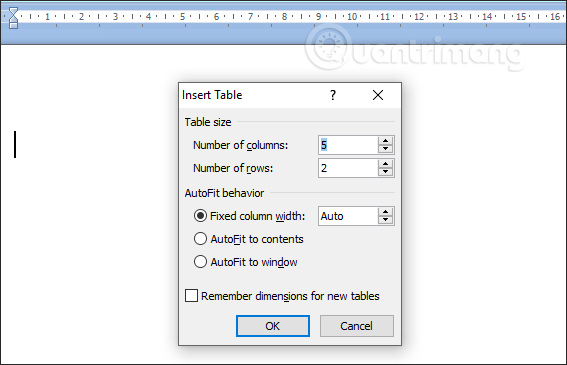
Method 2:
We click on Insert Table… then enter the number of rows and columns in the next interface that appears, and click OK to display the table.
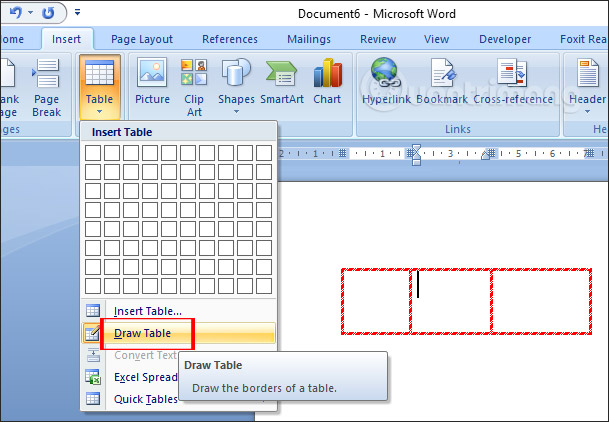
Method 3:
Users select Table and then click Draw Table . A pen icon will then appear, allowing you to draw the table as you wish. Simply move the pen vertically or horizontally to create the table and its cells.
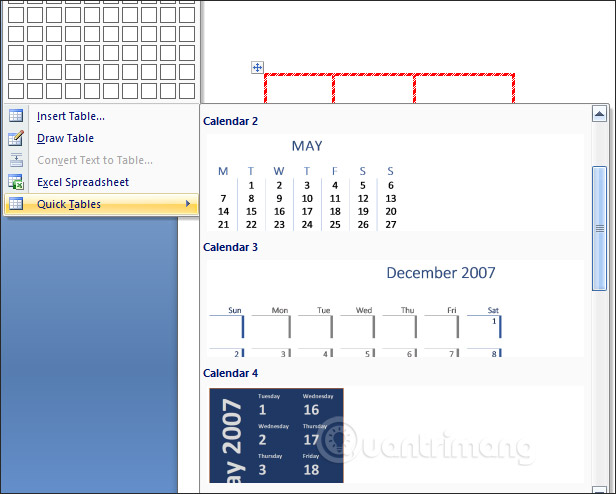
Additionally, clicking on the Quick Tables option will reveal many different types of tables categorized by various themes.
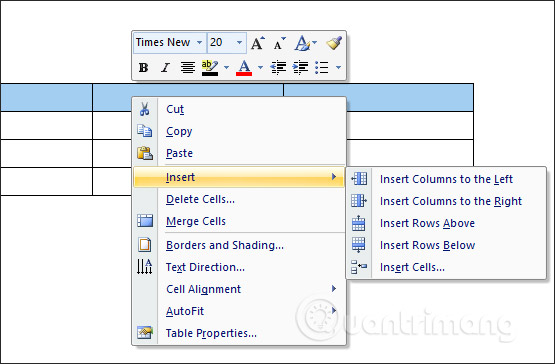
To add columns or rows to a Word table, highlight the row/column you want to add. Right-click and select Insert from the list that appears, then choose the location where you want to add the row or column to the table.
2. Adjust the formatting of Word tables.
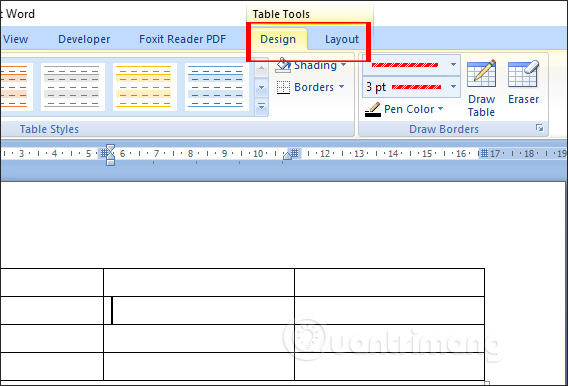
When the user clicks on the table, two additional tabs will appear to change the table's formatting : Design and Layout.
Step 1:
In the Design tab , there are different table design groups. We select Table Styles to choose a color style for the table. There are many table styles and colors that we can apply to the table.
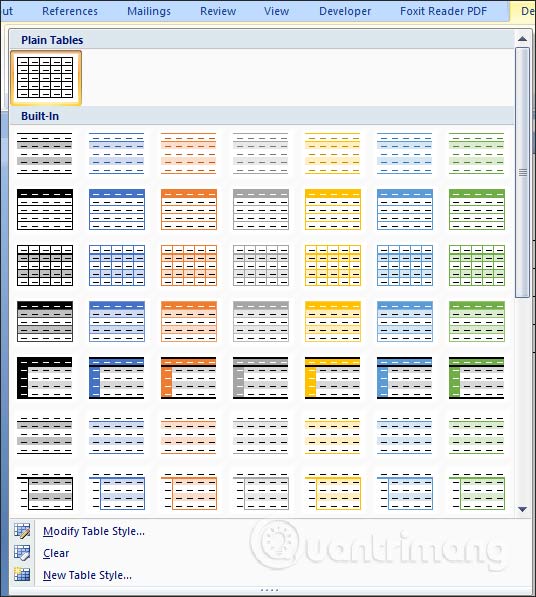
The table will then be converted to the style we selected.
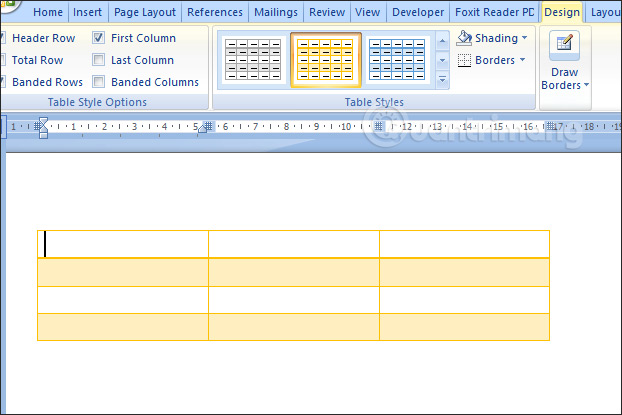
Step 2:
In the Table Style Options section , users also have many more options to format the elements of the table.
- Header row : Hide or show the header row of the table.
- Total row : Adds a total row to the end of the table with a list of functions for each cell in the total row.
- Banded rows and Banded columns : Change the boldness of alternating rows and columns.
- First column and Last column : Change the formatting of the first and last columns of the table.

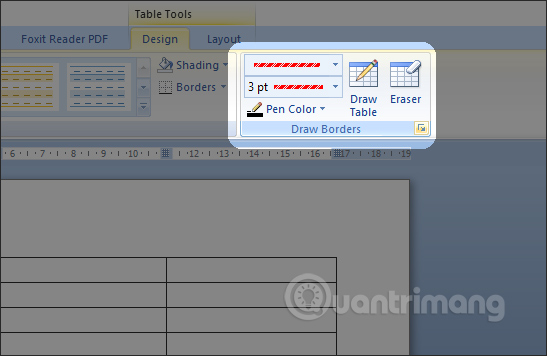
Step 3:
Next, in the Draw Borders section , users can create borders for the table. For detailed instructions on creating table borders, please refer to the article How to create table borders in Word .
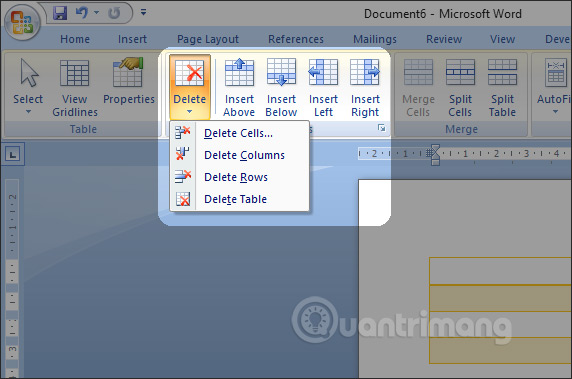
Step 4:
Users then click on the Layout option and will also see many customization groups for the table. Under Rows & Columns, we will find options to add columns or rows, or delete columns or rows as needed.
- Insert left : Inserts a column to the left of the selected column.
- Insert right : Inserts a column to the right of the selected column.
- Insert Above : Inserts a row above the selected row.
- Insert Below : Insert a row below the selected row.
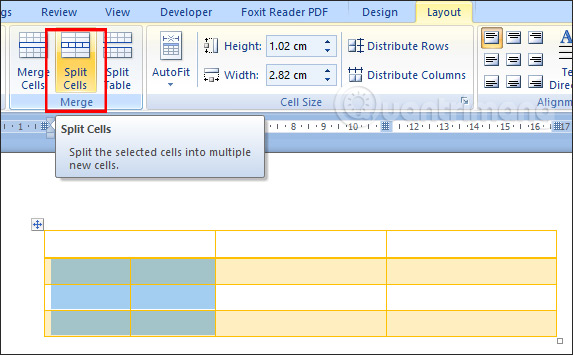
Step 5:
In the Merge group, you have options to group and split cells in the table. To group cells , select Merge Cells .
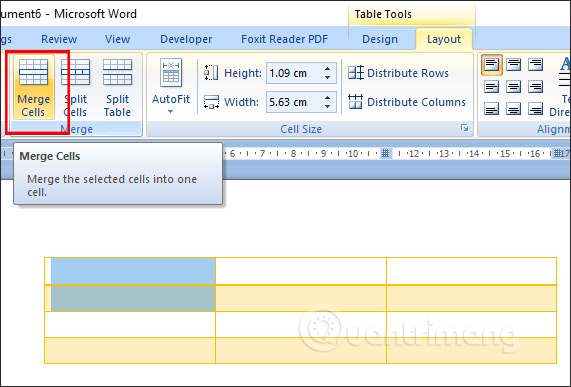
To split cells , select Split Cells . Split Table will create two separate tables. You can refer to the article How to split and merge tables in Word for more information .
Step 6:
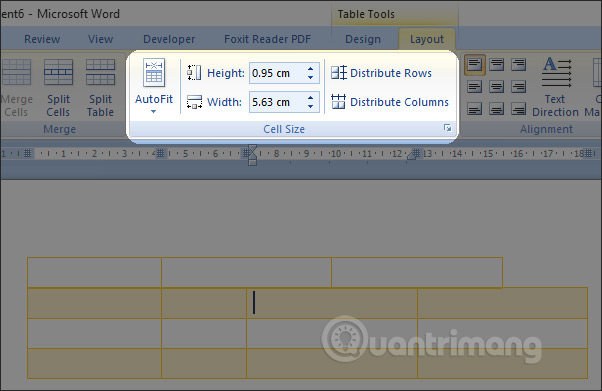
To adjust the size, increase or decrease the number of cells, we will adjust it in the Cell Size section.
Step 7:
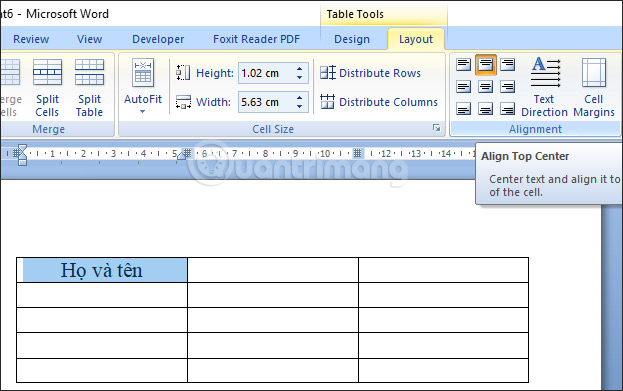
Finally, under Alignment , you have many options to change the text direction and alignment within cells, such as centering text in a Word table cell .
The above are all the steps to create tables in Word 2007, as well as steps to edit and format them. Overall, the steps are very simple and easy to follow.
- 8 useful table formatting tips in Microsoft Word
- How to remove spaces in a table in Word
- Instructions on how to add background color to individual cells in a table in Word.
- How to repeat the header bar in a Word list table
Good luck with your project!