How to Convert Ethernet Connection to WiFi
Convert Ethernet connection to Wi-Fi
Make sure you have a Wi-Fi network. You need to be on a Wi-Fi network to get a network connection. You can create your own connection point by referring to the wireless network (WiFi) connection setup instructions or using an existing connection point (such as Wi-Fi in a coffee shop).
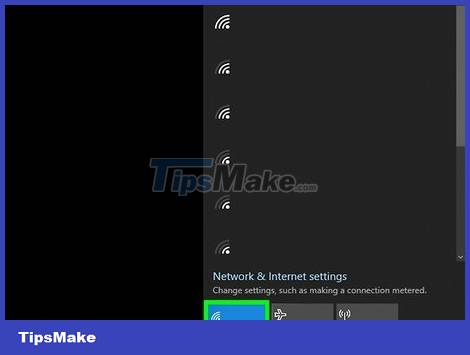
Connect to a Wi-Fi network (no Ethernet cable required). If you want to smoothly switch your Ethernet connection to Wi-Fi, connecting to the Wi-Fi network at least once will help your computer automatically connect when the Ethernet cable is removed (the computer will remember network and reconnect without you needing to turn on Wi-Fi; just click the network name in the list of available networks and enter its password).
Make sure Wi-Fi is turned on. You can do this by clicking the network icon or in the system tray at the bottom or top of the screen.

Attach the Ethernet cable. When you have to sit in one place, such as at a desk, using an Ethernet connection is often more stable than a wireless connection.

Remove the Ethernet cable. When there is no Ethernet connection, your computer's Wi-Fi scans for available networks. If you're already connected to your local Wi-Fi network, you don't need to do anything because the connection will happen automatically.
If you have not previously connected to a Wi-Fi network, you need to open the list of available networks (click the network or the Wi-Fi icon in the system tray at the top or bottom of the screen), click the network name, and enter the password (if necessary).
Change network adapter priority order in Windows 10
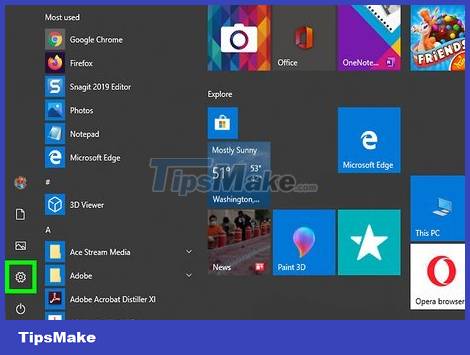
Open Settings. Click the Start menu and click the Settings icon.
If you do not have system administrator rights, you cannot continue with this method.
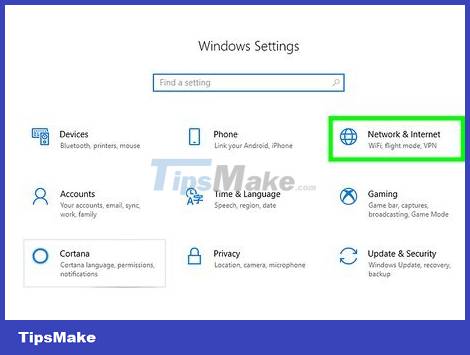
Click Network & Internet . You'll see this option next to the network icon.

Click Change adapter options . This is the option below the "Change your network settings" heading.
If you don't see this option, you'll need to click Status in the menu on the left side of the window.

Right-click the adapter you want to prioritize. In this case, you need to right-click on the Wi-Fi adapter.
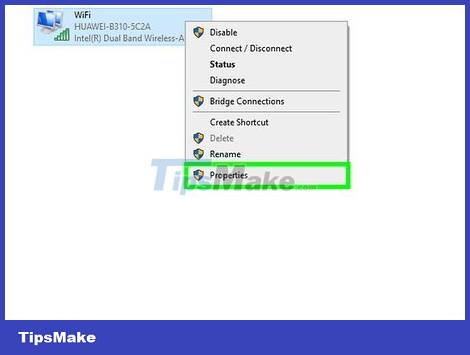
Click Properties . You'll see this option below the menu.
A new window immediately appears on the screen.

Click to select Internet Protocol Version 4 (TCP/IPv4) . This is an option in the list below "This connection uses the following items:"
The selection line is highlighted in blue to indicate that it is selected.
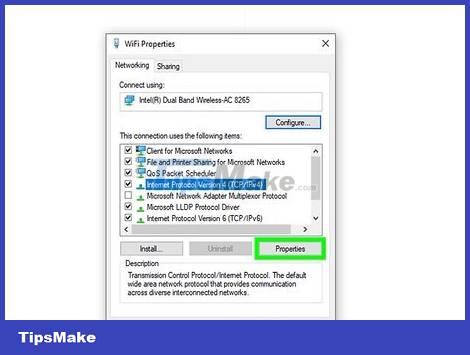
Click Properties . This selection is below the box where you selected "Internet Protocol Version 4" in the middle of the window.
A new window immediately appeared on the screen.

Click Advanced . This is the option at the bottom of the window on the right.
The "Advanced TCP/IP Settings" window is immediately displayed.
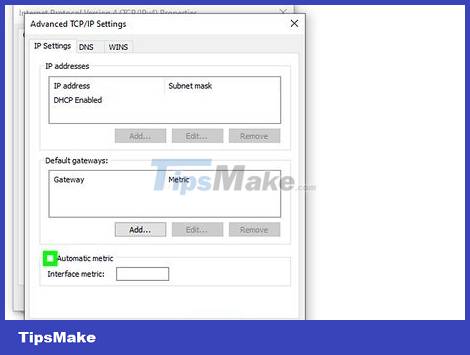
Click to uncheck the box next to "Automatic Metric". The Automatic Metric box will automatically assign network adapter priority.
The data entry field below changes from unavailable (light grey) to available (dark grey).
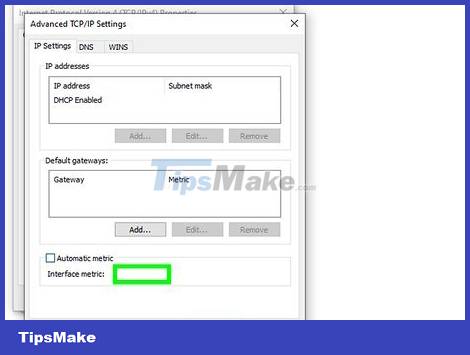
Enter a number in the "Interface Metric" field. The lower the number, the higher the priority. For example, if you set Wi-Fi's Interface Metric to 1, your Wi-Fi will become the default network connection regardless of which network you connect to.
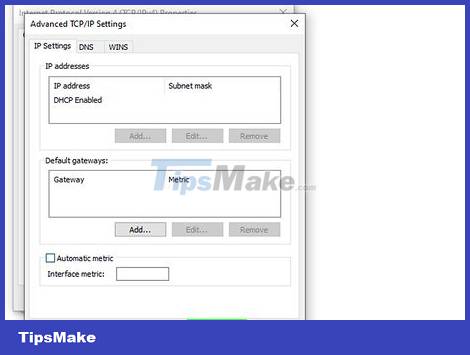
Click OK . The "Advanced TCP/IP Settings" window will close.
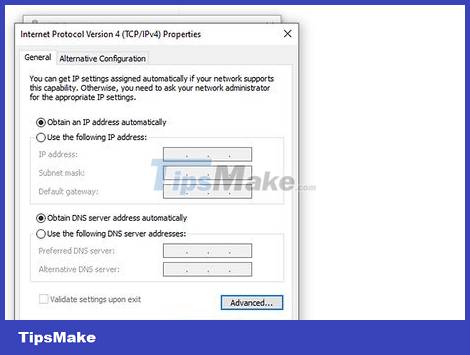
Click OK . The "Internet Protocol Version 4 (TCP/IPv4)" window immediately closes.
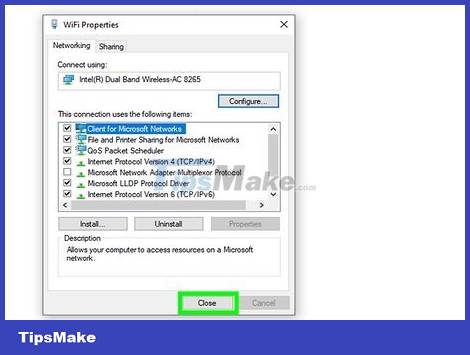
Click OK . The "Wi-Fi Properties" window also closes.
If you set the Wi-Fi network adapter to 1, the computer automatically connects to the Wi-Fi network instead of connecting through the Ethernet cable attached to the device.
Change network adapter priority order on Mac
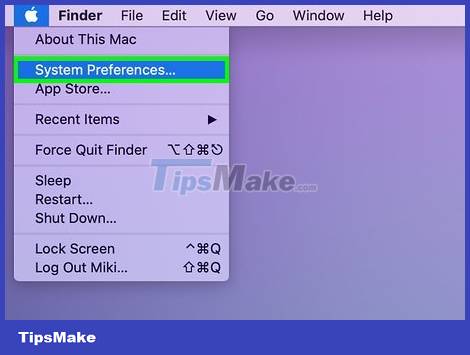
Open System Preferences. You'll find this option by clicking the Apple icon () in the upper left corner of the screen and clicking "System Preferences."
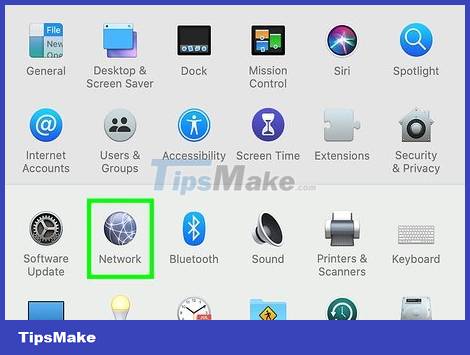
Click Network . This selection is next to the globe with hatched lines.
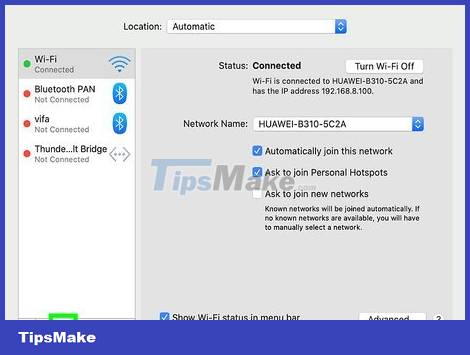
Click the gear icon. This is the option below the left pane of the window.
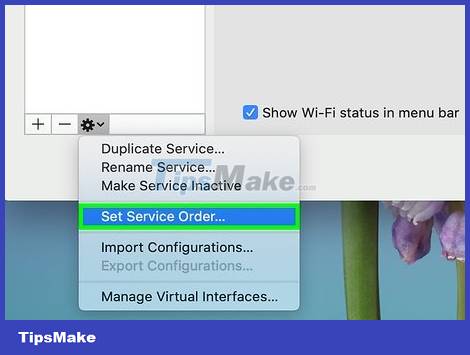
Click Set Service Order . You'll see this option in the second group of the menu that appears.
The new window will display the available network connection types, such as Ethernet, Wi-Fi, and Bluetooth.
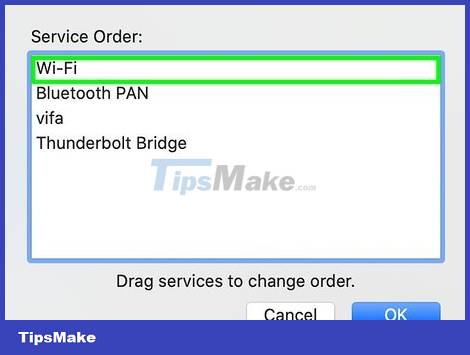
Drag and drop Wi-Fi to the top of the list. If you want to connect to Wi-Fi even if the device has an Ethernet cable attached, make sure the Wi-Fi is above the Ethernet connection.

Click OK . You'll see a blue button in the bottom right corner of the window.

Click Apply . When you are ready to apply the changes, you can click "Apply".