How to Change Windows 11 Lock Screen Timeout
Windows 11 lock screen timeout can be changed depending on how fast or slow the user wants the timeout to be..
Windows 11 lock screen timeout can be changed depending on the user's needs, whether they want the timeout to be fast or slow. If the Windows 11 lock screen timeout causes you to log in to your computer many times, interrupting your work. Below are instructions for changing the Windows 11 lock screen timeout.
How to change Windows 11 lock screen timeout via Settings
Step 1:
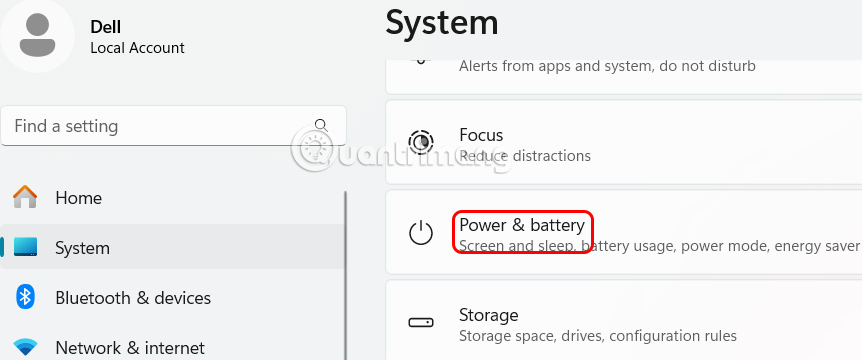
Press Windows + I to open Settings , then click on System and look to the right and select Power & battery .
Step 2:
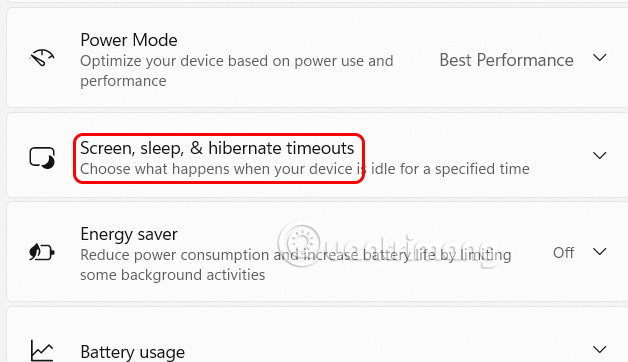
Next, we click on Screen , sleep to adjust the standby screen on the computer.
Step 3:
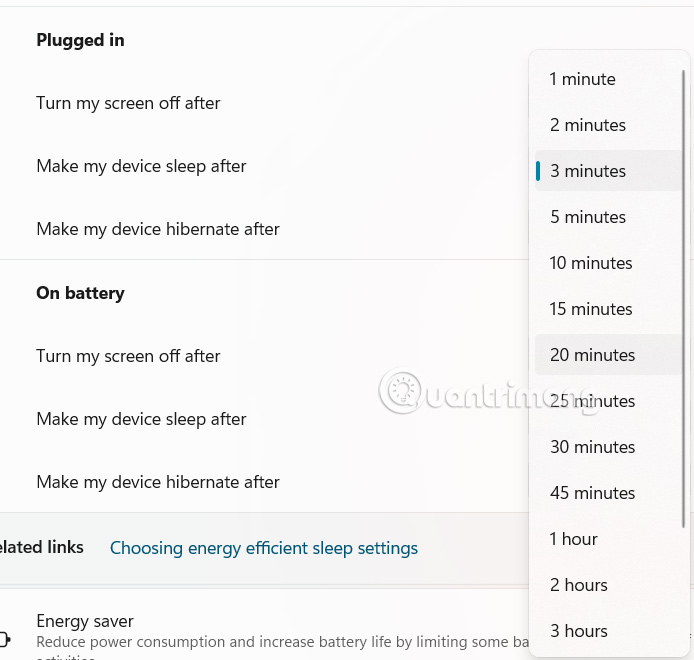
In the drop-down list at On battery you adjust the screen lock timeout at Turn my screen off after . Then also adjust down to Plugged in at Turn my screen off after .
Change Windows 11 lock screen timeout via Control Panel
Step 1:
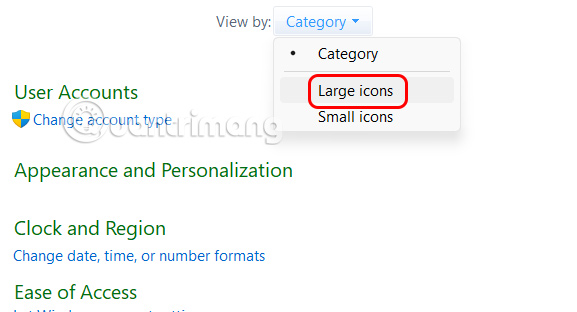
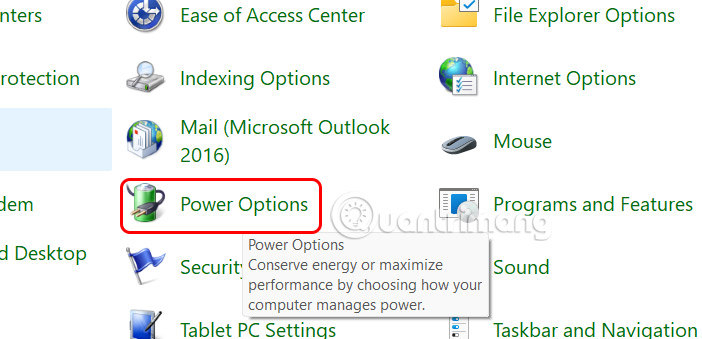
First you open Control Panel, then we click on Category and select Large icons .
Then the user clicks Power Options to adjust.
Step 2:
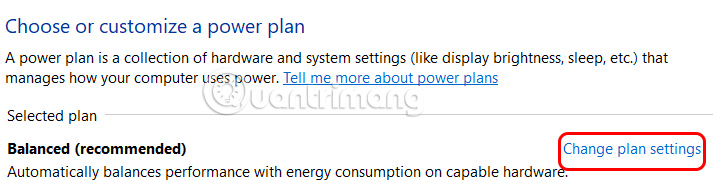
Here, the user continues to click on Change plan settings to change.
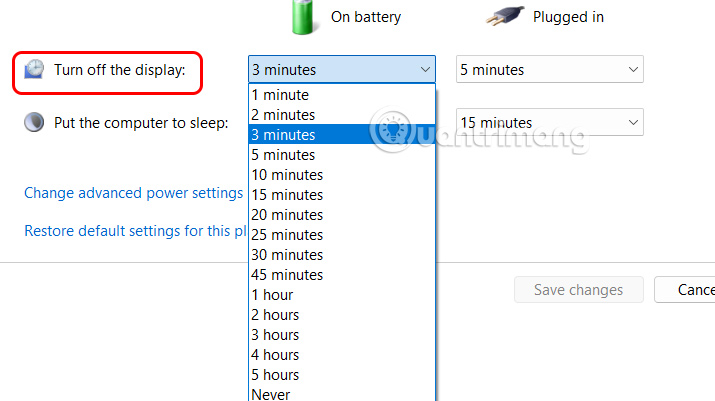
Tap the menu at Turn off the display and select the lock screen time you want to set.
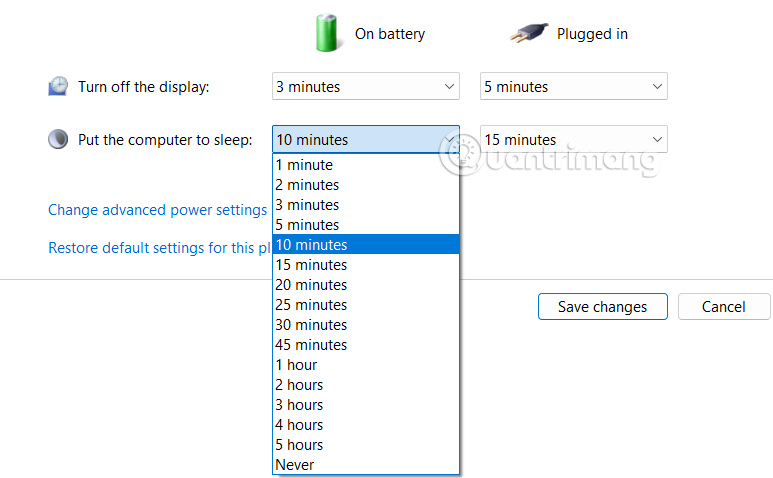
Continue clicking on Put the computer to sleep and also select the time to change.
We will apply the lock screen timeout change for both On battery and Plugged in.
Finally click Save changes.
Change lock screen time via Registry
Step 1:
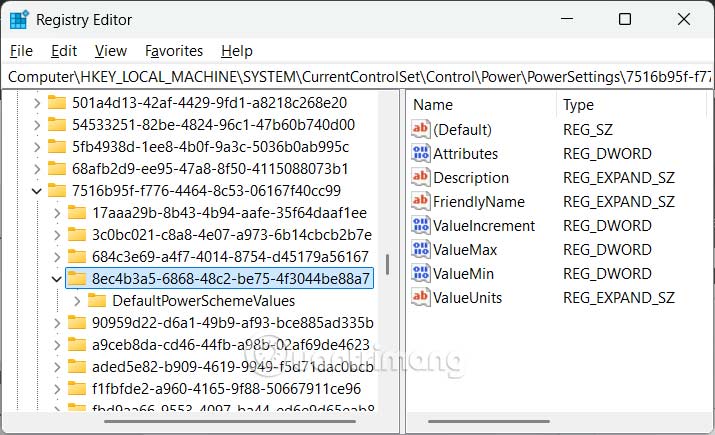
We press the Windows + R key combination to open the Run interface, then you enter regedit . Next, you access the path below.
HKEY_LOCAL_MACHINESYSTEMCurrentControlSetControlPowerPowerSettings7516b95f-f776-4464-8c53-06167f40cc998EC4B3A5-6868-48c2-BE75-4F3044BE88A7
Step 2:
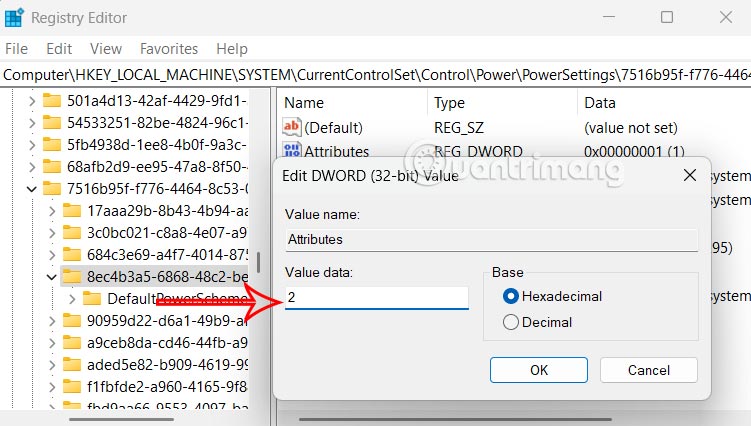
Look at the interface next to you, double-click on the Attributes value and select the change value to 2 .
Step 3:
Open Control Panel again , go to Power Options and select Change plan settings . Continue to click Change advanced power settings .
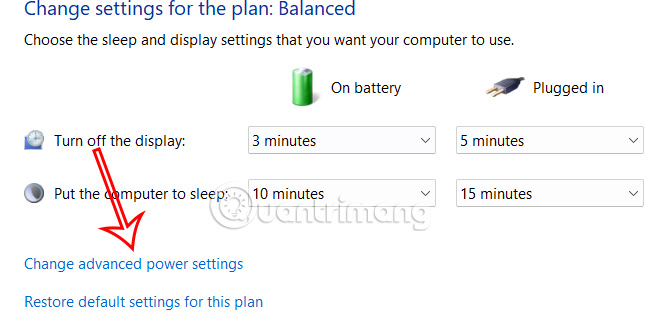
In this interface, users drag down to the Display section and expand Turn off display after to adjust.
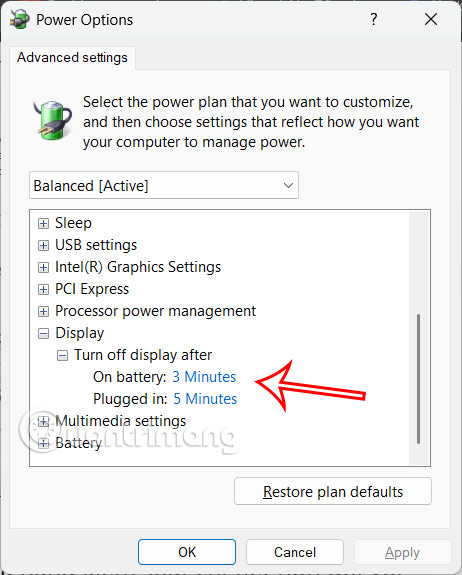
This method provides more granular control over the lock screen timeout, especially if you want the screen to turn off after a period of inactivity while the computer remains unlocked.