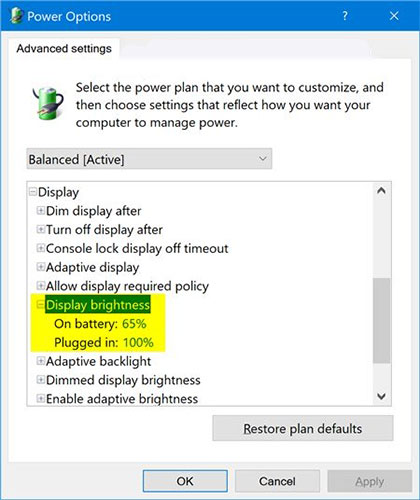
How to add / remove 'Display brightness' from Power Options in Windows
If you have a laptop or tablet, sometimes you need to change the screen brightness. For example, if you want to use your laptop outdoors on a sunny day, you might need a bright screen for better visibility. Or, if you're in a dark room, you might want to dim the screen.
A brighter screen will use more power and reduce battery life.
Install Display brightnes in Power Options
The Display brightnes setting in Power Options allows users to specify the default screen brightness level. This setting applies only to laptops that support the brightness control feature of the integrated display device.

Display brightness has been removed from Power Options by default starting with Windows 10 build 17639.
This tutorial will show you how to add or remove Display brightness settings in the Display section of Power Options on Windows 7, Windows 8 and Windows 10.
Note : You must be logged in as an admin to be able to add or remove this setting in Power Options.
This will not affect the user can change the screen brightness by other methods.
Add / remove "Display brightness" in Power Options with Command Prompt
1. Open Command Prompt with admin rights.
2. Enter 1 of the 2 commands below you want to use into the Command Prompt with admin rights and press Enter .
(To add Display brightness - default)
powercfg -attributes SUB_VIDEO aded5e82-b909-4619-9949-f5d71dac0bcb -ATTRIB_HIDE Or:
(To clear Display brightness)
powercfg -attributes SUB_VIDEO aded5e82-b909-4619-9949-f5d71dac0bcb +ATTRIB_HIDE 3. Now, you can close the Command Prompt with admin rights if you like.
You should read it
- ★ Set up a separate power source for Windows 7 on Laptop?
- ★ How to add / remove 'Allow wake timers' from Power Options in Windows 10
- ★ Steps to add/remove 'Maximum processor state' from Power Options in Windows
- ★ How to add / remove 'Lid close action' from Power Options in Windows
- ★ How to add or remove 'SEC NVMe Idle Timeout' from Power Options in Windows 10