How to add or delete a Wifi network on Mac OS X
If you want to add or delete a Wifi network for any reason. For other operating systems, adding or deleting a Wifi network is too simple. What about Mac OS X? Together refer to the article below.
Table of Contents
Your computer is running Mac OS X and you want to add or delete a Wifi network for some reason but you don't know how to do it yet. In the article below, Network Administrator will show you how to add or delete a Wifi network on Mac OS X. The steps are not as difficult as you think.
1. Delete a Wifi network
First open Network Preferences , then click "Advanced".

After opening the Advanced Panel , select the name of the Wifi network you want to delete and click on the "-" button .
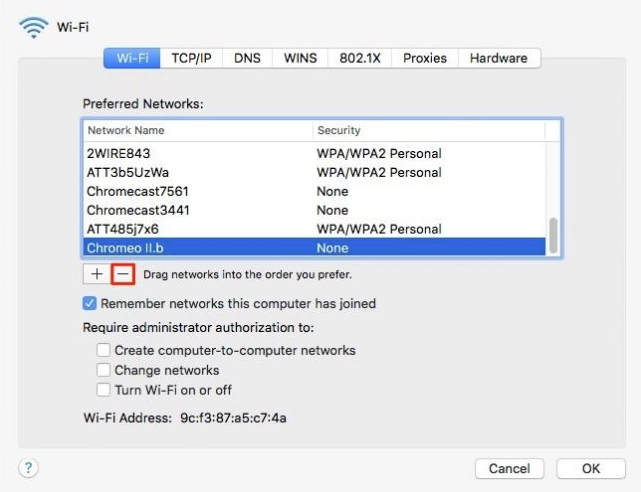
Next a warning dialog appears asking you to confirm whether you want to delete that Wifi network. Click on "Remove" to delete that Wifi network from the list of saved Wi-Fi networks.

See also: Create ZIP file in just two steps in Mac OS X
2. Add a Wifi network
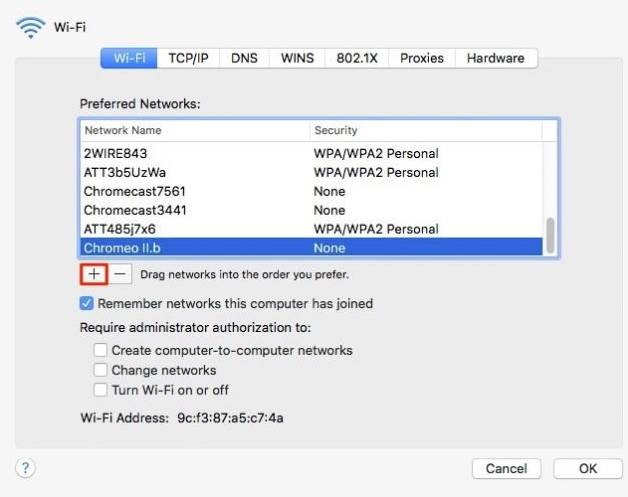
Similar to how you delete a Wifi network, first open Network Preferences , then click on 'Advanced'.
However, after the Panel Advanced appears, click on the '+' button.
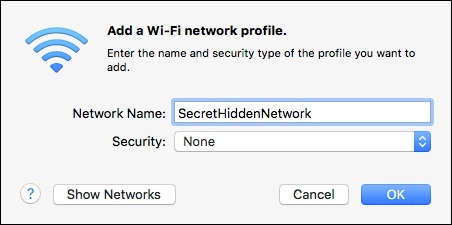
Then enter the full information of the new Wifi network name you created, the password and choose the Wifi security standard (WEP, WPA / WPA2, .).
Good luck!
Was this article helpful?
Your feedback helps us improve.
Related Articles
 Instructions to delete (forget) connected WiFi address on iPhone4 minutes read
 How to delete Wifi saved on Windows 10?3 minutes read
 How to delete connected Wi-Fi on the phone3 minutes read
 How to forget/delete WiFi networks on Chromebook2 minutes read
 Instructions on how to delete Wifi passwords saved on Windows 103 minutes read
 Protect WiFi network before hackers3 minutes read
Reader Comments 0
Sign in with email or Google to join the discussion.