Table of Contents
This practical guide explains how to draw messy hair for characters in anime/manga with clear steps and useful context. It also covers common requirements, potential problems, and the details that can help you get better results.
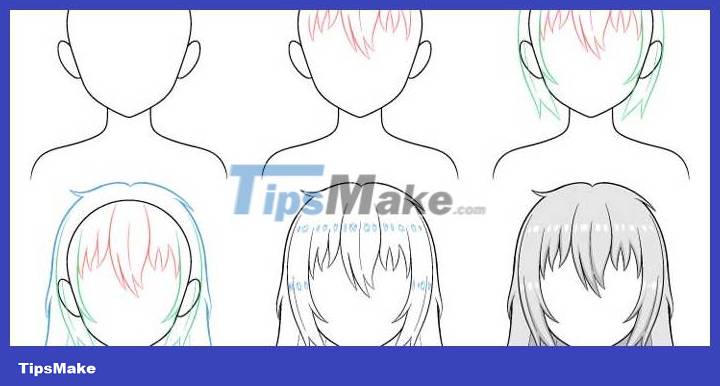
Messy hair is quite common in anime and is often one of the most defining features of a character's personality. This tutorial will take the example of drawing messy hair for a female character.
It is recommended to use a pencil and start drawing thin & fuzzy lines first to easily erase later. You can highlight them before drawing the shadow.
Step 1: Draw the Outline of the Head & Shoulders
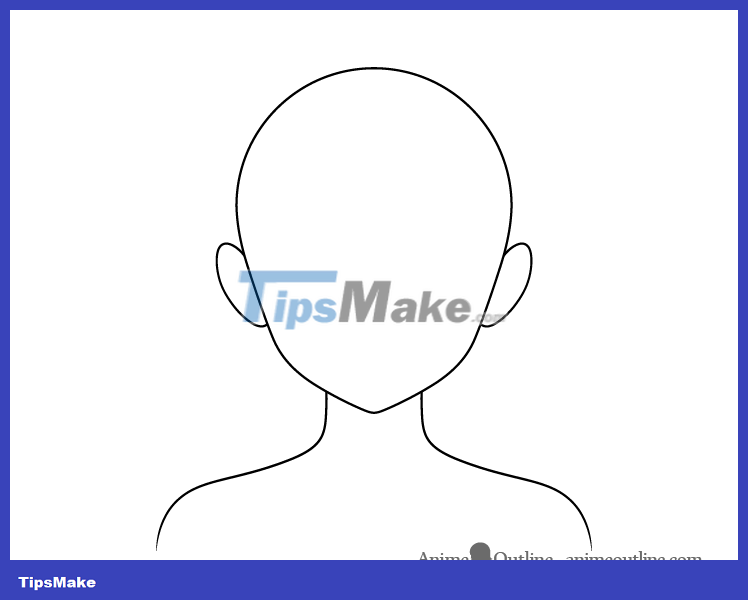
Before drawing the hair, sketch the head, neck and shoulders first. You'll want to draw the entire head even though large parts of it will eventually be covered by the hair. Doing so will easily create the right volume for the hair and avoid making mistakes.
Step 2: Draw Vertical Hair on the Forehead
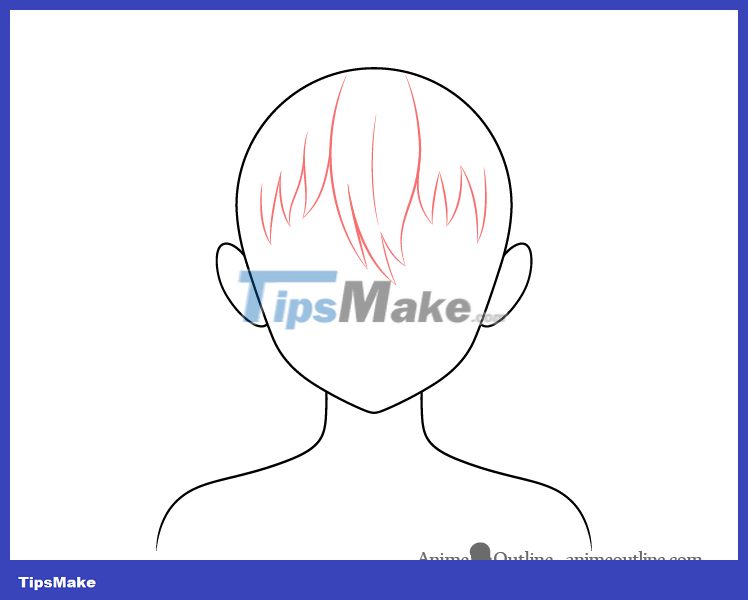
Like every other anime hair drawing tutorial, the bangs will be divided into 3 parts to make the drawing process more manageable. In this example, that part is drawn with red, green and blue strokes but you can draw with a regular pencil.
Start by drawing the front part of the hair a little longer in the middle and shorter on the sides.
Draw hair in large curls, curling in different directions to create a messy look.
Step 3 - Draw the Hair Along the Sides of the Head
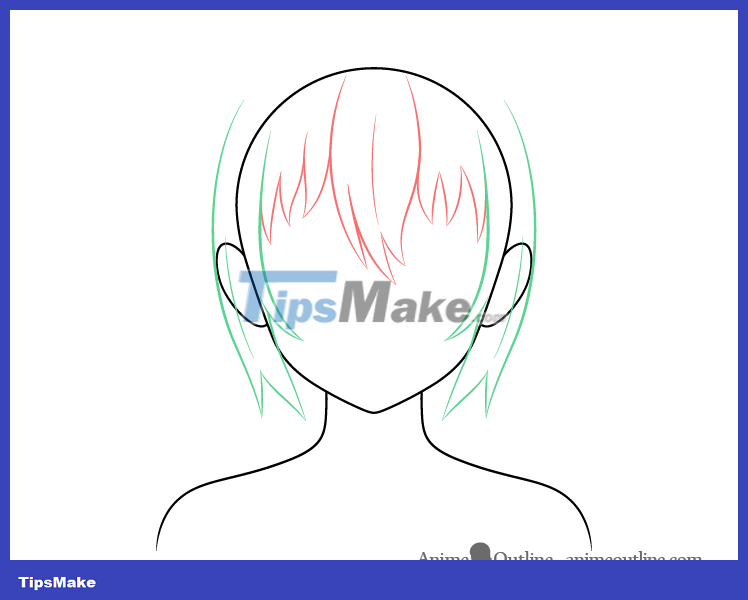
Draw the sides of the hair embracing the shape of the head. Draw a small clump of hair on each side that wraps around the ear and splits it at the end.
Step 4 - Draw the Hair at the Top & Back of the Head
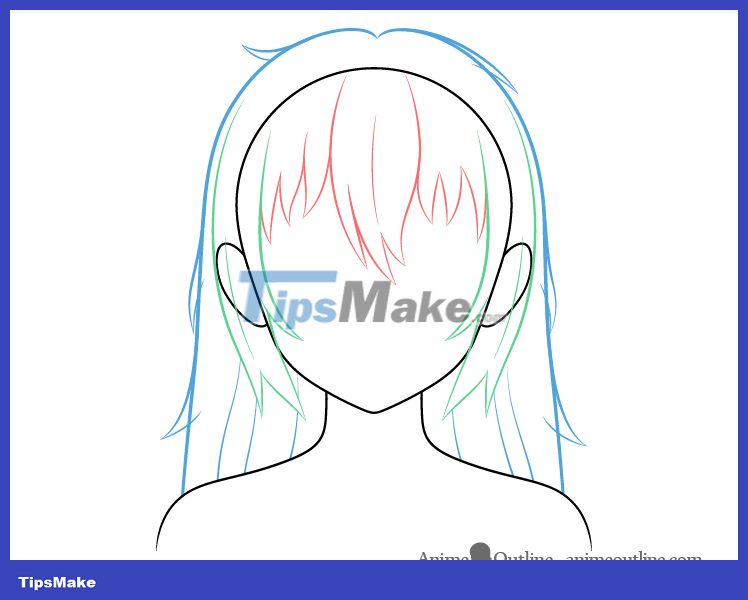
On the top/back part of the hair, draw the curl in the shape of the head going down, then widening around the ears.
Next, draw a little crease in the form of wavy lines running between the shoulders and the lower part of the head. Then, add a string of small clumps running along the outside of the hair. This detail is especially important in creating messy hair.
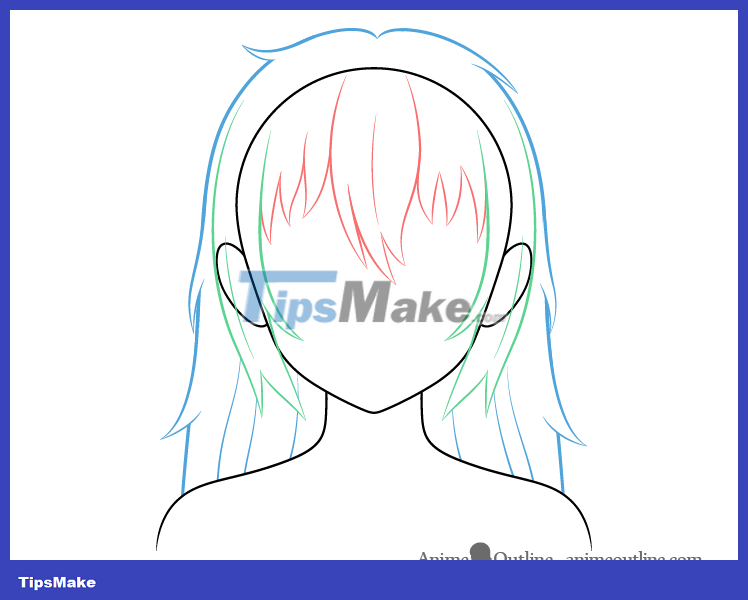
You can then erase the top/bottom hair sections where the curls were added.

After finishing, you can also erase the parts covered by the hair on the head to make the drawing look neater.
Step 5 - Sketch the Hair Highlights
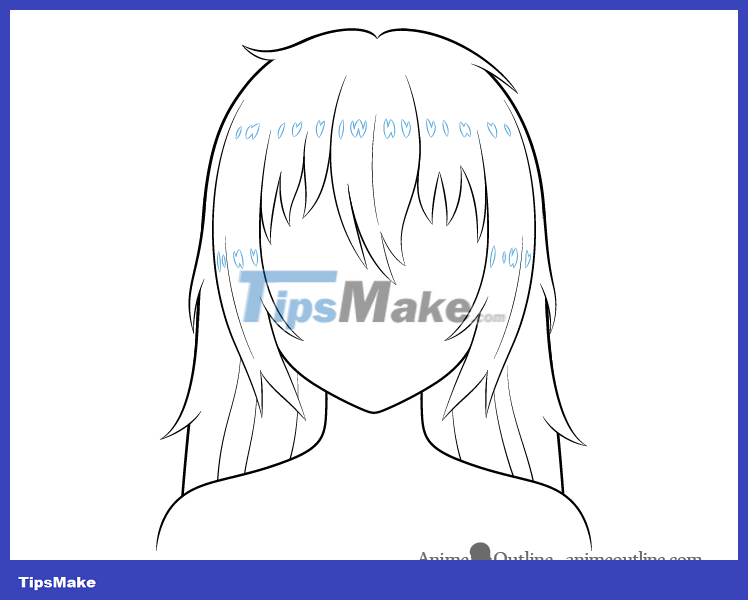
Before shading the drawing, you can sketch a series of small highlights running along the forehead and side hair. These are meant to show the light reflected off the smooth surface of the hair and give the hair a shinier look.
Alternatively, you can simply create highlights when shading, or add them on top of the shading if drawing online (in a new layer).
Step 6 - Add Shadows to Complete the Anime Drawing of Messy Hair
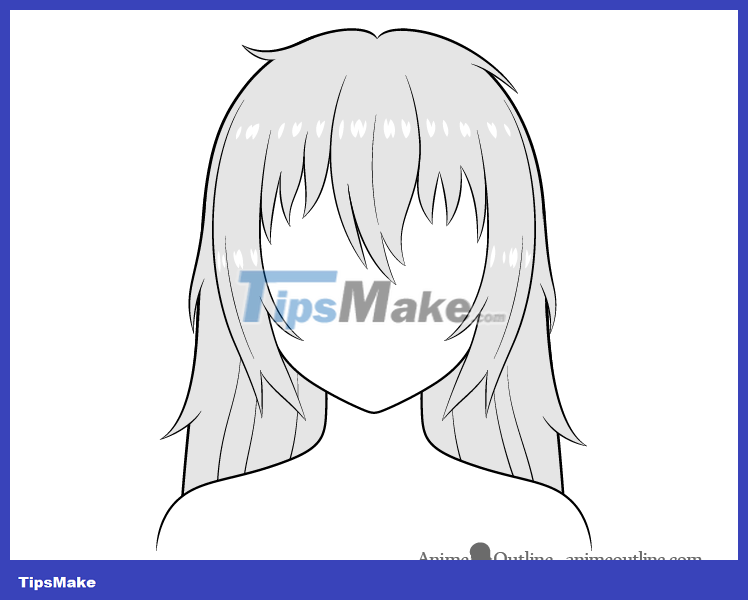
The first step in the shading process is to darken the entire hair area with gray (or your favorite color).
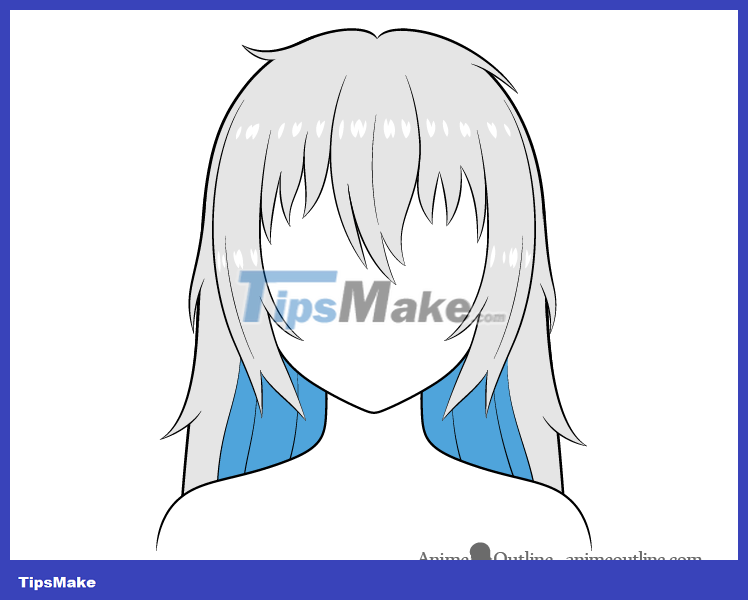
In this example, the shadows will be placed where they would appear in normal lighting conditions such as outdoors during the day or a well-lit room. Darken the shadow more than usual, but not too bold.
The biggest shaded area will be the background/inner part of the hair around the neck (blue in the picture). You can highlight it first.
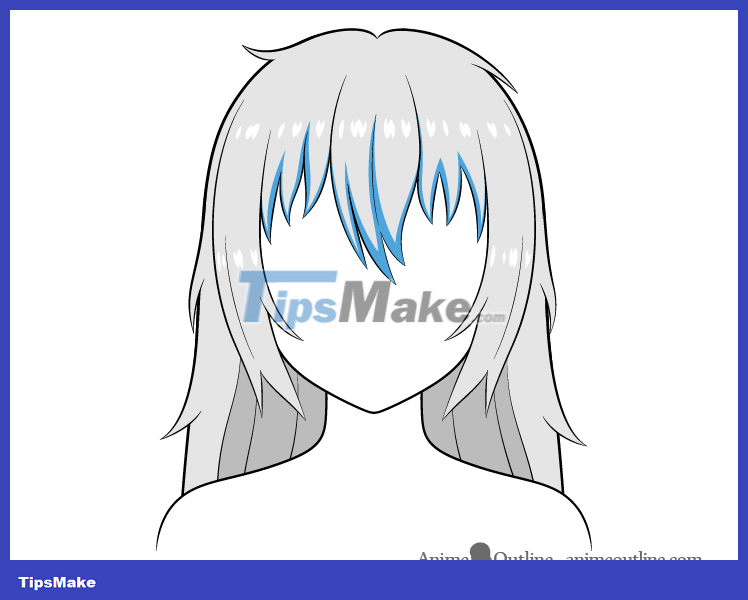
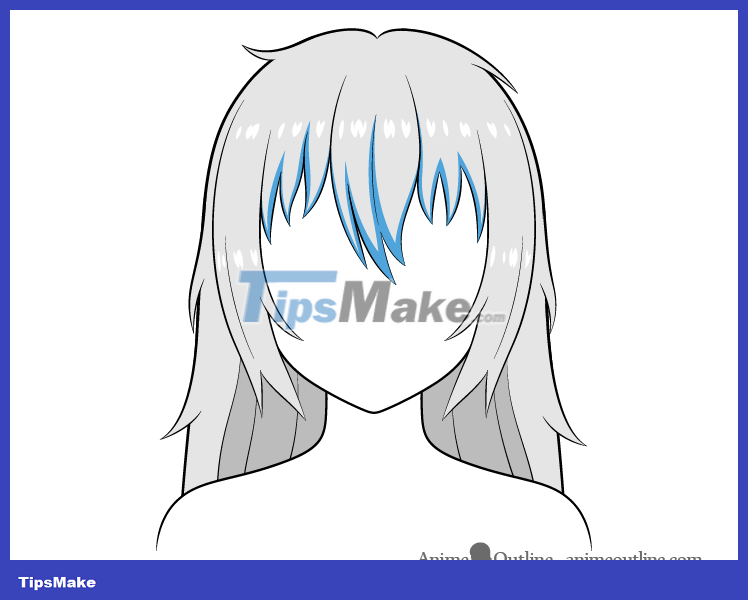
Next add some shadow to the front part running along the bottom and sides of the curl.
Add some shadow to the sides of the hair in the same way as you did on the front part.
Finally, add a little shadow on the lower part of the side curls at the base and top.
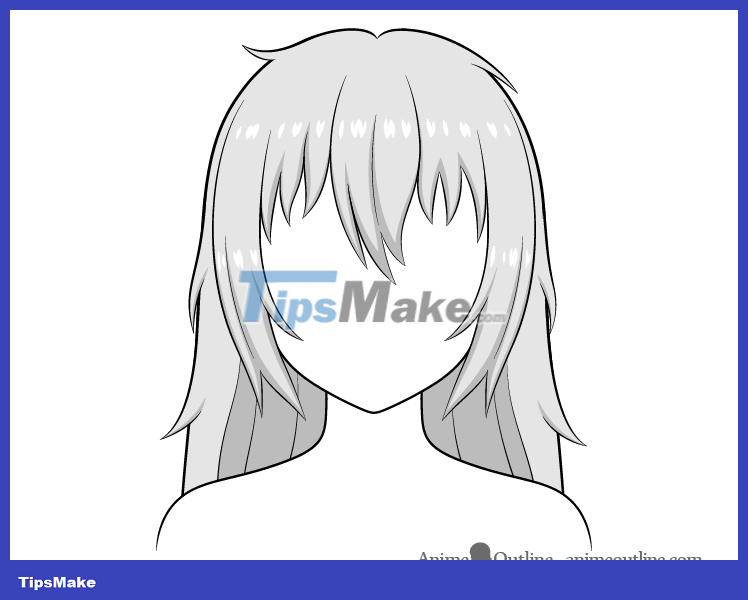
It's done! Good luck!
Conclusion
Understanding Draw Anime Hair makes it easier to compare options, avoid common mistakes, and apply the information in this guide more effectively. Review the relevant requirements before making changes or choosing a solution.
FAQ
How do you draw messy hair for characters in anime/manga?
Follow the steps in this guide in order, confirm the required settings or tools, and verify the result before making additional changes.
Is it safe to draw messy hair for characters in anime/manga?
It is generally safe when you follow the recommended instructions, use trusted tools, and avoid changing settings you do not understand.
What should you do if the process does not work?
Recheck the requirements, restart the device or application when appropriate, and review each step for missed settings or compatibility issues.
Related Articles
 How to Draw Anime Hair Covering One Eye6 minutes read
 How to Draw Braided Hair, Braids for Anime, Manga Characters Very6 minutes read
 Revealing 4-step Painting, Simple, Beautiful Anime Characters10 minutes read
 How to Drawing Details on Anime and Manga Characters4 minutes read
 This Device Will Tell You How Bad Your Hair Is3 minutes read
 How to Draw Crying Anime Eyes5 minutes read
Reader Comments 0
Sign in with email or Google to join the discussion.