Table of Contents
NotebookLM—renamed Gemini Notebook by Google in July 2026—can turn the sources in a notebook into an interactive mind map. The diagram shows major topics and their relationships; selecting a node opens a source-grounded explanation that you can examine in more detail.
The product name or button layout may differ while the rename rolls out, but the basic workflow remains the same: add reliable sources, select the relevant material, create a Mind Map in the Studio panel, and verify the generated branches against those sources. Google's original Mind Map announcement describes the feature as an interactive way to visualize connections in sources and notes.
1. Create a notebook and add the source material
Open Gemini Notebook/NotebookLM, create a notebook, and add the documents you want the map to cover. A focused source set produces a more useful map than a collection of unrelated files.
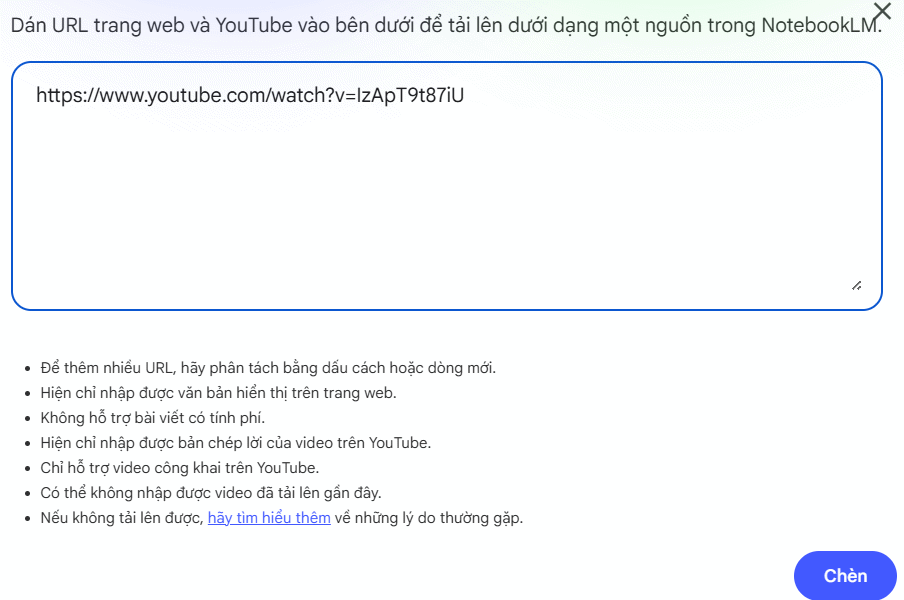
For example, a student could add a textbook chapter, class notes, and an educational YouTube video about the same period of history. Check that the source has finished processing and that its title appears in the Sources panel.
2. Select only the sources the map should use
If the notebook contains material for several topics, select the sources relevant to this map and temporarily clear unrelated ones. This keeps the top-level branches focused and makes it easier to trace a node back to evidence.
For a YouTube source, confirm that the video has usable spoken content and that NotebookLM processed it successfully. The map reflects the material NotebookLM can read; it is not an independent fact-check of the video.
3. Open the Mind Map controls
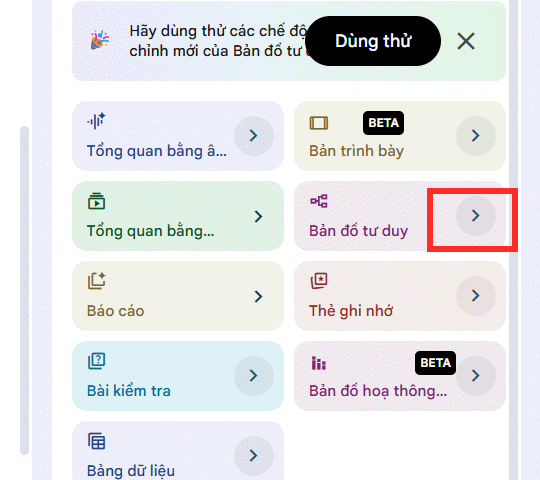
Find Mind Maps in the Studio panel. In layouts that display a tile, open its customization or edit control before creating the output. Older layouts may show a small arrow beside Mind Map.
4. Give the map a useful focus
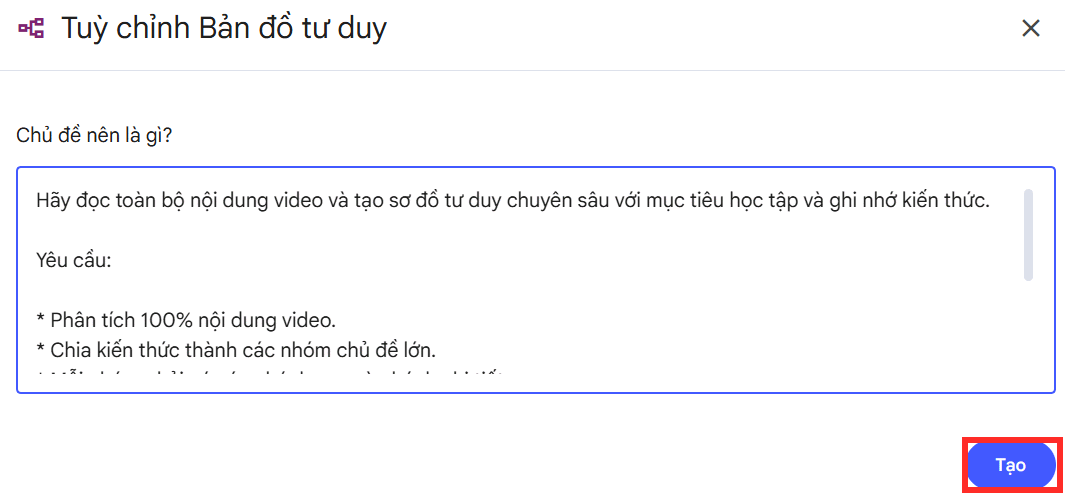
In the instruction field, describe the intended audience and the relationship you want to emphasize. A precise instruction is more useful than “summarize everything.” Examples include:
- Organize this chapter by causes, major events, and consequences for a first-time learner.
- Map the components of this system and show which inputs affect each stage.
- Compare the authors' claims, evidence, and limitations across the selected papers.
Select Create or Generate after reviewing the active sources.
5. Open and navigate the generated map
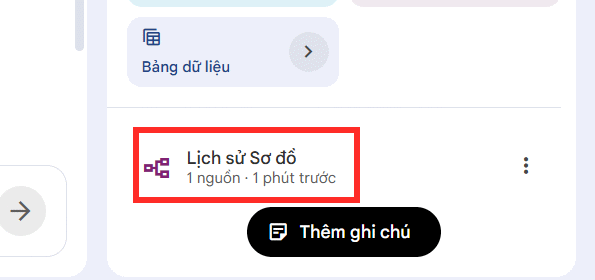
Generation may take a short while, especially when the source set is large. When the output appears in Studio, select its name to open it. Use the full-screen or expand control when the diagram is too dense for the side panel.
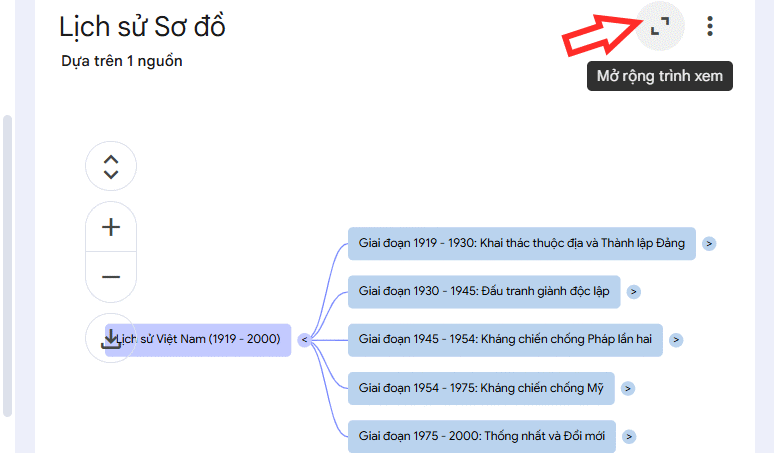
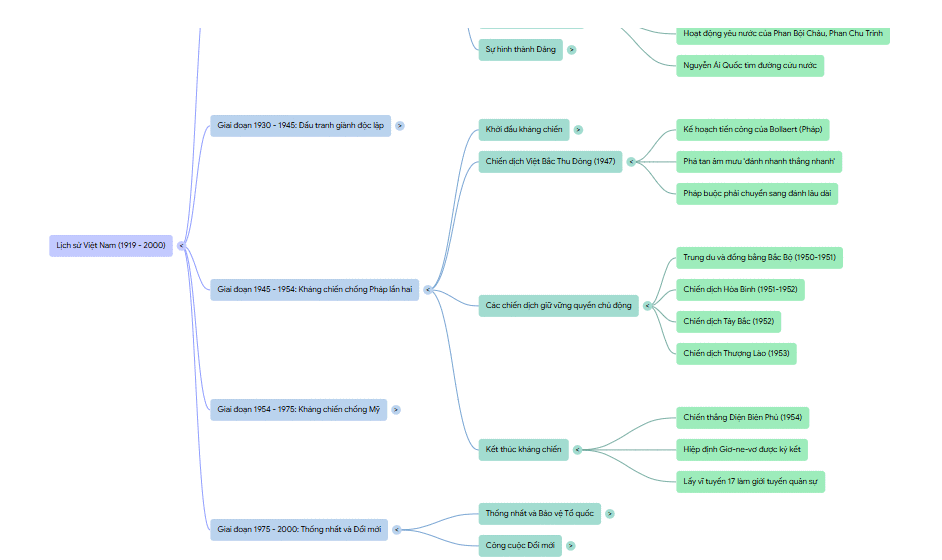
Select the expand icon on a branch to reveal lower-level topics. Collapse branches you are not studying so the visible structure stays manageable. Zoom and pan to inspect a large diagram instead of trying to read every node at once.
6. Inspect a node and verify it against the sources
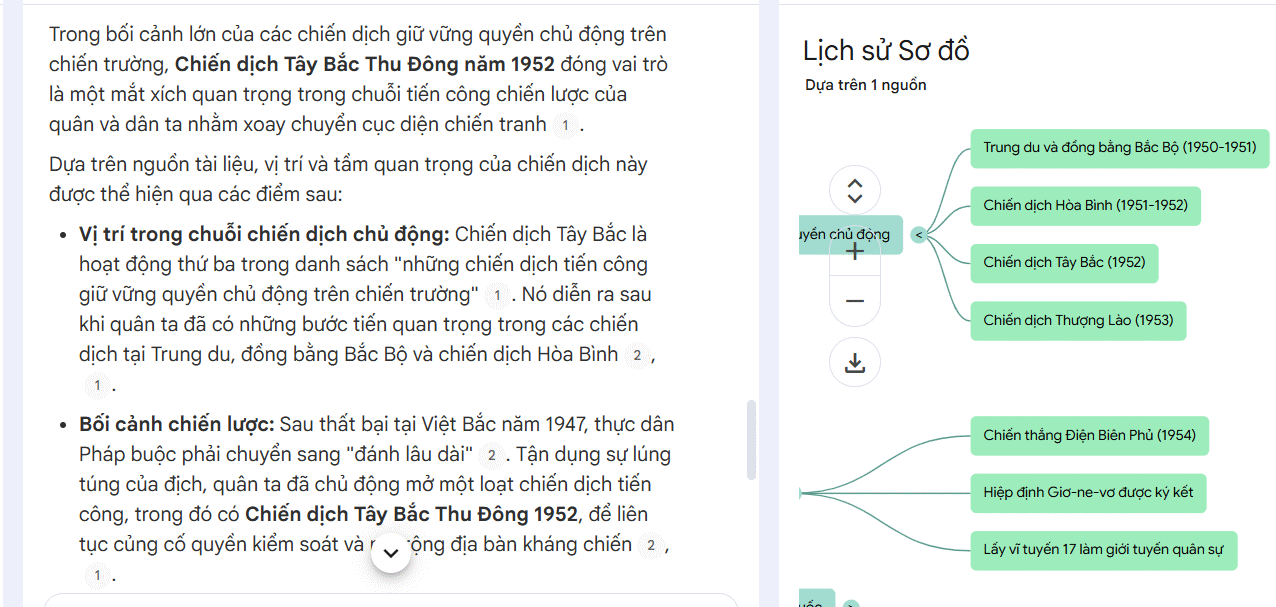
Select a concept in the diagram to open its explanation. Follow the citations or source references back to the relevant passage, then check whether the node represents the source accurately. A clean-looking map can still omit a qualification, compress competing views, or imply a relationship the source does not establish.
Use the adjacent chat to ask bounded follow-up questions such as “Which selected sources support this connection?” or “Show the passages that distinguish these two concepts.” If the evidence is weak, correct your notes rather than memorizing the map as fact.
7. Download the map
If the mind-map viewer shows a download or save icon, use it to export the diagram as a PNG image. Open the downloaded file to confirm that labels are readable. Keep a link or note identifying the notebook and source set, because the static image does not contain the same interactive citations as the original map.
Ways to make the map more useful
- Use separate maps for separate goals. One map can show chronology, while another compares themes or arguments. Google added support for multiple Studio outputs of the same type, although availability can depend on the account.
- Improve the sources before regenerating. Remove duplicates and add missing primary material instead of trying to repair every problem through the prompt.
- Convert nodes into active-recall questions. Hide a branch, explain it from memory, and reopen it to check your answer.
- Do not infer scale from the layout. A large node or central position does not necessarily mean a topic is more important unless the source and generation method establish that meaning.
- Preserve the source context. A downloaded image is a study aid, not a replacement for citations or the original documents.
For other study formats generated from the same notebook, see TipsMake's guide to Notebook audio and video overviews. If you are deciding whether a source-grounded notebook or a general chatbot fits the task, compare NotebookLM and ChatGPT.
Related Articles
 How to Create Mind Maps Using AI4 minutes read
 How to Create Mind Maps for Lessons Using Gemini5 minutes read
 The 3 Biggest Updates for NotebookLM7 minutes read
 How to Create Mind Maps Using Canva AI6 minutes read
 A Guide to Creating Mind Maps Quickly Using Napkin AI5 minutes read
 Best AI Tools for Creating Mind Maps7 minutes read
Reader Comments 0
Sign in with email or Google to join the discussion.