Table of Contents
Google Gemini can help turn a lesson document into a mind-map outline and then generate a visual version. The reliable workflow is to separate those tasks: first extract and verify the ideas, then create the image from the corrected outline. This prevents a polished diagram from hiding a missing branch, misspelled label, or invented fact.
Do not upload confidential student records, private assessments, copyrighted material you are not allowed to process, or documents restricted by your school. Work and school accounts may also have administrator-controlled feature limits.
What you need
- A signed-in Gemini account with file upload available
- A readable PDF, document, screenshot, or photo of the lesson
- A clear target: grade level, topic, number of branches, and purpose
- Time to compare Gemini's outline and image with the source
Google's file-upload help page lists current supported inputs and account requirements. Limits differ by plan and account type.
1. Prepare the lesson source
Use a clean document whenever possible. For photographed pages, crop the page, straighten it, and check that small labels and formulas are readable. A mind map is easier to review when the source covers one coherent lesson rather than an entire textbook.
Write down the information that must not be changed, such as dates, formulas, terminology, and required learning outcomes. If a diagram or table is essential, note that Gemini must interpret it rather than merely read the surrounding text.
2. Upload the document to Gemini
- Open Gemini on the web or in the mobile app.
- Select Add files and choose the document, image, or supported Drive source.
- Wait until the attachment appears in the prompt.
- Ask Gemini to confirm which pages or images it can read before requesting a summary.
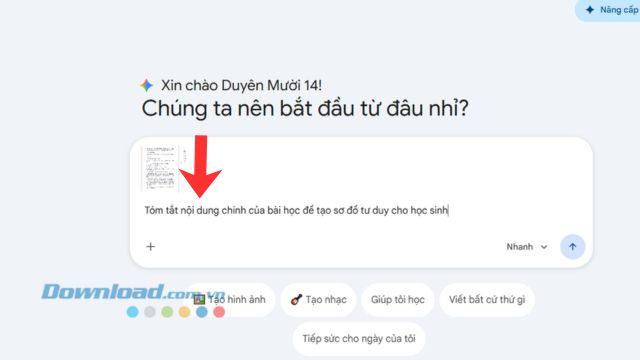
If a scan is blurry or a page is missing, fix the source instead of asking the model to guess.
3. Generate a structured outline first
Use a prompt that limits Gemini to the uploaded material and requests a reviewable structure:
Use only the attached lesson.

Create a text outline for a mind map aimed at Grade [level].
- Give one central topic.
- Create 4 to 7 main branches.
- Add 2 to 5 concise sub-branches under each.
- Keep dates, names, formulas, and definitions exactly as stated.
- Add the source page number after each main branch when possible.
- Do not add outside facts.
- Mark unclear or unreadable source text as [check source].
- Return the result as an indented outline, not an image.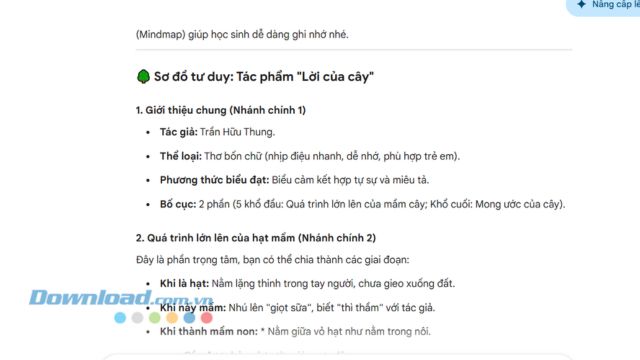
4. Verify and edit the outline
Compare every branch with the original lesson. Check:
- Whether the central topic matches the learning objective
- Missing ideas and duplicated branches
- Dates, definitions, formulas, names, and cause-and-effect relationships
- Whether examples are identified as examples rather than general rules
- Whether the language is appropriate for the intended grade
Correct the outline in the chat or in a text editor. This verified text is the source for the image; do not copy an unchecked response directly into image generation.
5. Open Gemini's image tool
In the Gemini web app, open the sidebar and choose Images. On mobile, open the menu and select Images. Availability, model choices, and quotas depend on the account and plan. Google's image-generation guide explains the current interface.
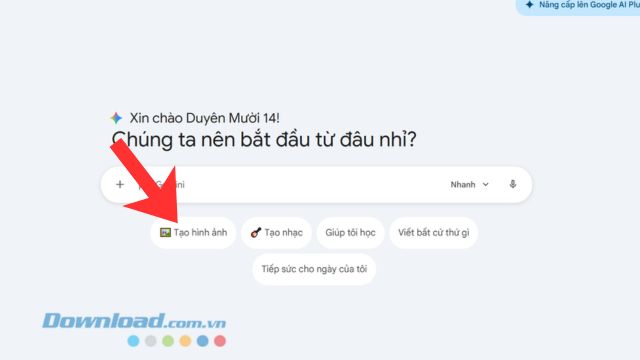
6. Generate the mind-map image
Paste the corrected outline with precise visual instructions. Keep labels short; dense paragraphs make AI-generated diagrams hard to read.
Create a landscape educational mind map from the verified outline below.

Audience: Grade [level]
Layout:
- One central topic in the middle
- One clearly separated branch for each main heading
- Left-to-right text
- Large, high-contrast labels
- A different consistent color for each main branch
- No decorative text, watermark, extra facts, or invented branches
- Preserve every label exactly as written
- Leave enough space between branches for printing

Verified outline:
[paste the corrected outline]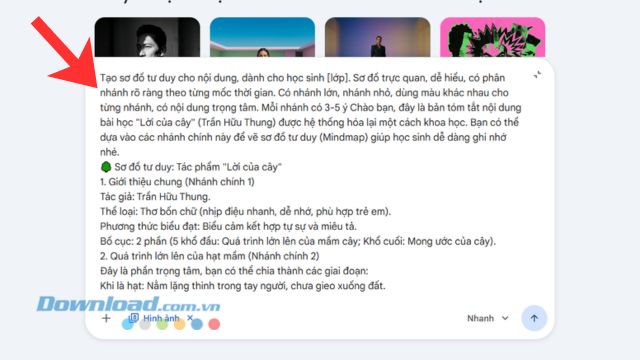
7. Review the image before using it
AI image tools can distort text even when the outline was correct. Zoom in and compare the graphic with the verified outline. Look for:
- Misspelled or duplicated labels
- Branches connected to the wrong parent
- Missing ideas or invented words
- Dates, formulas, and symbols rendered incorrectly
- Low contrast, tiny type, or color-only distinctions
- A layout that becomes unreadable when printed or projected
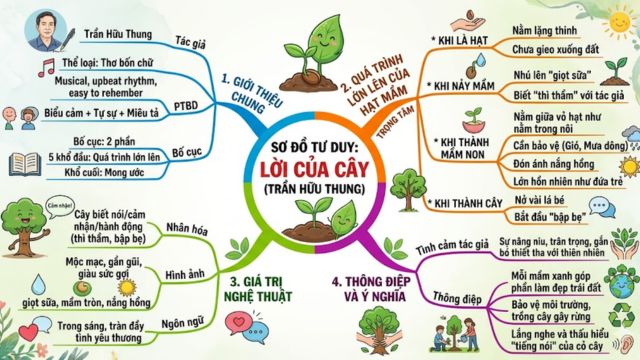
If only one or two labels are wrong, ask for a targeted correction but recheck the entire regenerated image. For an assessment, formula sheet, or accessibility-critical resource, rebuild the verified outline in a diagram or presentation tool where every label and connector can be edited directly.
Video walkthrough
Prompt variations
Quick exam review
Turn the attached lesson into a compact exam-review mind-map outline.
Keep only examinable definitions, processes, formulas, dates, and contrasts.
Use no more than 5 main branches and 4 short sub-branches per branch.
Use only the source and mark anything uncertain as [verify].
Chronological lesson
Create a text-first mind map for this history lesson.
Use the central topic as the event or period.
Organize main branches by time phase.
Under each phase, list key events, people, causes, and consequences.
Preserve dates exactly and cite the source page after each branch.
Concept comparison
Create a mind-map outline comparing [concept A] and [concept B].
Include definitions, shared features, differences, examples, and common mistakes.
Use only the attached lesson. Do not infer missing facts.
Younger students
Create a mind-map outline for Grade [level].
Use familiar words and short labels, but keep required subject terms.
Add one simple source-based example under each branch.
Do not turn nuanced statements into absolute claims.
When an image is not the best output
Keep the verified indented outline instead of an AI-generated image when the lesson contains many formulas, long quotations, fine-grained relationships, or accessibility requirements that the image cannot meet. A text outline is searchable, selectable, easier to correct, and more compatible with screen readers.
Classroom quality checklist
- The source was authorized for upload.
- The outline uses only the lesson and was checked line by line.
- Names, dates, formulas, and definitions match the source.
- Every image label is readable and connected to the correct branch.
- The diagram has sufficient contrast and a text alternative.
- Students are told that AI assisted with the visual.
- The final resource was tested at its actual print or display size.
Related Articles
 Instructions on Creating a Mind Map for a Lesson Using Gemini5 minutes read
 How to Create Mind Maps Using AI4 minutes read
 How to Create Mind Maps in NotebookLM3 minutes read
 How to Create Mind Maps Using Canva AI6 minutes read
 A Guide to Creating Mind Maps Quickly Using Napkin AI5 minutes read
 Best AI Tools for Creating Mind Maps7 minutes read
Reader Comments 0
Sign in with email or Google to join the discussion.