Easy data recovery guide with Easeus Data Recovery Wizard
How to use the EasyUS Data Recovery Wizard
EasyUS Data Recovery Wizard is easy to install and use. The program uses an intuitive control interface, allowing non-computer users to recover photos, videos, music and documents at a glance.

The steps below will guide you how to use the EasyUS Data Recovery Wizard to recover data, including how to download and install it and how to complete the data recovery process without any problems.
How to Download and install the EasyUS Data Recovery Wizard

The installation file of EasyUS Data Recovery Wizard is named "drw_trial.exe". After downloading, double click on the downloaded file to launch the installation. You will see a 'Welcome' dialog box asking if you want to continue. Click on Next.
Next, accept the license agreement and click "Next" in all installer windows. When you see the Select Additional Tasks panel, select "Create a desktop icon" (Create a destop icon) and continue the installation.
That's it, the EasyUS Data Recovery Wizard is ready to use. The software icon appears on the home screen. EasyUS Data Recovery Wizard can handle all data loss situations, so you can try to recover deleted, formatted, corrupted, inaccessible or lost data files. The next steps will guide you through how to recover data using the EasyUS Data Recovery Wizard.
Scan and recover lost data with EasyUS Data Recovery Wizard
Step 1: Choose a location to scan

Launch the EasyUS Data Recovery Wizard , hover over the partition, external hard drive, USB or memory card where you lost data and then click "Scan".
Step 2: Choose a file to recover

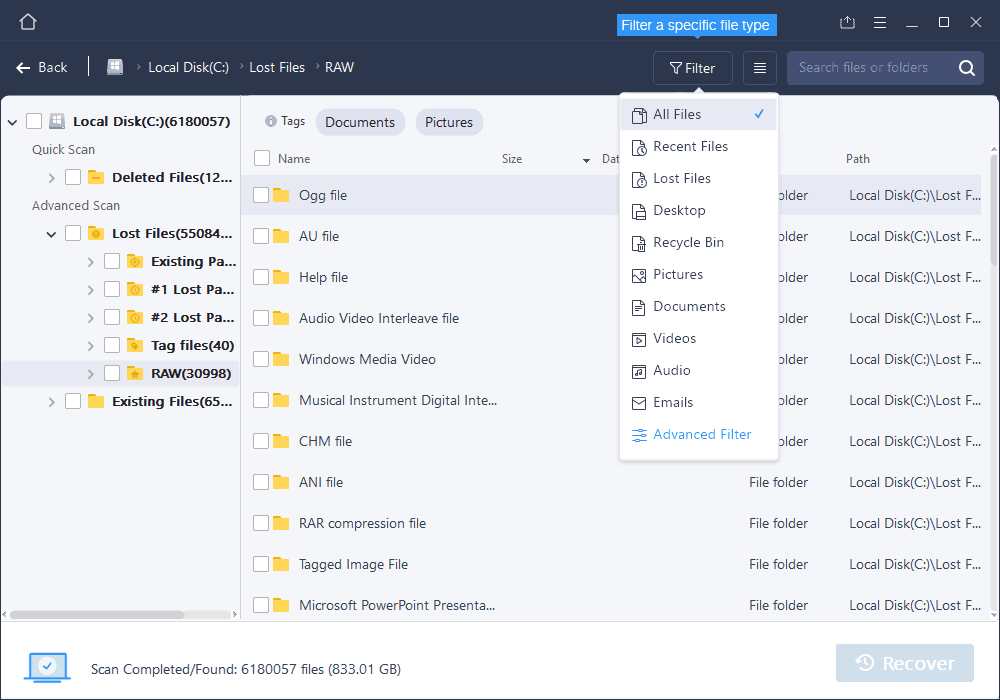
Wait until the scan is complete. Then select the files you want to recover. To locate data faster, use the search bar or filter to search for specific files. To check a file, double-click the item to preview its contents.
Step 3: Recover lost data
Click "Recover" (Recovery) and choose a location on another drive to save the file
 Caption
 The found files are displayed as a list. If necessary, you can switch to the Thumbnail View mode and they will be displayed as thumbnails. For each file, you can see the name, size, file type, modification time, creation time, last access date, attribute and status. What you see is what you can actually recover if you purchase the full EasyUS Data Recovery Wizard . The full version allows you to unlock the ability to recover an unlimited number of files and save them to the location of your choice.
As you can see, file recovery with Data Recovery Wizard is extremely easy and it does not require any special skills or technical knowledge. If you encounter some difficulties, you can use the Help system, which can be accessed by clicking "Help" on the interface. We have used a simple situation as an example here. In other cases, you can recover files even in more serious situations, such as when you accidentally formatted a drive and you want to recover data at that drive.
After you have determined the part of data you want to recover, you can follow these two ways:
1. Download the EasyUS Data Recovery Wizard and manually recover data for free
2. Buy the license and activate the EasyUS Data Recovery Wizard in the full version so that you can recover data after scanning. Good luck.
You should read it
- ★ 2 best data recovery software on your computer and memory card
- ★ How to get back a photo file deleted on the camera's SD memory card
- ★ Data Recovery Wizard - The most powerful data recovery software
- ★ Top 5 data recovery software, computer data rescue, hard drive, USB best
- ★ Tips to Recovery data on iphone, ipad, ipod