Create USB boot with just one simple, quick mouse click
Right after downloading, with just a few clicks, you can use a very professional rescue USB. Refer to how to create a bootable USB with just one click.
Table of Contents
Right after downloading, with just a few clicks, you can use a very professional rescue USB. So, please refer to how to create a bootable USB with just one click to share with those who need it.
What is the purpose of creating a USB Boot?
When your computer is running on the Desktop interface, installing Win directly is impossible. Therefore, the simplest and fastest way is to use USB . However, if you want to install Windows for your computer quickly and effectively, the USB needs to be created with USB Boot UEFI and Legacy 2021 in advance. Boot is the boot for the computer.
Creating a USB to install Win 10 with UEFI and Legacy standards not only helps you install Windows, but also helps you rescue data stored on your computer's hard drive, perform basic hard drive repair, fix Windows errors, crack computer passwords when you forget them, or partition hard drives more reasonably, etc.
Note when creating USB Boot to install Windows 10, 7
Some issues you need to note before creating USB Boot:
- Please back up all your data on the USB to another USB before creating a USB Boot because all data on the USB will be lost.
- Prepare a new USB with at least 4GB capacity.
- Download the ISO data file containing the standard Win installation package.

Create bootable USB with just one click
+ Step 1: After downloading => Use Winrar or 7-Zip to unzip the downloaded file. After unzipping, you will have the files.
If there is no need for integration, your USB BOOT will only have Mini Windows XP and Mini Windows 10.
+ Step 2: Right click on file 1_Click_Anhdv_Boot_2018.exe => select Run as administrator to run with admin rights.
+ Step 3: Follow the program's instructions. Programmed in Vietnamese, so it's very easy to use.
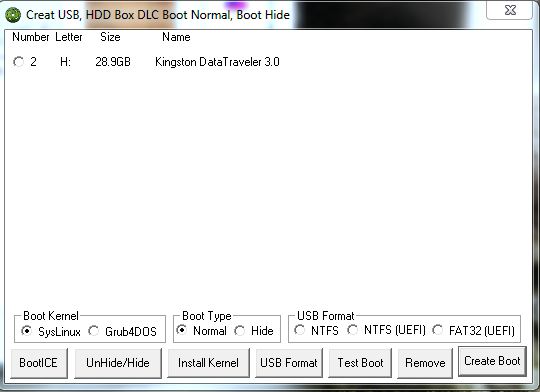
+ Step 4: Select the device you want to create boot. Observe the capacity column to determine the correct USB you want to create.
+ Step 5: In this step, there will be 2 options for you: create USB BOOT with hidden partition or create USB BOOT in the usual way:
If you choose to create a USB BOOT with hidden partitions, your USB will be divided into 2 partitions:
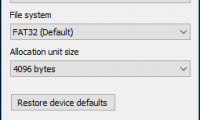
USB-BOOT: This is a hidden partition, which is responsible for containing boot files and computer rescue tools. This partition is formatted as FAT32 to be able to boot on both UEFI and LEGACY standards.
USB-DATA: This is a partition formatted with NTFS format so you can save files with a capacity > 4GB.
Enter Y: When you want to create a BOOT USB with hidden partition. Think about using your USB with capacity >= 8GB.
Enter N: When you want to create a USB BOOT in a single partition
My USB has a capacity of 16 GB so I will enter Y => press Enter to create a USB Boot with a hidden partition.
+ When the warning appears, it is necessary to format your USB, so if the USB contains all important data, copy it to another file first.
Enter Y => press Enter to agree.
+ Step 6: In this step, I can explain it more simply for you to understand:
This partition has a default storage capacity of 2GB (2048 MB). If you want to integrate Mini Windows 7/8, you must add 1 GB (1000 MB) more. Then your hidden partition will have a capacity of 2048 + 1000 = 3048 MB (that is 3 GB).
In addition, you can integrate Bitdefender into USB BOOT, you must add another 700 MB.
+ Step 7: The USB Format process has taken place and the process of copying data to USB has begun.
After copying, there will be a notification board and you just need to follow the instructions.
+ Step 8: Unplug the USB and plug it back in. If the error still shows 2 partitions, continue with the error fixing step.
Rerun the tool 1 Click => select language => select USB => enter number 5 => press Enter to Fix errors related to incorrect display of USB Anhdv Boot.
After fixing the error of displaying both USB partitions. The USB-BOOT partition has been hidden, leaving only the data partition.
+ Step 9: The USB BOOT creation process is complete.
Finally try to test the usb boot. You run the QemuBoot Tester file in USB-DATA.
The above article is a guide to creating a USB boot with just one click, you can do it simply, if you are interested, you can follow and do it. TipsMake will guide in detail the problems with computers, components. that you encounter. Hope the article will be useful to you.
Was this article helpful?
Your feedback helps us improve.
Related Articles
 How to create USB Boot, USB install Windows by Rufus4 minutes read
 Create USB Boot with 1 Click MultiBoot v5.0, Boot both UEFI and Legacy standards8 minutes read
 Instructions for creating USB boot with Hiren's BootCD quickly6 minutes read
 20 best USB boot software8 minutes read
 Create USB Boot with Hiren's Boot3 minutes read
Reader Comments 0
Sign in with email or Google to join the discussion.