Compatibility note: These steps use the Photoshop CS6 interface. Tool names are broadly similar in newer Photoshop releases, but panel locations and available options may differ.
In this article, you will learn how to use various tools in Adobe Photoshop CS6 to create fashion images with different shapes and how to use Adjustment layers and masks to combine color palettes and elements in an image.
- Photoshop CS6 Tutorial (Part 1): Creating Digital Images
- 10 common problems in Photoshop and how to fix them.
- Guide to creating animated images and GIFs using Adobe Photoshop CS6
Start by creating a new file (Ctrl + N) in Adobe Photoshop CS6 with dimensions of 1000px x 1500px ( RGB color mode ) at a resolution of 72 pixels per inch. Use the Paint Bucket Tool (G) to fill the new background with the color #212F60 .

Find an original image, in this example, an image of a model.
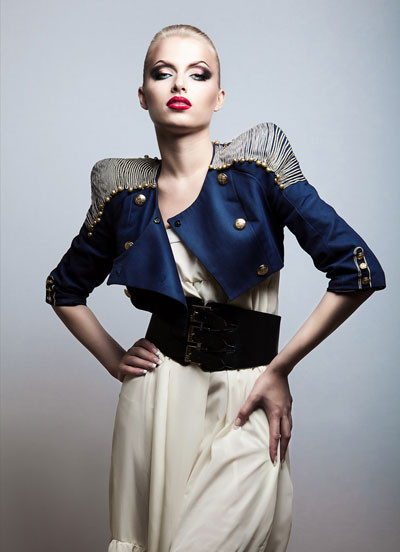
Remove the background using tools like the Pen Tool (P) , Magic Wand Tool (W) , Magnetic Lasso (L) , or even simply by selecting Filter > Extract and inserting it into a new layer.
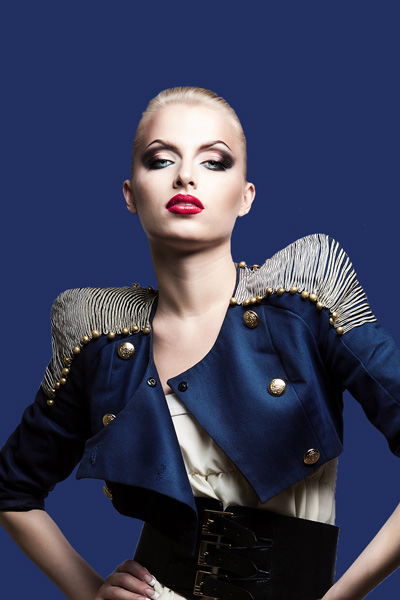
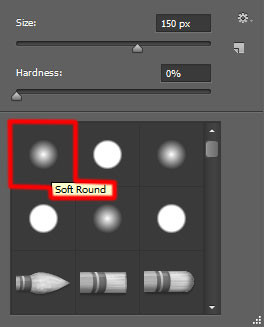
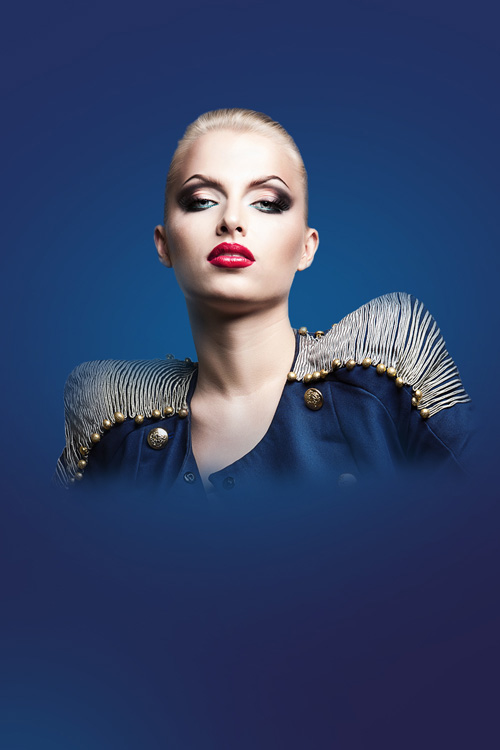
Group the model's layers into a single group (hold down Ctrl , select the layer in the Layers panel , and then press CTRL + G ). Then apply a mask to this group by selecting Add layer mask at the bottom of the Layers panel and choosing the Soft Round brush with black color.
Paint over the mask to conceal the model's face in a similar way to the image below.
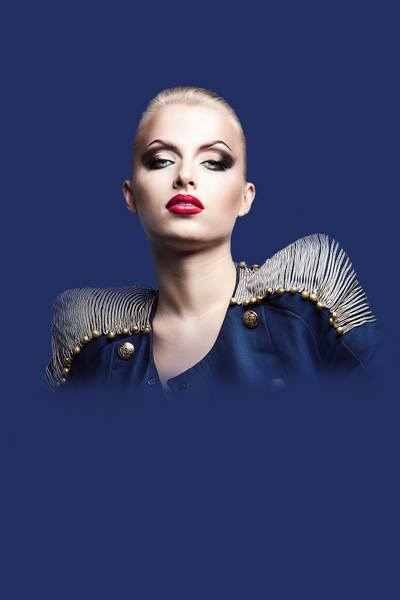
Create a new layer and select the same brush as above to draw the bottom empty space, choose the color #7B78FF ( Opacity - 20% ), and place this layer below the model's layer. Next, create another new layer and select it with a Soft Round brush to draw around the model as shown below, using the color #0097E0 (Brush with Opacity - 15% ), and place this layer below the model's layer.
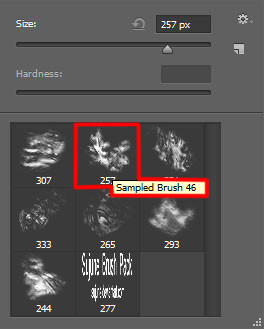
Next, download the Sujune Brush Pack 2 from DeviantArt and the brush pack for Adobe Photoshop called Light Brushes 2. Copy the brush files to the folder C:Program FilesAdobeAdobe Photoshop XPResetsBrushes (Adobe Photoshop X is your Photoshop version).
Create a new layer and select a brush from Sujune Brush Pack 2 to fill the background with color #37004A ( Opacity - 15% ).
Place this layer below the model layer.
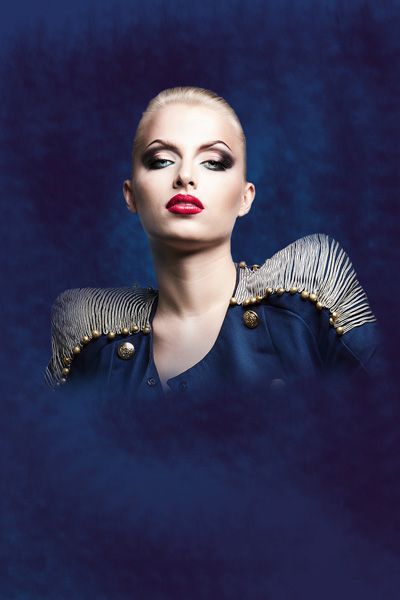
Create a new layer and select the Soft Round brush to paint the left side of the empty space and the bottom right corner of the picture. The brush color is #37004A ( Opacity - 15% ). Place this layer below the model layer.
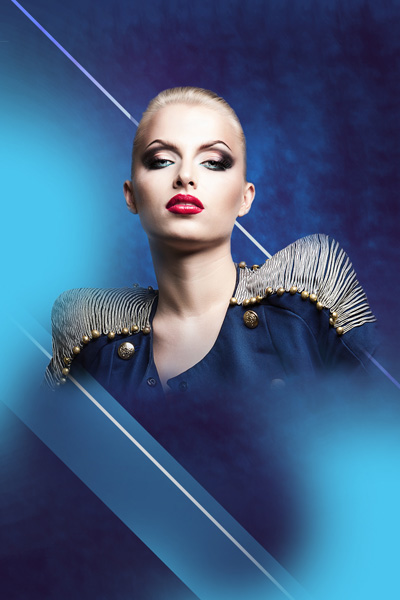
Use the Rectangle Tool (U) to draw a rectangle with the color #2E5783. Tilt the rectangle using the Free Transform command (Ctrl + T) and place this layer below the model layer.
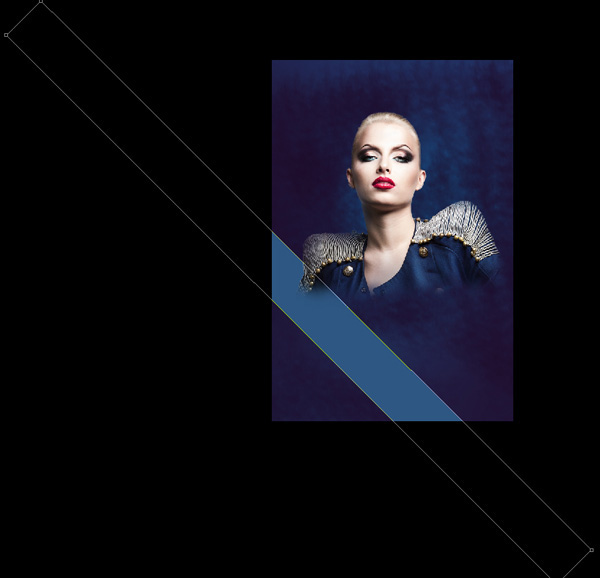
Add a mask to the final layer by selecting Add layer mask at the bottom of the Layers panel and choosing a black Soft Round brush (set the Opacity to 15% in the Options bar). Paint over the mask to hide the rectangles along its edges.
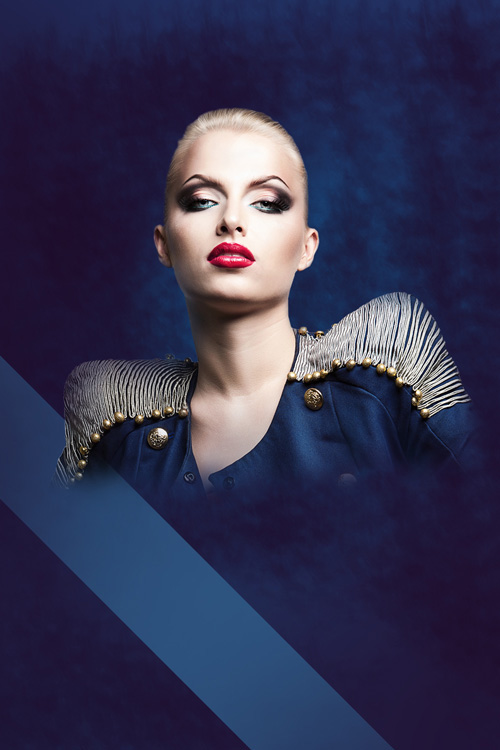
Create a new layer and select the previously used brush to paint the area behind the model and below the rectangle. The brush color should be #00B1ED ( Opacity - 30%) . This layer should be below the model's layer.
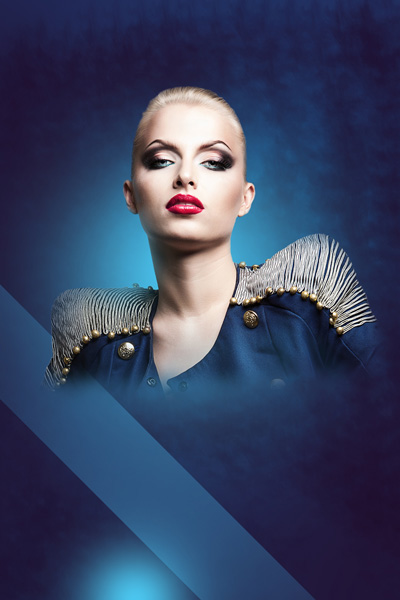
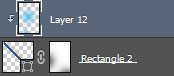
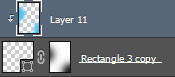
Hold down the Alt key (Windows) or Option key (Mac OS) and click between the brush layer and the rectangle layer in the Layers panel to create a Clipping mask .
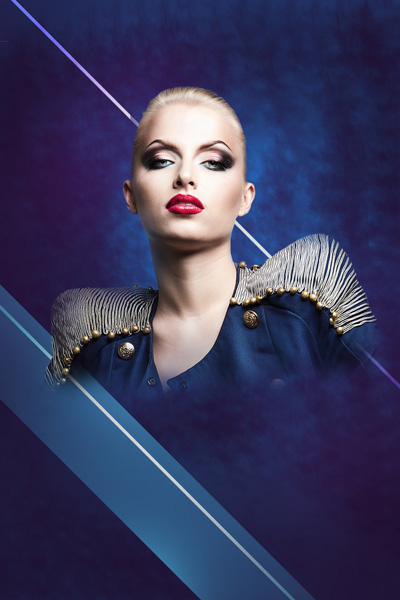
We have the following result:
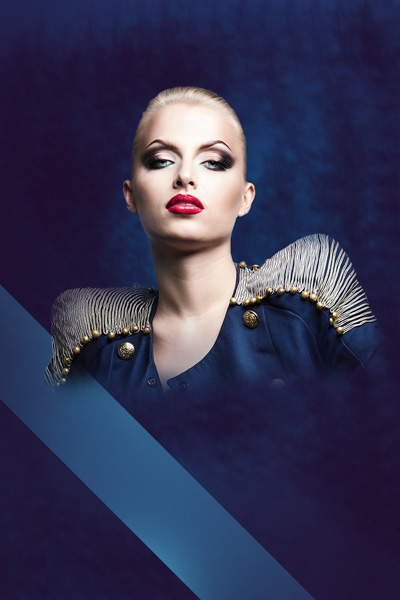
Next, create a new layer using a white Soft Round brush (Opacity - 20%) to draw a point behind the model. This layer will be below the model layer.
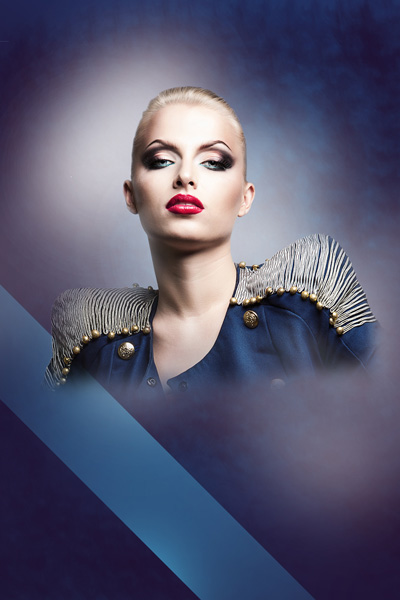
Set the Blending mode for this layer to Overlay .
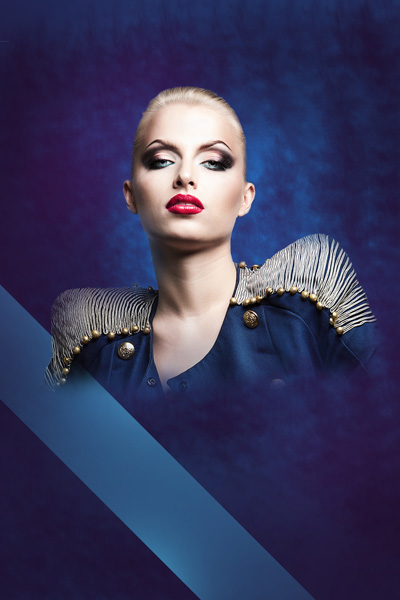
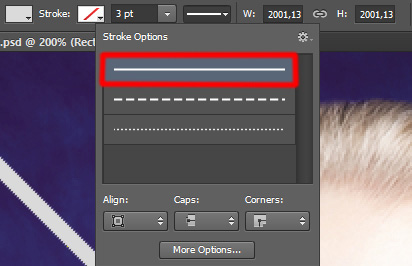
Using the Rectangle Tool (U) , draw a line with the color #DADA. Add a Stroke from the Options bar as shown below.
Use the Free Transform command (Ctrl + T) to create an incline.
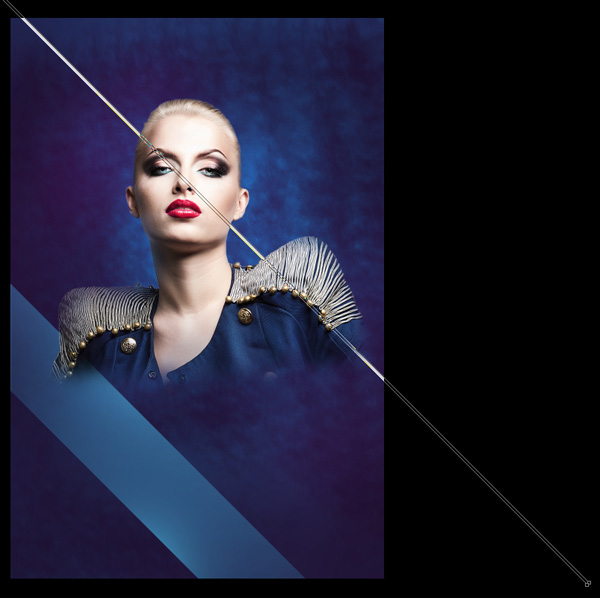
Set the Blending mode for this layer to Vivid Light.
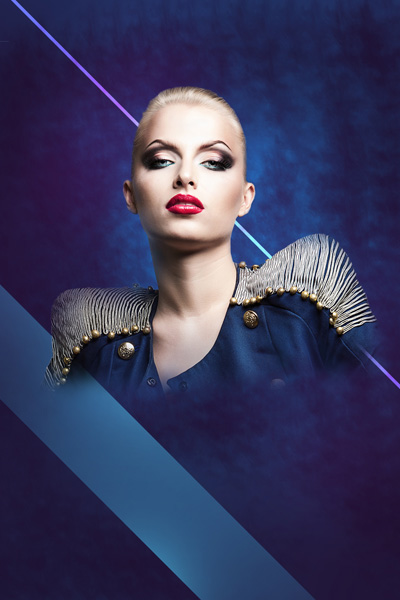
Add a layer mask to the same layer by selecting Add layer mask and then selecting the Rectangular Marquee Tool (M) as shown below:
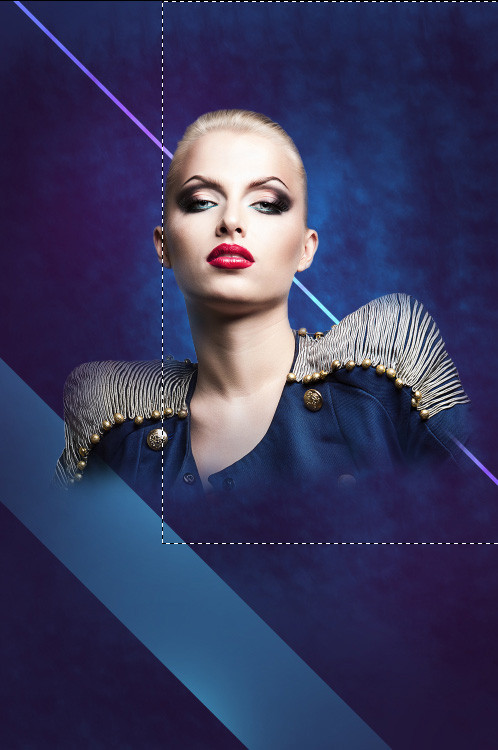
Using a black Soft Round brush ( Opacity - 20%) , paint to hide the inside of the selection area on the left and right.
The result is as follows:
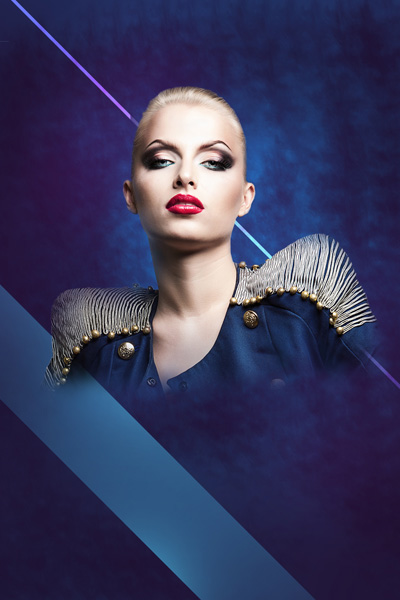
Create a copy of the newly created layer and change the Blending mode to Normal . Hide the edges of the lines in the mask using the brush as shown above. The copied layer containing the lines will be below the model's layer.
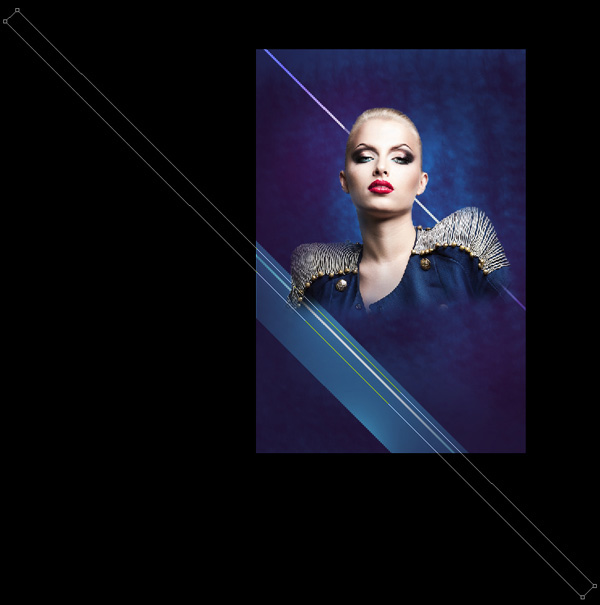
Create another copy of the last line layer and select the Free Transform command (Ctrl + T) to move the copy exactly as shown in the image below. The layer of the copy must be below the layer of the model.
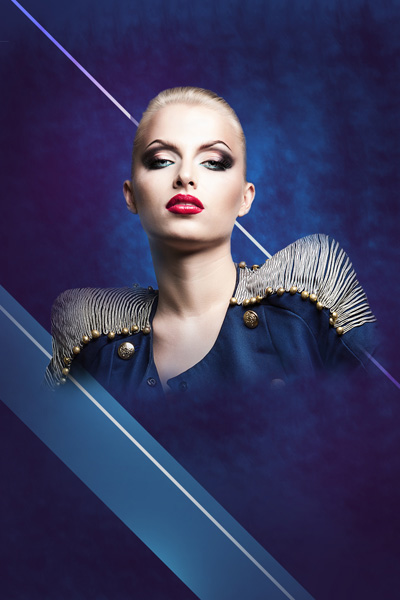
Create a new layer above the previous copy and select the Soft Round brush to draw the outline of the line. The brush color is #4BC5EE . This layer is also below the model's layer.
Hold down the Alt key (Windows) or Option key (Mac OS) and click between the brush layer and the line layer in the Layers panel to create a clipping mask .
Set the Blending mode for this layer to Linear Light.
Using the Rectangle Tool (U) , create another straight line, then tilt it with Free Transform (Ctrl + T).
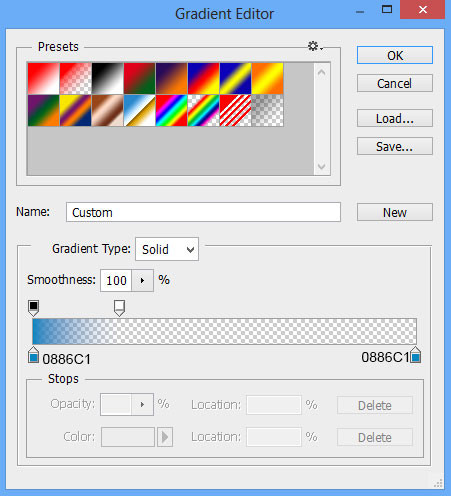
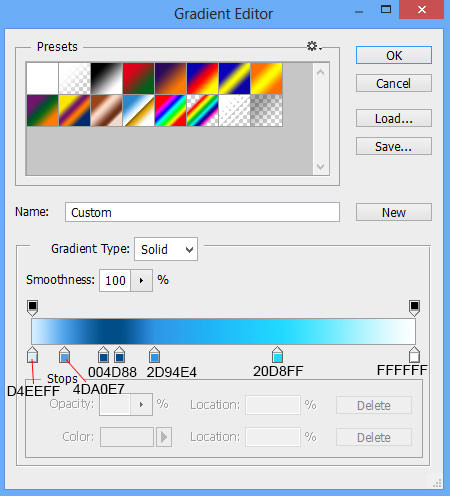
Set the Fill value to 0% for this layer and click the Add a layer style icon at the bottom of the Layers panel to select Gradient Overlay. Click the color bar to open the Gradient Editor and set the color stops as shown below. Press OK to close the Gradient Editor dialog box.
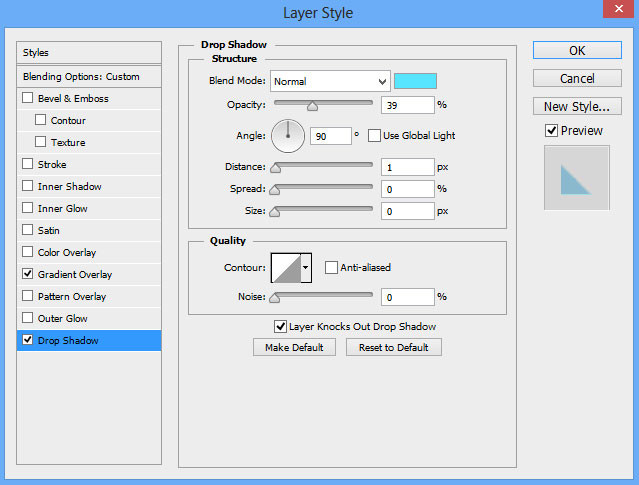
Add Drop Shadow:
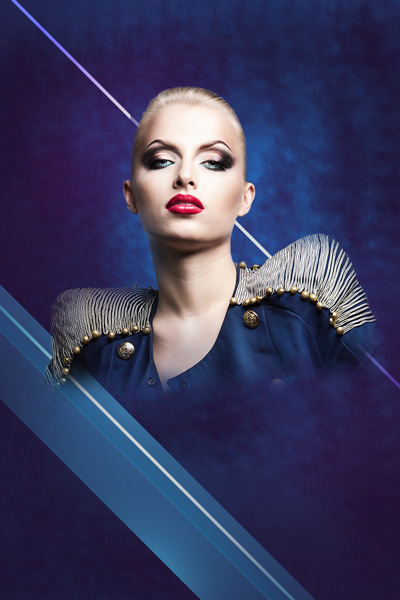
We have the following result:
Make eleven copies of the layer you just created and select the Free Transform command (Ctrl + T) to position the copies in the same way as shown below, and place this layer below the model's layer.
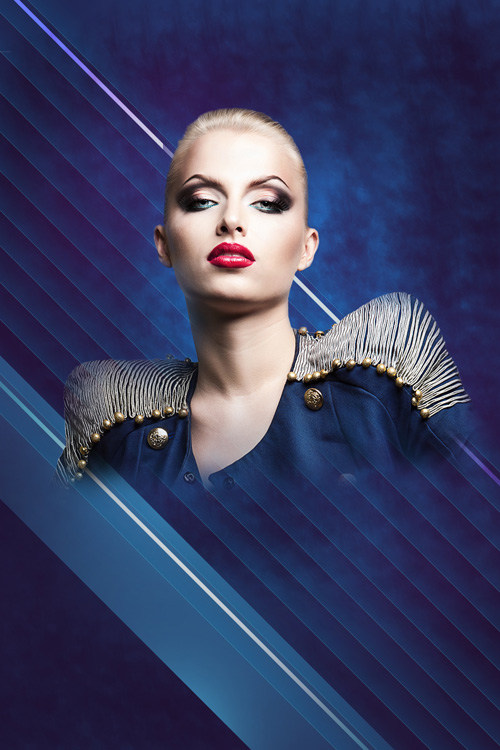
Next, group all these thin line layers together (hold Ctrl to select the layers in the Layers panel and finally press CTRL + E to Merge Down ). Set the Blending mode for this layer to Lighter Color .
Create a new layer and select the Soft Round brush to paint the top area with the color #FAFA00 (Opacity - 7%) . This layer is also placed behind the model's layer. Set the Blending mode for this layer to Hard Mix .
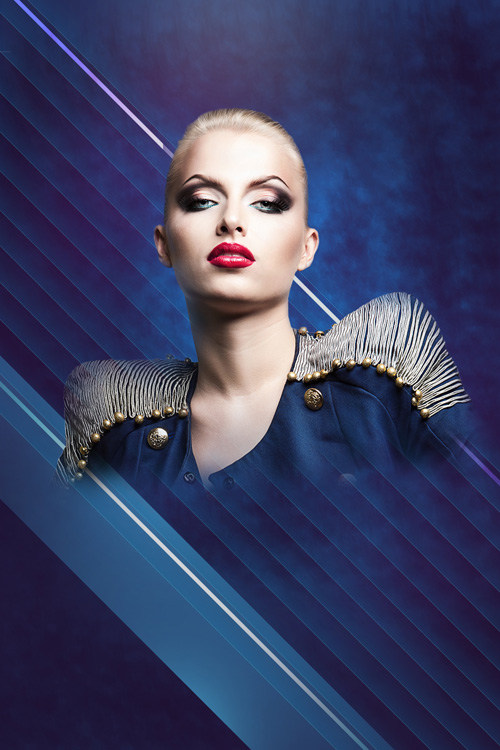
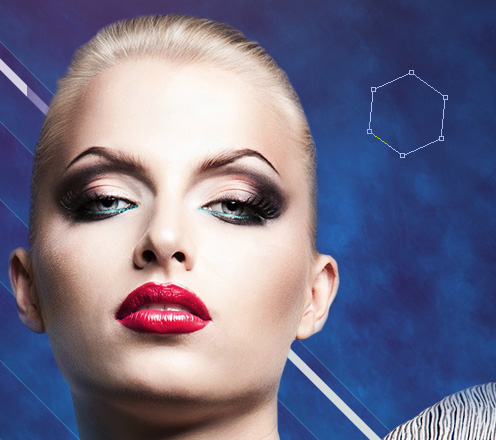
Use the Polygon Tool (U) to draw a polygon as shown below and place this layer below the model layer.
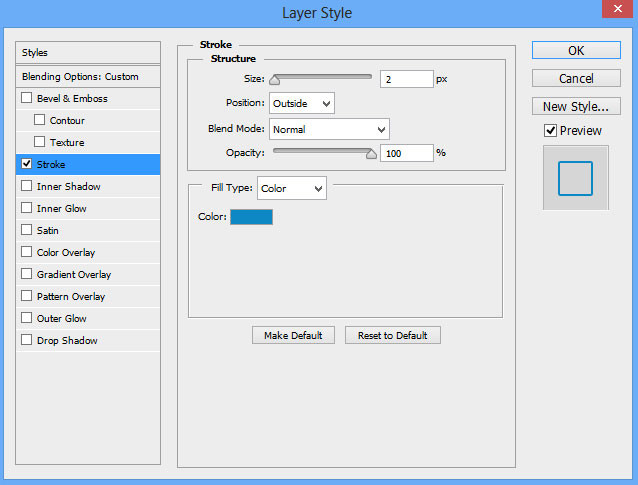
Set the Fill value to 0% and click the Add a layer style icon in the Layers panel to select Stroke .
We have the following image:
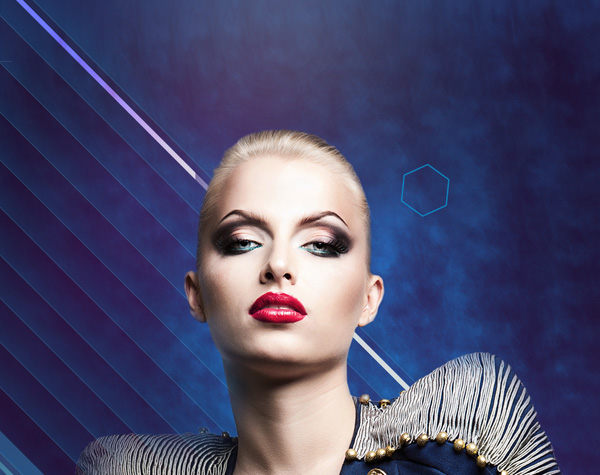
Make three copies of this layer and select the Free Transform command (Ctrl+T) to merge the copies together.
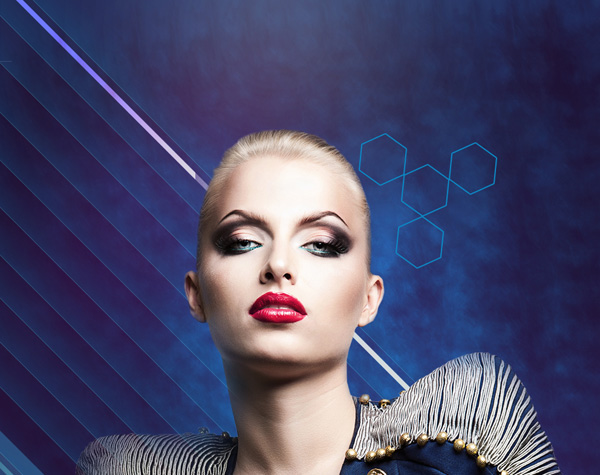
Group these polygon layers together (hold down Ctrl to select the corresponding layers in the Layers panel and press CTRL + G) . After grouping, copy this layer and apply the Free Transform command (Ctrl+T) to resize the copy and position it as shown below. Set the Blending mode for the top-left polygon group to Color Dodge .
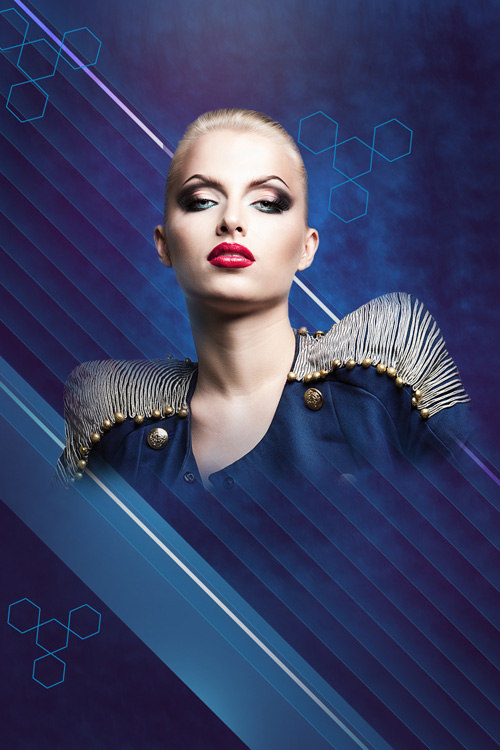
Now, draw a series of squares by selecting the Rectangle Tool (U) and choosing white. Copy multiple squares and select the Free Transform command (Ctrl+T) to place the copies and change the Fill value of the copy layer to match the image below. These component layers will be placed below the model layer.
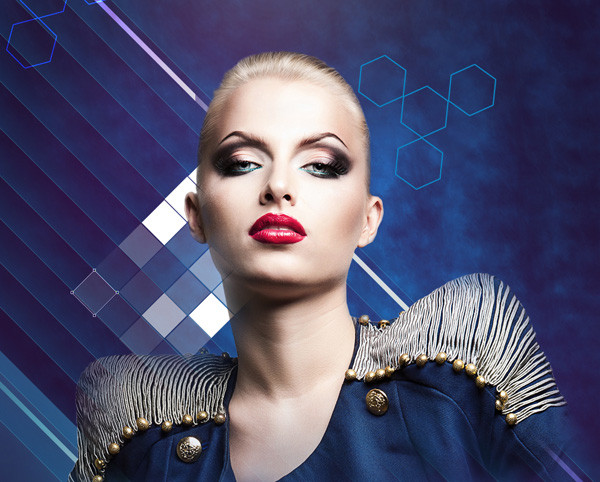
Group these square layers together (press CTRL to select the layers and hold down the left mouse button while dragging the selected layers to the Create a new group icon at the bottom of the Layers panel ). Set the Blending mode for the new layer to Hard Mix .
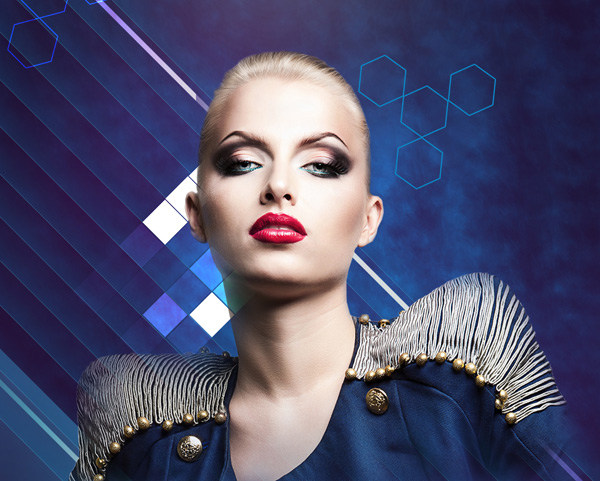
Add a mask to this layer by selecting Add layer mask and using a black Soft Round brush (set Opacity to 20%). Paint the mask to hide the squares as shown below.
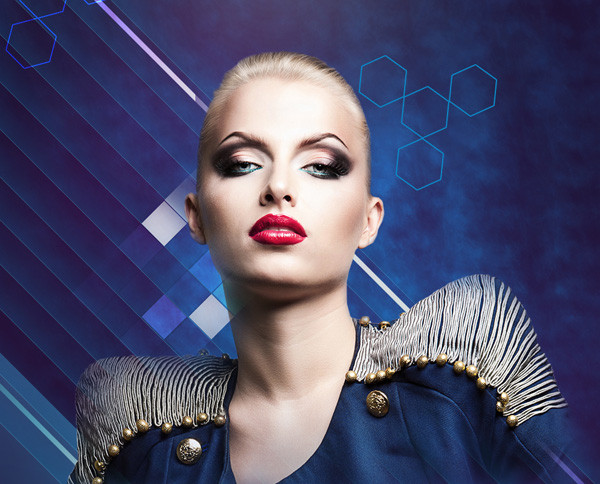
Copy the group containing the squares and select the Free Transform command (Ctrl+T) to rotate this group and achieve the same effect as shown below. The copy of this group must be placed below the model layer. Remove the mask and change the Blending mode to Overlay .
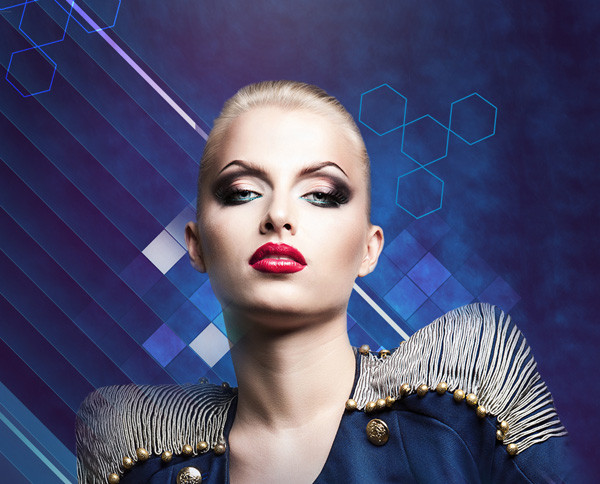
Create a copy of the recently created group and insert a mask into the copy by selecting Add layer mask and using a black Soft Round brush (Opacity - 20%) to hide the square, similar to the next image.
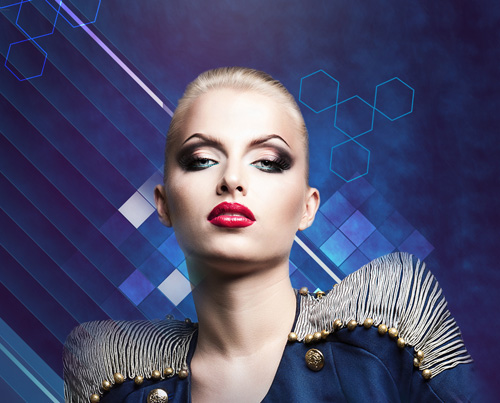
Next, create highlights behind the model's shoulders by creating a new layer and using a white Soft Round brush ( Opacity - 15%). This layer should also be placed below the model layer. Set the Fill for this layer to 84% and the Blending mode to Overlay .
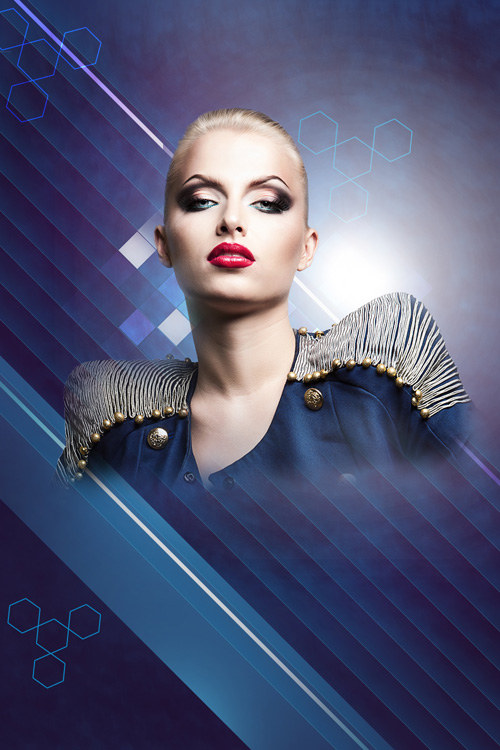
Create a new layer and select the Soft Round brush to paint specific areas of the model image and create shadows. Use the color #45005C ( Opacity – 15%) . This layer and the next layer are placed below the model layer. Hold down the Alt key (Windows) or Option key (Mac OS) and click between the brush layer and the model layer in the Layers panel to create a clipping mask.
Create a new layer and add more shadows to the model layer. This time, choose a black Soft Round brush (Opacity - 20%) .
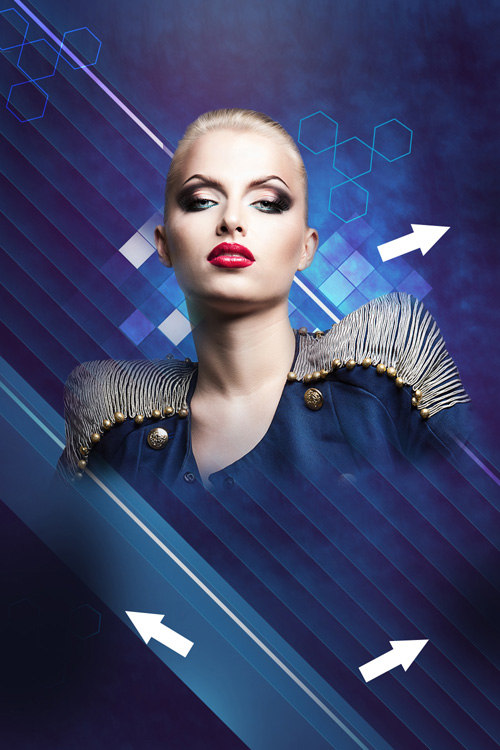
Hold down the Alt key (Windows) or Option key (Mac OS) and click between layers in the Layers panel to create a clipping mask. Next, create a new layer and use the brush as above to paint on the model's surface, using the black color #E47200 (Opacity - 20%).
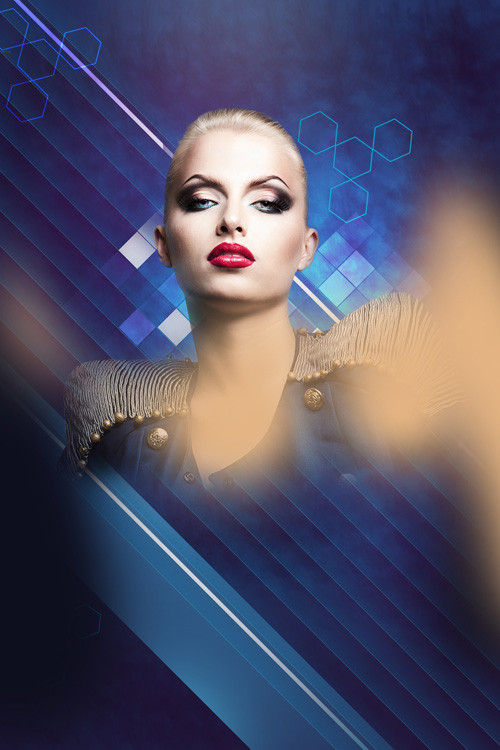
Set the Blending mode for this layer to Soft Light . Hold down the Alt key (Windows) or Option key (Mac OS) and click between layers in the Layers panel to create a clipping mask.
Create a new layer and select the white Soft Round brush (Opacity - 10%) to paint the areas as specified below.
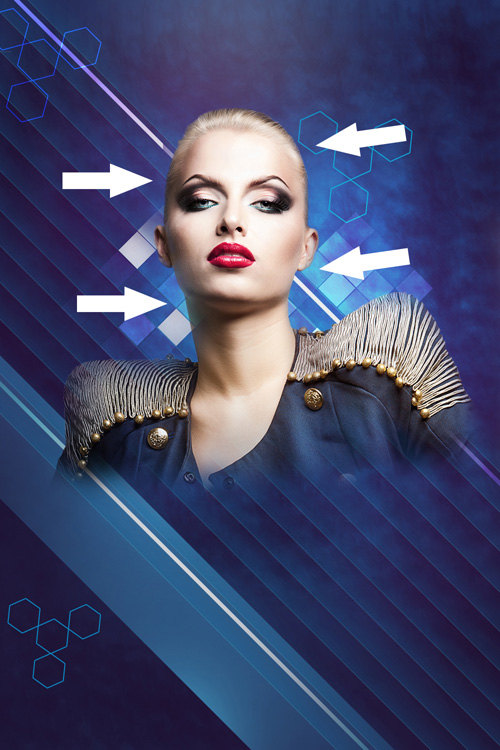
Hold down the Alt key (Windows) or Option key (Mac OS) and click between layers in the Layers panel to create a clipping mask.
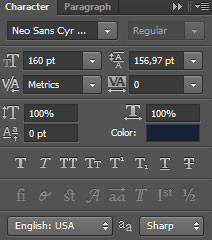
Insert text using the Horizontal Type Toll (T) tool. Select the font, size, and color in the Character panel .
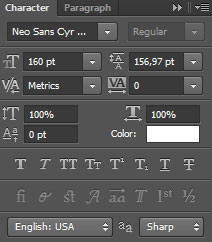
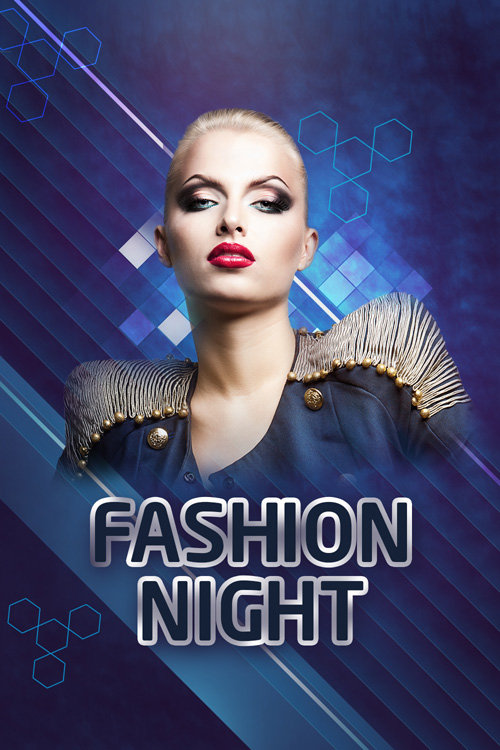
Click in the blank space and type "Fashion Night" . Press Enter to display the text.
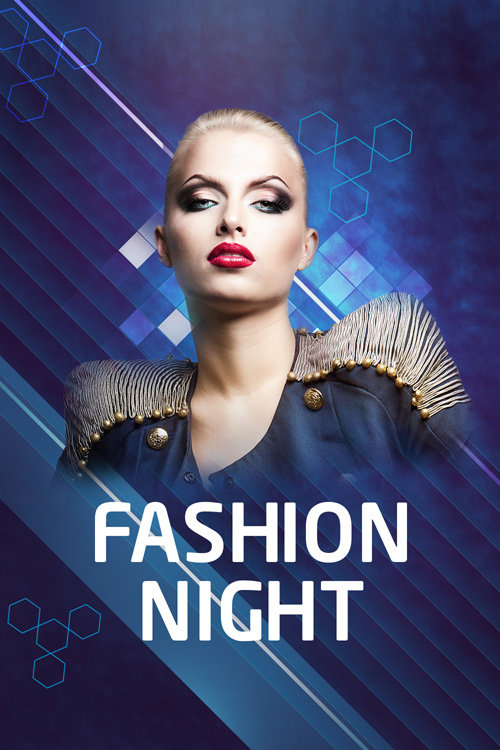
Click on Add a layer style in the Layers panel and select Stroke .
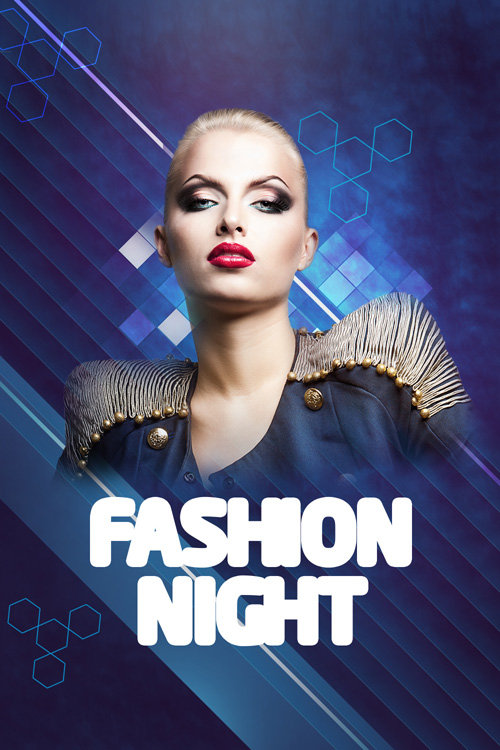
Right-click on the text layer in the Layers panel and select Convert to Smart Object . Click the Add a layer style icon and select Drop Shadow .
Create a new layer and select the Soft Round brush to add a shadow to the text. Choose the brush color #1F1C3E ( Opacity – 15% ).
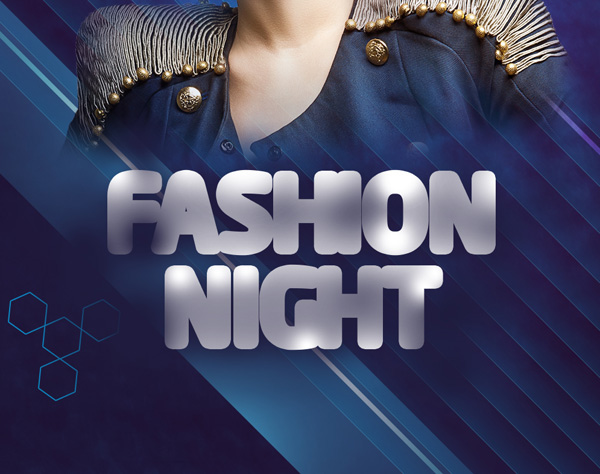
Hold down the Alt key (Windows) or Option key (Mac OS) and click between the brush layer and the text layer in the Layers panel to create a clipping mask.
Insert a mask into the same layer by selecting Add layer mask and using a black Soft Round brush (with an opacity of 40% in the Options bar ).
Apply a masking coat to hide shadows, as shown below.
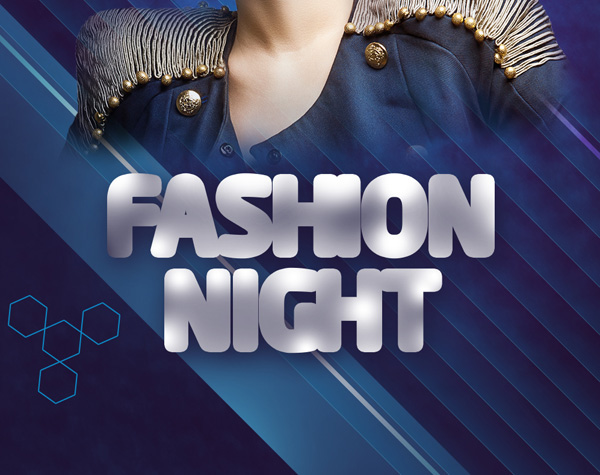
Repeat the above steps with the text but in a different color.
Click in the blank space and type " Fashion Night". Press Enter to apply the text.
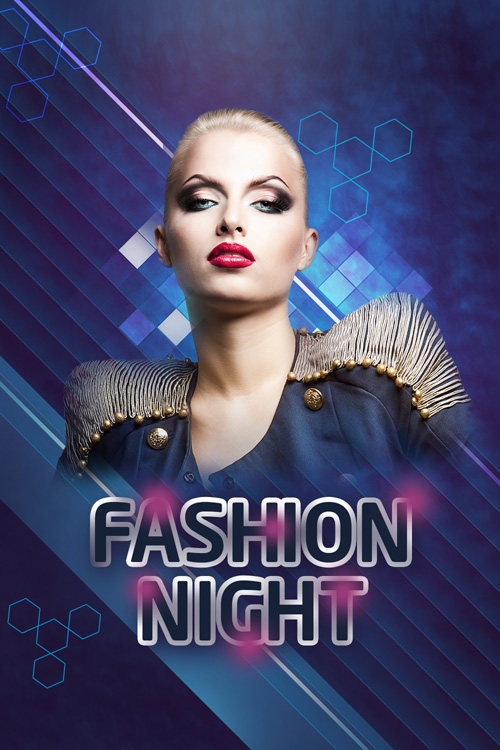
Create a new layer and select the Soft Round brush to draw on the text with the color #9B3C7B. Choose a brush with a different diameter.
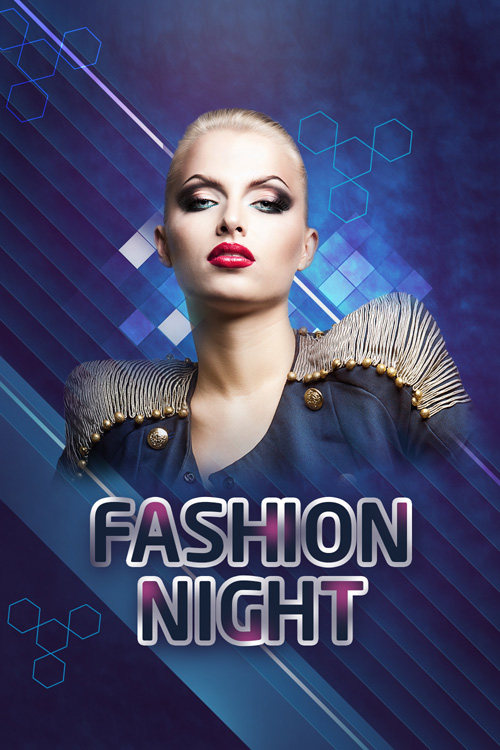
Next, you need to create a custom brush. In this case, create a new file (Ctrl + N) with dimensions of 100px x 100px ( RGB color mode ) at a resolution of 72 pixels/inch. Select the Pen Tool (P), set the drawing mode on Shape Layers in the Options bar , and draw a black triangle as shown below.
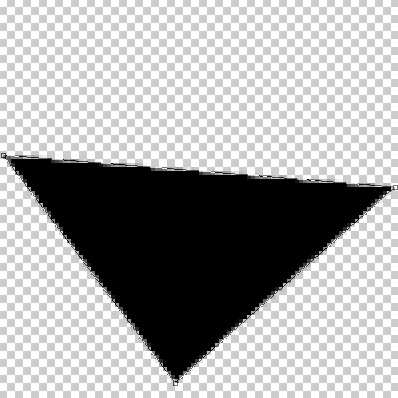
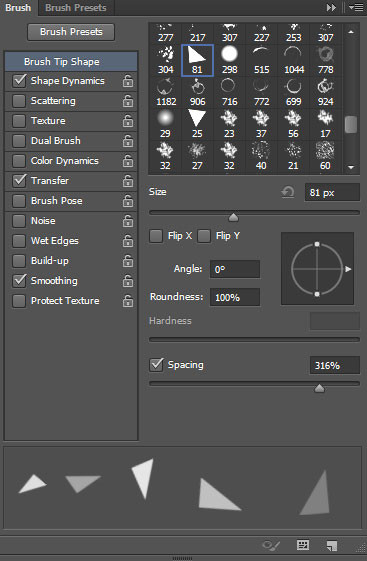
Go to the menu and select Edit > Define Brush Preset . Enter a name for the brush in the Brush Name dialog box . Return to the main file, customize the brush in the Brushes panel (F5) , and select Brush Tip Shape . Click and drag any slider to change the size and spacing of the brush as shown. The Preview window displays the brushstroke changes.
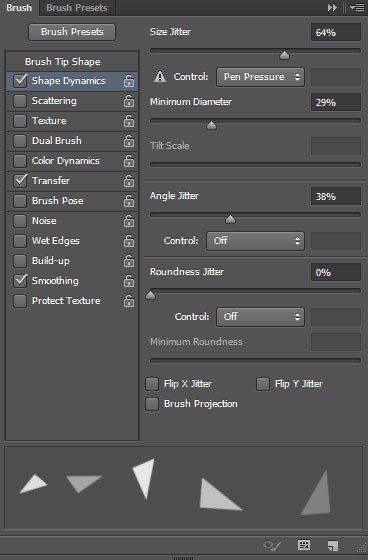
Go to Shape Dynamics and apply the following settings:
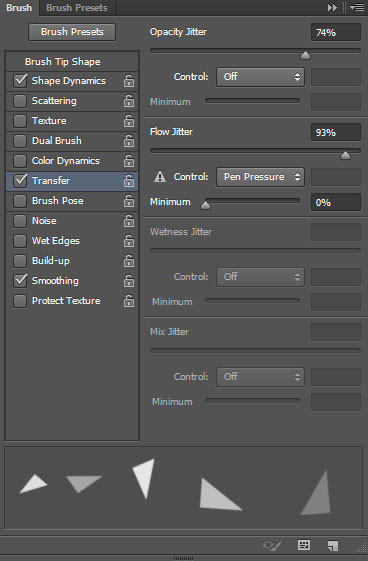
Select Transfer :
Create a new layer and use the brush you just created with the color #CAECF8 . Set the Blending mode to Soft Light.
Create a new layer and select a brush with the same color that was applied previously.
Insert a mask into the same layer by selecting Add layer mask and choosing a black Soft Round brush (Opacity - 80%). Paint the mask to hide the triangle as shown below.
Create a new layer and use two types of brushes—a soft round brush and a brush from the Sujune Brush Pack 2—to apply to the model's face.
The color of this brush is #00BDD2 (Opacity - 40%).
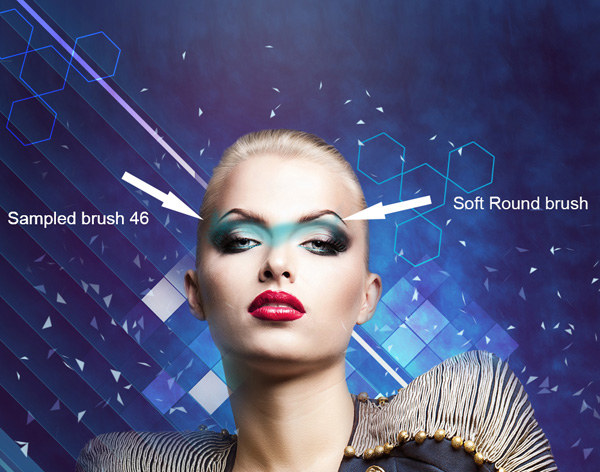
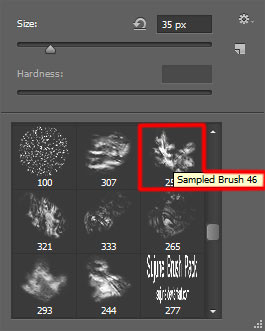
Create a new layer and select the brush shown above from the Sujune Brush Pack 2. The brush color is mentioned in the image.
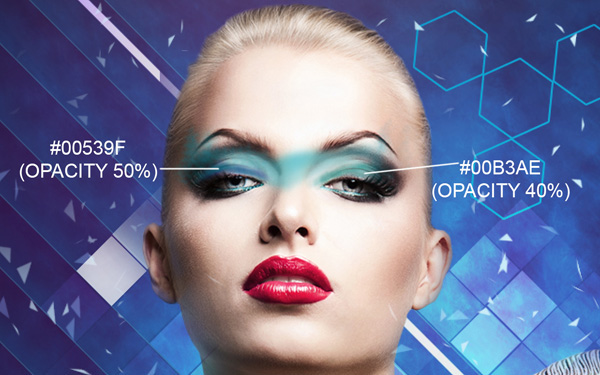
Create shading and add definition to the eyebrow edges by creating a new layer and selecting the Soft Round brush in color #0006A9 (Opacity - 30%) and black (Opacity - 30%).
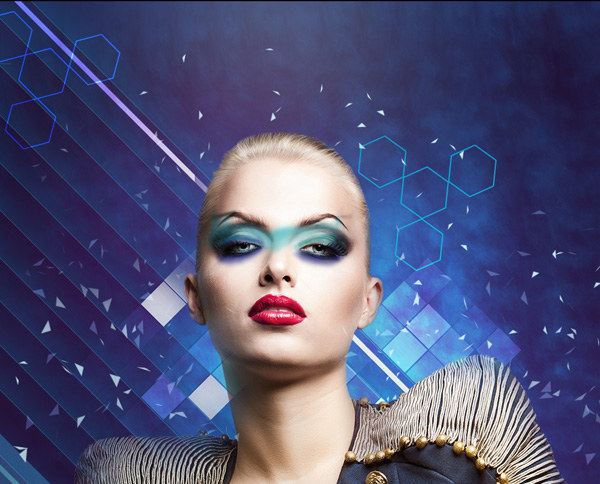
Continue using the Pen Tool (P) to draw the next shape as shown below. Color #2F328F .
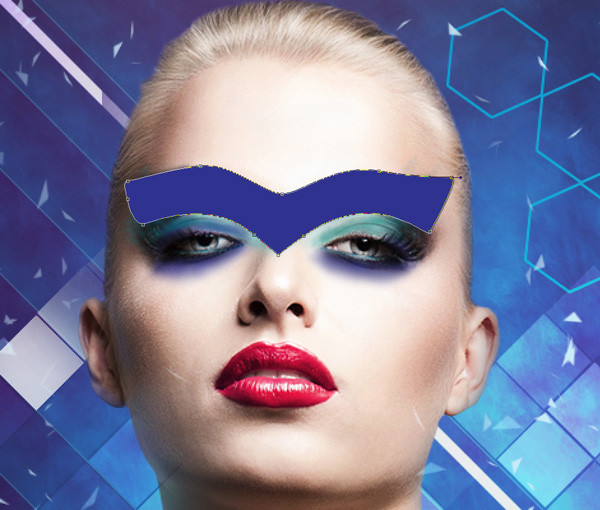
Insert the mask on top of the previous layer as you did before, and select a black Soft Round brush (Opacity - 40%). Paint the mask to hide the left and right sides, as shown in the image below.
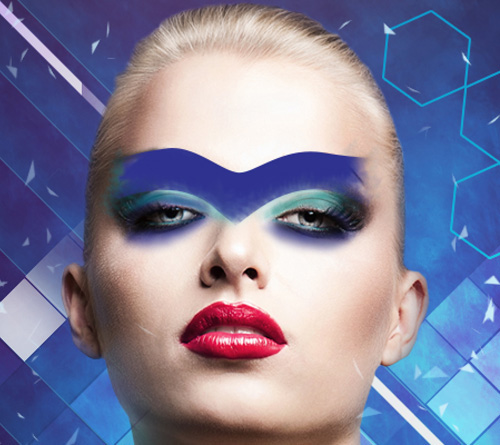
Create a new layer and select two types of tools. First, draw with the Soft Round brush using two colors, then select the Smudge Tool (R) to expand the drawing colors to get an image similar to the one below.
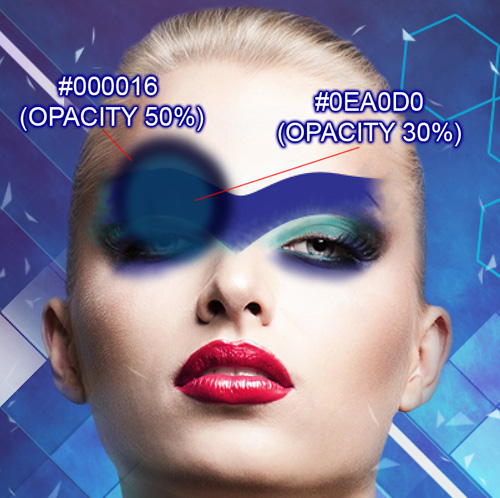
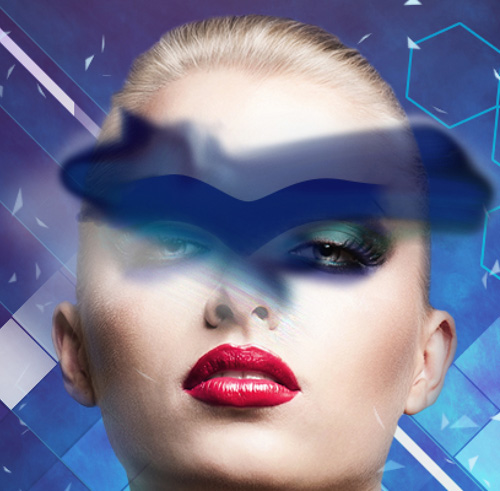
Hold down the Alt key (Windows) or Option key (Mac OS) and click between the brush layer and the shape layer in the Layers panel to create a clipping mask.
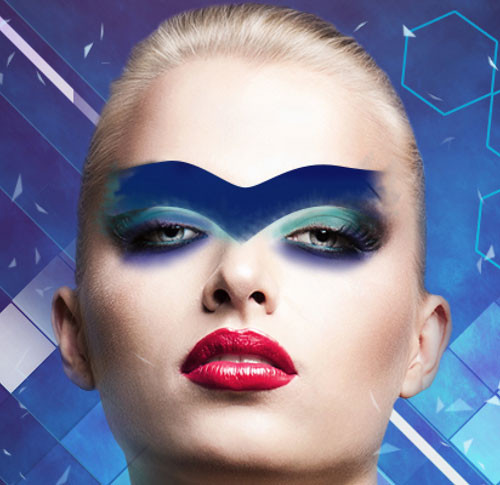
Create a new layer and continue applying makeup to the model's face using the Soft Round brush in color #28009A ( Opacity - 20%). Then select the Smudge Tool (R) to smudge along the painted area.
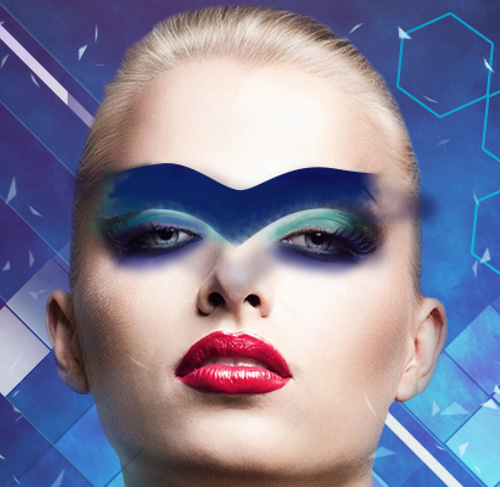
Hold down the Alt key (Windows) or Option key (Mac OS) and click between layers in the Layers panel to create a clipping mask. Create a new layer and select the next brush from Sujune Brush Pack 2 to paint black (Opacity - 20%) for the top and gray (Opacity - 20%) for the bottom.
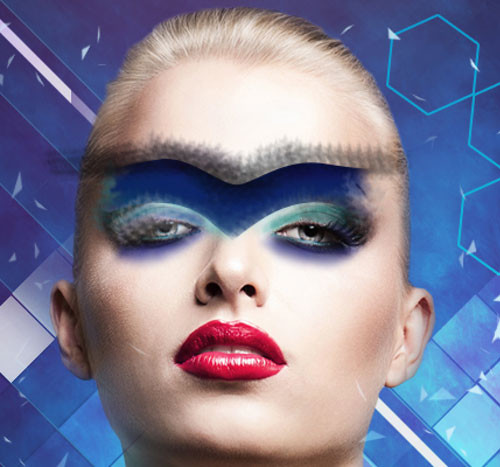
On the next layer, continue using the same brush to draw the model's face. This time select the color #2D2B51 (Opacity - 20%) . Then expand the color and use the same Smudge Tool (R).
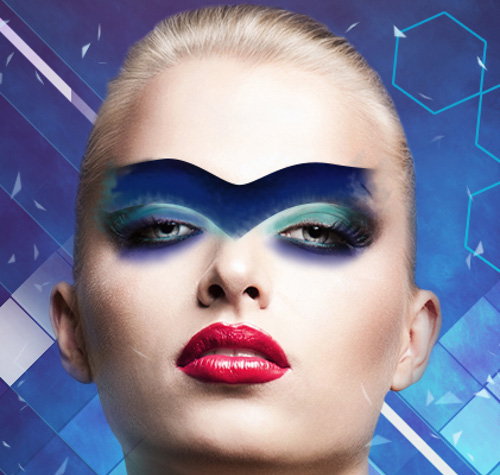
Now, repeating the steps described above, continue working on the model's makeup with the same brush color. Create a new layer and use the brush to draw the model's right eyebrow. On the left, we will insert a very smooth line which will be extended using the Smudge Tool (R) .
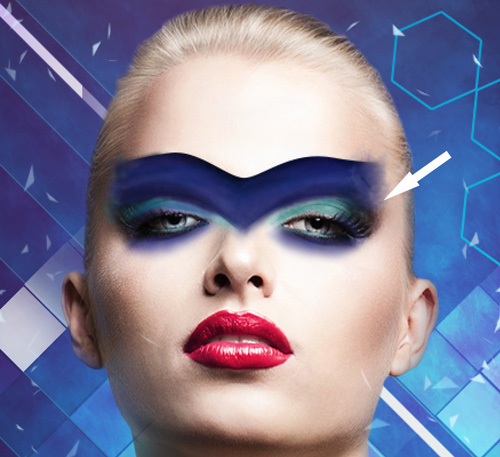
Finish the makeup by creating a new layer and using a Soft Round brush to paint the designated areas. The brush color is #00C7FE ( Opacity – 20% ).
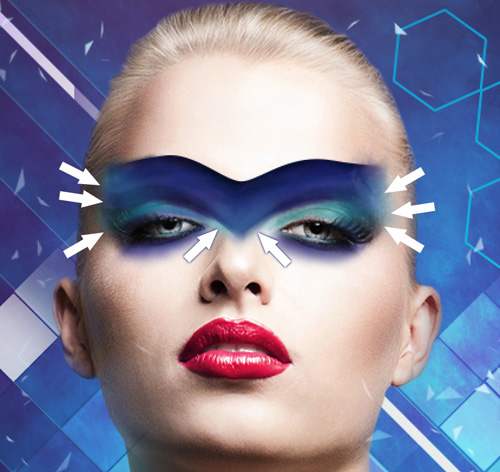
Next, draw another line using the Rectangle Tool (U):

Copy the last layer containing this line and select the Free Transform command (Ctrl + T) to create a slant for the copy and position them in the same way as shown in the image below.
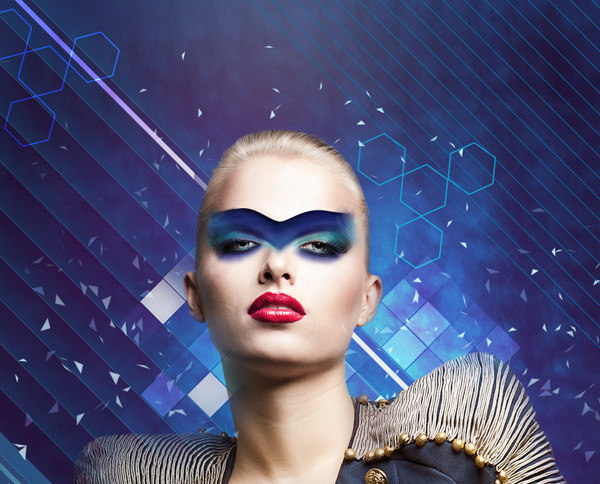
Group all the layers containing these lines together. Create a copy of this group and use the Free Transform command (Ctrl + T) to place the copy of the group in the bottom left corner.
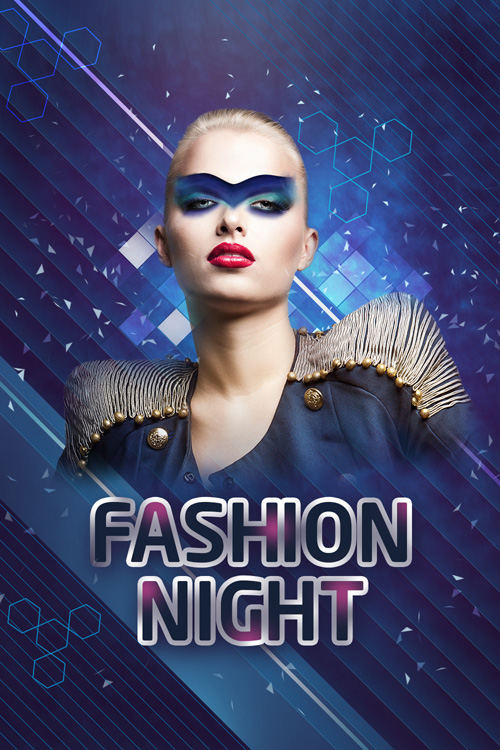
Insert a mask into the group by selecting Add layer mask and choosing the Soft Round brush in black (Opacity - 20%).
Create a new layer and select the Soft Round brush to draw over the lines in the upper right corner, which are colored #002CB5 (Opacity - 15%).
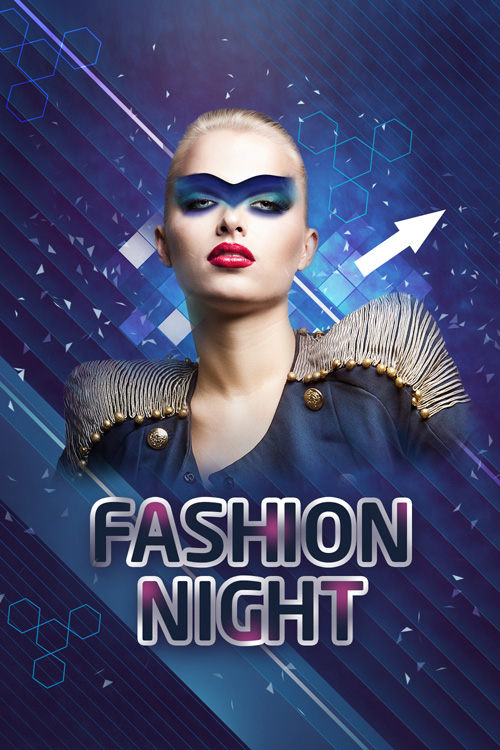
Set the Blending mode for this layer to Color Dodge .
Create a new layer and select the Standard brush in white (Opacity - 40%) to insert multiple small dots of varying diameters.
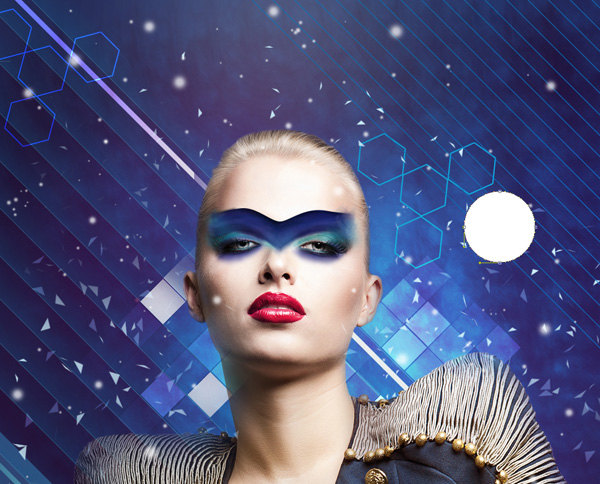
Use the Ellipse Tool (U) to draw large circles.
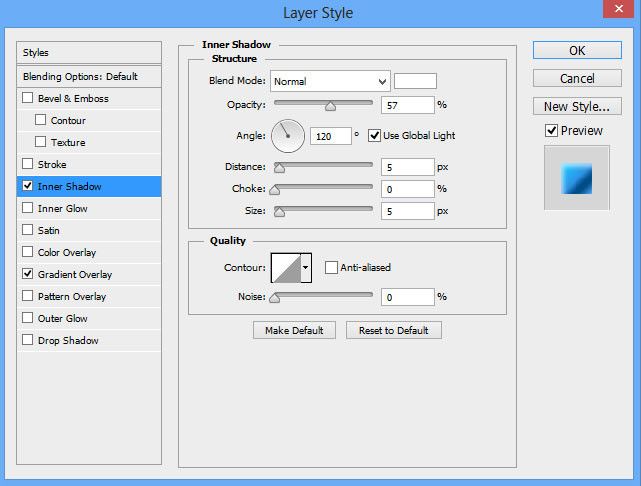
Click on Add a layer style from the bottom of the Layers panel and select Inner Shadow .
Select Gradient Overlay:
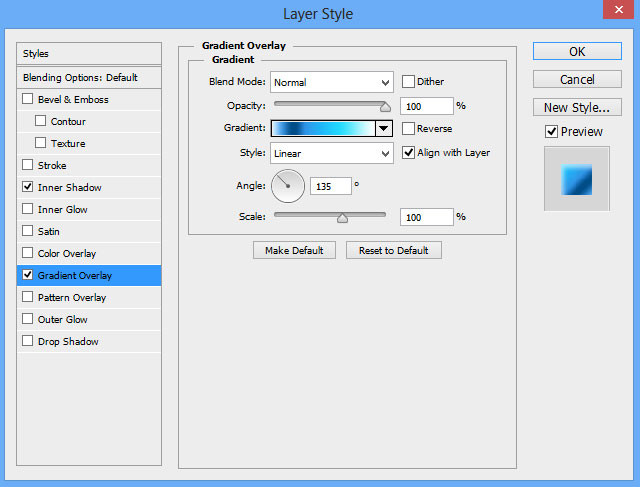
Click the color bar to open the Gradient Editor and set the color stop points as shown. Press OK to close the Gradient Editor dialog box .
Using the Pen Tool (P), create several triangles with the color #293B0 .
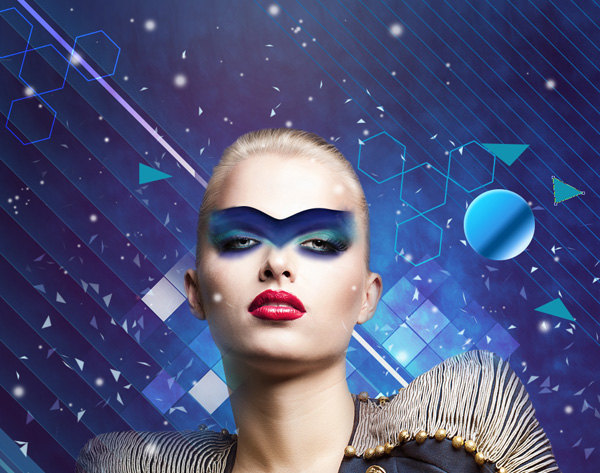
Group all the layers of the blue triangle (in the same way described above). Insert a mask into the group by clicking on the bottom of the Layers panel under Add Layer Mask and selecting the black Soft Round brush (Opacity - 20%) to hide the triangle in the same way as shown below.
Create a new layer and select the Soft Round brush to paint the background on top of it. The brush color is #005FB9 (Opacity - 30%). Gently erase the brush layer on the model's head using the Eraser tool (E) . Set the Blending mode for this layer to Screen .
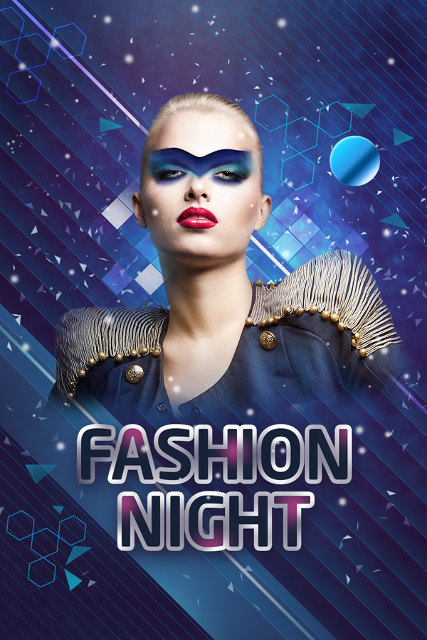
Next, create a glow effect for the text by creating a new layer and using a brush to draw a point with the color #CAECF8.
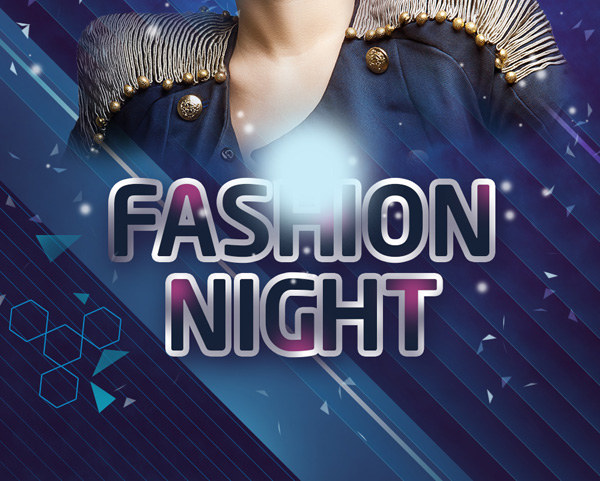
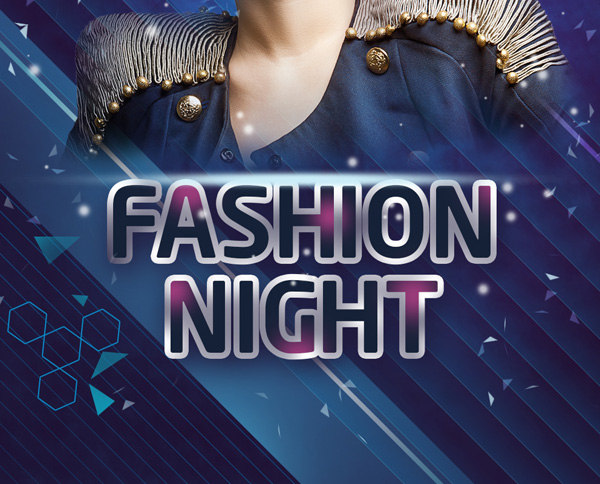
Use the Free Transform command (Ctrl + T) on that point layer and compress it vertically, then stretch it horizontally.
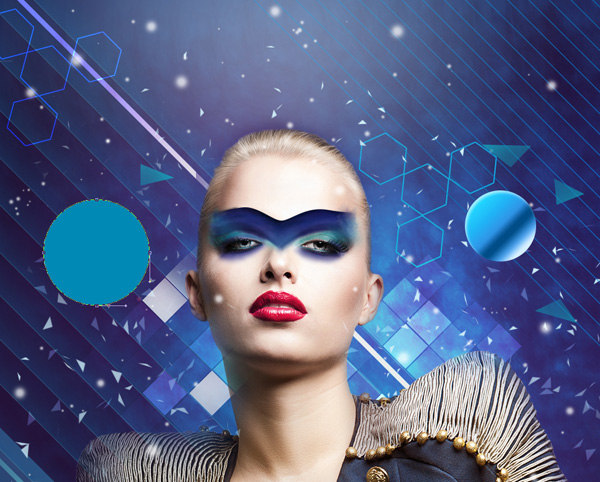
Next, draw a circle of color #0089B4 with the Ellipse Tool (U) .
Insert a mask into the same layer by selecting Add Layer Mask . Press CTRL + I on the mask to invert the colors and select the Soft Round brush with white color (Opacity - 30%) to achieve a similar circular effect by clicking multiple times to get the result shown below. Use a black brush to erase the area in the bottom left corner.
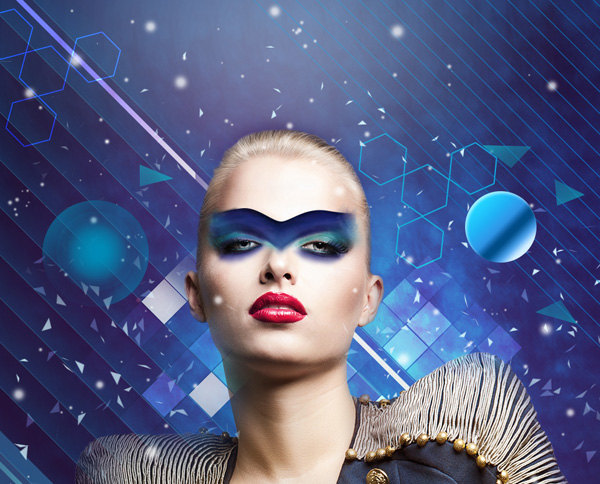
Create a new layer and use a white Soft Round brush (Opacity - 15%) to create a glowing effect on the circle by clicking on it multiple times. Set the Fill value to 45% for this layer and the Blending mode to Overlay .
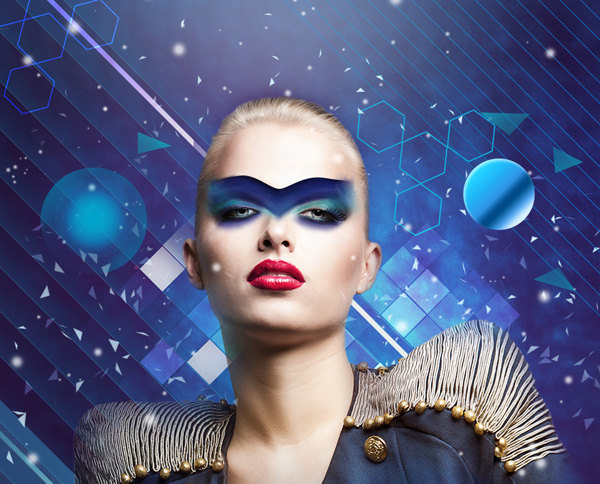
Next, using the shining effect, create a new layer and use the brush from Light Brushes 2. In this case, we will draw some small stars around the model's right shoulder.
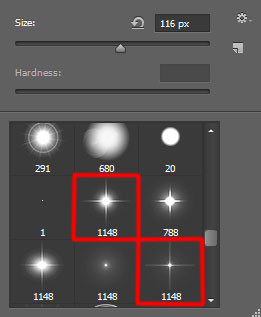
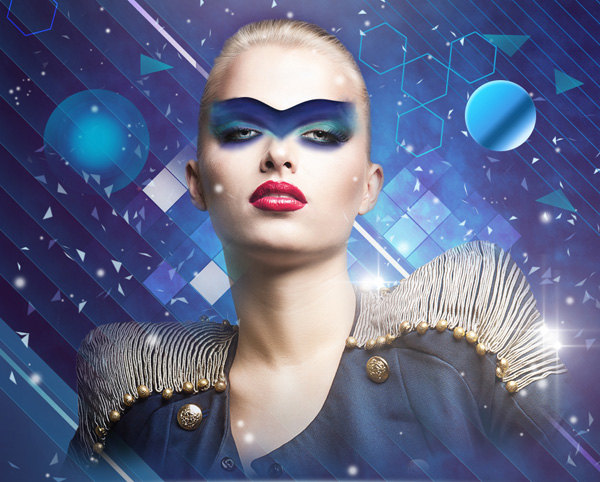
We have the result.
Create a new layer and select the Soft Round brush to darken the edges of the empty area. The brush color is #2C1C3A (Opacity - 20%).
Next, create a new layer and select the Paint Bucket Tool (G) to fill it with the color #5A31F2.

Set the Fill to 8% for this layer and change the Blending mode to Color Burn .
Create a new layer and use the same brush as before to paint the background on the top right and bottom left, placing some color on the model's right shoulder. The brush color is #00A1F1 (Opacity - 40%).
Set the Fill to 27% for this layer and change the Blending mode to Linear Dodge.
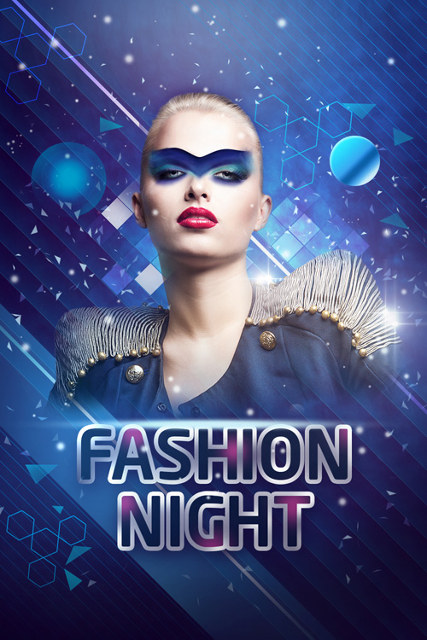
Make the text and model buttons brighter using brush #1148 from Light Brushes 2.
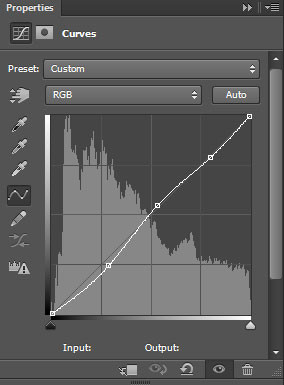
Click on Create new fill or adjustment layer in the Layers panel and click on Curves to adjust the curve as shown to make a small color modification.
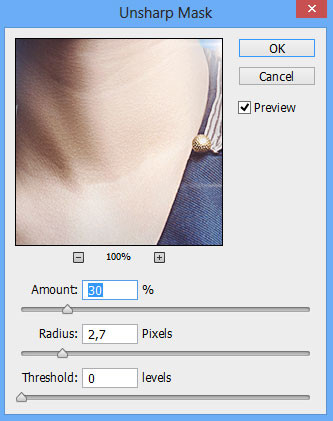
Finally, combine all the layers into a single layer (hold down CTRL and select all layers in the Layers panel and then press CTRL + E ). On the rasterized layer, use the following filter: Filter > Sharpen > Unsharp Mask .
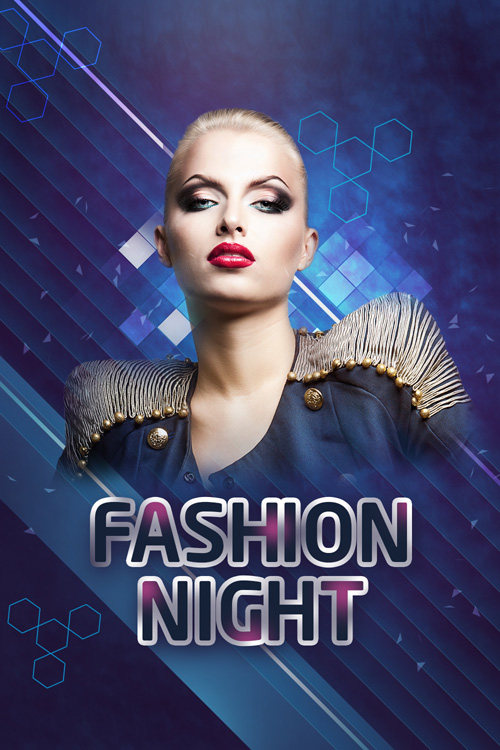
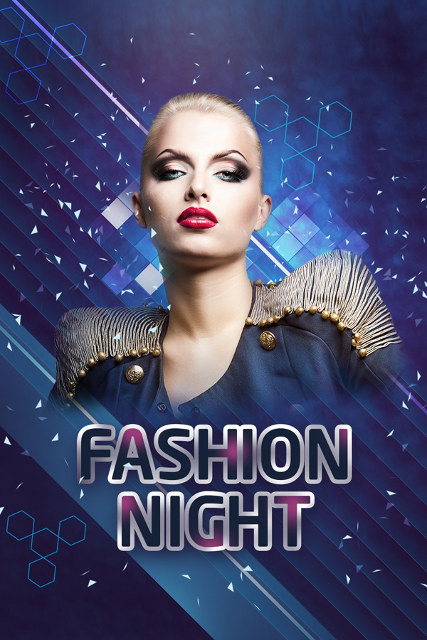
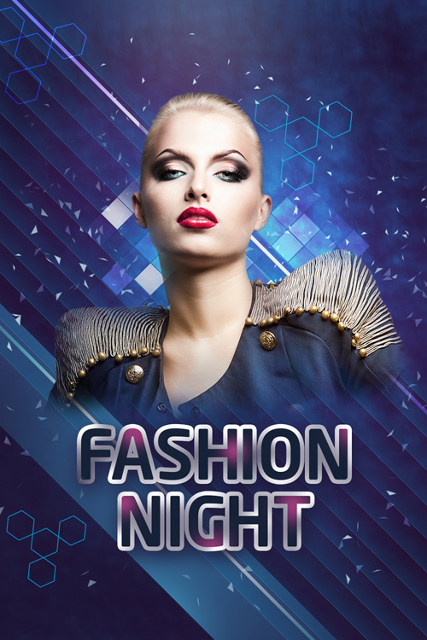
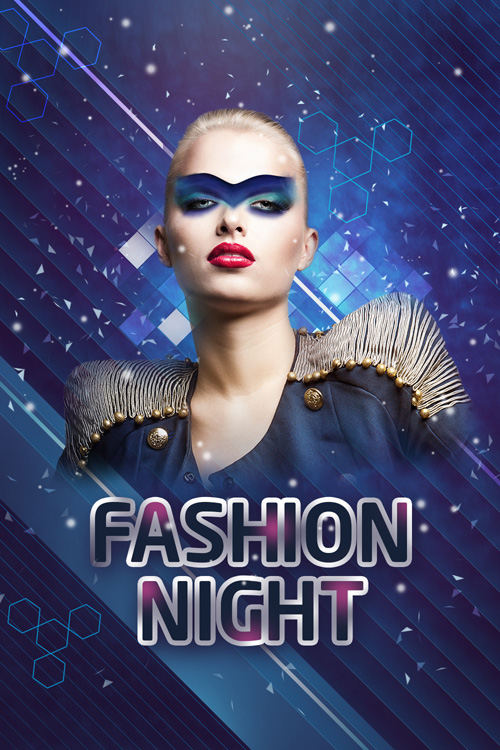
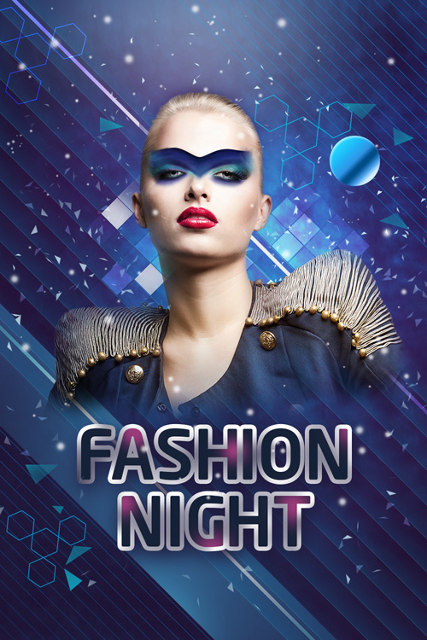
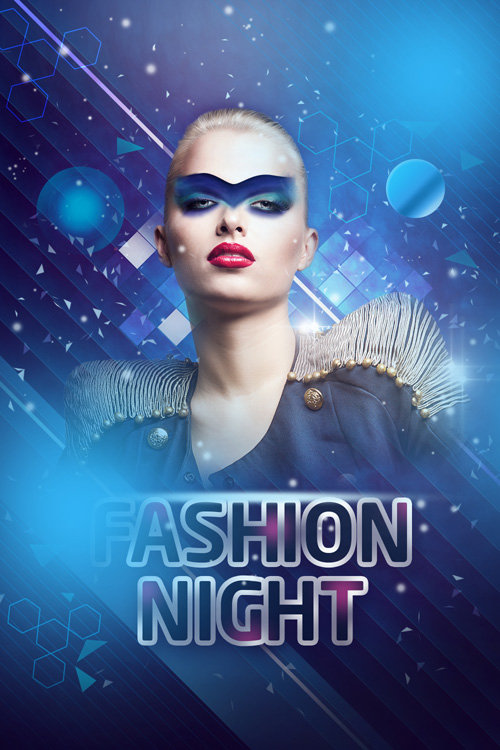
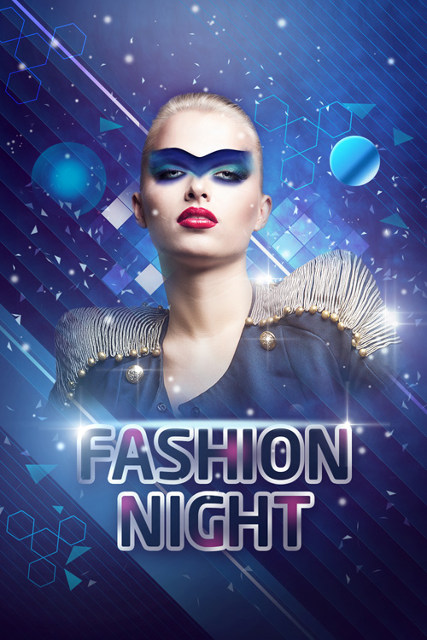
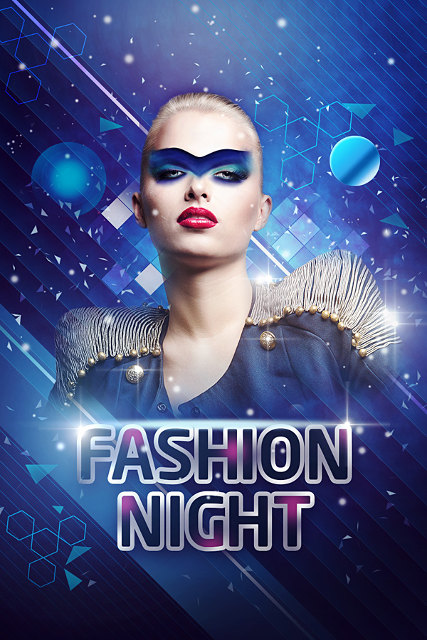
And here we have the final image:
Good luck with your project!
Related Articles
 How to Use Photoshop CS6 (Part 2): Create Fashion Collage Images17 minutes read
 Create Ghosts in Photoshop or GIMP7 minutes read
 How to Cut and Join Faces in Photoshop Quickly and Simply3 minutes read
 How to Split Photos with Photoshop: Edit Photos11 minutes read
 How to Merge Multiple Photos into a Photo Frame in Photoshop3 minutes read
 Tutorial for Creating 3D Photo Effects in Photoshop (Part 1)5 minutes read
Reader Comments 0
Sign in with email or Google to join the discussion.