Create contrast in Photoshop
Photoshop provides users with a lot of ways to improve the contrast in images, from simple image adjustments of Brightness / Contrast to using more complex tools like Levels, Curves, and of course also Camera Raw.
In this tutorial, TipsMake.com will show you how to quickly increase the contrast and make the image come alive by using Level, Curves, simple Blend Mode and adjustment layers in Photoshop. (Applies to Photoshop CC and CS6).
Create and increase contrast in Photoshop
- Working with Level
- How to use Curve?
- Use Blend Mode to increase image contrast
- Step 1: Add a Vibrance adjustment layer
- Step 2: Change the Blend Mode layer to Overlay or Screen
- Step 3: Adjust the contrast with the Opacity option
- Step 4: Drag the Saturation slider to -100
- Step 5: Adjust the level of saturation slightly
- Compare the original version and the version with higher contrast
Working with Level
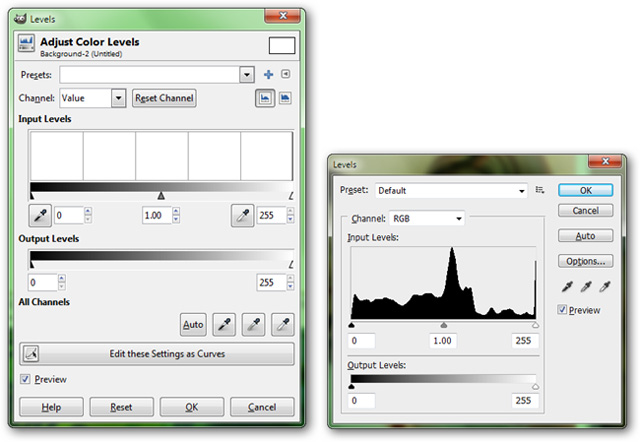
Level is an excellent tool for adjusting the Histogram and removing the rich areas in the image. In the picture are GIMP Level tools (left) and Photoshop (right), which look similar. Both have two basic sliders, one is Input Levels and the other is Levels Output.
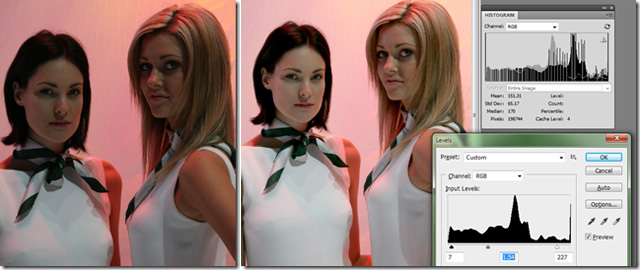
In Photoshop, go to Image> Adjustments> Levels to access this tool.
Input levels are used to adjust the range of values by changing the three points in the horizontal axis. Moving points ' Darks ' will make dark colors darker. Adjusting the ' Brightness ' point will make the highlights become more prominent. And adjusting the middle point will cause the overall value of the image to tilt toward one side or the other, brighter or darker. Very effective in removing unwanted values in the old Histogram, while stretching details from other parts.
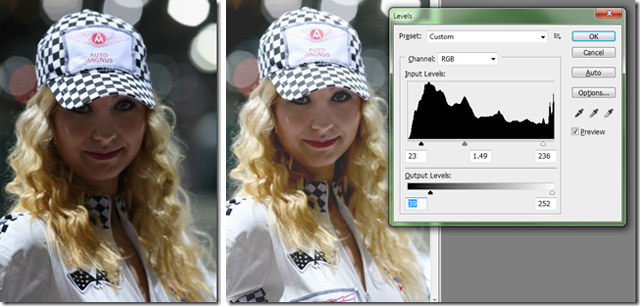
The output levels give you control over the vertical axis (Y axis) of Histogram, and let you set a ceiling that determines the dark value that the picture can reach, as well as the light value. When used in conjunction with adjusting the Input level, it can calm down the most stubborn pictures.
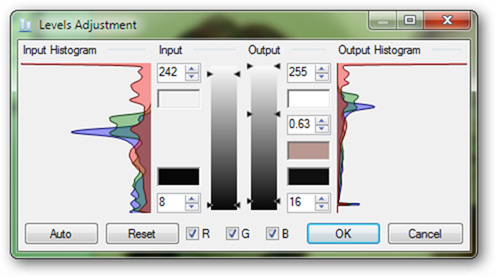
It should be noted that the Level tool in Paint.NET is quite different from Photoshop or GIMP. It's a bit more complicated, but with a basic understanding of the Histogram with a bit of patience, you can completely adjust any picture like when using Photoshop or GIMP.
How to use Curve?
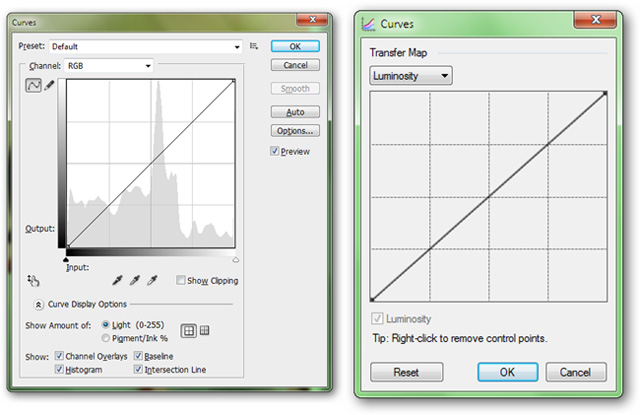
Curve is another way to adjust the image on the same color system, with a little note that the tool is a bit more complicated, allowing adjustments to small details in the image. In Photoshop go to Image> Adjustments> Curves to open this tool.
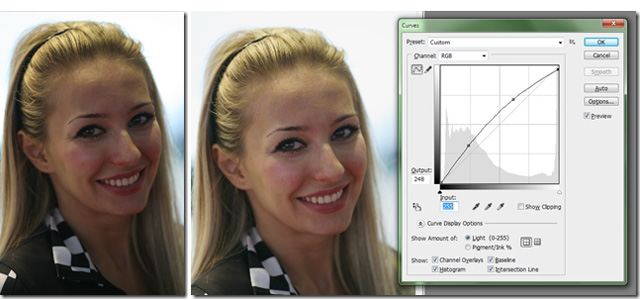
On a basic Curve chart, the vertical axis represents Ouput Levels, another type of expression of the Histogram. To make it easier to understand, the ' curve ' represents a continuous diagonal in a 1: 1 ratio. This means that the darkest part of the horizontal marked value will equal the corresponding value in the vertical axis. So what does all this mean? Basically, you can set ceiling limits for light and dark values, while creating complex changes to other parts of the image.
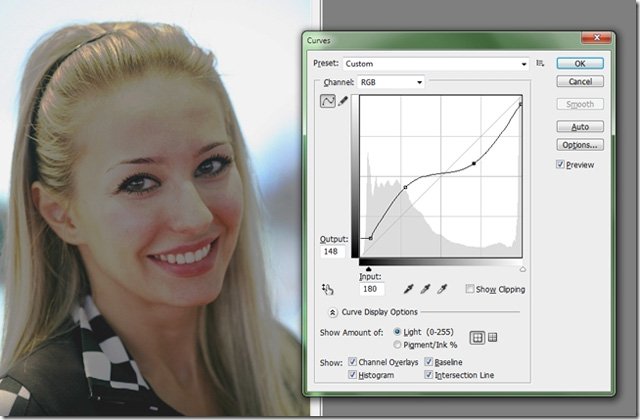
When adjusting the curve , you can make a tremendous difference between the edited photo and the original photo. Neutral tones can turn into bright colors, dark into bright, neutral into neutral . all in one single tool.
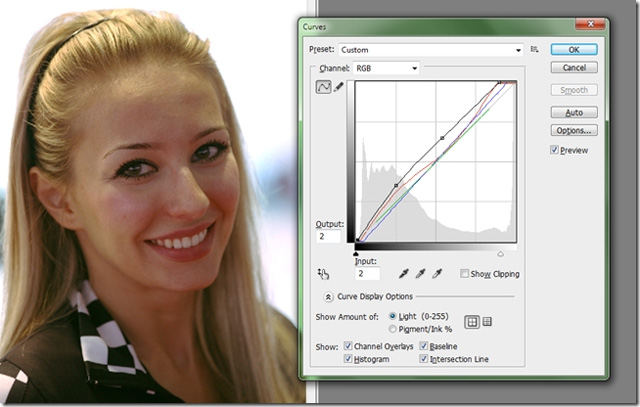
More complicated, Curve can be used to adjust a similar Level channel. This allows you to transform very richly from what is in the original picture. For example, you can turn light into yellow or gray, while making the shadow become red or greener. Curve can prove to the talent of photographers, from amateur to old village.
Use Blend Mode to increase image contrast
In addition to Curve and Level, do you know that certain Blend modes in Photoshop can also increase contrast? Find out how to do it right away!
The advantage of using Blend Mode to increase contrast is that they are extremely easy to use. You will see, by combining the Blend Mode with one of Photoshop's adjustment layers, we not only increase the contrast but also control the colors in our images.
Normally, increasing contrast also increases color saturation (resulting in colors that look too saturated). But by selecting the appropriate adjustment and blending layers, we can adjust the contrast and color separately. For example today we will use Photoshop CC 2019 but readers can do the same with Photoshop CS6.
We will start by learning how to quickly improve the contrast in the image with the Blend Mode and then the article will show you how to fix any color problems that arise from it.
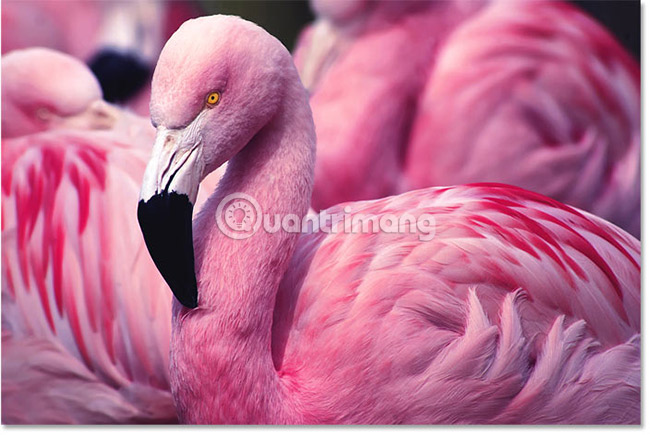
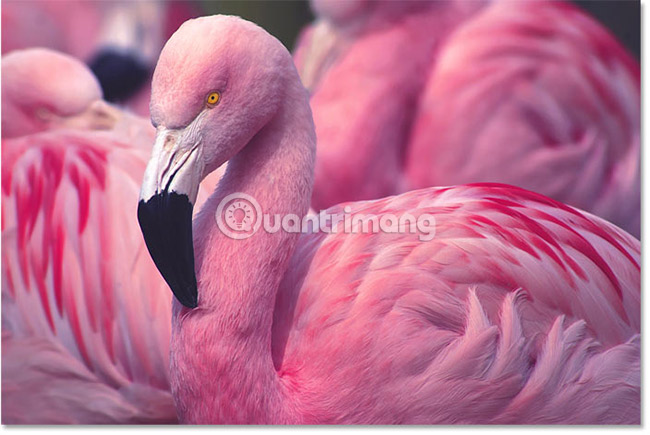
This is an example image opened in Photoshop, and although this is a great photo, it looks a bit 'flat'. See how the Blend Mode and adjustment layers can quickly make this image stand out:
Step 1: Add adjustment layer to Vibrance
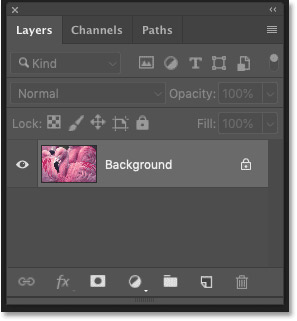
In the Layers panel , users will see images on the Background layer , currently the only layer in the document:
The first thing to do is add a layer of Vibrance adjustment above the image. Click the New Fill or Adjustment Layer icon at the bottom of the Layers panel :
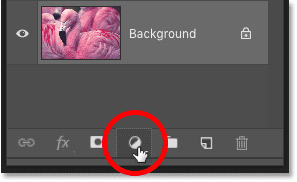
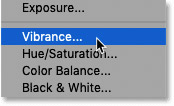
And choose Vibrance from the list:
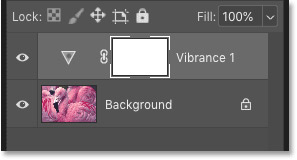
The adjustment layer appears above the Background layer . The reason why we choose Vibrance will be revealed in the following section:
Step 2: Change the Blend Mode layer to Overlay or Screen
To increase the contrast in the image, all the user needs to do is change the adjustment layer's Blend Mode to a layer to increase the contrast.
Still in the Layers panel , click the Blend Mode option in the upper left. By default, the Blend Mode is set to Normal:
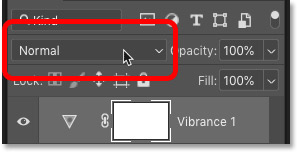
Photoshop includes a group of Blend Mode specially designed to increase contrast. This group starts with Overlay and ends with Hard Mix. Each Blend Mode in this group will increase the contrast and produce different results.
Blend Mode Overlay
For most images, the two best active Blend Mode is Overlay and Soft Light. Start by selecting Overlay:
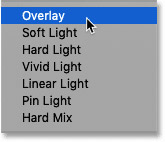
And just by changing the Blend Mode, the contrast of the image has been increased. On the left is the original image and the right is the result after using Overlay:
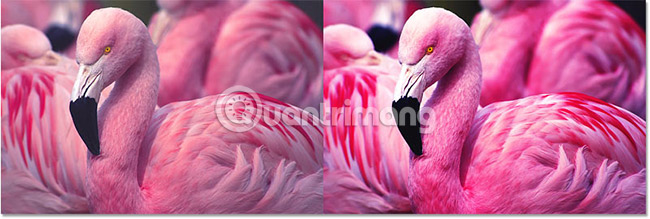
Blend Mode Screen
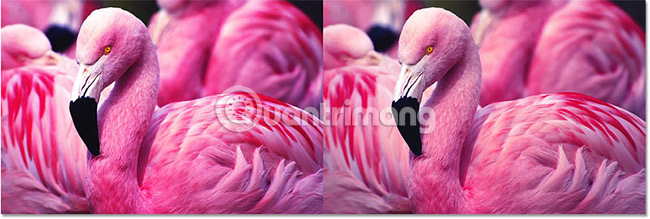
If the result of Overlay is too strong, then you should try using the Soft Light Mode instead:
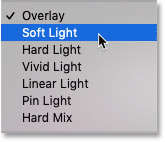
As its name suggests, Soft Light creates a more soft and delicate effect. On the left is the result of using Overlay and the right is the result of using Soft Light . For this image, Soft Light is the best option, but for other images, Overlay can do better:
Step 3: Adjust the contrast with the Opacity option
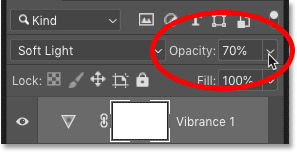
You can fine-tune the Blend Mode results by adjusting the Opacity of the adjustment layer. The Opacity option is located at the top right of the Layers panel .
The lower the opacity (from the default value of 100%), the higher the contrast:
How to edit colors after increasing contrast
Why do we choose the Vibrance adjustment layer to increase the contrast? If all you need to do is change the Blend Mode, why should Vibrance be needed? Why not Levels, Curves, or anything else? The reason is that when the contrast is increased, the color saturation of the image also increases, adjusting Vibrance to help overcome this more easily.
If you compare the original image and the version with higher contrast, users will find that the color in the version with higher contrast is currently too saturated. Here the article is comparing the original (left) with the result from the Blend Mode Overlay (right) to make it easier to observe. But Soft Light can also create saturated colors at a lower level:
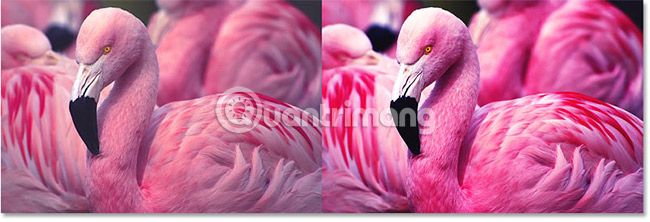
Step 4: Drag the Saturation slider to -100
So how do we reduce color saturation? Very simple. In the Properties panel , we see that adjusting Vibrance includes the Saturation slider . There is also a Vibrance slider on it, but what we want is Saturation.
To restore the original saturation of the image, simply drag the Saturation slider to the left, to the value of -100:
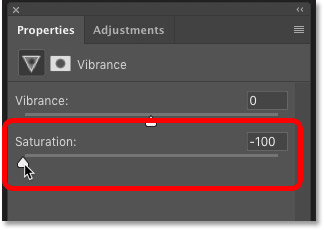
On the left is the original image after changing the Blend Mode to Overlay. And on the right is the image with the same contrast increase but with different color saturation:
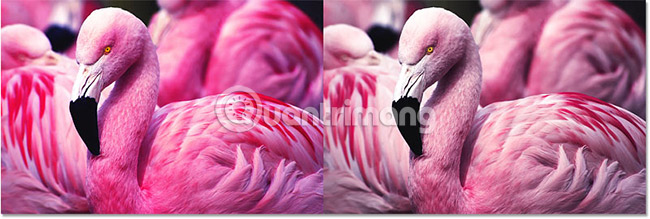
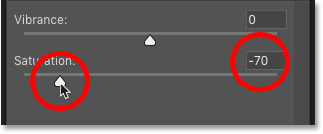
Step 5: Adjust the level of saturation slightly
Now depending on the image, the user may want to adjust a bit of color saturation. In that case, just drag the Saturation slider back to the right until you are satisfied. For example, increasing saturation from -100 to -70:
Compare the original version and the version with higher contrast
To switch between the original and the new version, with higher contrast, enable and disable the Vibrance adjustment layer by clicking on its display icon in the Layers panel :
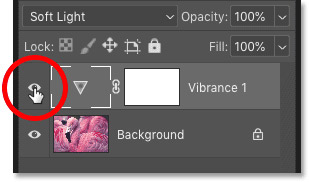
When the adjustment layer is disabled, users will see images with low initial contrast:
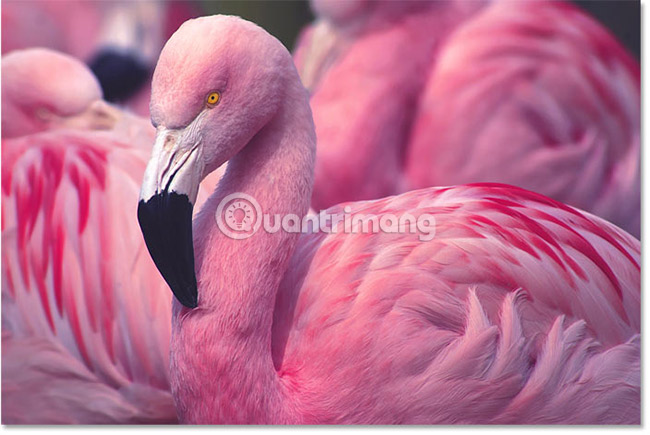
And with the adjustment layer activated again, users will see results with higher contrast (using Blend Mode Soft Light):
