Table of Contents
This updated guide examines How to Increase the Contrast on the Mac Screen and organizes the essential facts, background, and practical takeaways in clear American English.
'Increase Contrast' is one of the many useful features in macOS. It makes it easier for users with low vision to read computer screens, but anyone can use this feature to make the interface easier to read.
Once enabled, every UI element (whether it's just a text box or button) has a distinctly black border around it. This makes it easier to locate a node and know where one part of the application ends, as well as where another begins.
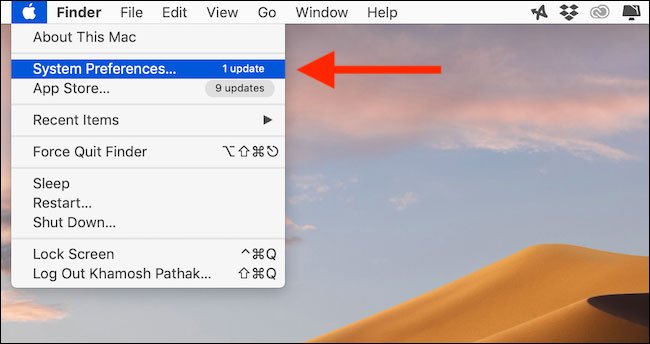
You can enable this feature from the macOS System Preferences . Click the Apple button from the menu bar and then select System Preferences.
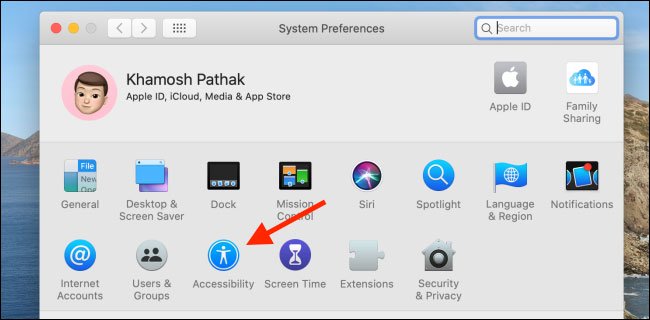
Next, click on the 'Accessibility' button .
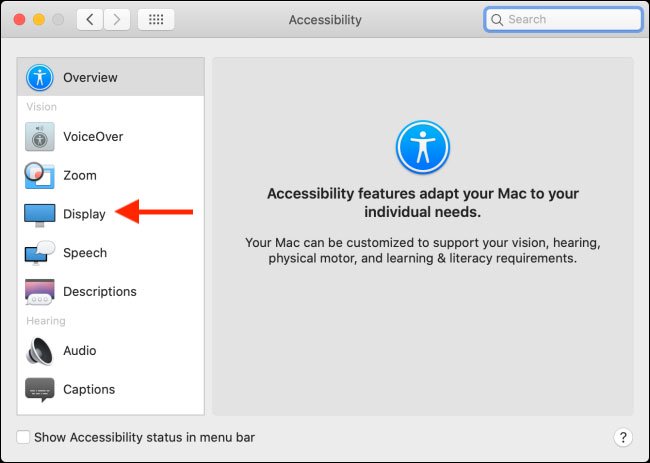
From the left sidebar, select the 'Display' option.
Here, click the checkmark next to 'Increase Contrast'.
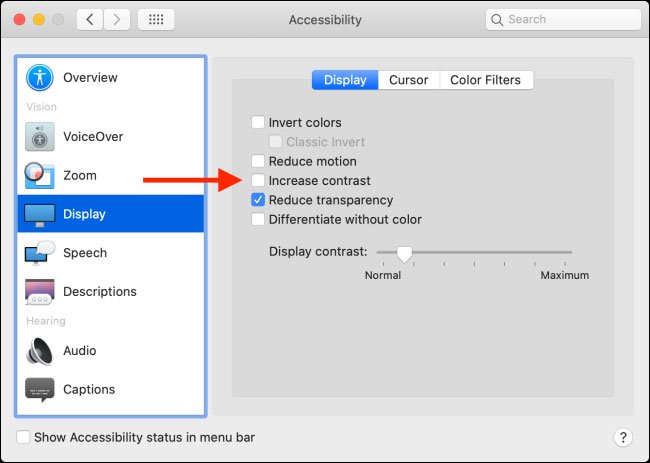
Now you will see that the whole UI has borders around every element and, as an added benefit, the transparency effect is gone. When you enable the 'Increase Contrast' feature, macOS also automatically activates the 'Reduce Transparency' option.
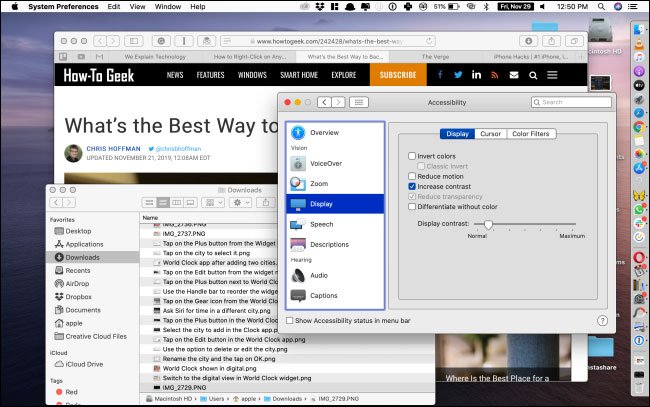
When you want to turn this feature off, go back to Display in Accessibility and click the checkmark next to the 'Increase Contrast' option.
Hope you are succesful.
:
- How to adjust screen brightness from Terminal in macOS
- How to turn on macOS screen using QuickTime
FAQ
What is How to Increase the Contrast on the Mac Screen about?
It provides a structured overview of mac, explains the main context, and highlights practical takeaways for readers.
Why does this topic matter?
Understanding the main concepts helps readers evaluate the issue, avoid common mistakes, and make better-informed decisions.
How should readers use this information?
Use the guidance as a practical starting point, confirm details that may have changed, and follow current product, safety, or security recommendations.
Related Articles
 What Is Contrast?8 minutes read
 The Simplest Way to Turn on and Off High Contrast on Windows6 minutes read
 These Software Change the Brightness, Contrast the Most Effective4 minutes read
 How to Adjust High Contrast Mode on Windows3 minutes read
 Create Contrast in Photoshop: Level Concepts11 minutes read
 Take Shading Photos: Use Shading and Contrast in Photography5 minutes read
Reader Comments 0
Sign in with email or Google to join the discussion.