Building a wireless network with a broadband router - Part 2: Configuring the router and computers on the network
The best way to set up a private network is to use a broadband router. This device will connect all computers in your network and also automatically share your broadband Internet connection. In part 1 of this series, we have n & e
 Part 1: Prepare the hardware
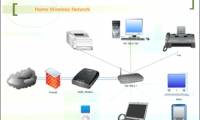
There are now more and more people willing to build their own wireless network. Wireless networks can be set up at your home or office, from which you can share files, use printers and access the Internet without having to run a jumbled network cable to network computers. . This is one of the coolest things in case you have computers in locations where it is difficult to set up your wired network cabling or in case you want to freely access your network and the Internet with Your laptop is anywhere in your office or home: you can bring your laptop from your bed or office to the living room, which is constantly connected to the network.
The best way to set up a private network is to use a broadband router. This device will connect all computers in your network and also automatically share your broadband Internet connection. You can share files and printers between computers. This device may have wireless features, so it may allow you to connect computers without the need for a network cable.
In Part 1 of this series, we have mentioned some devices needed to set up a wireless network using a broadband router, which will continue with the basic configuration of computers and routers.
Configure the computer
All computers on your network must be configured to automatically receive network configurations from a DHCP server (the router itself). This is the default Windows configuration, but you should always check if the computers are configured correctly.
To configure computers, click Start > Settings > Network Connections , the screen shown in Figure 9 will appear. Now double-click the network card that is connected to the router. If this computer is connected to the router with a normal network cable, the network card is the card that is connected to the router; If this computer is connected to a wireless router, the network card is a wireless network card.

Figure 9: Network connections
On the screen that appears, click Properties . The screen shown in Figure 9 will appear. Now double-click Internet Protocol (TCP / IP) and the figure shown in Figure 10 below will appear.
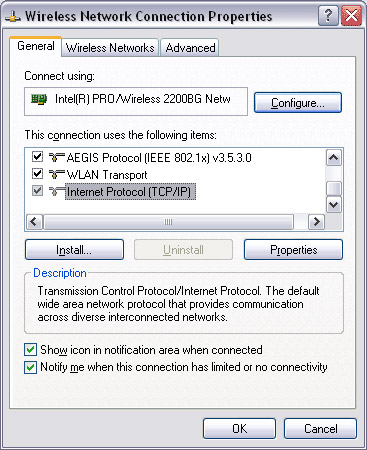
Figure 10: Properties of the network card
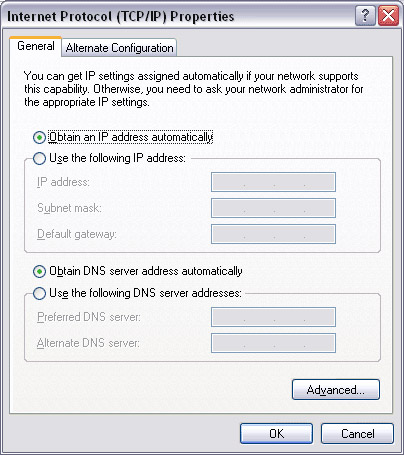
Figure 11: Configuring TCP / IP
On this screen you need to select ' Obtain an IP address automatically ' and ' Obtain DNS server address automatically '. Or this option to make sure the computer will ask the router to use that configuration. Don't forget to click OK if you need to change anything on the screen.
Now that the computers are configured correctly, you need to switch to configuring the router.
Configure the router basically
As we mentioned earlier, the main problem with wireless broadband routers is that its wireless access will work without any encryption. So after turning on the router, anyone with a wireless network card can access your network. Obviously we need to change this immediately!
The first thing to know is the IP address of the configuration panel for your router. This information will be written on the manual of the router. It is usually 192.168.0.1, 192.168.1.1 or 10.0.0.1. Launch the web browser and get that http:/// [IP address] . The router used in our example uses the 192.168.1.1 address, so we need to enter http://192.168.1.1.
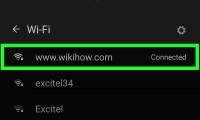
This address will work automatically on computers connected to the router via a regular network cable. On computers that have a wireless connection to the router, you first need to connect it to your network, which we will discuss below. This is one of the reasons we recommend installing the original router with a computer that connects to the router using a regular network cable.
All configuration options will be different depending on the model of the router. Therefore, you will not have the option names exactly as described below, however they will exist, as they are basic options.
Normally, the first configuration screen will ask you to choose between two quick installation options (or install the available steps) and advanced settings. Basic installation is enough for the majority of users to build a small network. After doing this basic installation, your wireless network will be able to work. However, you can exploit the features of the advanced settings that the router has, such as locking Internet access at a certain time of the day, blocking websites that are viewed, etc. You can find interesting options. taste here to apply appropriately to the network.
Anyway, let's talk a little bit about basic installation. Some routers require a password when accessing the control panel for the first time. If this is the case, you should carefully read the instructions on which user and password to use (in the D-Link DI-524 router of this example, the user is 'admin' and the password is still blank).
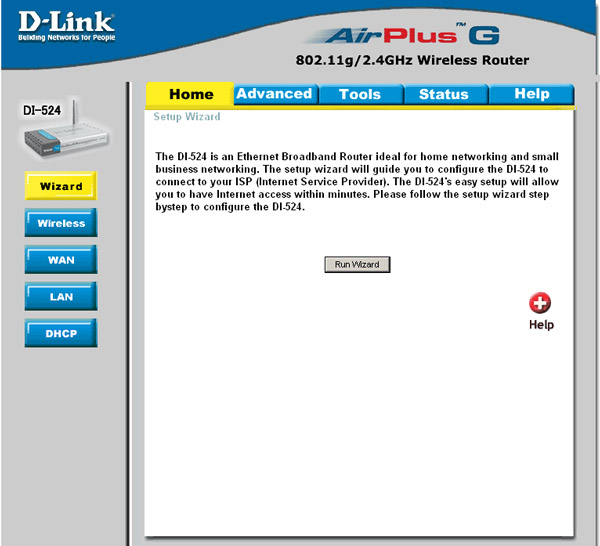
Figure 12: The first screen on the router configuration panel
We choose ' Run Wizard ' and go through a series of screens. The first screen is to set up a new administrative password. This is very important because it prevents someone from changing your network configuration. After setting up a new password, click Next .
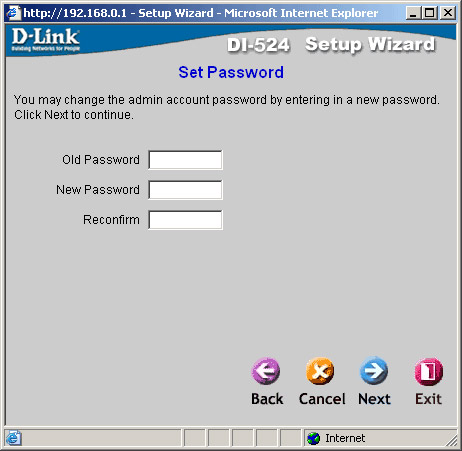
Figure 13: Set up administrator password
In the case of this example, the next configuration is the time zone. This configuration depends on your time zone. Click Next .
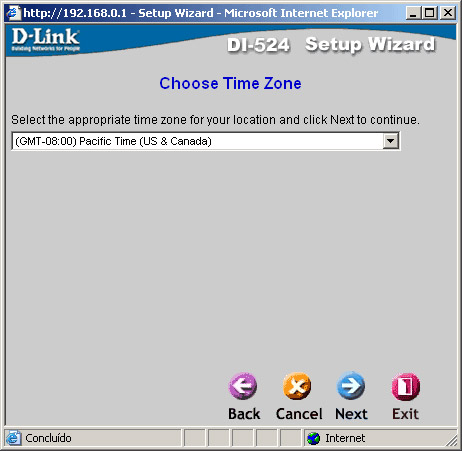
Figure 14: Configuring time zones
The next screen (Figure 15) shows an optional configuration that is not required by most broadband connections. It allows you to specify a host name or enter a certain MAC address for use by a broadband router. Keep the same and click Next .
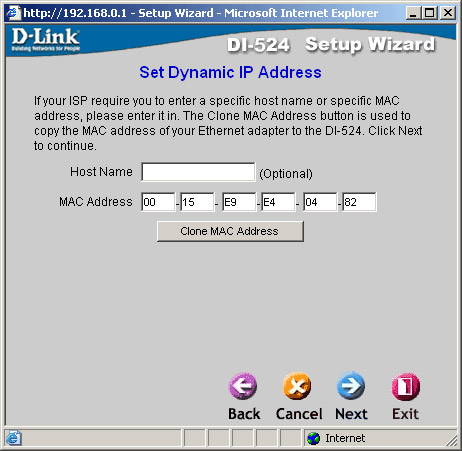
Figure 15: Configuring the MAC address used
The next screen is the most important screen. On this screen you will configure the name of the network (SSID) and enable encryption. The name of the network is how computers will call your network. In the case of this example, we named the network ' MyHome ' (you can see in Figure 16). Please enable WEP encryption and select an encryption level of '128 bits'. Now you need to create an encryption key (password) that will be used to encrypt the transfer data in the network. With 128-bit WEP encryption, the key must be a sequence of 26 hexadecimal characters, that is, include characters 0-9 and A to F. You can enter numbers randomly. You can see the example in Figure 16 (for security reasons you should not use the same number we show here). It is important to record this number on a piece of paper or remember it in a password file. You need to enter this number in all wireless access computers on the network, so don't forget to save this number!
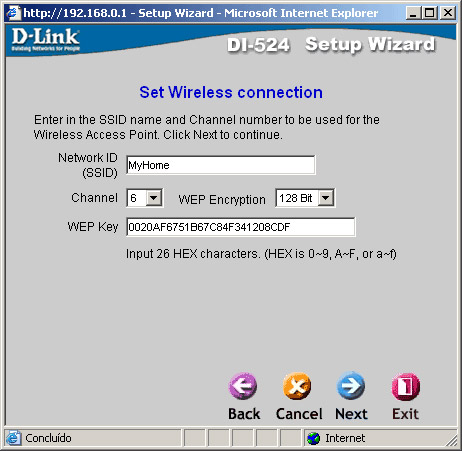
Figure 16: Configure network name and enable encryption
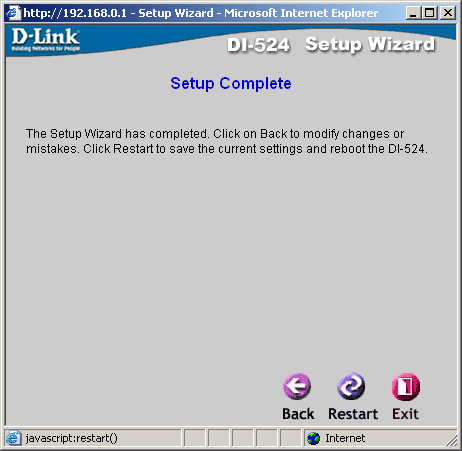
Figure 17: Installation utility ends
Now the installation utility is finished and your wireless network can work! What you need to do now is configure the encryption key on each wireless access computer to the network. We will show you how to do this in the next article.
 Part 3: Connect wireless computers to the network
Was this article helpful?
Your feedback helps us improve.
Related Articles
 Build a wireless network with a broadband router - Part 1: Prepare hardware17 minutes read
 7 best 802.11g wireless broadband routers7 minutes read
 Build wireless networks with a broadband router - Part 3: Connect wireless computers to the network8 minutes read
 Design a small network with a broadband router (Part 1)9 minutes read
 How to Set Up a Wireless Router10 minutes read
 Guide to building an Ultimate Wireless Network19 minutes read
Reader Comments 0
Sign in with email or Google to join the discussion.