Table of Contents
Access Commonly Used Items in Windows 7 with Jump Lists is easier to understand when the core ideas are paired with practical examples. The sections below explain the topic clearly, highlight useful steps, and point out details that can prevent common errors.
TipsMake.com - Search for a way to easily access frequently used files, folders, and websites can be a difficult issue with previous Windows versions. With the new Jump List feature in Windows 7, you get quick access to recently used items.
>>> 5 unique features of Windows 7
Use Jump Lists
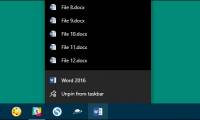
To access the Jump list, right-click the icon of any program on the Taskbar, as in this example of Internet Explorer. Note that you can put those items on the Taskbar if you want.

When you have a jump list open, click on the first letter of an item to jump into it.

Here is an example of the Jump List feature in the Start menu. This makes it easy to access recently opened items.

To delete the jump list history, right-click on Start and select Properties.  Now, under the Start Menu tab, uncheck both boxes in the Privacy section to clear the history of the Taskbar and Start menu.

This is a new feature in Windows 7 that makes accessing items easier.
FAQ
What is Access Commonly Used Items in Windows 7 with Jump Lists?
TipsMake.com - Search for a way to easily access frequently used files, folders, and websites can be a difficult issue with previous Windows versions.
Why is Access Commonly Used Items in Windows 7 with Jump Lists important?
A clear understanding of Access Commonly Used Items in Windows 7 with Jump Lists helps you make informed decisions, avoid common mistakes, and use the relevant tools or techniques more effectively.
How should beginners approach Access Commonly Used Items in Windows 7 with Jump Lists?
Start with the fundamental concepts, follow the examples step by step, and test each change in a safe environment before applying it to important systems or data.
Related Articles
 Steps to Clear Jump Lists History on Windows 103 minutes read
 Trick to Increase the Number of Items Displayed in Jump List on5 minutes read
 Bookmark Favorite Folders: How to Bookmark Folders on Windows 108 minutes read
 Guide to Beat the Game Jump King5 minutes read
 How to Use Jump Point to Manage Files on Windows 103 minutes read
 minutes read
Reader Comments 0
Sign in with email or Google to join the discussion.