Table of Contents
The best way to transfer iPhone photos depends on whether you are setting up a new phone or sending selected pictures to someone else. Use Quick Start, a backup, or iCloud Photos for your own full library. Use AirDrop, an iCloud Link, a shared album, cloud storage, or Messages for individual photos.
Before moving a full library, back up important photos and confirm that the new iPhone has enough storage. Do not erase or trade in the old phone until you have opened several full-resolution photos and videos on the new one.
Move your library to a new iPhone
1. Use Quick Start
Quick Start transfers apps, settings, messages, and photos while setting up a new iPhone.
- Connect the old iPhone to Wi-Fi, turn on Bluetooth, and plug in both phones.
- Turn on the new iPhone and place it near the old one.
- Follow the setup prompt and authenticate with the old iPhone.
- Choose a direct device transfer when offered, then keep both phones near each other until setup finishes.
The phones may be unavailable during part of the transfer. Time varies with library size, wireless conditions, and the amount of other data. Apple’s current steps are available in its Quick Start guide.
2. Restore an iCloud or computer backup
A recent backup is the practical option when the old phone is unavailable or when you already use encrypted computer backups.
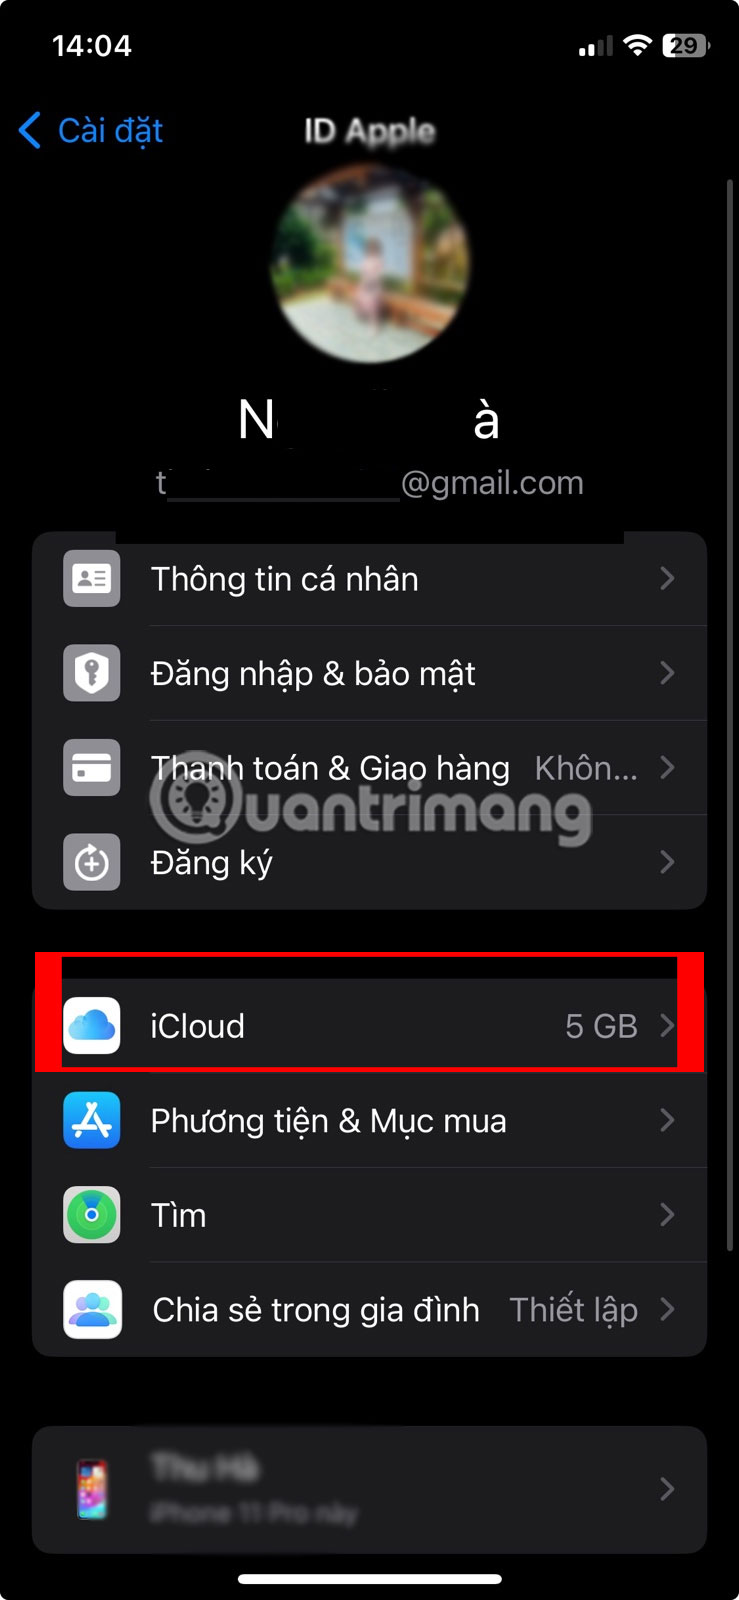
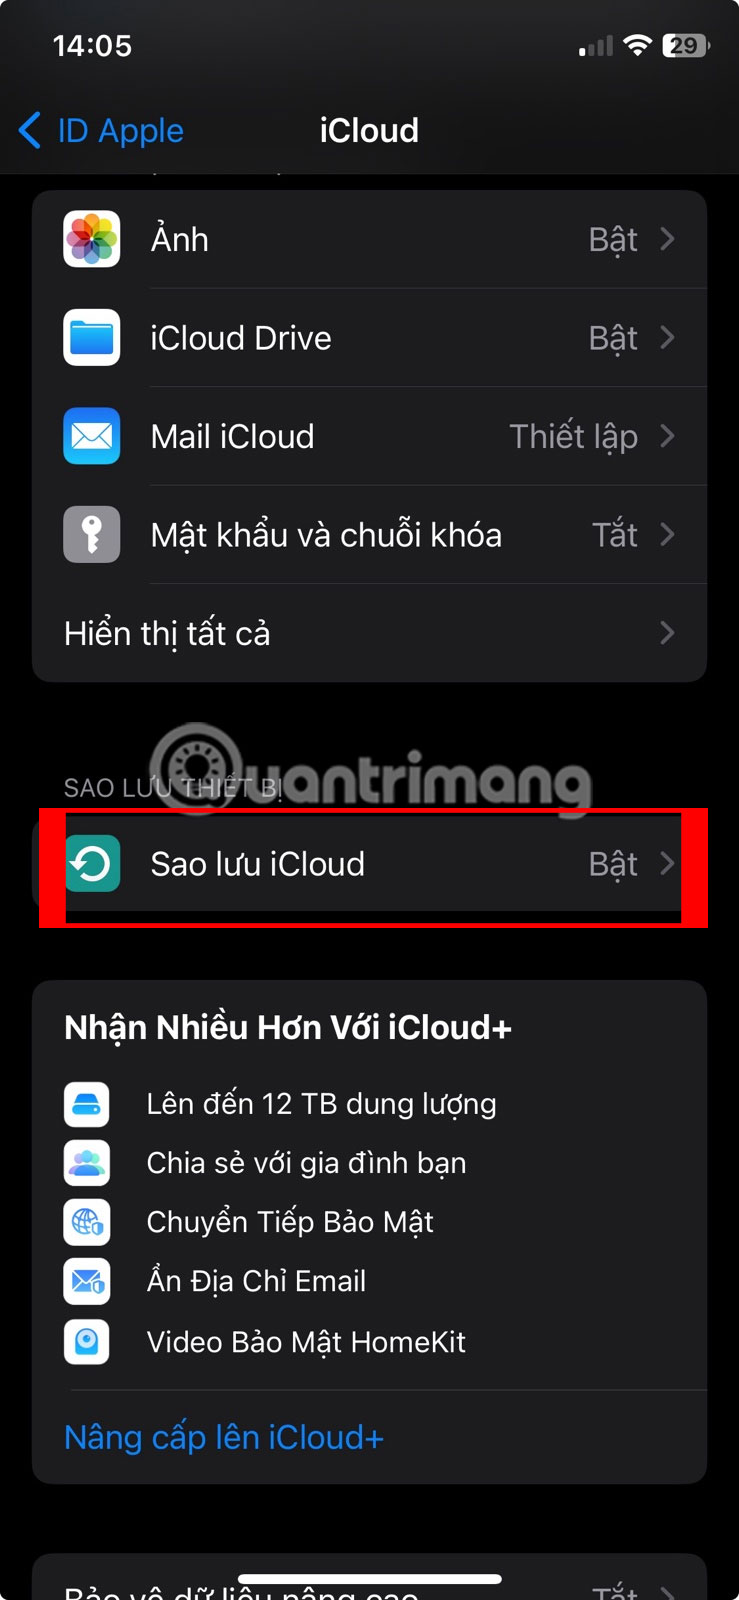
- iCloud: on the old phone, go to Settings > [your name] > iCloud > iCloud Backup, then select Back Up Now.
- Mac: connect the phone, open Finder, select the iPhone, and create a backup.
- Windows: use the Apple Devices app to back up the connected iPhone.
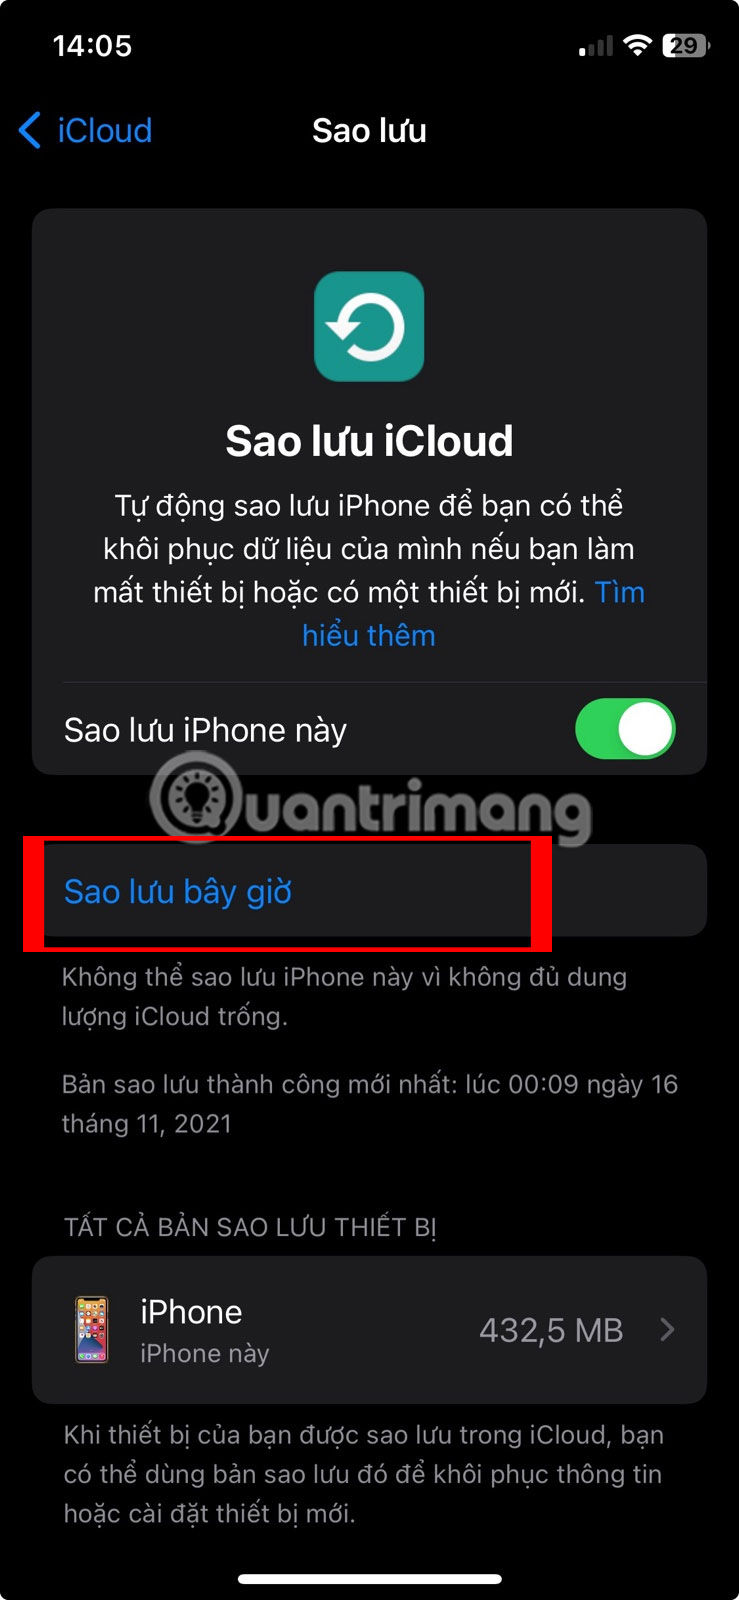
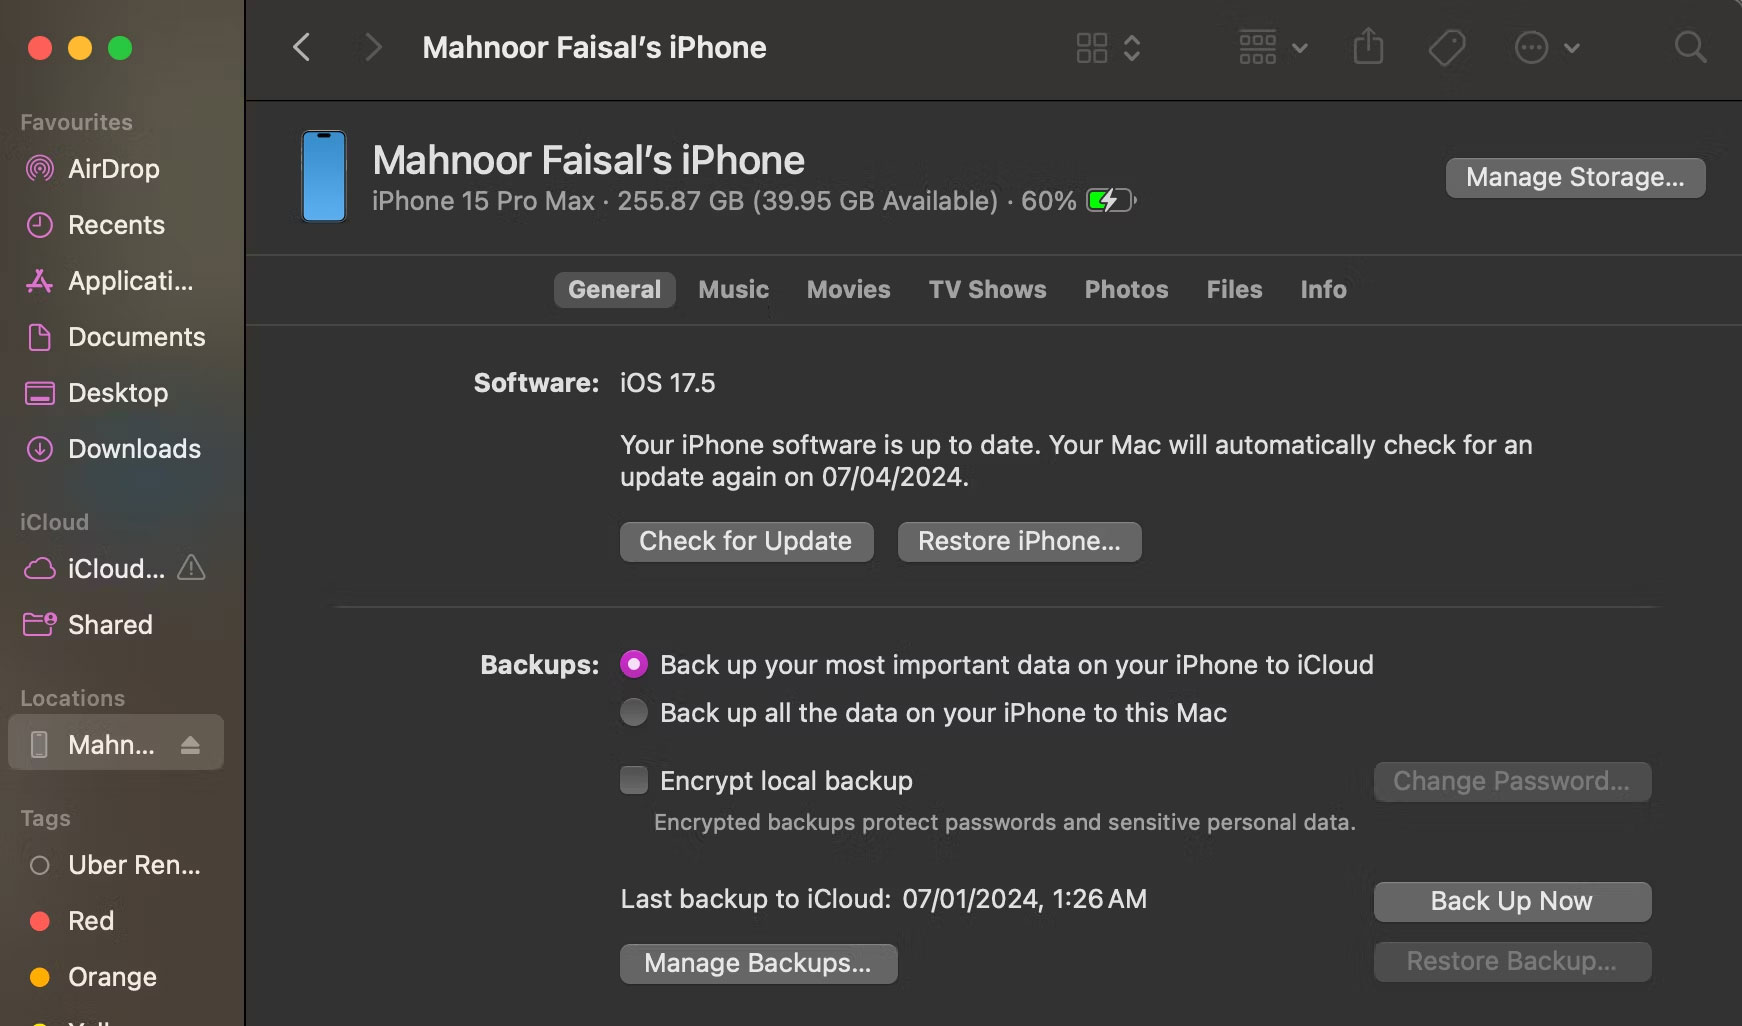
During setup on the new phone, choose the matching restore option and select the newest correct backup. If iCloud Photos was enabled, the photo library is synced separately and may not be stored inside the device backup. Keep the new phone on Wi-Fi and power while originals or optimized versions download.
3. Sync with iCloud Photos
Use this method when both phones belong to you and should show the same iCloud photo library.
- On the old phone, open Settings > [your name] > iCloud > Photos and enable Sync this iPhone.
- In Photos, check the library status and wait for pending uploads to finish.
- Sign in to the same Apple Account on the new iPhone.
- Enable Sync this iPhone in the same Photos settings.
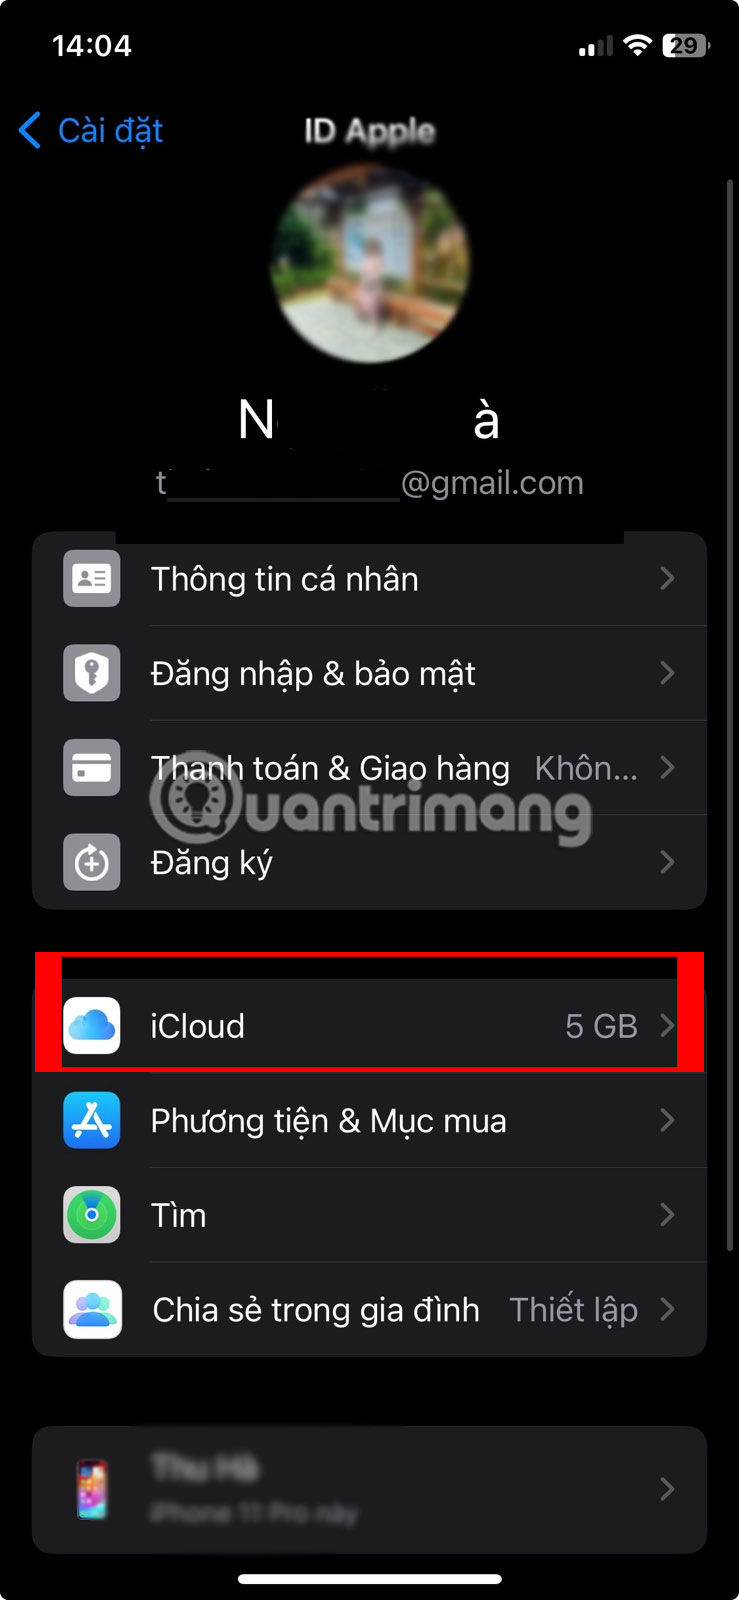
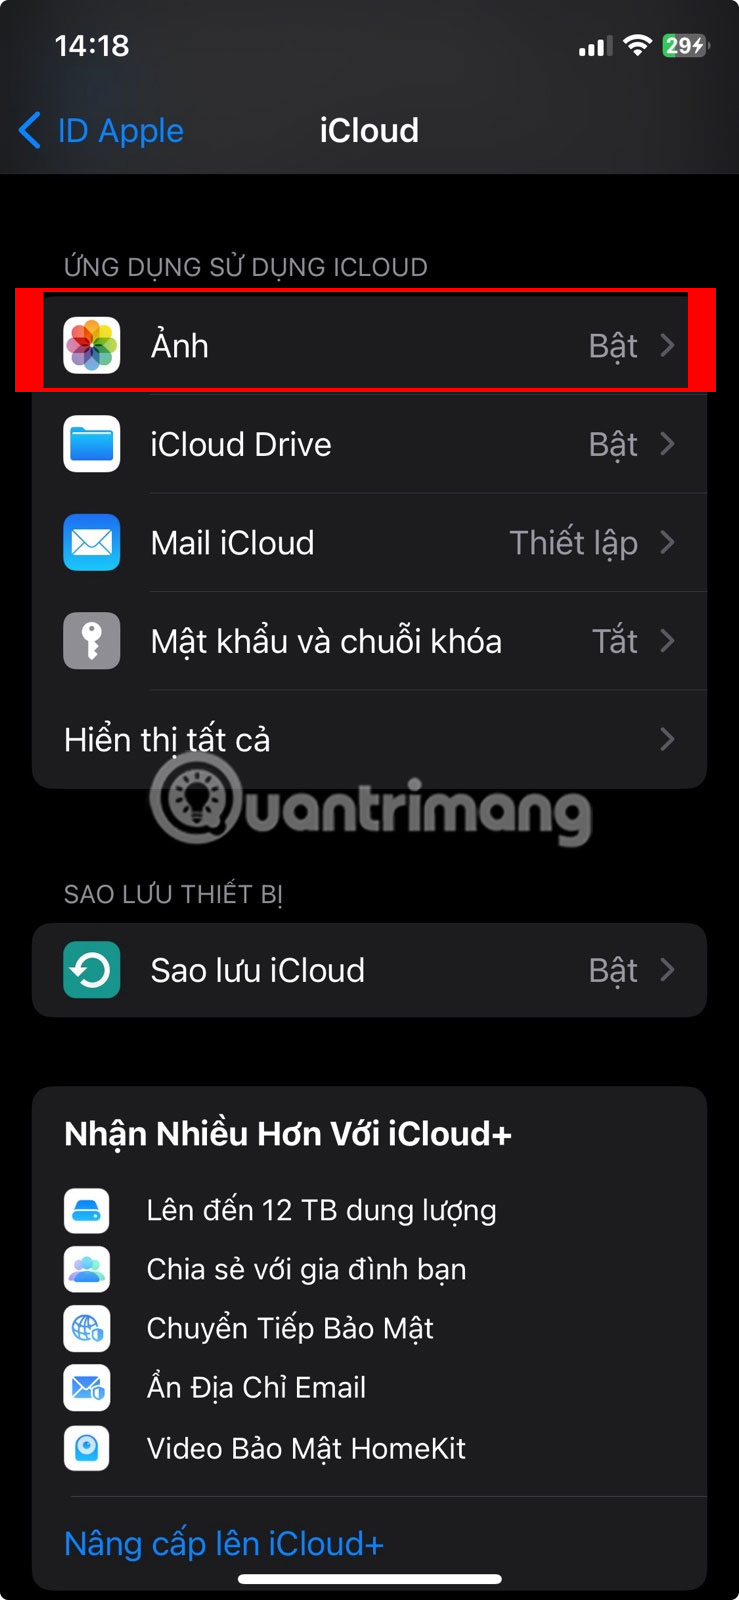
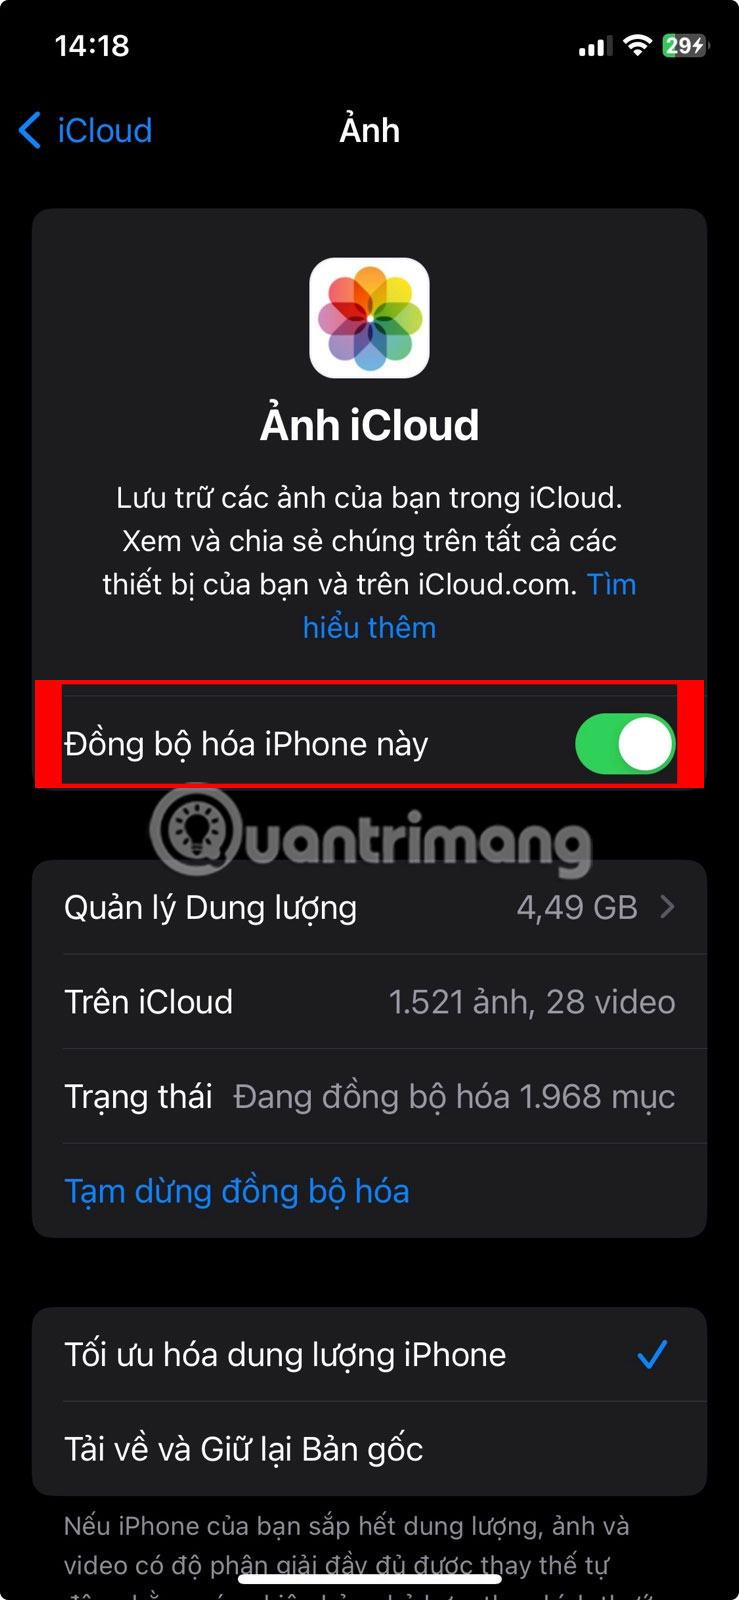
iCloud Photos is synchronization, not a one-way copy. Deleting a synced photo on one device deletes it from the same iCloud library and other synced devices. Make sure your iCloud plan has enough space before starting.
Send selected photos to another iPhone
4. Use AirDrop for nearby devices
- Turn on Wi-Fi and Bluetooth on both iPhones.
- On the receiving phone, allow AirDrop from Contacts Only or Everyone for 10 Minutes.
- In Photos, select the items, tap Share, choose AirDrop, and select the recipient.
- The recipient accepts the transfer unless both devices use the same Apple Account.
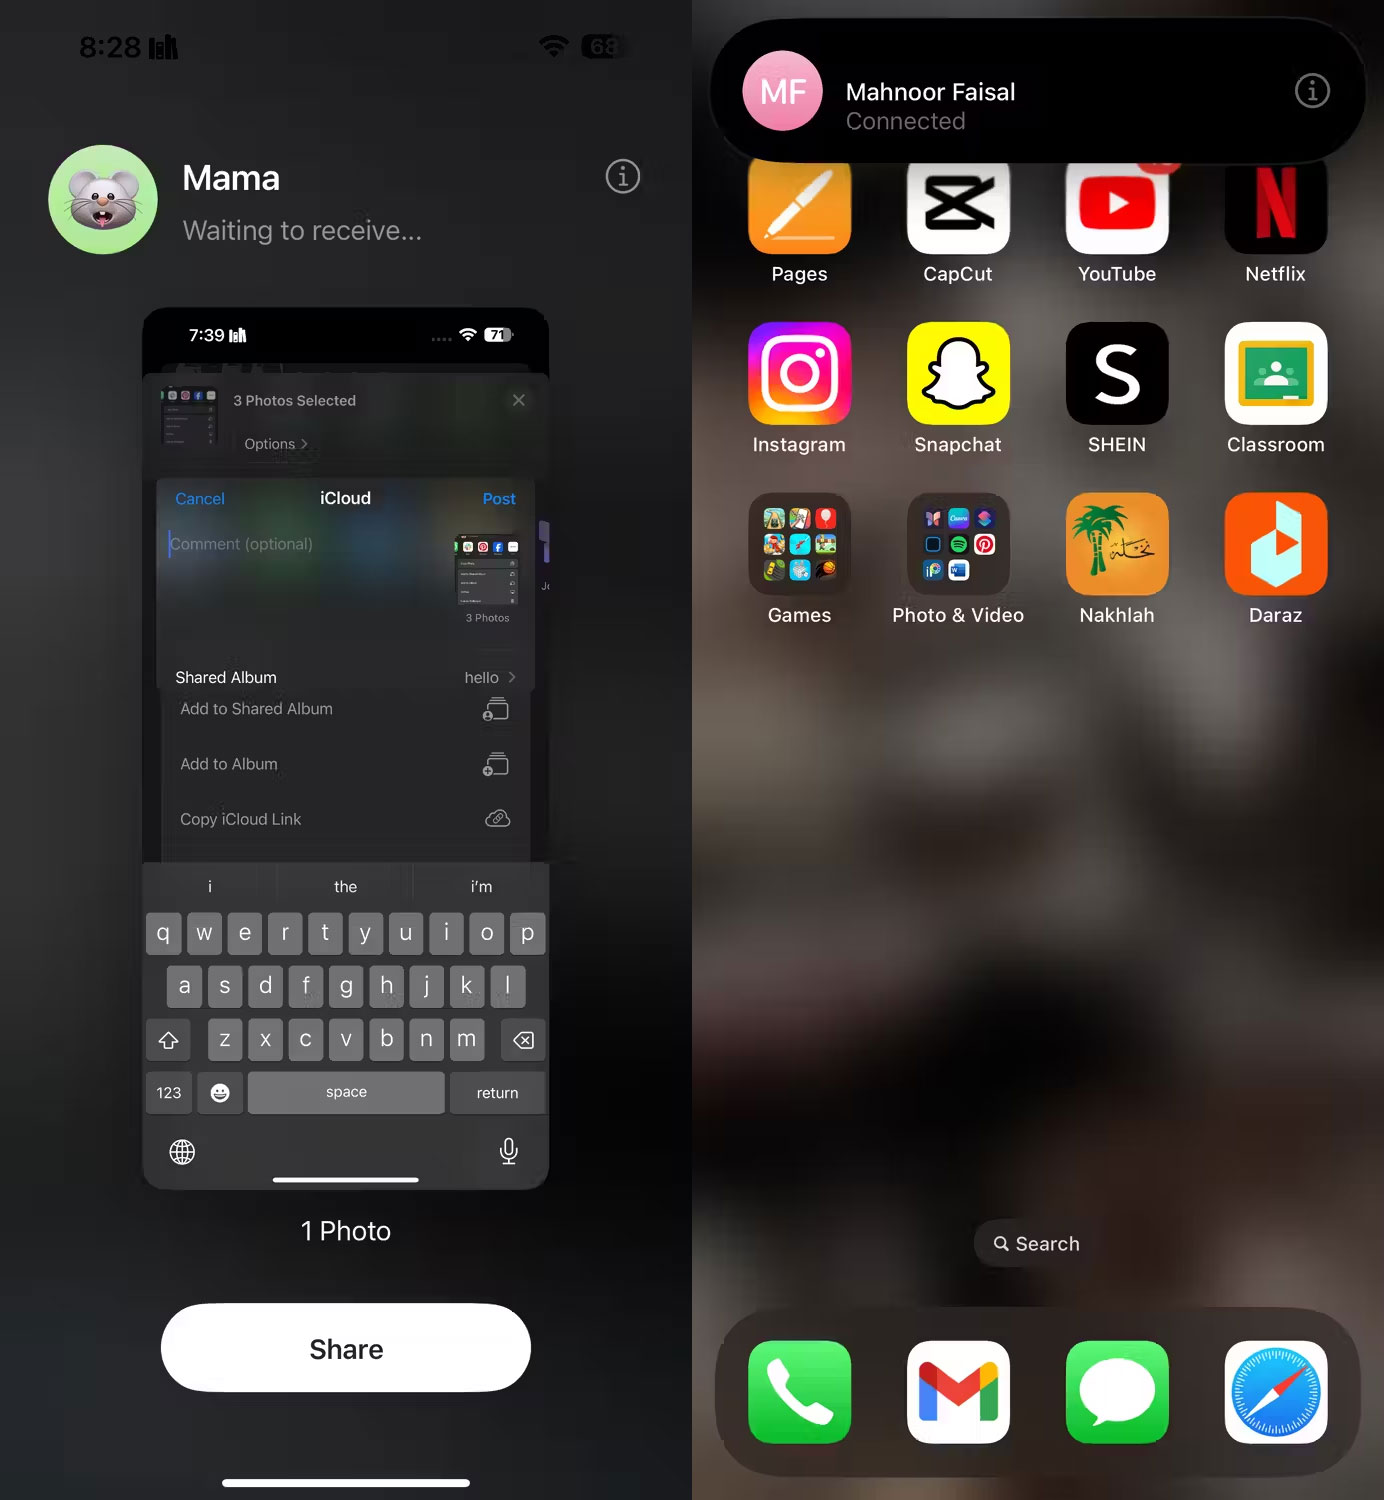
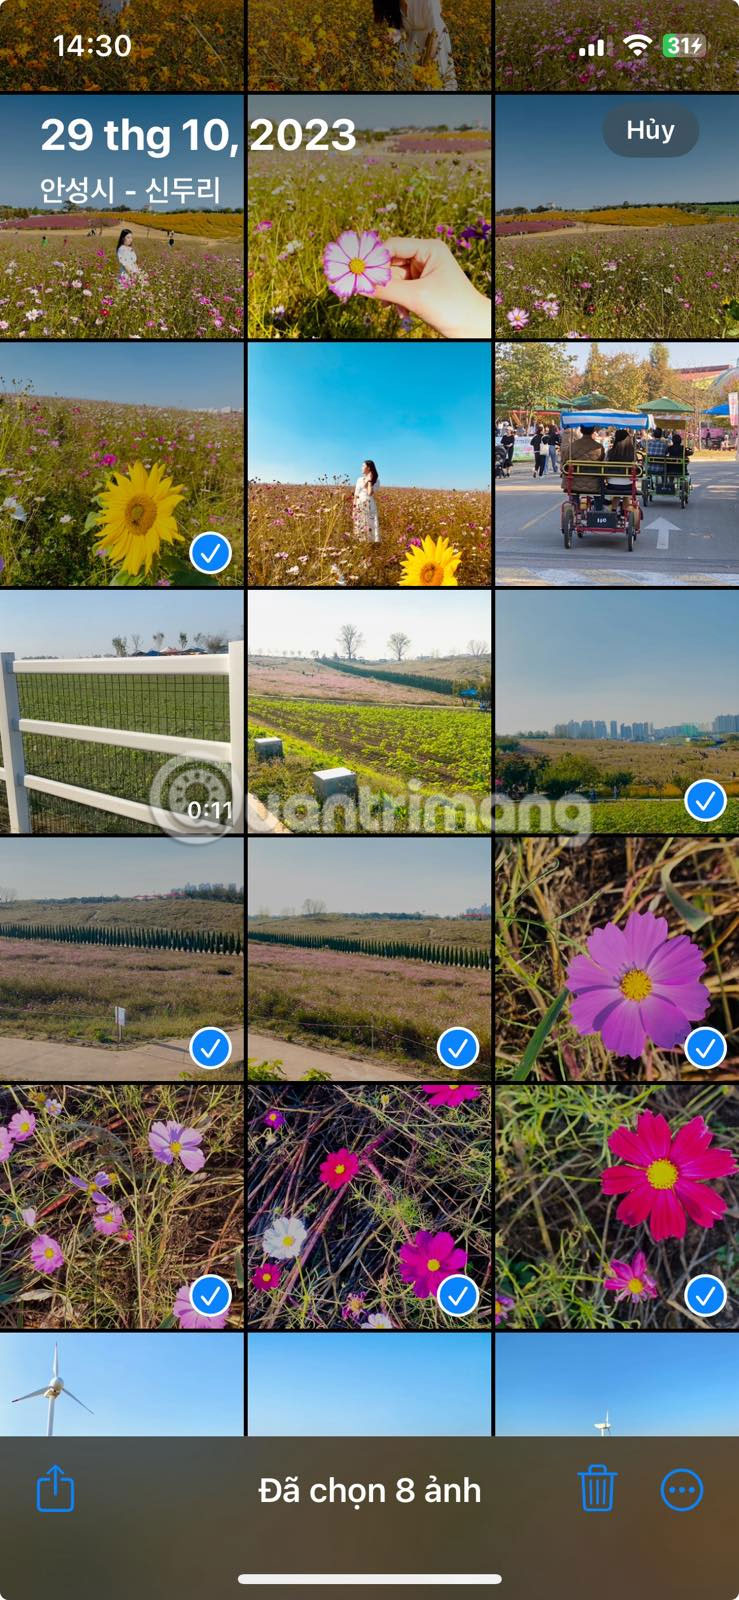

For original metadata and edit history, open Options in the share sheet and enable All Photos Data before sending. NameDrop is for exchanging contact information; ordinary photo sharing uses AirDrop. If the recipient does not appear, unlock both phones and check AirDrop receiving settings. See also how to customize the iPhone share sheet.
5. Send an iCloud Link
An iCloud Link is useful for a large selection when the recipient is not nearby.
- Select the photos or videos and tap Share.
- Open Options and turn on iCloud Link, or choose the current Copy iCloud Link action.
- Paste the link into a message or email.
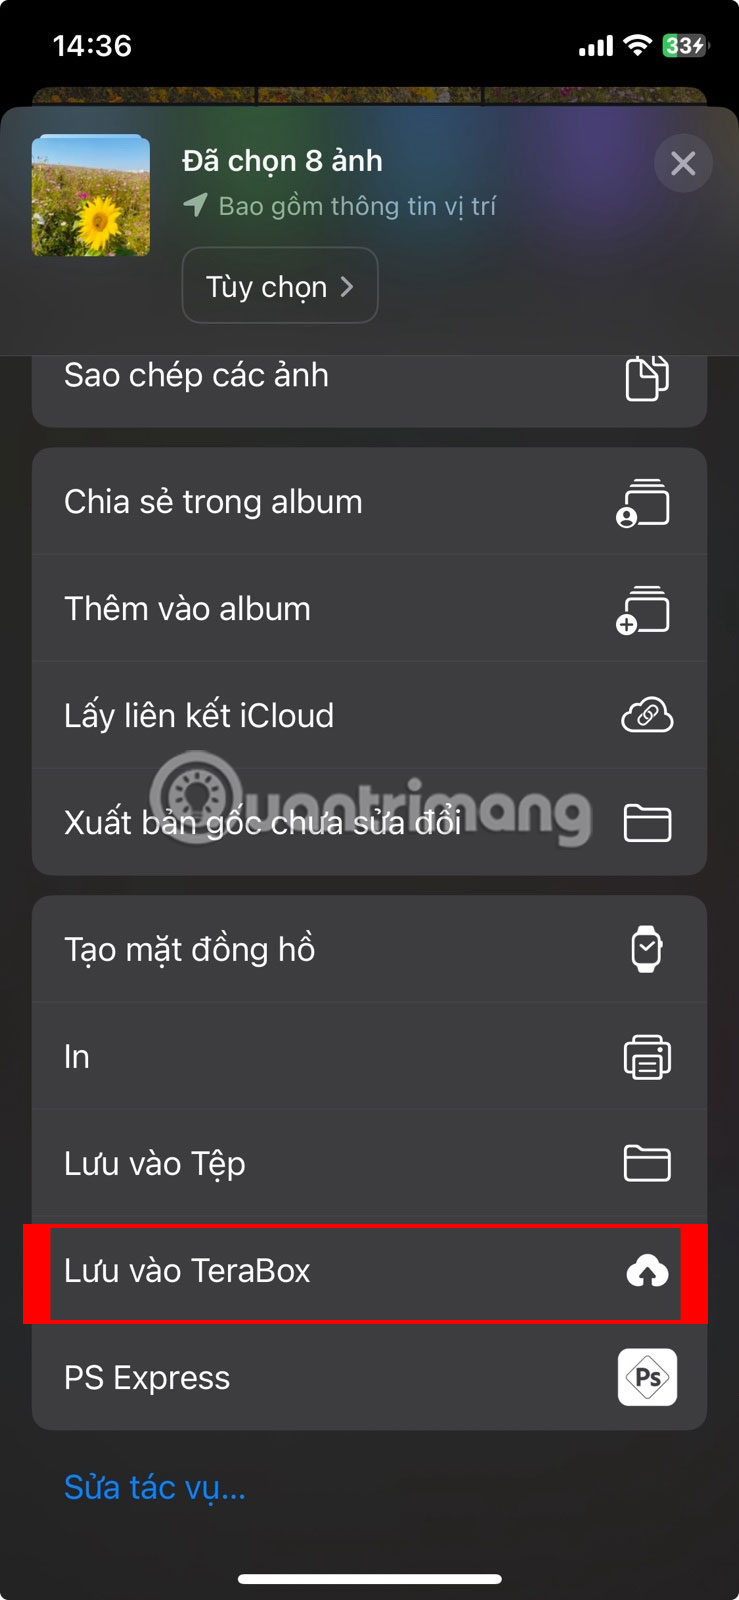

Apple states that iCloud Links expire after 30 days, and the owner can stop sharing earlier. Anyone with the URL may be able to view the collection, so do not use it for sensitive images.
6. Use another cloud-storage service
Google Drive, Dropbox, OneDrive, and similar services work across platforms:
- Install and sign in to the service’s iPhone app.
- Select photos in Photos, tap Share, and choose the storage app. If it is hidden, tap More.
- Choose a folder and upload.
- Create a view-only link in the storage app and send it to the recipient.
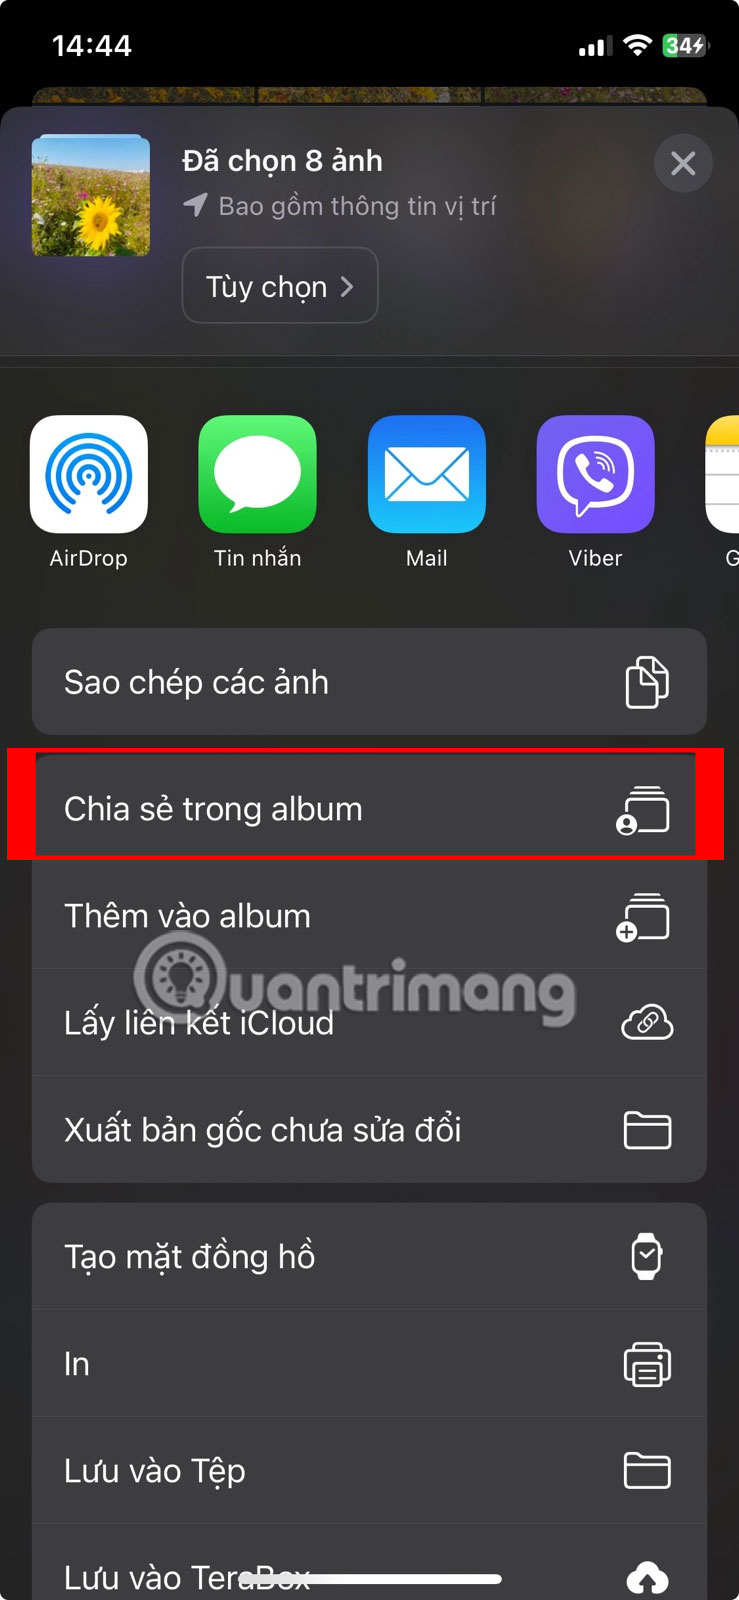
Check the link permission before sending and remove public access afterward. Uploading and downloading can use substantial mobile data, especially for 4K video.
7. Create an iCloud Shared Album
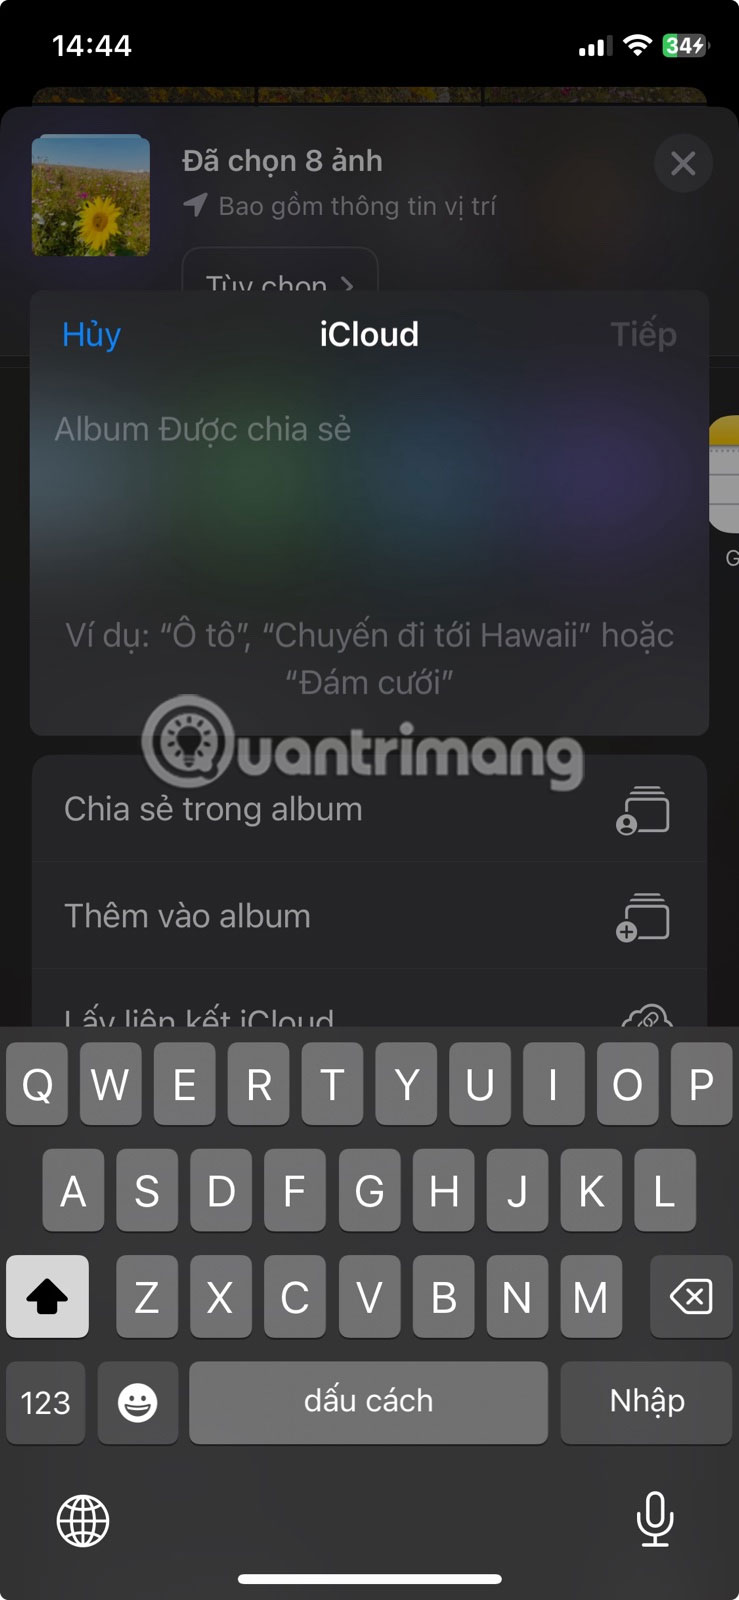
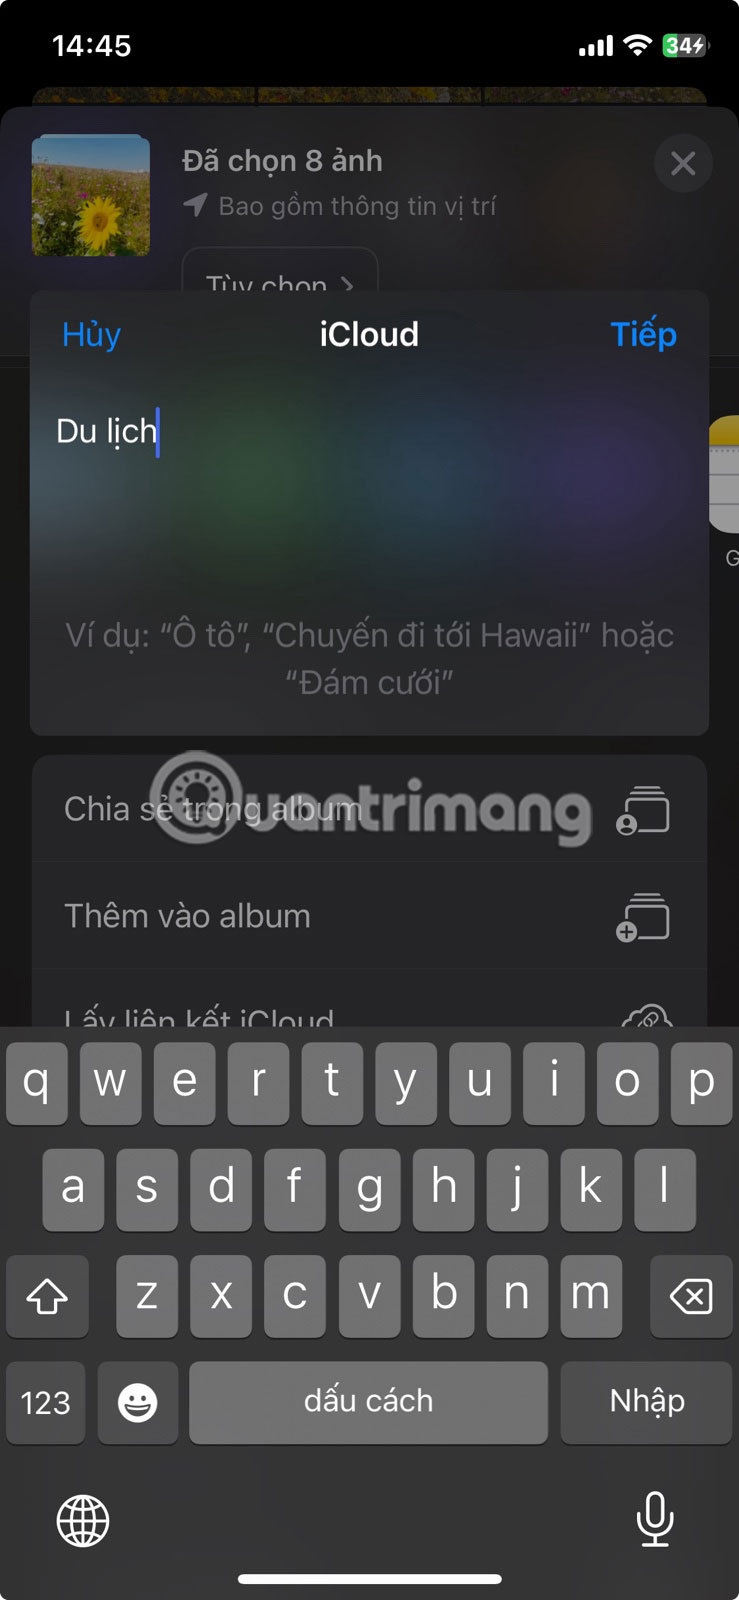
Shared Albums are useful for an event or ongoing group collection. Enable the feature under Settings > [your name] > iCloud > Photos > Shared Albums. Then select photos, tap Share, choose Add to Shared Album, name the album, and invite participants.

Shared Albums support comments and contributions when enabled, but shared copies may be reduced in resolution. Use AirDrop or an original-file link when full-quality transfer is essential. A Shared Photo Library is a different feature for up to six people who jointly manage one collection; members can edit and delete shared items.
8. Send photos in Messages
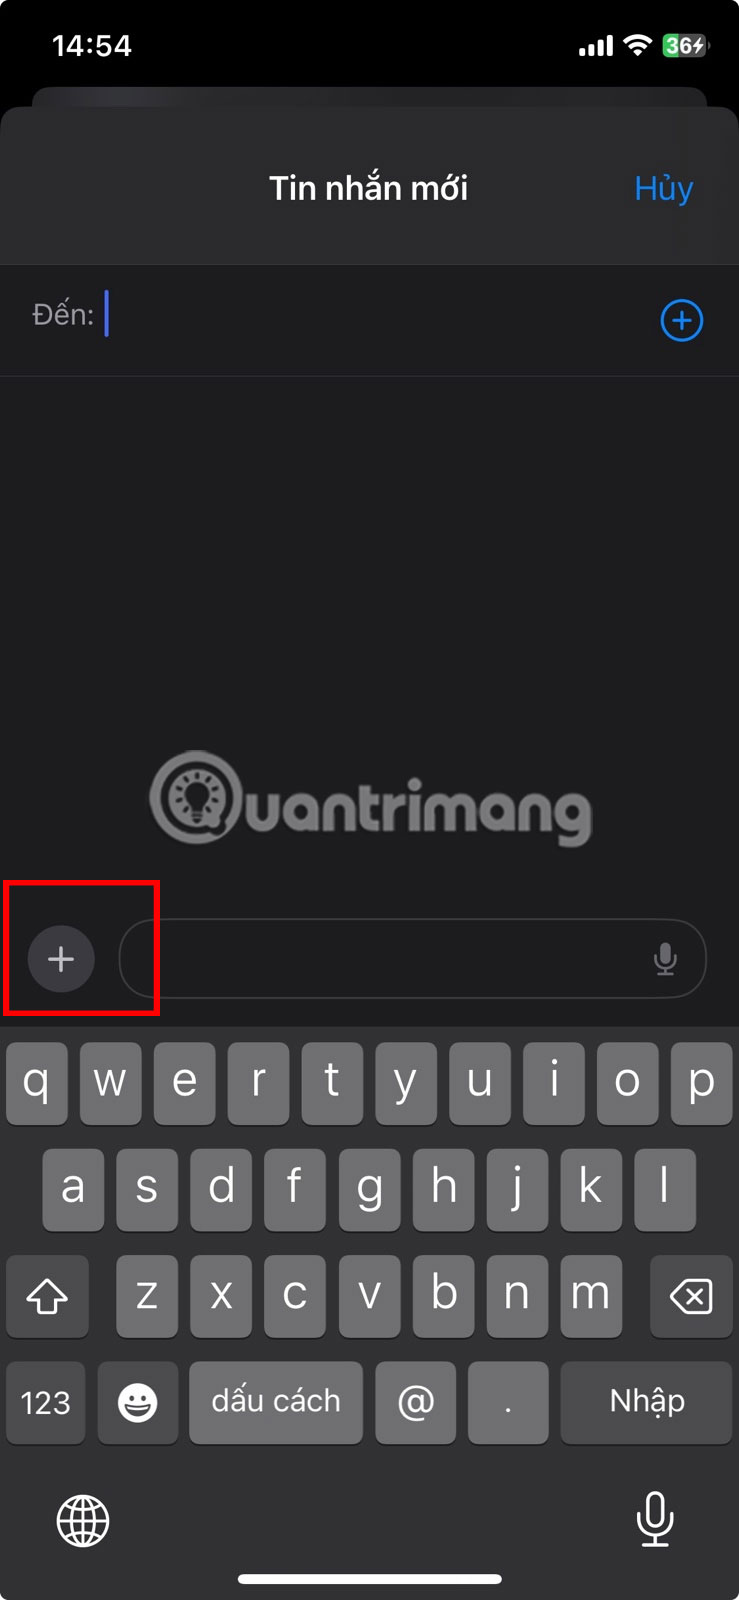
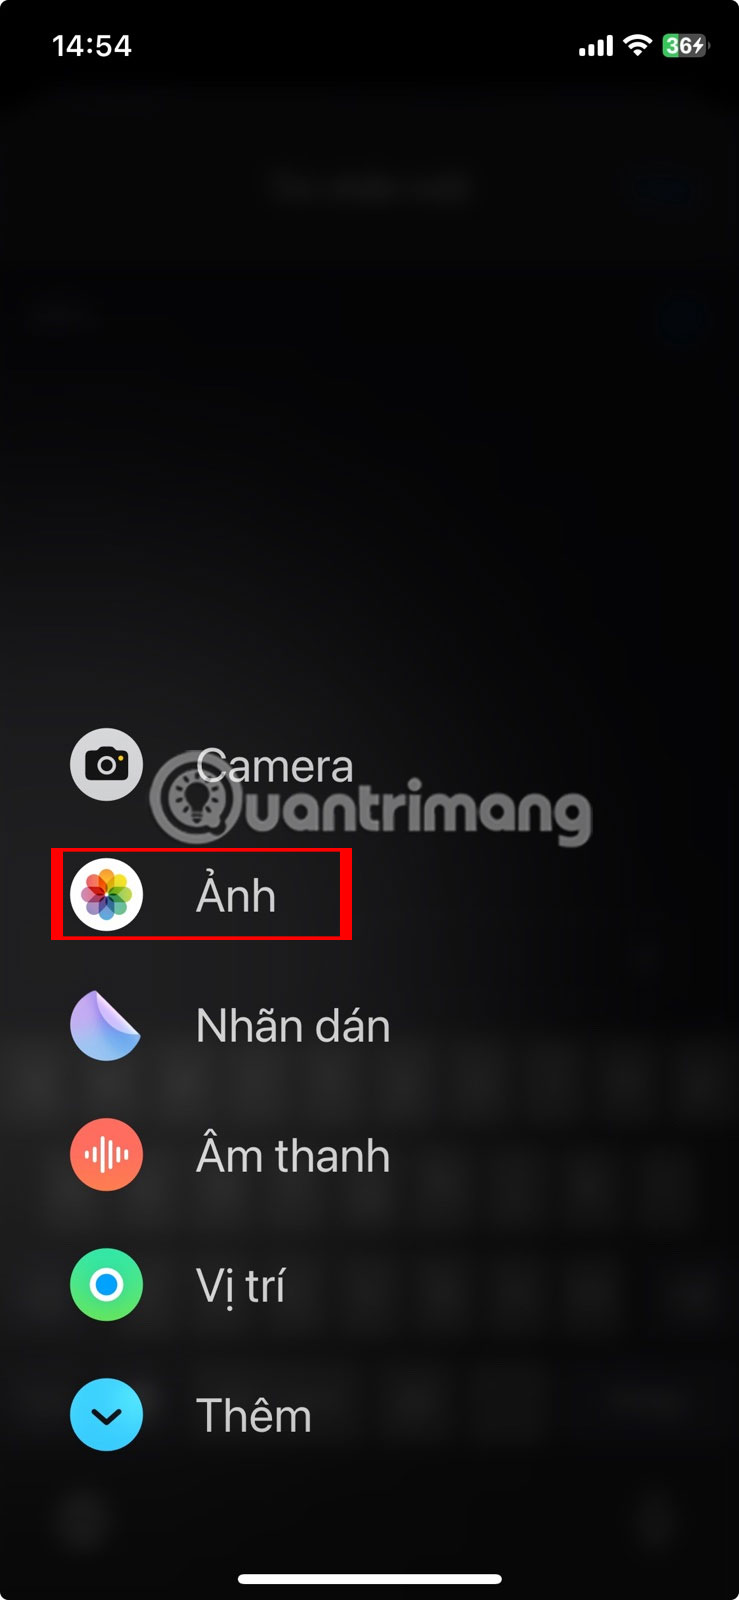
Open the conversation, tap the + button, choose Photos, select the images, and send. This is convenient for a small number of pictures but less suitable for an entire library.

iMessage uses internet data; SMS/MMS behavior and charges depend on the carrier, and MMS can reduce quality. Check that Low Quality Image Mode is off in Messages settings if quality matters.
Which method should you choose?
| Goal | Best starting option |
|---|---|
| Set up a new iPhone with everything | Quick Start |
| Old iPhone is unavailable | Restore the latest backup |
| Keep one personal library on both phones | iCloud Photos |
| Send full-quality photos nearby | AirDrop |
| Send a temporary remote download | iCloud Link |
| Collect photos from a group | Shared Album or Shared Photo Library |
| Send a few casual pictures | Messages |
Related Articles
 No Software Needed, This Is the Fastest Way to Transfer Images Between4 minutes read
 Instructions to Transfer Photos from iPhone to Macbook Extremely Fast3 minutes read
 How to Transfer Photos from iPhone to Mac: Step-by-Step Guide15 minutes read
 4 Ways to Transfer Photos from Computer to iPhone: Recommended Choices8 minutes read
 How to Transfer Images Directly from the Camera to iPhone7 minutes read
 How to Transfer Photos and Videos from iPhone iOS 11 to PC with5 minutes read
Reader Comments 0
Sign in with email or Google to join the discussion.