Table of Contents
This guide explains how to install and Experience Android 11 Directly on Windows 10, with clear steps, practical tips, and important checks before you begin.
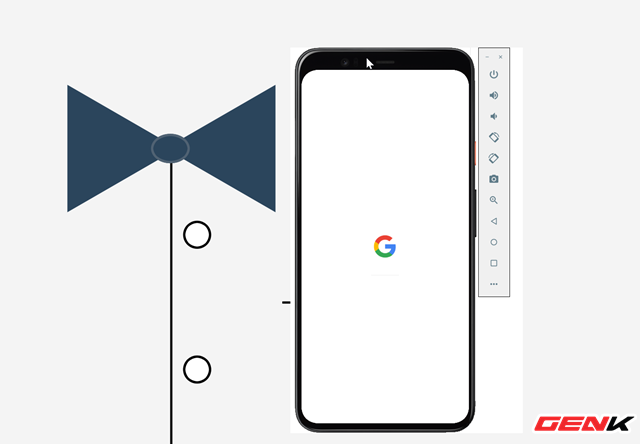
Currently, Android 11 Public Beta is only available for smartphones from Pixel 2 to Pixel 4 XL. However, right now you can also install and experience it directly on Windows 10 through the help of Android Studio released by Google itself. As follows.
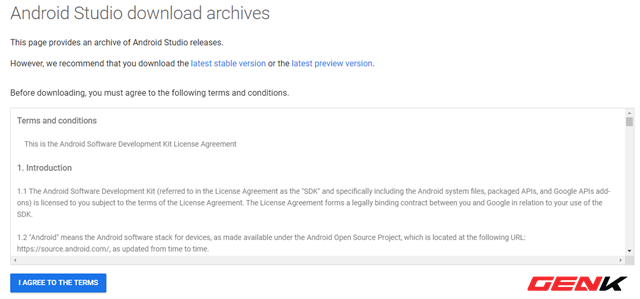
Step 1 : Visit the Android Studio website and click "I AGREE TO THE TERMS".
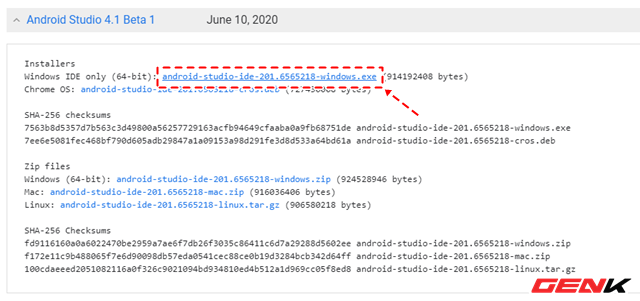
Click on the line "Android Studio 4.1 Beta 1", then click on "android-studio-ide-201.6565218-windows. exe" to download the Android Studio installation package. Here you should download the EXE packet instead of ZIP because installing directly from the EXE package will get more stability during use.
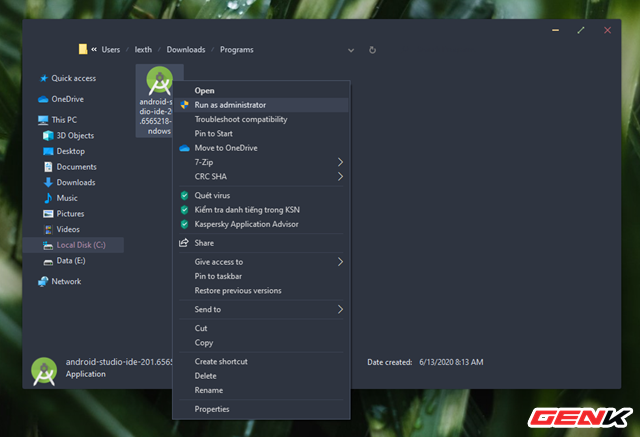
After the download is complete, launch the package to start installing Android Studio on your computer.
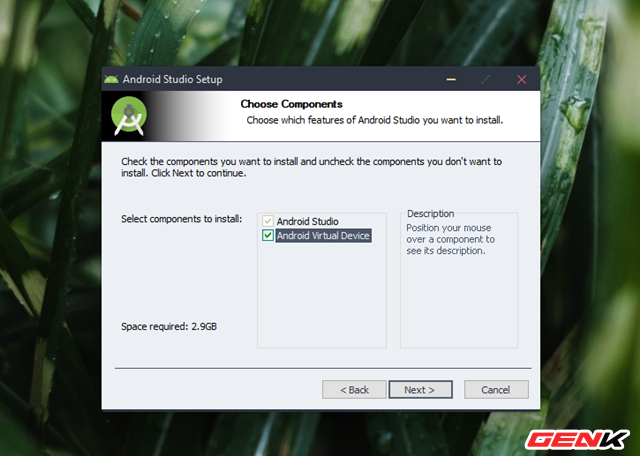
In the configuration when installing Android Studio, select the "Android Virtual Device" option.
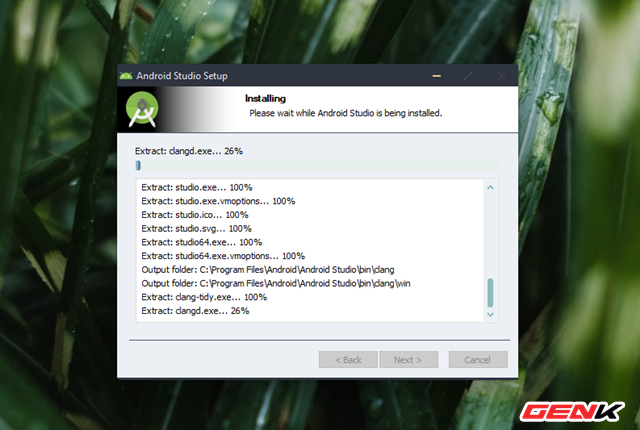
The installation process will take a few minutes, please wait patiently and limit the operation on the computer.
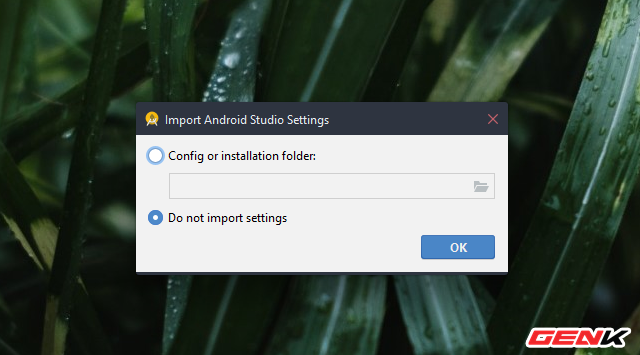
Step 2 : After installing Android Studio, start it up. At the first startup screen, check the "Do not import settings" option and click OK.
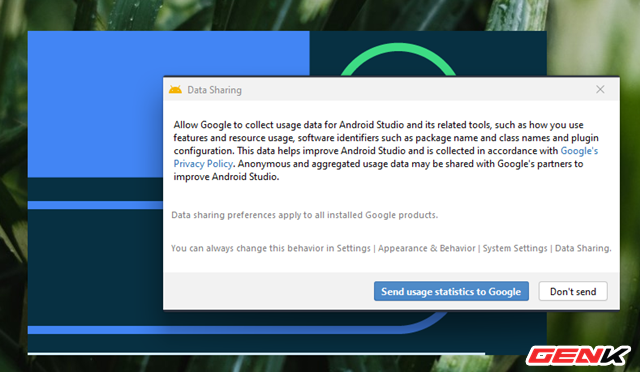
Next, click "Don't send" in the window that appears.
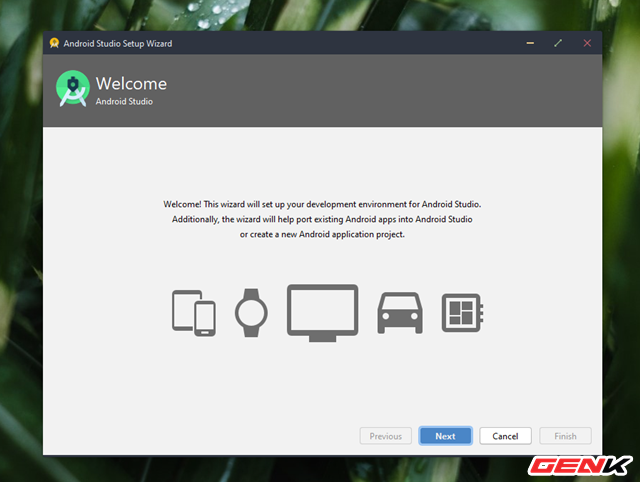
When Android Studio has finished booting, click "Next".
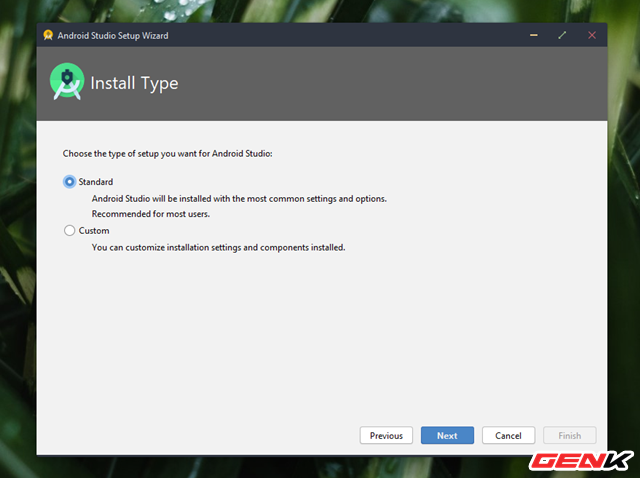
Tick the "Standard" option and click "Next".
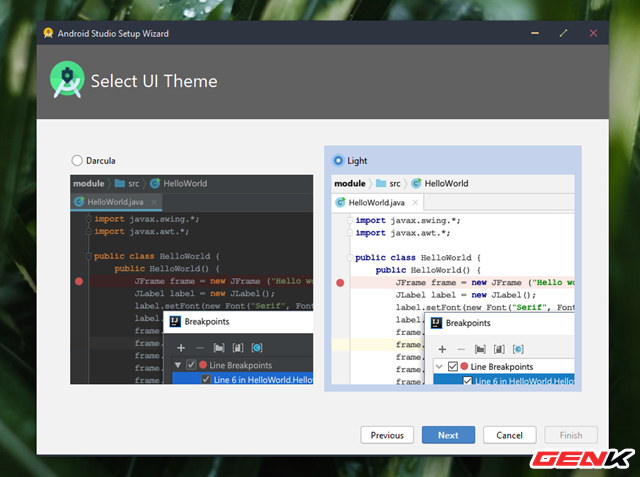
Next is the theme color selection for Android Studio.
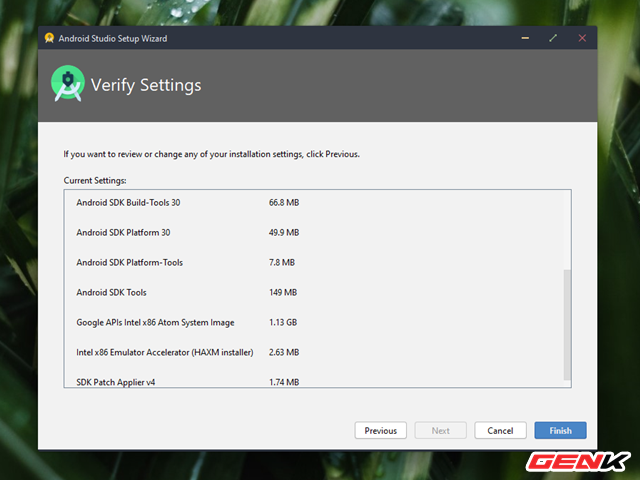
Now comes the information on the installation packages that Android Studio needs to download. Click "Finish" to begin. This download will take some time.
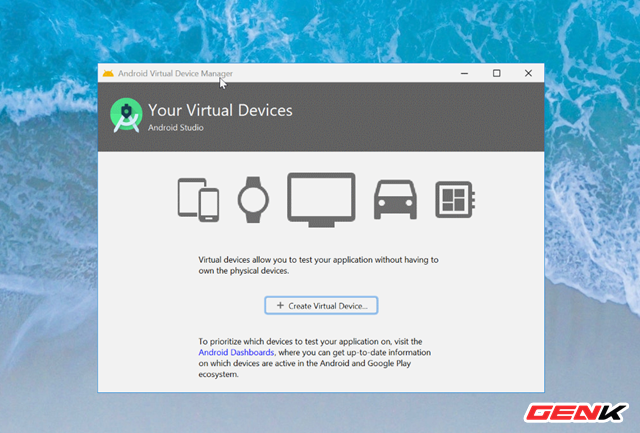
Step 3 : When done, the main interface of Android Studio will appear. Click on the gear icon and choose "AVD Manager", then click on "Create Virtual Device."
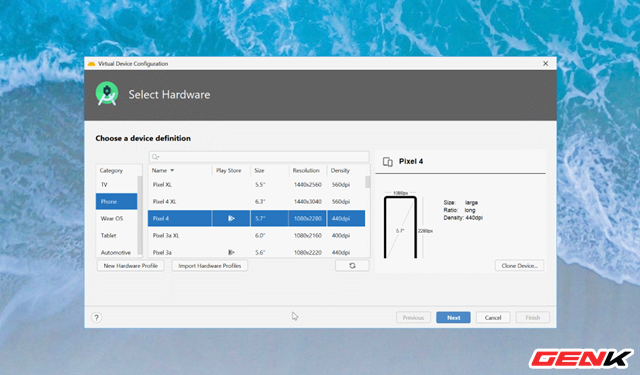
Select the display size of Android 11 depending on the device you want to experience, then click "Next".
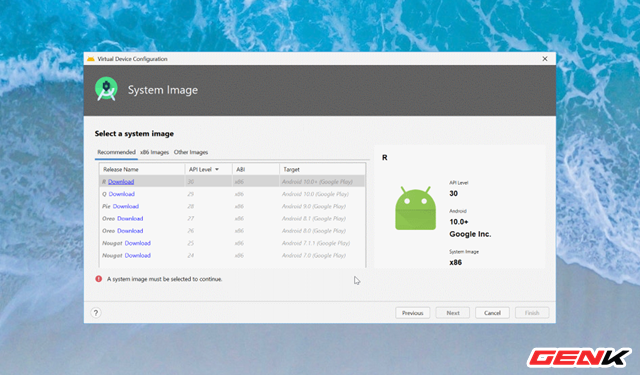
Next, press "Download" in the "R" line (Android 11).
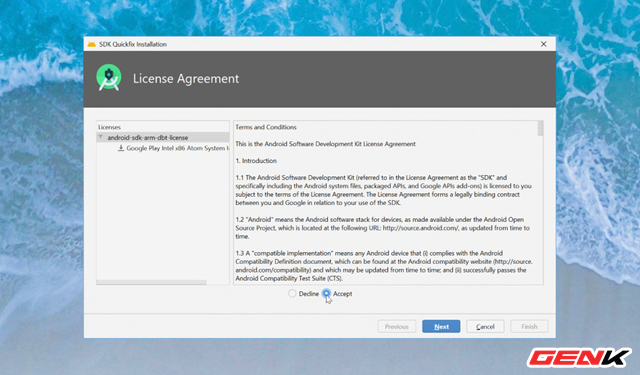
Interface to use agreement appears, please select "Accept" to confirm and click "Next".
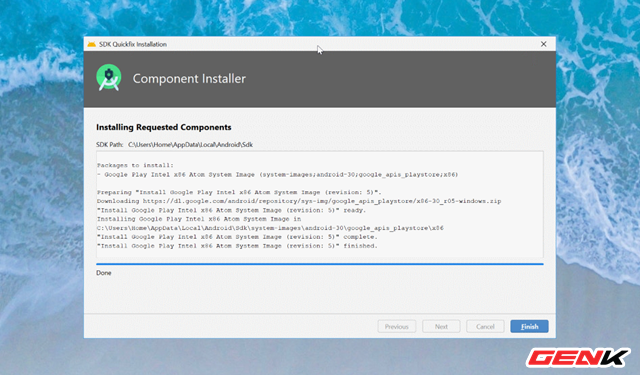
The download process will begin.
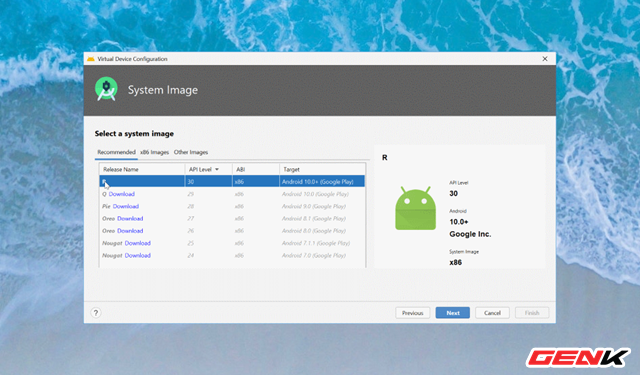
When done, you will be taken back to the previous interface, now press "R" again and click "Next".
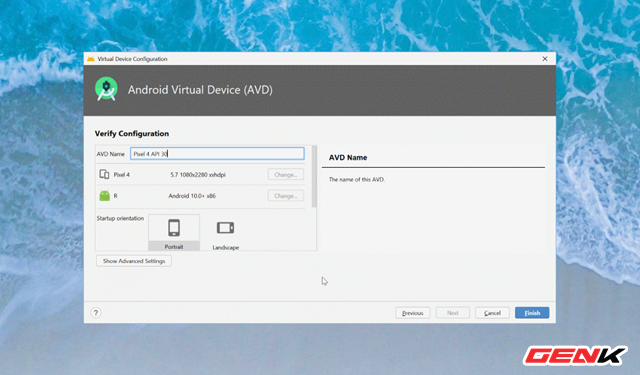
Name your virtual device running Android 11 and click "Finish" to finish.
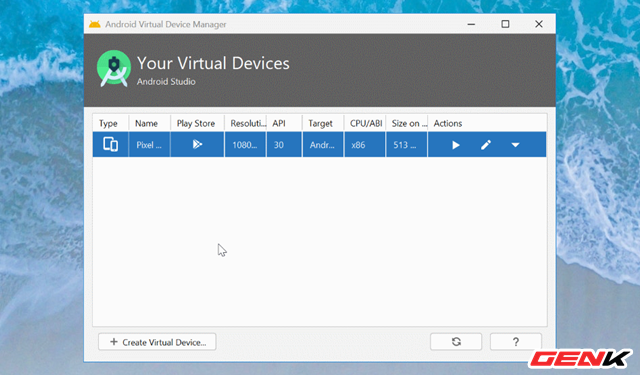
Step 4 : Your Virtual Devices interface will appear, along with a list of virtual devices and the Android version that is running. Click on the Start button to launch it.
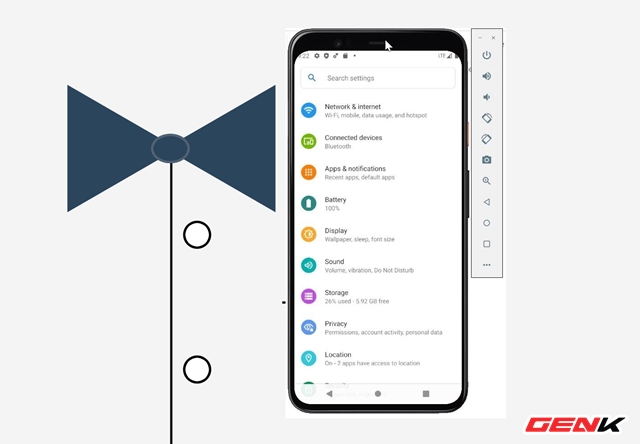
A window of a virtual machine simulating a device running Android 11 will appear, fully functioning as an actual device. And you can start experiencing it already.
In general, Android Studio simply provides you with a virtual machine running Android 11 so you can experience, as well as start writing suitable applications for this new version of Android.
Hope the article will be useful for you.
FAQ
What should I know about Install and Experience Android 11 Directly on Windows 10?
Focus on the key features, requirements, limitations, and practical use cases explained in this guide.
How do I get the best results with Install and Experience Android 11 Directly on Windows 10?
Follow the recommended steps, use current software or information, confirm compatibility, and review settings before major changes.
Are there any risks or limitations?
Potential limitations depend on compatibility, data quality, cost, privacy, support, and how the product or method is used.
Related Articles
 Steps to Directly Install Android Apps from APK Files on5 minutes read
 How to Install Android Apps on Bluestacks: Complete Guide8 minutes read
 How to Install Android on a Windows Computer Without Software10 minutes read
 Install Android on Your Computer, Run Android in Parallel with11 minutes read
 Tap: How to Install Windows 8 on an Android Tablet8 minutes read
 Access Android Storage on Windows 11: Step-by-Step Guide4 minutes read
Reader Comments 0
Sign in with email or Google to join the discussion.