Table of Contents
iPhone and iPad include a screen recorder, so no third-party app is needed for ordinary recordings. Add the Screen Recording control to Control Center, choose whether to include microphone narration, and start after the three-second countdown.
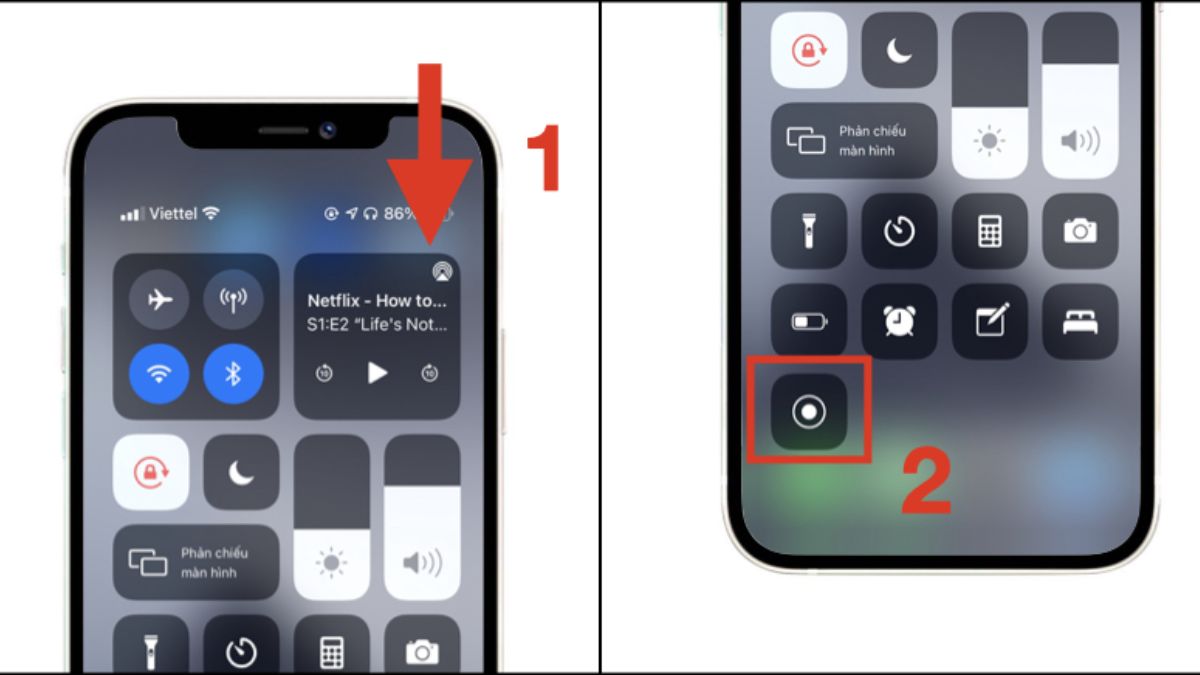
Add Screen Recording to Control Center
Open Control Center and use its add/edit controls to add Screen Recording. On older iOS versions, open Settings > Control Center and add Screen Recording there. The icon is a circle inside another circle.
Start and stop a recording
- Open Control Center: swipe down from the top-right on an iPhone with Face ID, or swipe up from the bottom on supported Home-button models.
- Tap Screen Recording and leave Control Center during the countdown.
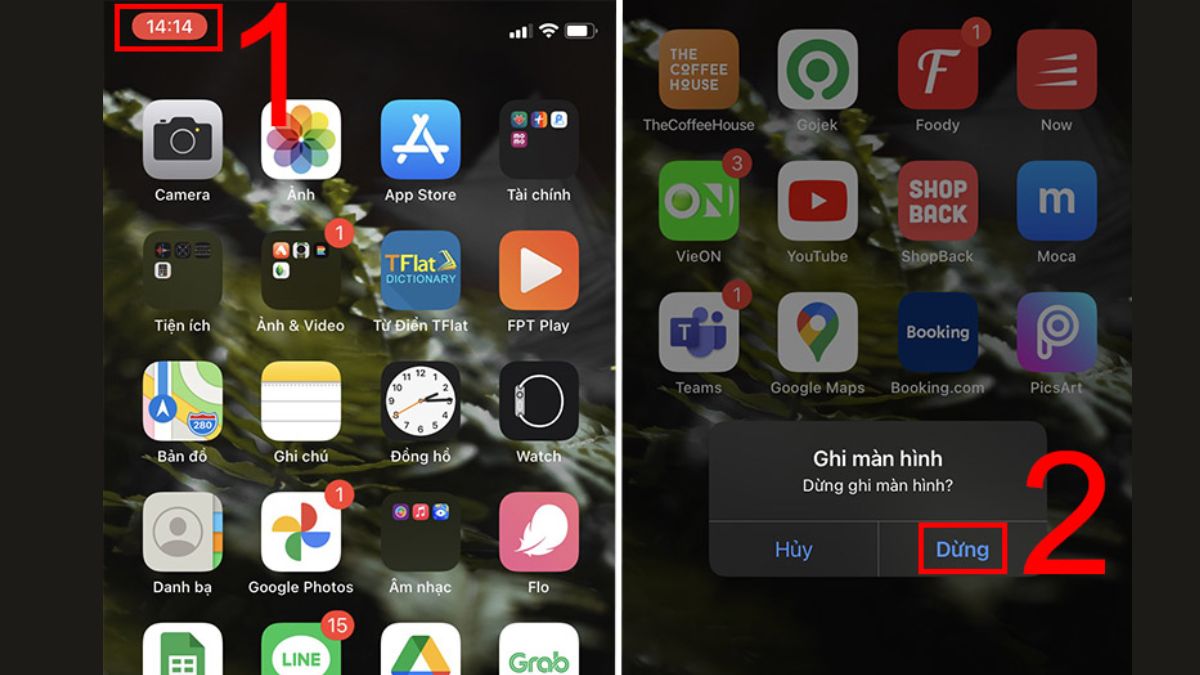
- To stop, tap the red status indicator at the top and confirm, or reopen Control Center and tap the recording control.
- Open Photos to view, trim, or share the saved video.
Locking the iPhone or using protected content can stop or blank parts of a recording.
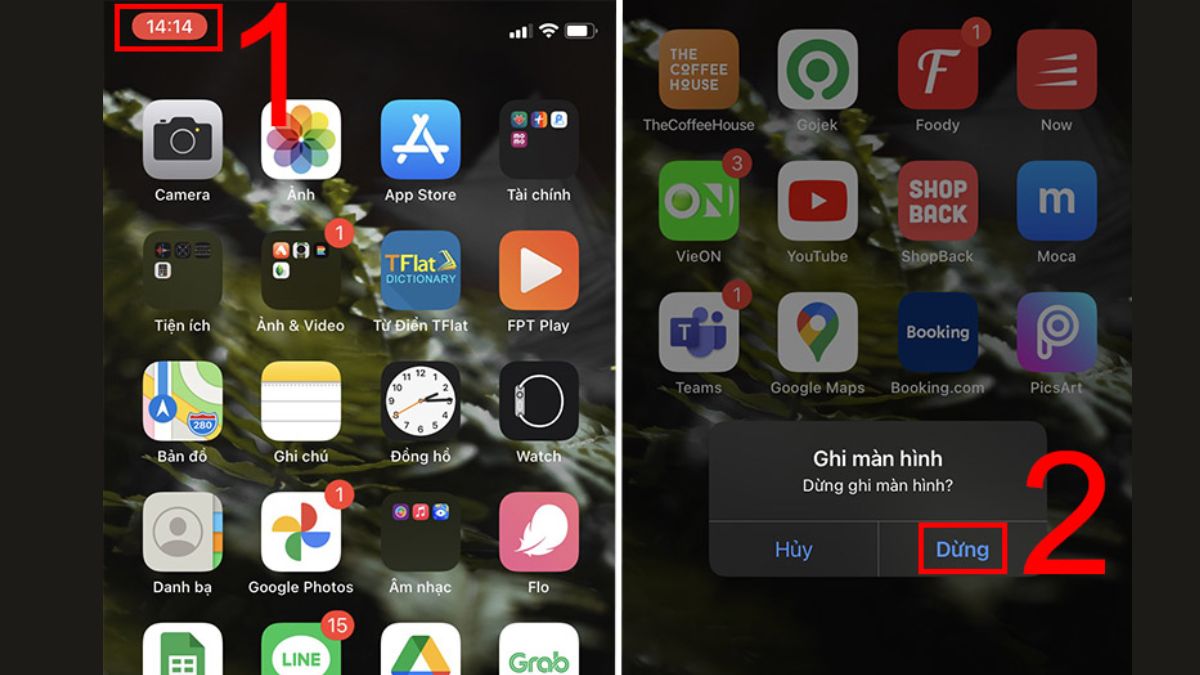
Record your microphone
- Press and hold the Screen Recording control.
- Tap the microphone button to turn narration on or off.
- Tap Start Recording.
Microphone audio can capture your voice and nearby sound. App audio is separate: some apps include it, mix it differently, or block it because of calls, copyright protection, privacy, or technical restrictions.
Why a recording has no sound
- The microphone was off for narration.
- The app blocks or does not provide recordable internal audio.
- A call, AirPlay session, Bluetooth route, or another audio session changed the source.
- The microphone is obstructed or permission/settings are restricted.
Test a short recording in a non-sensitive app. Do not assume a silent recording means the microphone hardware is broken.
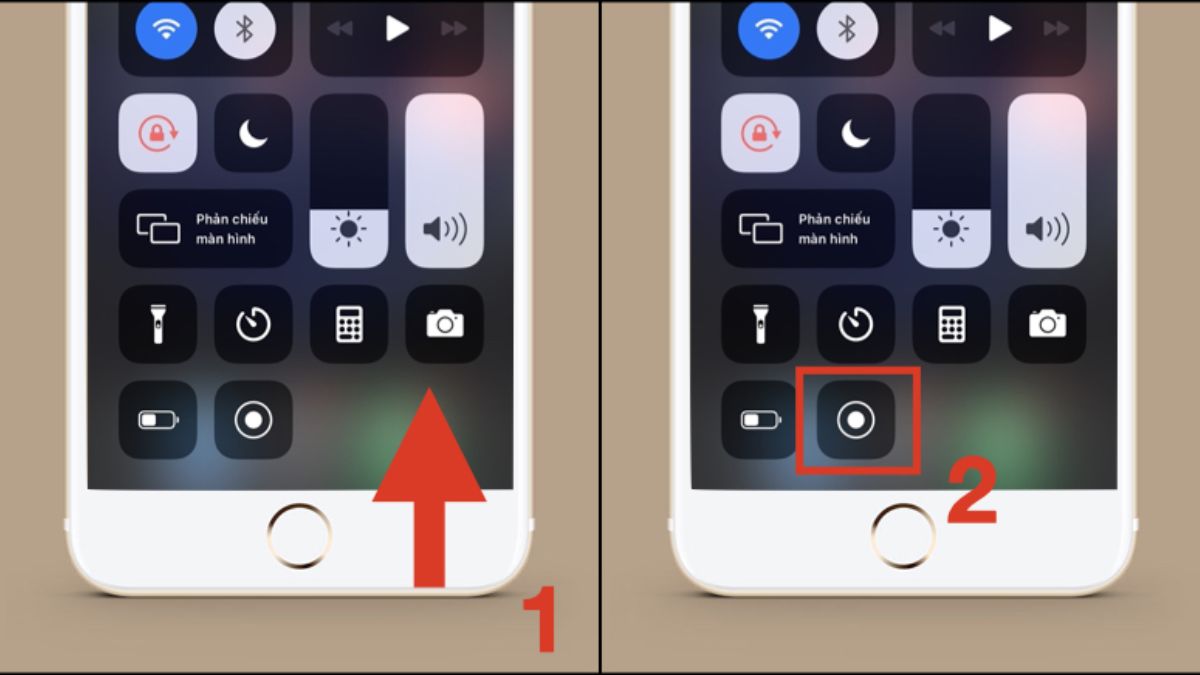
If Screen Recording is missing
- Add it to Control Center again.
- Restart the iPhone and install a stable iOS update.
- Check Settings > Screen Time > Content & Privacy Restrictions for recording restrictions.
- On a work or school device, ask whether device-management policy blocks capture.
Screen recording requires iOS 11 or later. Very old devices that cannot run a supported iOS version should not use untrusted recording apps as a workaround.
Record an iPad screen
The process is the same: add Screen Recording to Control Center, open Control Center using the gesture for that iPad, and tap the control. Use a long press to enable the microphone.
Privacy and legal considerations
Do not record private conversations, calls, meetings, health or financial screens, or another person without the consent required by applicable law and policy. Hide notification previews and enable a Focus mode before recording. Review the video for passwords, one-time codes, account names, messages, faces, and location data before sharing.
Avoid “hidden camera” or background-recording apps that promise covert capture with the screen off. They can create serious privacy and legal risk, and iOS may restrict background camera behavior.
Improve the result
- Free storage before a long recording.
- Set orientation before starting and avoid rotating midway.
- Enable Do Not Disturb or Focus.
- Record a short test for audio and legibility.
- Trim the beginning and end in Photos.
For editing, see how to trim an iPhone video. For computer capture, see Windows screen recording options.
Related Articles
 How to Record Your iPhone Screen and Audio Is Super Easy6 minutes read
 How to Record iPhone Screen Video, How to Record iPhone5 minutes read
 How to Record iPhone and iPad Screen Videos on the Computer7 minutes read
 How to Record Computer Screen and in Detail8 minutes read
 20+ Ways to Record Computer Screen, Record Laptop Screen25 minutes read
 How to Record Windows 11 Laptop Screen Videos7 minutes read
Reader Comments 0
Sign in with email or Google to join the discussion.