Ways to fix touchpad not working on Windows 11
The operation on the touchpad brings a lot of convenience to the user. But sometimes, the laptop touchpad may not work and stop responding. If you've ever been a victim of a similar problem, this guide is for everyone. Let's learn how to fix touchpad not working on Windows 11 and apply to your device
Restart the computer
This is always the way to try first in case of an error. If the touchpad isn't working due to a minor software glitch, restarting the PC should fix this.
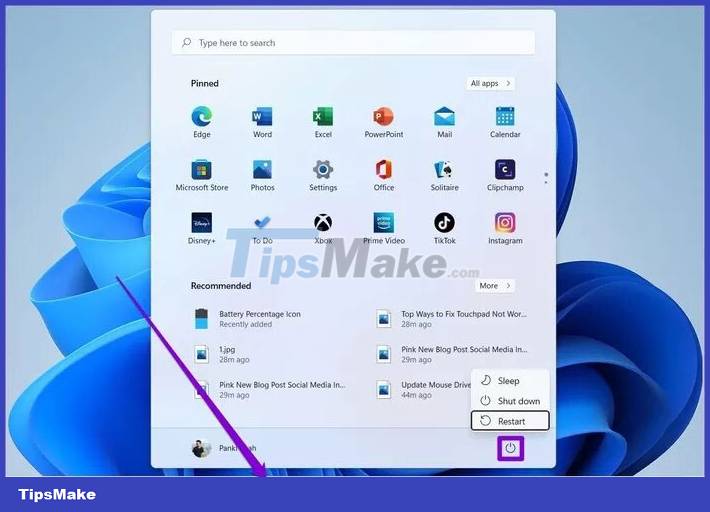
To restart the PC, people can use an external mouse or keyboard. To restart the PC using the keyboard, press the Start button, use the arrow keys to select Power, and press the Enter key. Now, select Restart from the menu and press Enter again.
Enable touchpad
Before thinking about a broken touchpad situation, check that it is turned on and working properly. Many laptop models have a function key to disable the touchpad. Therefore, users need to check if they have accidentally disabled the touchpad.
Check your antivirus program
Anti-virus programs can interfere and modify touchpad settings. To be sure, disconnect from the internet and then temporarily disable anti-virus software to check if that affects the touchpad's performance.
Run Troubleshoot
Windows provides a series of troubleshooters that are able to diagnose and fix errors themselves. Follow these steps to access it.
Step 1: Open the Start menu, type cmd and use the arrow keys to navigate to Run as administrator > press Enter.
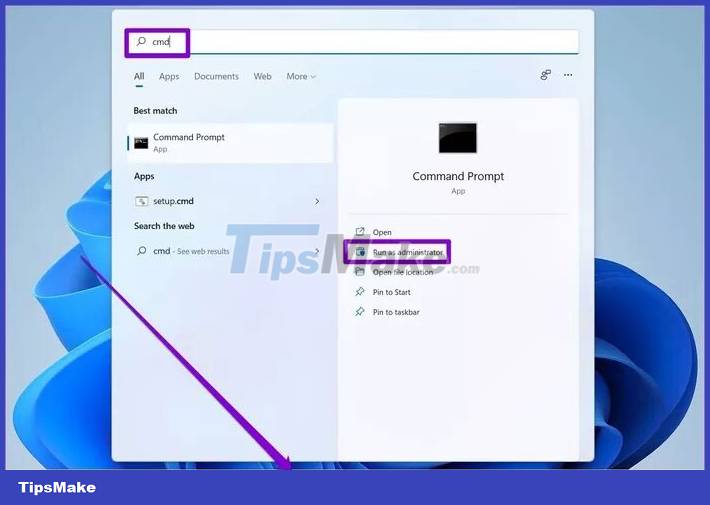
Step 2: In the console, type the command msdt.exe -id DeviceDiagnostic and press Enter.
Step 3: In the Hardware and Devices window that appears, click Next to allow it to scan for any problems.
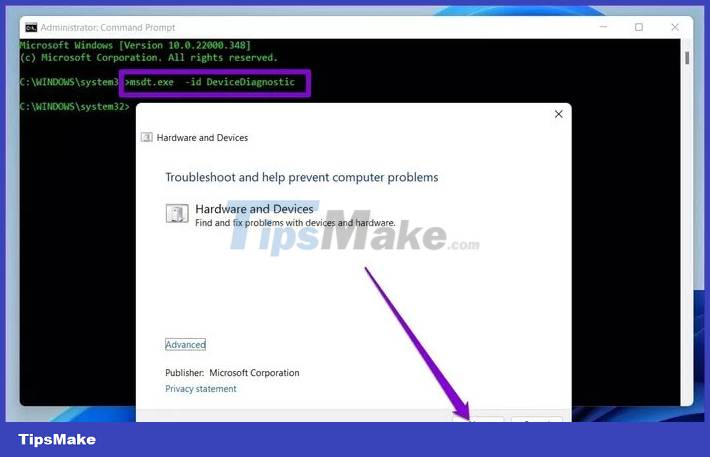
If the tool asks to perform an automatic repair after completing the scan, select Apply this fix to continue. Once done, reboot the device and test the touchpad.
Fix touchpad driver
If the troubleshooter fails to identify any problems with the touchpad, it can be resolved and repaired using the Settings menu.
Step 1: Press the Windows + I key combination to launch Settings. Switch to the Apps tab on the left and select Apps & features.
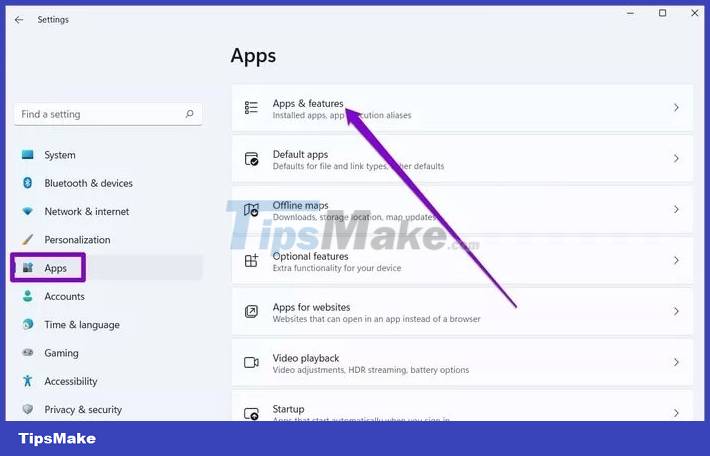
Step 2: Find the touchpad, click the three dots next to it and select Modify.
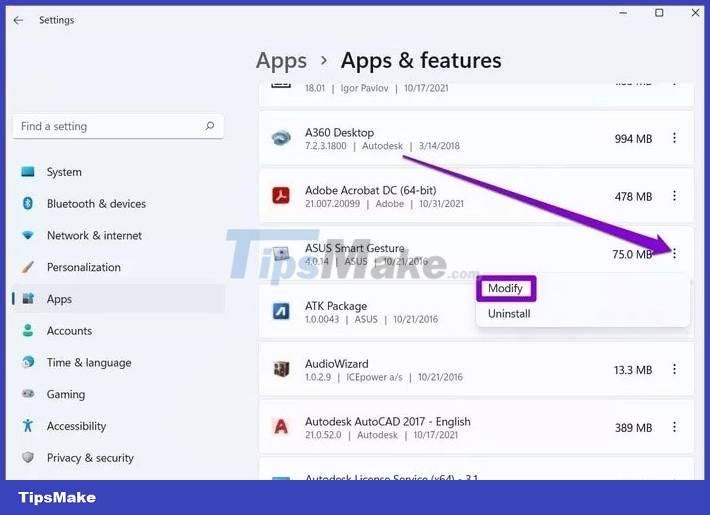
Step 3: Follow the on-screen instructions to complete the restore process.
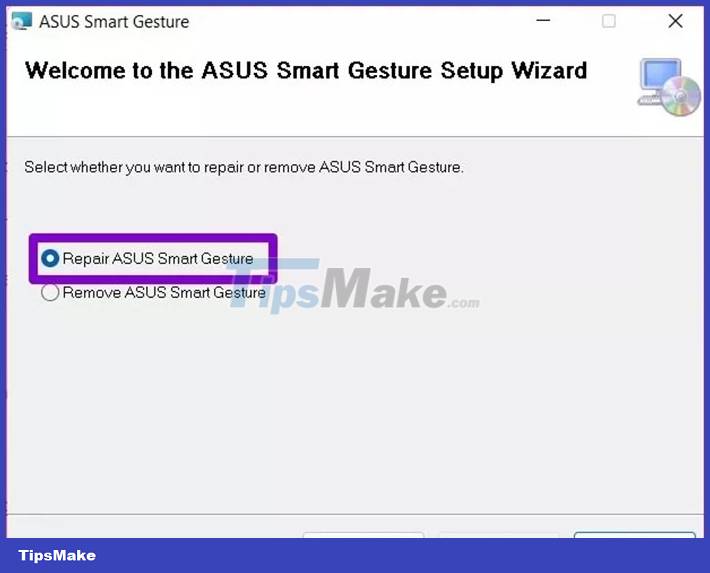
Update or reinstall the driver
If automatic updates are turned off on Windows, the drivers will become outdated and can cause touchpad errors. In that case, try manually updating the driver by following the steps below.
Step 1: Open the Start menu, type device manager and press Enter.
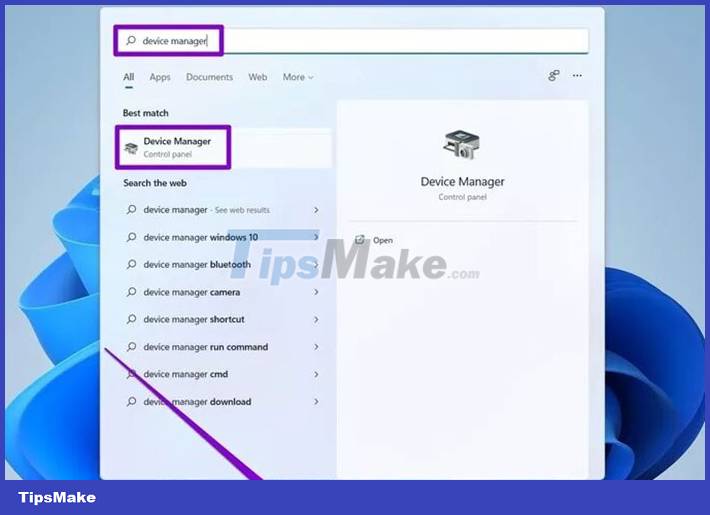
Step 2: Expand the Mice and other pointing devices section, right-click on your touchpad and select Update driver option.
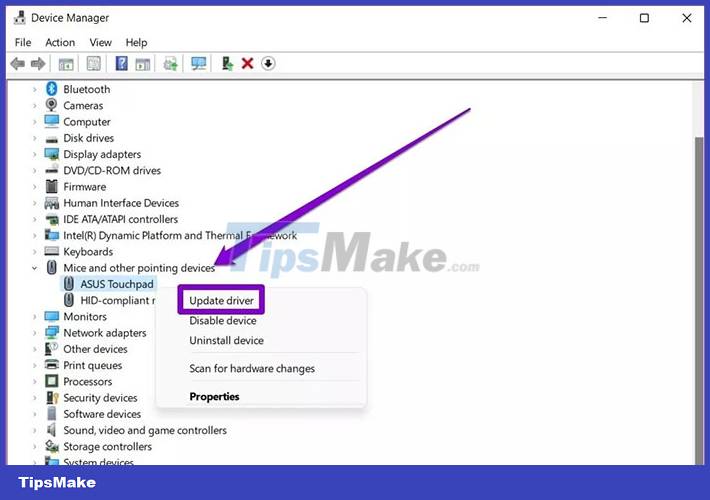
System recovery
Windows 11 has a handy feature called System Restore that performs a full system backup periodically. Such backups can be useful when there is a problem that cannot be resolved in other ways. Apply this method to return the touchpad to its original state in case of an error.
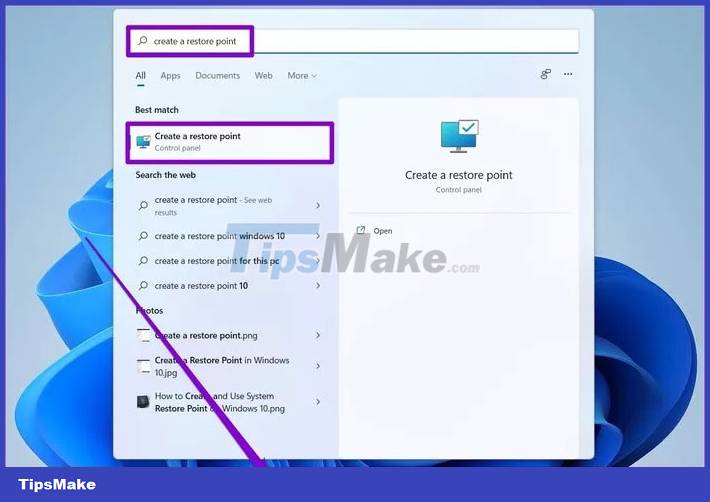
Step 1: Open Start, type create a restore point and press Enter.
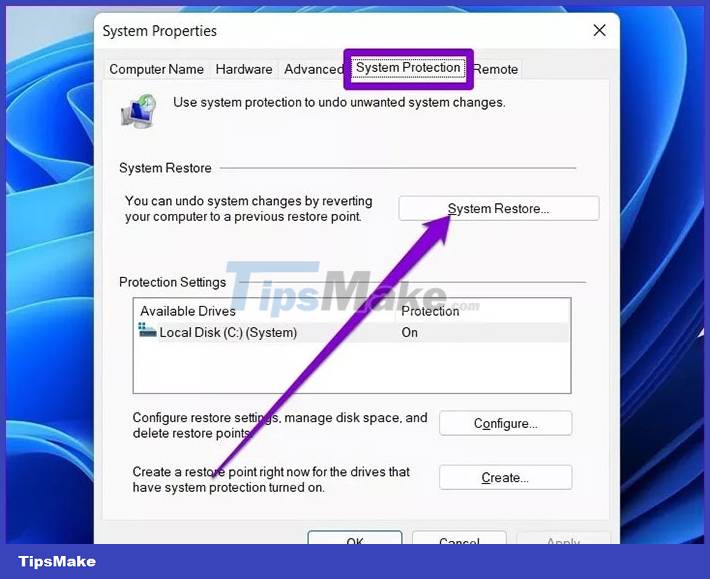
Step 2: In the System Protection tab, click the System Restore button.
Step 3: Users can use the suggested restore point or choose another one by themselves by tapping the second option.
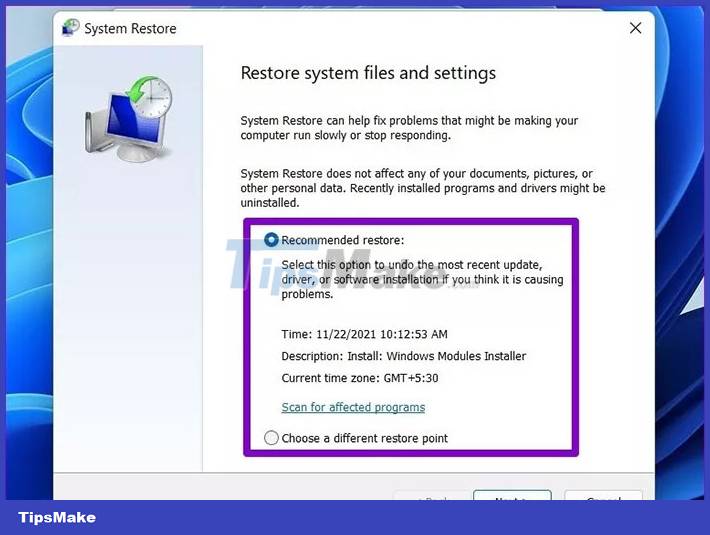
Select a restore point, click Next, and follow the on-screen instructions to perform a system restore.