Upgrade laptop hard drive to SSD
Network Administration - Do you want to speed up your laptop and extend battery life during use? Replace the laptop's hard drive with a high-speed SSD.
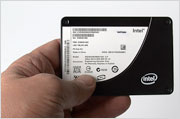
SSDs ( Solid-State Drive ) are currently in common use. Because SSDs do not have a lot of moving components, they can withstand shock better than standard hard drives - making them perfect for laptops. SSDs provide unbelievably high read performance, but the performance is a bit different; The process of writing data with small capacity can happen quite quickly, but with large blocks of data, the process can take longer than traditional hard drives.
However, upgrading to an SSD is not as easy as buying a hard drive and plugging it into your computer. So in this article, I will show you some tips for choosing the right model, make sure that it works with your setup, clone the old hard drive carefully and ensure the installation process. placed well done.
Basic about SSD hard drive
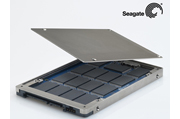
The main drawback of an SSD lies in its cost: in GB, SSDs cost a lot more than standard hard drives, hard drives with the old standard have been significantly reduced in price. Recent years. It's easy to find an inexpensive laptop with a 160GB, 250GB, or even 320GB hard drive, but a high-quality SSD with a capacity of 256GB will raise the price of your laptop to over $ 700. That's a pretty high price you need to pay to get this new hard drive, especially if the current laptop or netbook is a low-cost finished product.
SSDs have two main types: SLC (single-level cell) and MLC (multi-level cell). SLC SSD stores a bit of data on a flash memory cell, and the MLC drive stores two or more bits of data per cell. With that physical structure, MLC drives are slightly cheaper than SLC drives with the same capacity, because they need less physical flash memory components.
The disadvantages of MLC drives are lower access speeds than SLCs, but compared to conventional hard drives, they still provide much faster speeds. You can see SLC drives in data centers and workstation class environments, where more expensive costs will be mitigated by increasing productivity and reliability.
The SSD we selected as an example in this article is MLC with a capacity of 120GB, but you can choose for yourself the SSD type and capacity to match your needs most.
Is your laptop ready?
Before embarking on the implementation and replacing the hard drive, whether you like it or not, you need to consider whether your laptop is suitable for the SSD type. Here are some issues to keep in mind.
- Is your laptop running Windows XP ? If you have an old laptop with Windows XP operating system installed a few years ago, then it upgraded so SSD is not a good idea. While SSDs can work with Windows XP, the operating system is not optimized for SSDs like Vista, more specifically Windows 7. The latest Windows supports the TRIM command, which is a help to have. Optimized SSD performance. In general, you should not replace the hard drive of laptops running Windows XP with SSD.
- Does the laptop's BIOS support SSD? Some BIOS of old laptops do not work properly with SSD. However, there is no major rule to follow in that concern, so before you buy, do a web search on the PC model and SSD compatibility to see if other users have met must upgrade issues or not.
- Can your laptop upgrade ? Some older laptops do not allow to easily upgrade hard drives. This is especially true for some Macbook and Macbook Pro models. Therefore, it is necessary to ensure that the upgrade will not invalidate the warranty and require "major surgery" on your laptop.
If you have any doubts, be careful and check on online forums and other resources before making a replacement to the SSD. This technology is still very new, so backward compatibility issues have not been resolved completely.
There are many companies that offer more SSDs than standard hard drives, so you can choose from multiple models to find out which SSD is best for you. We recommend that you choose the manufacturer's SSD that is capable of producing flash drives, or have a separate engineering team for hard drive components.
In the following section, we will show you how to upgrade an existing netbook with a 250GB hard drive to an OCZ Apex 120GB SSD. The OCZ drive has a midrange capacity, MLC SSD lacks TRIM support, but its speed in the testing process is quite good.
See page 2
Prepare for an SSD
After determining which laptop is capable of managing the SSD, you need to follow some preparation steps to perform this conversion.
- If your laptop is running Windows Vista, update to Service Pack 1 . This version will improve the performance of Vista when running on SSD. Note that Windows 7 is still the best operating system for SSDs, but the ability to work with Vista is also quite good.
- Upgrade the system BIOS . This is a very important upgrade if your Windows installation is running in Advanced Host Controller Interface (AHCI) mode. AHCI mode will execute the NCQ command queue, which is an effective method of moving the reader to the disk locations in standard hard drives. But since SSDs do not have disks and no readers, NCQ may adversely affect performance issues on SSDs. However, the new driver and AHCI BIOS support have somewhat mitigated this effect.
- If your system is running in AHCI mode, change the BIOS hard drive access mode to IDE . However, this change is not always possible, sometimes you can get a blue screen if Windows is not set to boot from standard IDE mode. If this adjustment works, put your system in IDE mode.
- Check hard drive layout . You can do so by clicking Start, selecting Run, typing diskmgmt.msc to bring up the disk management panel. Most laptops that are running Windows Vista or Windows 7 will have an extra, invisible partition containing system recovery information; This partition is often used to replace a restored CD or DVD. Windows 7 systems also have the System Reserved partition, which contains Windows boot information and some other data using Windows 7 Ultimate's BitLocker encryption mechanism. These components only occupy a capacity of 100MB, do not consume much space. The problem is, however, that you need to leave the System Reserved partitions and recovery partitions hidden at their exact size - otherwise, the laptop may not boot properly.

- Backup data ! There are two types of users having problems with computer data: people with data are lost and people will lose data. This upgrade process will be safe, but whenever you make a change to the storage problem, it's best to backup your system first.
- Check hard drive capacity . You may be switching from a high-capacity hard drive to a low-capacity SSD. If the drive currently in use has the amount of data stored beyond what an SSD can provide, then you need to release some of your data. Backup files to an external drive or burn them to CD or DVD if you need that information.
Install SSD, step by step
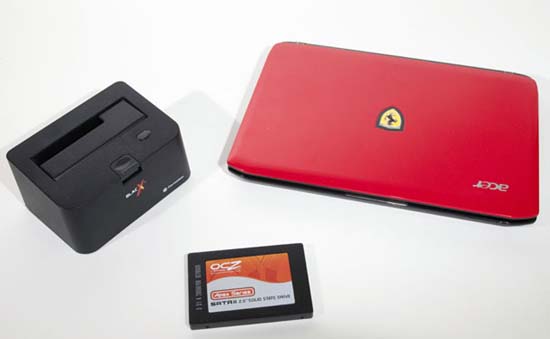
For this article, we upgraded a recent Windows 7 system, an Acer Ferrari One ultraportable laptop. Despite being assigned to this category of laptops, Ferrari One is just a negligible netbook in terms of performance. With an 11-inch screen, its size and light weight make it easy to navigate.
Since this is a portable laptop, it can be a bit more favored than bulky laptops of the same type, so we decided to replace the Toshiba hard drive with its 250GB capacity with the drive. OCZ Apex SSD has 120GB capacity.
Replacing a laptop's hard drive means removing the data from the old hard drive and transferring it to the new hard drive. With this job, you have a few options.
- Use an external hard drive with USB connection interface . Connect this external hard drive to your computer and then clone the old hard drive to the new hard drive via USB. (We will introduce the software to do that work later). After installing a new hard drive to your laptop, you can get the old hard drive and insert it into the USB drive, which allows you to use the old hard drive to backup or as a secondary drive.
- Use a third drive, create an exact copy image for the old drive and copy it as a data file to the external drive. Install a new drive and then perform the reverse process, copy the image file from the external drive to the new drive.
- Use an external drive to clone the disc (like Thermaltake BlackX shown in the image above), after the clone process is complete, replace it with the new hard drive.
Install Windows
In addition to the issues you need to consider with the hardware, you need to consider what software will help the conversion process is easy.
You can simply install Windows on a new hard drive, then copy it to all the data you have backed up first. (Only backup your data). This method feels like upgrading from Windows Vista to Windows 7.
It should be noted that recent laptops have fewer drivers and accessory CDs included, they often have hidden drivers in the recovery partition. However, the recovery partition is not useful when you want to change the operating system.
So you need not only data but also new diver. Although Windows 7 provides some of its own drivers for older hardware, you'll definitely have some software on your laptop that requires new drivers. If you decide to delete all Windows installations on your hard drive, make sure you download all the drivers - especially network drivers! If your plan is to upgrade the operating system and then download the rest of the driver, make sure your network hardware - whether wired or wireless - works.
If using this method, use the migration tool to transfer all data and applications. You can use Windows' own Windows Easy Transfer tool, or have a look at third-party tools like Laplink PC Mover.
See page 3
Software clone hard drive
If you don't want to change the operating system, the simplest way to upgrade the hard drive for your laptop is to use the hard drive clone tool. That's the way we did it to replace the experimental computer in the lesson.
Software that has been able to copy bit-bits for disk partitions has appeared in recent years. Utilities such as Norton Ghost, Acronis True Image, and even the free Drive Image XML utility are very useful utilities for creating backups as well as for hard drive transfers.
For the above example, we used Acronis True Image Home 2010, the utility is $ 50 and uses the professional version of True Image for cloning the hard drive.
You can use the 'drive-clone' tool in one of two ways. The first method is to create a bootable CD, then boot from that CD and run the software to copy the hard drive. The second method is to install the application in Windows, then clone the hard drive by running the software inside Windows. We used the following method because this method does not require adding an optical drive to the laptop.
Before starting the clone, install the Apex SSD into the Thermaltake hard drive dock, then plug the dock's power cord into the wall. Before booting the computer, plug the USB cable from the hard drive dock into one of the USB ports on the laptop. Then turn on ( turn on ) everything and wait until the USB is detected, then run True Image.
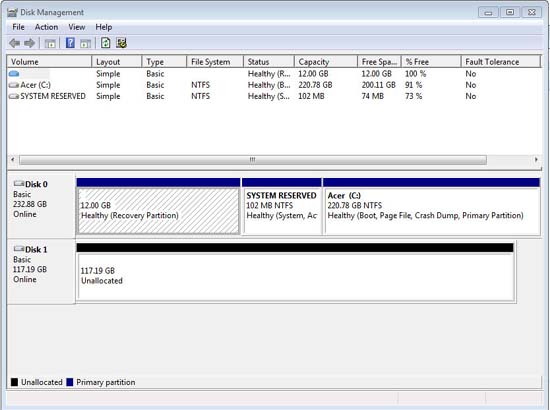
Looking at the layout of the hard drive (in the screen above), we learned that we need to keep the recovery partition at 12GB and the System Reserved partition is 102MB. Since the main partition is 220.78GB, we need to shrink. Luckily, the test laptop is a new system, so we only have 22GB of real data and applications on the hard drive, which means that there is no need to delete the data.
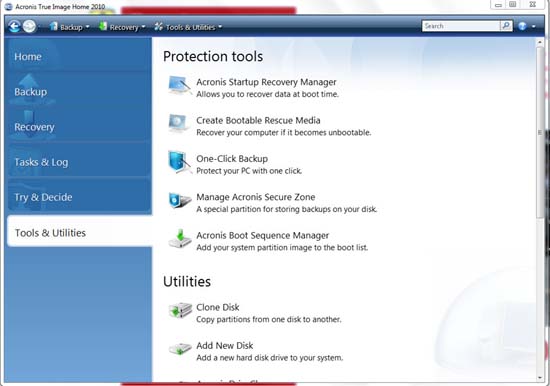
We installed True Image Home 2010 on our test laptop, then ran the application and selected ' Clone Disk '.
When an automatic or manual hard disk clone option appears, select the manual method for the reason why you want to manage how the three partitions will be clone.
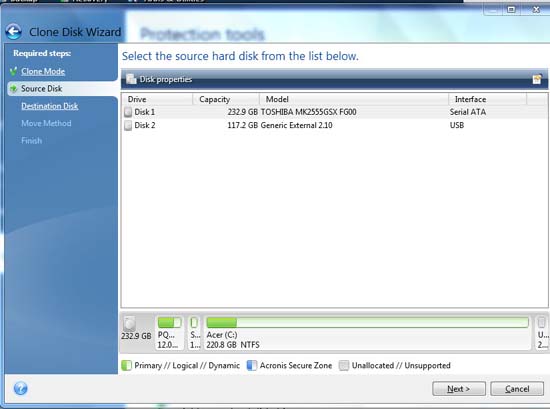
Then we select the source drive, which is Toshiba drive, with listed capacity of 232.9GB. You can see the layout charted at the bottom of the screen. Since we only connect two hard drives, OCZ Apex will become the target drive (destination).
Important note : Need to choose the right target drive. This is the most important part of the whole process. If you choose the following, you will be at risk of copying system settings, losing the operating system and all data!
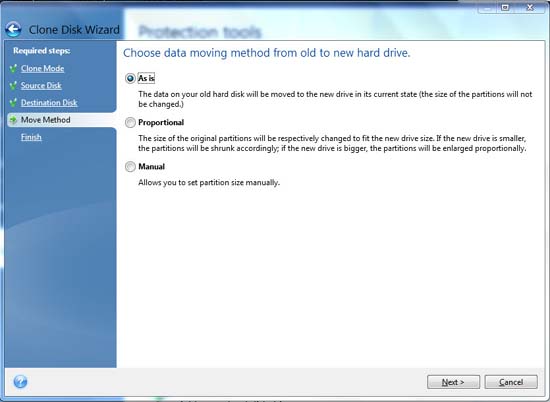
In the next step, select the transfer method. Since we want to keep the same partition size, choose 'As is' . With True Image Home 2010, this option is quite clever: it will create genuine copies of small partitions, including their size, but if you know that the main partition will be smaller and resize it to unity. In previous True Image versions, you need to manually select 'Manual' and the size in the partition size.
Then click ' Next ' - this time True Image will perform a hard drive integrity check, reboot the system and perform the clone process in DOS mode.
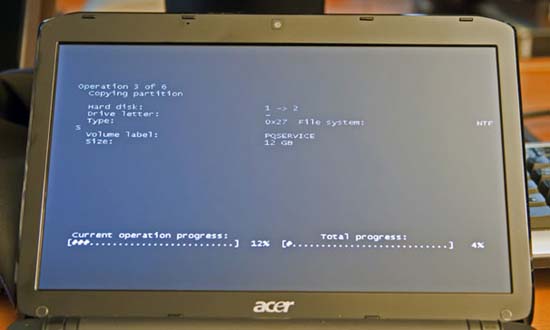
If you want, when doing a clone action, you can see the transmission process in progress.
See page 4
Replace the hard drive
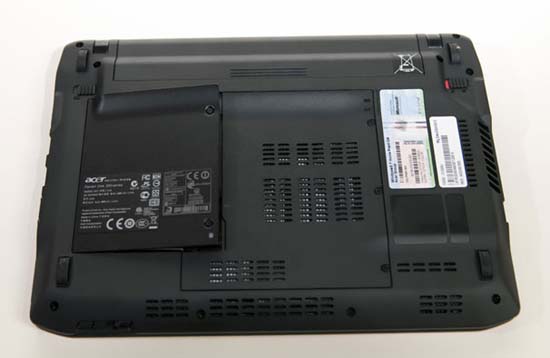
When the clone process is finished, let's do the work of replacing the hard drive physically. For different laptops, how to remove and install the hard drive will be different. The Acer computer we use has a hard drive underneath the panel that is easily removable, accessible by removing a few small screws.

You need to check your laptop meticulously and perform the removal and installation of the new hard drive with caution.
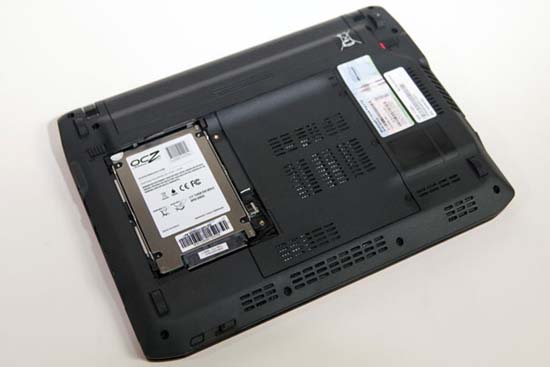
After installing the SSD, we start the laptop and wait. The laptop was tested in Windows 7 Home Premium operating system, and the results were pretty good.