Turn an old PC into a LAN Server with RouterOS - Part 1
In this article, I will show you how to use RouterOS software to take advantage of an old computer as a LAN server..
In this article, I will show you how to use RouterOS software to make use of an old computer as a LAN server, which can save a lot of costs compared to buying a new Cisco router.
RouterOS software has many useful features: routing, firewall, bandwidth management, wireless access points, backhaul links, hotspot gateway, VPN server, . Free 24-hour trial version will provide give you all functionality without a restriction. You must then purchase a subscription for a level that you use.
Unlike increasing control on the router, you can use the internal RADIUS server to authenticate Wi-Fi encryption in the enterprise. You can also use the VPN server to access remote files or use it to protect your connections at Wi-Fi hotspots. Another idea is to create a virtual SSID or VLAN to isolate visitor access. Whether you're working on a business LAN or want to improve your home network, this is what you can do.
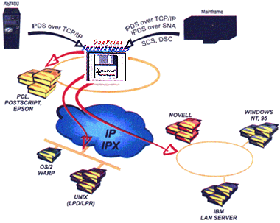
In this two-part tutorial, we will show you how to set up basic router properties, then you can experiment with other features. In part one, we will focus on hardware and software requirements, then install RouterOS on the hard drive. Next we will configure RouterOS with an Internet connection and set the IP address for the router. You will see how to use the remote PC GUI application to perform the rest of the configuration.
Start with RouterOS
You should first make sure you have all the hardware requirements. Although RouterOS can be installed on other platforms, we will install it on a regular PC (Intel / AMD 32-bit). To be able to run remotely or whatever, at least you still need a set of keyboards, mice and monitors during the installation process. You can then use WinBox or other remote administration utilities.
You also need to have some type of storage device (IDE, SATA, USB, SD, .) used for this installation. Before installing RouterOS, the program will automatically partition and format the drive, it will also create a default operating system. RouterOS requires a minimum of 64MB of free space.
Obviously, RouterOS supports many network adapters, such as new 10G Ethernet cards, 802.11a / b / g / n wireless cards and 3G modems. Normally you need to have at least two Ethernet cards: one to connect to the Internet and one to connect to the switch to provide additional ports for your computers.
Before starting, download the remote GUI configuration tool, WinBox, to another computer that can connect to RouterOS computers during the initial configuration process. In addition, you also need to download RouterOS ISO CD image and burn it to a CD.
Install on the hard drive
When you have completed the preparation steps, insert the CD into the CD drive and reboot the system. RouterOS will automatically load and enter the installation screen. Select the software package you want to install, then the I key. You can consider the following packages: system, lcd, dhcp, advanced-tools, routing, security, and hotspot.
Once the installation process is complete, you can log into the command line interface using the username admin and a blank password.
The first thing you should do is change the password by typing in the password and pressing Enter .
Next you need to label the interfaces (network adapters): can be ether1 and ether2 . On the main menu, type interface , press Enter , type monitor-traffic and test with the ether1 interface. You can then classify it by plugging a computer into each network adapter (to generate traffic) and see which adapter is currently active.
Page 2 : Configure Internet and Router IP settings
Configure Internet and Router IP settings
Just like when setting up a pre-set router, you must configure an Internet connection. The following sections will introduce you to several different connection types.
If you have an Internet cable or a connection that does not require specific configuration (a dynamic IP), then you definitely need only plug in the router and have Internet access. RouterOS does the same, but you must enable DHCP first. This feature is always enabled on pre-set routers. Here's how to enable it in RouterOS:
- From the command line, type setup and press Enter.
- Type d to make DHCP client settings.
- Make sure the correct name for the network adapter or interface is connected to the Internet modem and press Enter. You will then see some interface names when checking previous traffic.
If you have a static Internet IP address (advanced service) from a certain ISP, you don't need login information at this time, follow these steps to configure your connection:
- From the main menu, type setup and press Enter.
- Type a to appear IP settings and gateway.
- Type a to create a new IP address.
- Make sure the correct name for the network adapter or interface is connected to the Internet modem, then press Enter . You will see some interfaces when checking previous traffic.
- Type in the Internet IP address that you are issued by the ISP, followed by the '/' character and the netmask number, then press Enter (for example 209.165.155.124/20)
- Type g to set the Default Gateway.
- Type the IP of Default Gateway, assigned to you by the ISP and press Enter .
- Type x to exit the IP settings menu.
- Type x to save the changes you made and return to the main menu.
If you have a PPPoE or PPTP connection, such as DSL, type setup from the main menu and press Enter . It depends on which connection you have, type p or t and follow the prompts to enter the required information.
Next we will create an IP address for our router. This will allow the router to communicate on the network. It also gives you an address to use when connecting to the configuration utility. Follow the steps below to add IP information:
- From the main menu, type setup and press Enter .
- Type a to appear IP settings and gateway.
- Type a to create a new IP address.
- Make sure the interface is defined and press Enter . You will see the interface names when checking the previous traffic (ether1).
- Type in the IP address and the netmask is distinguished by a '/' sign and press Enter (for example 192.168.1.1/24)
- Type " g " to set the Default Gateway.
- Type the desired IP address, this is the address you just created, then press Enter .
- Type x to exit the IP settings menu.
- Type x to save the changes you made and return to the main menu.
WinBox configuration utility
Now that you have a RouterOS machine, you can use the WinBox program to configure settings instead of using the command line utility. Although it is a very simple program, this utility can provide quick and easy access to settings. The organized menus and settings are very similar to the console.
Plug the computer into the Ethernet adapter you designed for your local network. Then before creating a remote access connection to RouterOS, you must configure your computer's network card with a static IP address within the IP address created for RouterOS. For example, you can use the 192.168.1.115 address if the router's IP is 192.168.1.1.
Now to connect, open WinBox, type in the IP address created for RouterOS, enter the login information and click Connect.
Conclude
In the next part of this series, I will show you how to configure the router so that users can connect to the Internet.