Transfer from Linux Mail Server to Exchange Server 2007 (Part 2)
In this article we will create an email address policy to apply to new users and will create users based on the Linux passwd file.
 Transfer from Linux Mail Server to Exchange Server 2007 (Part 1)
Anderson Patricio
In this article we will create an email address policy to apply to new users and will create users based on the Linux passwd file.
Create an email address policy
We have some Linux distribution and MTA (Message Transfer Agents), in this article we will transfer from Postfix to Exchange Server 2007. Each MTA has different configuration files but most of them use passwd file. and alias to collect information about the current network environment. One of the information we need to know is how the current name scheme is being used. If they have the format FirstName.LastName@domain.com or FirstLetterFirstName+LastName@domain.com , your job will be a little simpler because we will use this naming scheme in Exchange Server 2007 before creating New mailboxes. If there is no standard after creating users, we need to validate each user to ensure that the email address is appropriate for the environment.
Before creating the email address policy, we need to configure Exchange Server 2007 to accept the external domains configured in the Linux box. To configure Accepted Domains in Exchange 2007, follow the steps below:
- Open the Exchange Management Console.
- Open Organization Configuration.
- Click Hub Transport , and then click the Accepted Domains tab.
- In Toolbox Actions, click N ew Accepted Domain
- Add a name for the new domain and fill in the Accept Domain field with the extension name (eg apatricio.ca) and click New , as shown in Figure 1.

Figure 1: Add accepted domains, all domains have been configured
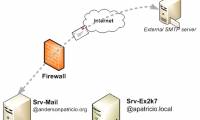
The Linux box must be added to Exchange Server
- Click Finish
Now, create an email address policy to print to the correct SMTP address on the user later:
- Open the Exchange Management Console.
- Open Organization Configuration, and click Hub Transport .
- Click Default Policy and Edit in Toolbox Actions
- Introduction . Just click Next
- Conditions . Click Next
- E-Mail Address . Click Add and we can set the new SMTP address format to be used by new users. Select the format that is being used by the Linux box and select the accepted domain list by selecting the domain you just created. Click OK . See Figure 2.
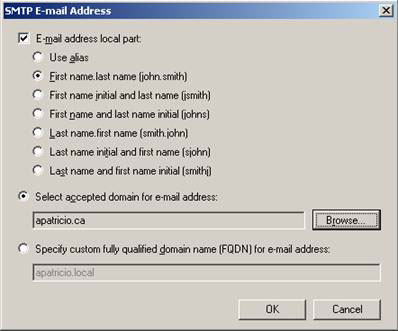
Figure 2: Add a new SMTP address format to be used in mailboxes.
- E-mail Address . We can add more SMTP formats but only need to use one Reply Address (Figure 03). Click Next
Note :
We can create multiple name schemas to better fit into the current environment, completely beneficial if there are multiple standards in our environment.
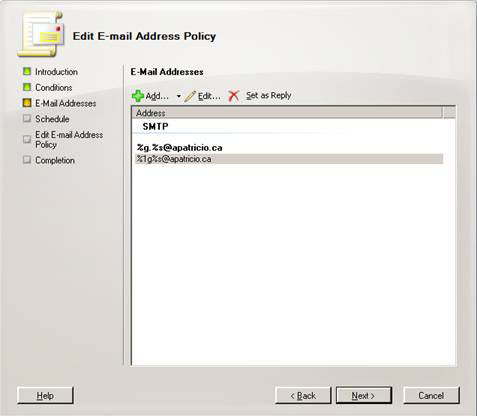
Figure 3: Defining the email address policies that will be applied to the mailbox.
- Schedule . Accept the default values and click Next .
- Edit E-mail Address Policy . Click Edit.
- Completion . Click Finish.
Now all users will receive an SMTP address that matches the new email address policy. We must ensure that the SMTP addresses of the current Linux users will be the same in the new mailboxes.
Create Active Directory users
We will use PowerShell to create all Active Directory users and mailboxes, using a file with all usernames being used in Linux.
- Copy the passwd file placed on the / etc / passwd path from Linux to any environment that has Excel installed.
- Rename passwd to passwd.csv and open it with Wordpad
- Click Edit , Replace and in the Find what field write ':' in the Replace with field with ';', and then click Replace All.
- Save the file and close it.
- Now open the passwd.csv file that you just edited in Microsoft Excel.
- Please clean the file to be usable by Powershell. Linux has a group of system accounts and we don't want these users in our Active Directory? Therefore all regular users have a uid (User ID) of 500 or higher. Now we can remove users with a uid (third column) lower than 500. It is also necessary to copy these changes in the passwd.csv file with Excel.
- After using the uid information to remove unnecessary users, we can remove all columns that will not need to be used in Active Directory such as passwords (column 2), uid (column 3), guid ( column 4), dir and shell columns.
- Click right on line 1, click Insert to create a new blank line above.
- At the top of each column is the title that describes that column. We will use it to create users, mailboxes and other information for new user accounts. In this example, we will create columns with the following headings: UserName, DisplayName, FirstName, LastName, Office, OfficePhone and HomePhone to match the information we have in the passwd file of Linux.
The CSV file after cleaning will look like the one shown in Figure 4 below
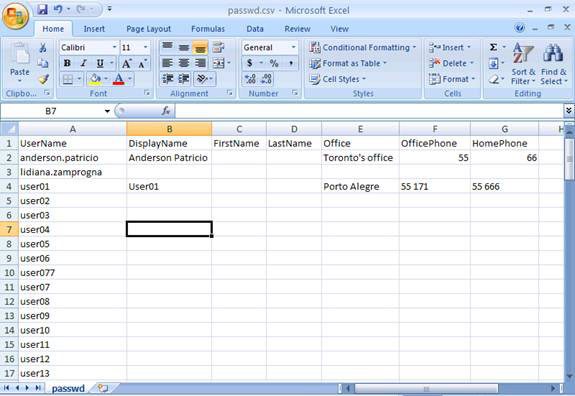
Figure 4: CSV file after cleaning up again
Now we can fill in the CSV file with user information and create additional columns to import into Active Directory (Figure 5).
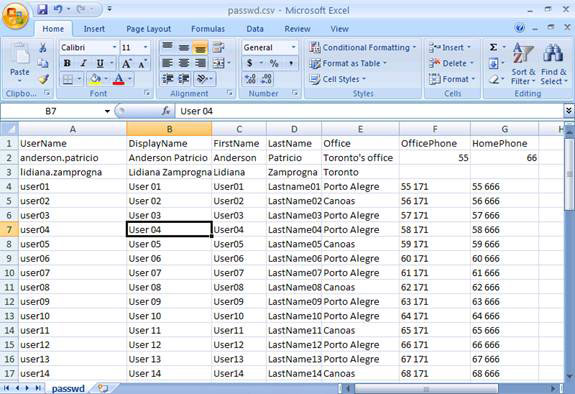
Figure 5: Final CSV file with all current user information retrieved from the Linux box.
We have built the CSV file, this is the time to create users through Powershell.
- Copy the passwd.csv file into C: in Exchange Server
- Open Exchange Management Shell.
- Import CSV into a variable with the cmdlet below:
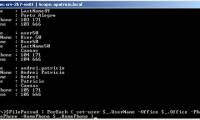
$ FilePasswd = Import-Csv C: passwd.csv - To validate the content of the $ FilePasswd variable (Figure 6), type:
$ FilePasswd
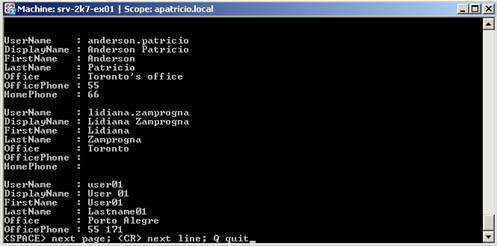
Figure 6: Contents of the $ Passwdfile variable
- Create an OU (OrganizationUnit) to create new users. In this article we will use an OU named Postfix Users.
- We must define the initial password for the new accounts to be created through PowerShell, then type in the following cmdlet:
$ Password = Read-Host 'Password' –AsSecureString
We will be asked for a password. It is recommended to use an easy-to-use password for all new accounts. The user will use this password for the first login to Active Directory. We must declare all users about this initial conversion and password process.
- Now that all the requirements for creating users are finished (Figure 7), we can create mailboxes with CSV files imported through the $ FilePasswd variable and the columns defined in Excel with the item destination validated with the parameters used. The following table can be used to create the cmdlet during user creation:
Cmdlet parameter
The variable will be used
$ FilePasswd
CSV file has been ipmort (step 3)
$ UPN
Each line reads the variable $ FilePasswd will add the Username extension @ apatricio.local. We have to change the domain name FQDN currently used during AD deployment.
-Alias and -Name
$ _. UserName is the Username column of the CSV file
-UserPrincipalName
It will be the value of the variable $ UPN for each user
-DisplayName
$ _. DisplayName is the DisplayName column in the CSV file.
-FirstName and -LastName
$ _. FirstName and $ _. Lastname are the FirstName and LastName columns respectively in the CSV file.
-Database
Database that new users will create, to validate the mailbox database we can use run Get-MailboxDatabase.
-OrganizationUnit
The OU where the new users will be created.
-Password
$ Password was created in step 6
ResetPasswordOnNextLogon
$ True. All users after first logging in AD will be asked to change the password.
Table 1
In this article, the following cmdlet will be used:
$ FilePasswd | ForEach {$ UPN = $ _. UserName + 'apatricio.local'; New-Mailbox –Alias $ _. UserName –Name $ _userName –UserPrincipalName $ UPN –DisplayName $ _. DisplayName –FirstName $ _. FirstName –LastName $ _. LastName -Database 'srv-2k7-ex01mailbox database' –OrganizationUnit 'PostFix Users '–Password $ Password –ResetPasswordOnNextLogon $ true}

Figure 7: Create new users via PowerShell cmdlet
Now we can open the Exchange Management Console to see the newly created mailbox (Figure 8).
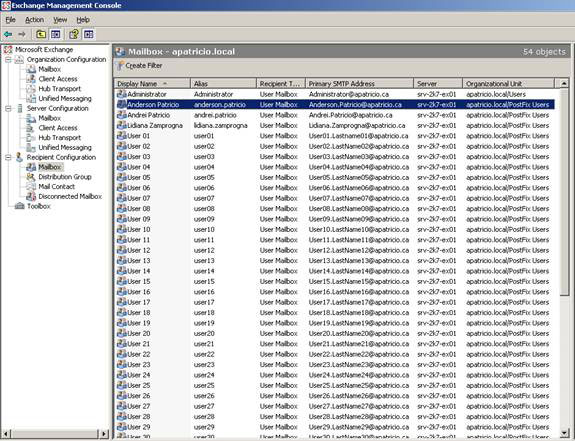
Figure 8: New users created
In the above process, we created all users from the Linux passwd file. If you are using an alias file, you need to upgrade those email addresses in the current environment. If there is only a small number of email addresses in the alias file, your work can be done manually, but in some cases it is possible to use the script to add a secondary SMTP address. .
Conclude
In this article we have defined your email policy to validate with the current policy being used in the Linux Box. We have also created all users in Active Directory and Exchange Server with the same source as the Linux passwd file.
 Transfer from Linux Mail Server to Exchange Server 2007 (Part 3)
Was this article helpful?
Your feedback helps us improve.
Related Articles
 Transfer from Linux Mail Server to Exchange Server 2007 (Part 1)10 minutes read
 Transfer from Linux Mail Server to Exchange Server 2007 (Part 4)10 minutes read
 Transfer MDaemon to Exchange 2007/2003 (Part 2)10 minutes read
 Transfer MDaemon to Exchange 2007/2003 (P.7)8 minutes read
 Transfer Exchange 2003 to Exchange 2007 (Part 2)9 minutes read
 Transfer from Linux Mail Server to Exchange Server 2007 (Part 3)10 minutes read
Reader Comments 0
Sign in with email or Google to join the discussion.