The easiest way to install CCTV via network
TipsMake.com will guide you how to install the most simple and detailed network camera..
More and more households, shops, businesses install CCTV to ensure security. So how to install CCTV over the network ? Is it difficult to implement? Please help TipsMake.com solve all these problems!
Instructions on how to install CCTV via home network
Tools to prepare
A complete CCTV system needs the following tools:
- CCTV
- Video recorder (with the number of channels corresponding to the number of observation positions).
- Hard drive storage
- TV screen or computer screen (if you need to display and observe on the spot)
- Power source for the camera (should choose 12V / 2A source with stable IC).
- Power cord, signal cable, image cable (HDMI or VGA cable).
- Connector set connects camera to recorder (BNC jack and lock F5).
- Network cable (RJ-45 pre-press or self-press)
- Electric tape, plastic sheet, pliers, drill, screwdriver, A-ladder, millet, screw, double-sided tape, plastic splint.
How to install cheap surveillance cameras at home
Step 1: Check the camera and recorder.
- Make connector head (BNC jack and lock F5) for a short piece of wire to test on the camera for each camera.
- Power the recorder, connect the recorder to the TV screen via HDMI.
- Powering the camera (if you cover your infrared sensor with your fingers, the led arrays light up means you have successfully powered the camera).
- Connect the camera head to the recorder and check the camera image on the TV screen. If the image shown on the TV screen is correct, stable, not infected or haunted, it is okay.
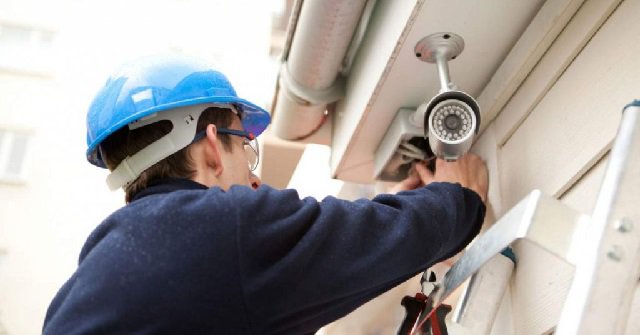
Step 2: Locate and install cameras and recorders
The location selected for camera installation should ensure the following requirements: The best observation angle, which can cover the entire area and the direction to be observed; without being backlit, uniform light is equivalent to the area to be observed; less affected by weather like sunshine and rain.
Use a drill and screw to screw the camera stand and recorder. If you want to control the display, it is necessary to place the front of the recorder so that the infrared eye is outward to receive the signal from the remote. In case you do not need to display the image on the screen but just watch it over the network, you can install the entire recording head in the hidden position. In addition, the recorder should be installed near the network modem to be easily connected to the internet.
Select the appropriate camera mounting location
Step 3: Signal wire, power cord for camera.
- The installation distance usually depends on the type of camera, camera technology. For example, old analog cameras have an installation distance of less than 100m, new technology cameras such as AHD, HD-CVI have installation distances of 300-500m.
- Persons who install CCTV should rely on the actual situation to guess the line to ensure aesthetics, save wire and have to drill the wall as little as possible.
- Conducting the spreading of signal wires for the entire camera system, termination terminals at the position of the recorder. Note, when wiring, you should spread the wire a little to prevent the bends leading to the lack of wires.
- Using drawstring, electrical tape to withdraw and bundle all the signal cable segments to go together.
- Locate where power may be available to supply the camera. This position must be a technical location, ensuring that the power is always available and should avoid the position behind the switch, the power outlet.
- Laying the power cable to power the camera, it is best to go with the signal cable system to enhance the aesthetics.
- Using duct tape, fixed plastic strip of cable.

Ensure the aesthetics when signaling, power cord for camera
Step 4: Connect the signal cable and power cable to the camera
- Make the BNC connector at the top of the signal cable, then wrap it tightly with tape to prevent water from getting into the connector.
- Connect the signal cable at the two ends of the cable, one end to the camera, the other end to the connection port behind the recorder.
- Turn off CB total power and then connect the power source for each observation camera. Covering the infrared sensor with your hand, if the infrared light is red, it means the camera is powered.
Step 5: Connect the recorder to the screen
Connect the recorder to the display screen and check whether the CCTV cameras are functioning properly. If any camera has not been shown, the image is disturbed, then the camera installer should check the cable and the connector.
Step 6: Fixed the entire cable line, cleaning installation area.
Step 7: Configure the CCTV system to view over the internet
Dynamic domain name configuration - DDNS: To be able to access the CCTV system, you need to configure dynamic domain name - DDNS. The dynamic domain name system will automatically update whenever the router moderm changes the IP address. Therefore, just remember the dynamic domain name, you can access and view the camera system. Steps to configure dynamic domain names:
- Register DDNS service with service provider (can register at sites such as DYNDNS, NO-IP, .).
- Initializing the Host needs to use DDNS.
- Configure the HOST, recorder or moderm parameters to update the dynamic IP.
Configuring NAT PORT : After successfully configuring DDNS, you need to switch to the Forward Port (NAT PORT) step to record to the internet. You can configure NAT PORT by one of two ways:
Method 1: Disable the firewall and add the IP address to the DMZ recorder
First, you need to make sure the recorder is connected to the Moderm with a network layer. You can PING check the IP record then ADD the recorder to the DMZ area. This is the simplest way but there is a risk of hackers attacking.
Method 2: FORWARD is exactly the PORT of the recorder.
You do not need to turn off the Firewall but just forward the correct ports of the recorder to the internet. This way will be able to better secure the system.
Notes when installing CCTV via network
Thus, we have come together to learn how to install CCTV over the network. However, for the most successful installation, you should note the following:
- Do not forget to check the quality of CCTV and recorder: Many people often skip the test of CCTV and recorder (ie step 1) because it is not really necessary. However, that is a wrong view. Surveillance cameras and recorders may experience technical errors when purchased. Testing will help you detect this error early and work with your provider.
- You should not choose a completely darkened installation area so that the camera can view the area with full light or place the camera in an outdoor position to observe areas with little or no light. Because in those cases, the infrared part of the camera will have to switch continuously, affecting the image quality.
- Surveillance cameras often have large transmission capacity so you should choose the good transmission cables to ensure the system works stably and smoothly.
Hopefully after our article, you will know how to install CCTV over the network. Visit META.vn for advice and order quality and cheap wifi cameras.
>>> Maybe you care:
- How does night vision camera work?
- What to consider when buying surveillance cameras for families
- What is ip camera? Which IP camera is good?
- How to set up security cameras that can be accessed remotely
- How to use the old smartphone as an anti-theft surveillance camera