Setting up Wi-Fi authentication in Windows Server 2008 - Part 1
Why does the enterprise use the Enterprise mode of WPA / WPA2 encryption with 802.1X authentication for their wireless networks and set up Windows Server 2008 to work as a RADIUS server.
Network Administration - Why does the enterprise use the Enterprise mode of WPA / WPA2 encryption with 802.1X authentication for their wireless networks and set up Windows Server 2008 to work as a RADIUS server.
If you are implementing a Wi-Fi connection in your corporate network, you should use the Enterprise mode of Wi-Fi Protected Access security (WPA or WPA2) - preferably WPA2 with AES encryption.
This Enterprise mode uses 802.1X authentication, which is the authentication type that provides unique encryption keys for each user session. Personal mode uses Pre-Shared Key (PSK) pre-shared keys, which are static encryption and are not secure enough for businesses or organizations.
The Enterprise mode of WPA / WPA2 has several important advantages:
- End users can log in using the username and password of their domain account if you use Active Directory. You can change the login credentials as well as revoke a user's access. If using Personal mode, people will login with the same static encryption key. So if a laptop is stolen, you need to change the encryption key for all other clients - with Enterprise mode you will not encounter this.
- This mode allows for better encryption key security. Personal mode PSK is easy to guess by brute-force dictionary attacks.
- End users will securely receive unique encryption keys for each session. For example, other employees cannot interfere with other people's wireless traffic like in Personal mode.
- This mode supports better VLAN networks. You can grant a wireless network (SSID) to all users, including employees and customers. It is possible to assign users different VLANs in the RADIUS server and place them in an assigned VLAN when they connect wirelessly.
The only problem with Enterprise mode is setting up the Remote Authentication Dial In User Service (RADIUS) server and configuring the clients. This job requires a lot of time (and more money if you don't have a Windows server) in the server settings and configuring wireless access points (APs). In addition, Windows does not allow easy connection with these types of networks, so you must rely on the help of qualified people.
As you might expect, the Windows server now has a RADIUS server function that allows 802.1X authentication. Therefore you do not need to buy a RADIUS server separately or need to learn about open source server products like FreeRADIUS. Windows Server's RADIUS functionality was previously mentioned in many Windows Server 2000 and 2003 versions, so in this article we will introduce its use in Windows Server 2008 version.
Starting with Windows Vista and Windows Server 2008, Microsoft introduced a new feature called Network Policy Server (NPS). Microsoft Network Policy Server (NPS) feature allows you to enforce health policies for clients according to the features or settings below:
- Internet Protocol security (IPsec) communication
- 802.1X authentication connections
- VPN connection
- Configure Dynamic Host Configuration Protocol (DHCP)
- Terminal Services Gateway connections (TS Gateway)
NPS also replaced and Internet Authenticate Service (IAS) integration included in previous versions of Windows Server. If you are interested in all the NPS features of Windows Server 2008, refer to the article in English here.
Notes and requests before implementation
In this tutorial, we will only set up the NPS RADIUS function. We will use Extensible Authentication Protocol (EAP) —Protected EAP (PEAP) in detail. To enforce 802.1X authentication, you need a server security certificate. Users log in with the username and password of the accounts defined in Active Directory on Windows Server.
Note that you need a wireless controller or an AP configured with a static IP address. Then you need to create an entry in Windows Server for each AP with its IP address and shared secret.
Make sure that you have performed the initial configuration of Windows Server 2008. Set up the time zone, connect to the network with a static IP address, name the server, enable automatic upgrade, install upgrades levels available.
You also need to have an Active Directory Domain setup. Make sure that the Active Directory Domain Services role is enabled and you have configured it with the dcpromo.exe utility.
Install the Certificate Services role
To use the PEAP protocol, you must install the Certificate Services role. Role Certificate Services allow you to create a Certificate Authority (CA) to assign the required certificate at the server. Here the client can validate the server before sending its login credentials.
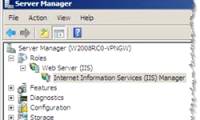
In the Initial Configuration Tasks window, find Add roles and click it. If you have closed or hidden this window, click Start> Server Manager, select Roles, click Add Roles.
Select Active Directory Certificate Services (see Figure 1), click Next .

Click Next on the screen. Then select the Certification Authority role and the Certificate Authority Web Enrollment. When you see the prompt (see Figure 2), click Add Required Role Services . Then click Next to continue.
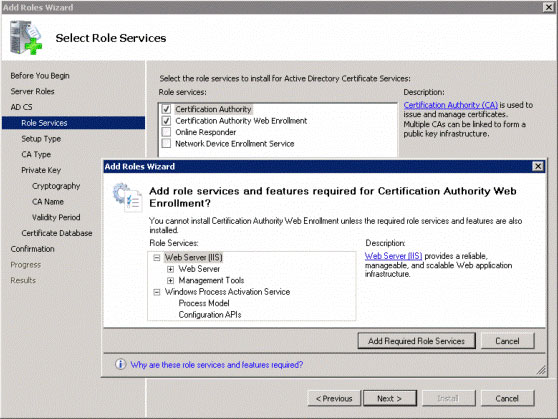
Figure 2: Configuration by adding role services
Select the Enterprise type (Figure 3) and click Next .
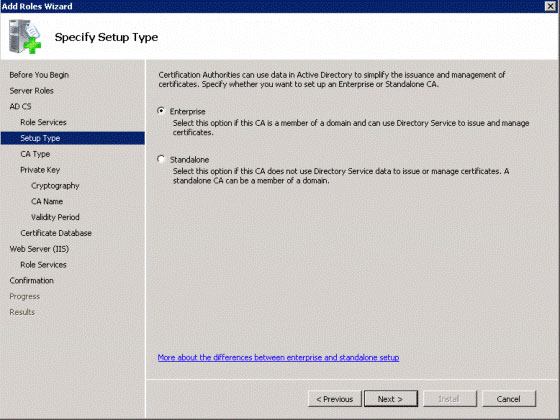
Figure 3: Select Enterprise type
For CA type, select Root CA (see Figure 4), click Next .
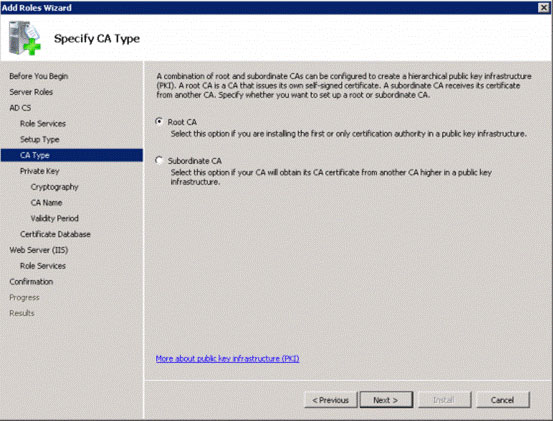
Figure 4: Select Root CA
With the Set Up Private Key option, select Create a new private key (see Figure 5), click Next .
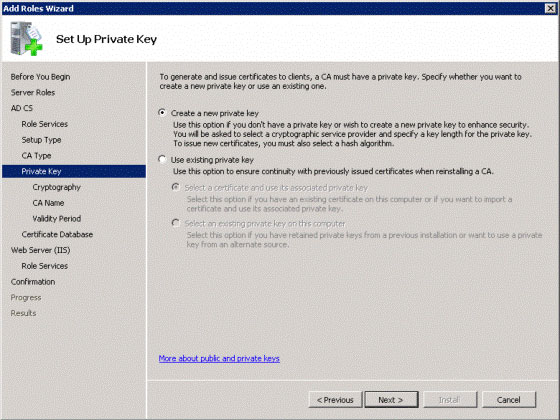
Figure 5: Creating a new private key
Use the default options to encrypt the CA (see Figure 6) and click Next .

Figure 6: Continue by accepting the default values
If necessary, you can change the CA settings (see the example in Figure 7), click Next . However, for security reasons you should use the FQDN as a generic name. To distinguish the certificate, you should put -CA at the end of the name.
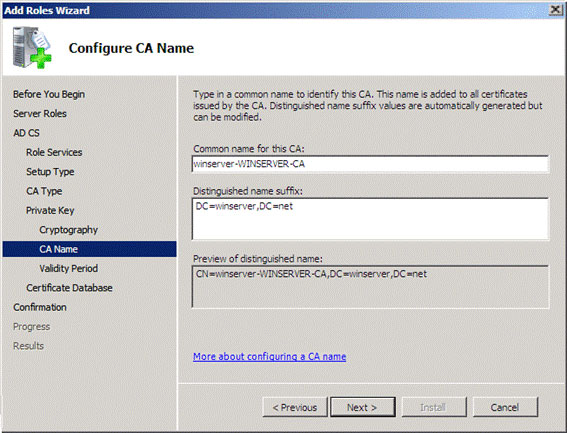
Figure 7: Select the CA name
For valid time, you can extend this time by up to 5 years (for example, up to 20 years as shown in Figure 8), this way you will not have to renew or re-create the certificate. Click Next to continue.
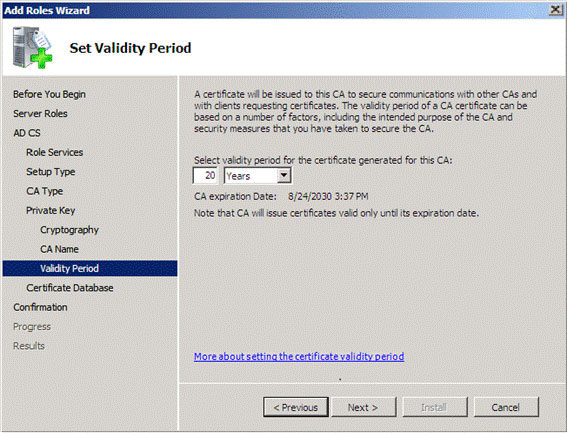
Figure 8: Increase valid time
Use the default certificate database locations (see Figure 9) by clicking Next .
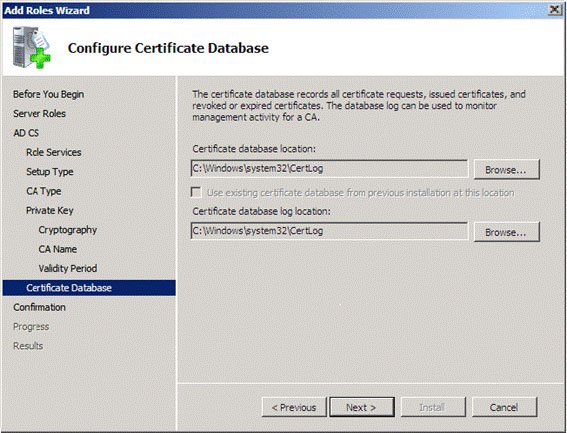
Figure 9: Continue to accept the default location
Refresh the Introduction to IIS and click Next .
If you want, you can change the installed roles and click Next .
Refresh the settings and click Install .
Request a certificate
Now that you have set up CA, there is a certificate required by PEAP for the authentication server. First you have to create Microsoft Management Console (MMC): Click Start , type MMC and press Enter .
On the MMC window, click File > Add / Remove Snap-in .
Select Certificates (see Figure 10), click Add .
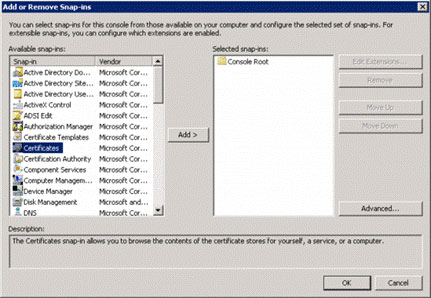
Figure 10: Add the Certificates snap-in
Select Computer account , click Next .
Select Local computer , click Finish and click OK .
Tips:
You can save this MMC on your desktop for easy access: click File > Save .
Open Certificates (Local Computer Account) , open Personal , right click Certificates and select All Tasks > Request New Certificate (see Figure 11).
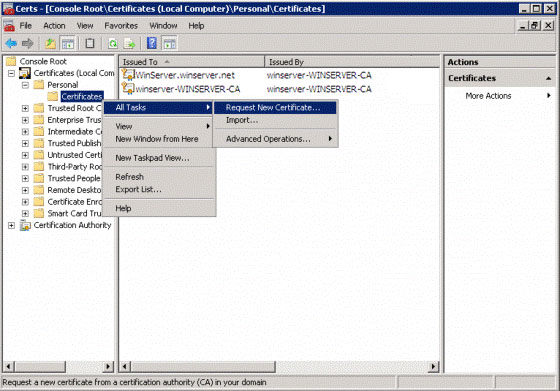
Figure 11: Request a new certificate
In the info window, click Next to continue.
Select the Domain Controller , click Enroll . After successful, click Finish .
Conclude
In this article, I have explained how the Enterprise mode of Wi-Fi Protected Access along with 802.1X authentication can secure wireless networks. After performing initial configuration for Windows Server 2008 and setting up Active Directory, we installed Certificate Services to create CA. Then issued the certificate.
In the next part of this series, we will continue installing Network Policy and the Access Services role, configuring wireless controllers or APs, configuring client computers.
Was this article helpful?
Your feedback helps us improve.
Related Articles
 Set up Wi-Fi authentication in Windows Server 2008 - Part 211 minutes read
 Instructions for using FreeRADIUS for Wi-Fi authentication - Part 110 minutes read
 Setting up a VPN server on Router Tomato - Part 18 minutes read
 Instructions for setting up and managing FTP Server on Windows 108 minutes read
 Installing and configuring the 2004 ISA Server Firewall - Chapter 38 minutes read
 Configure Windows Server 2008 to remotely access SSL VPN Server (Part 2)18 minutes read
Reader Comments 0
Sign in with email or Google to join the discussion.