Table of Contents
“This site can’t be reached” is a general Chrome message. The small error code underneath it is the useful part: DNS errors, timeouts, refused connections, and unreachable addresses have different causes. Start with checks that do not change system settings, then escalate only if several websites fail.
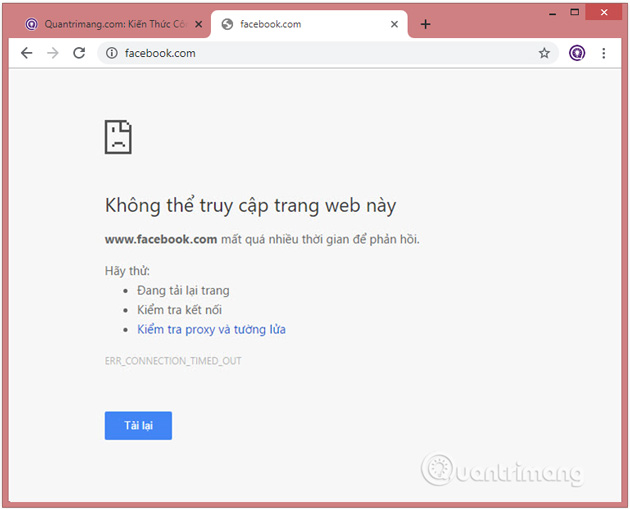
Read the error code first
DNS_PROBE_FINISHED_NXDOMAINorERR_NAME_NOT_RESOLVED: the hostname did not resolve; check the address and DNS.ERR_CONNECTION_TIMED_OUT: traffic is not completing; the server, route, VPN, firewall, or network may be responsible.ERR_CONNECTION_REFUSED: the destination actively refused the connection or nothing is listening at that address.ERR_ADDRESS_UNREACHABLE: the device has no usable route to the address.ERR_SSL_*: troubleshoot the clock, certificate, interception software, and site configuration; changing DNS may not help.
1. Check whether the problem is the site, Chrome, or the network
- Check the URL for spelling, an incorrect subdomain, or an extra character.
- Open a different known site in Chrome.
- Open the same URL in another browser and on another device.
- Try another authorized network, such as mobile data. Do not use this to bypass workplace, school, parental, or legal restrictions.
- Restart Chrome, then the computer and router if several devices are affected.
If only one site fails on every device and network, the site may be down, misconfigured, region-limited, or no longer available. Contact its operator rather than repeatedly resetting your computer.
2. Review Chrome Secure DNS
Open Chrome’s menu and choose Settings. Search for DNS.

Open Privacy and security > Security.
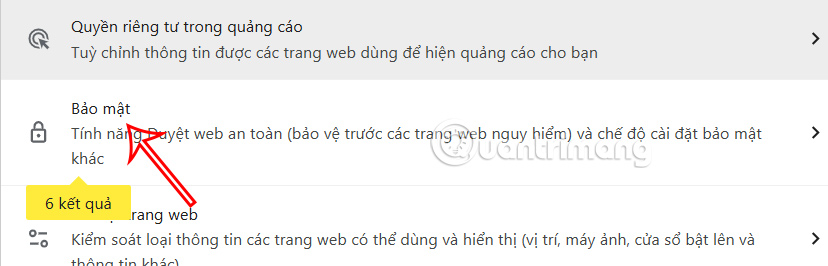
Find Use secure DNS. Try the current service provider first.
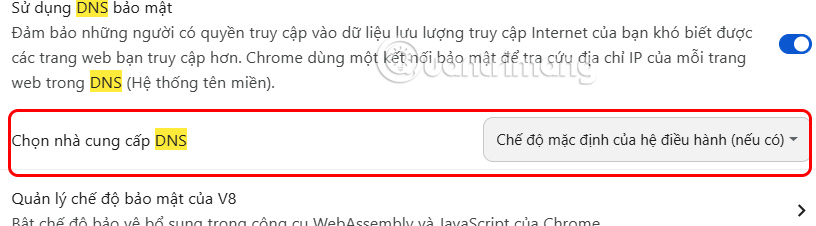
If policy permits, temporarily choose a reputable provider from Chrome’s list and retry. A different DNS resolver can fix a resolver failure but cannot legitimately remove access controls or repair an offline server.
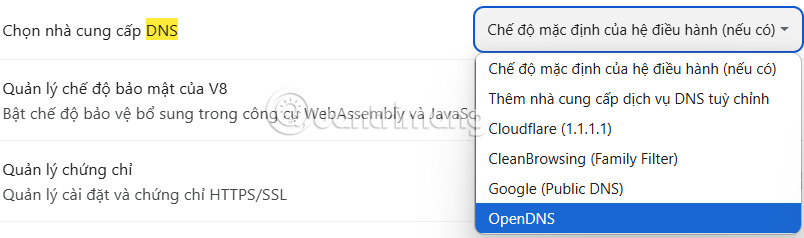
On a managed device, the setting may be locked. Do not install a random DNS or VPN extension to work around organization policy.
3. Flush the Windows DNS cache
Open Command Prompt and run:
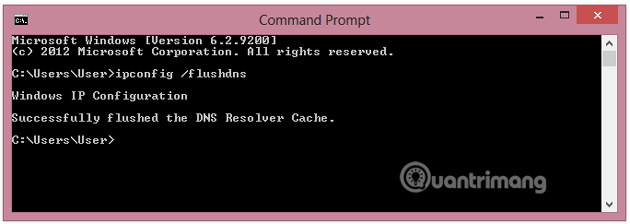
ipconfig /flushdns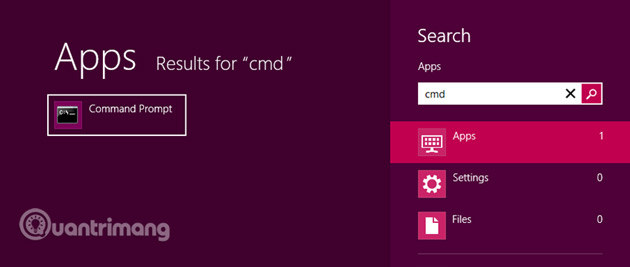
A success message confirms the local resolver cache was cleared. Reopen the site.
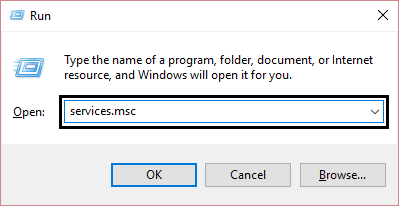
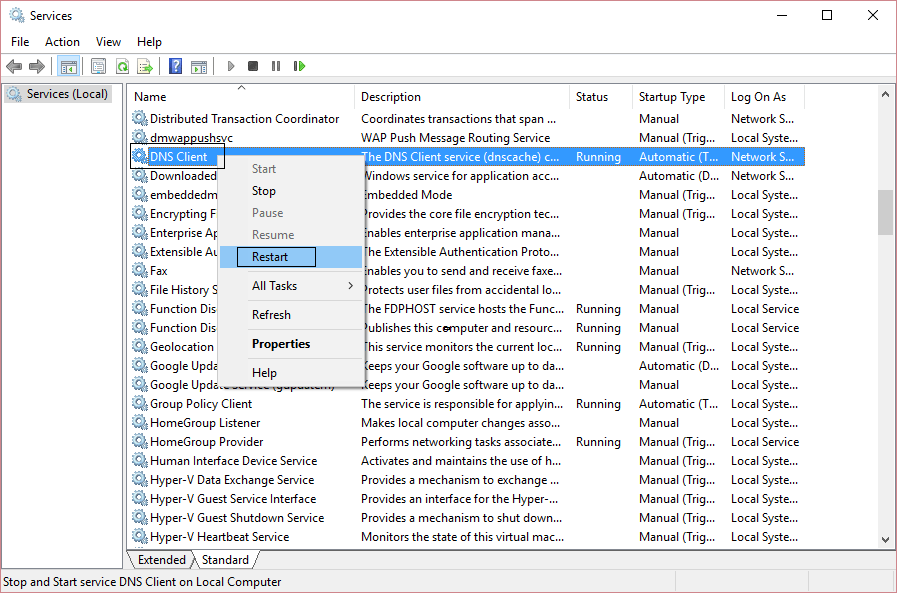
Restarting the Windows DNS Client service is rarely necessary and may be blocked by the system. The older Services workflow is shown below for context, but flushing the cache or rebooting is safer for most users.
4. Check system DNS settings
Open the properties of the active network adapter and select Internet Protocol Version 4 (TCP/IPv4).
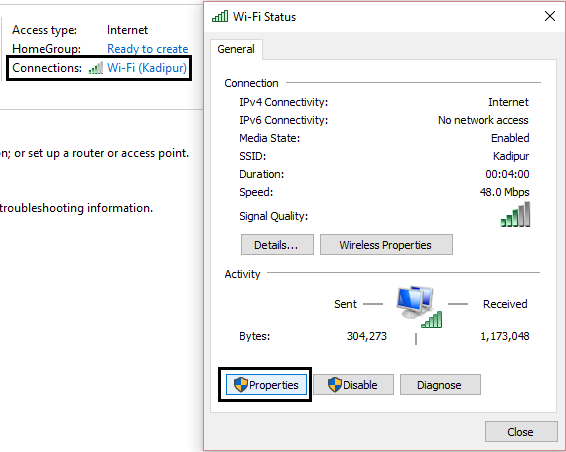
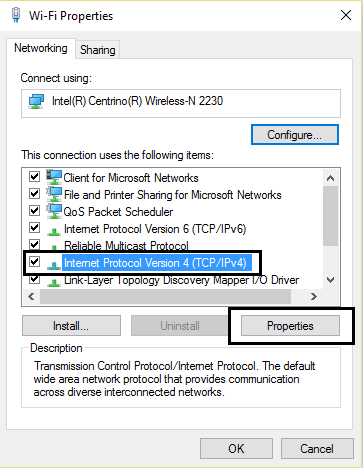
Normally, use DNS addresses automatically supplied by the network. If the resolver is demonstrably failing and policy allows a change, use a reputable provider’s documented addresses—for example, Google Public DNS uses 8.8.8.8 and 8.8.4.4. Record the original setting so it can be restored.
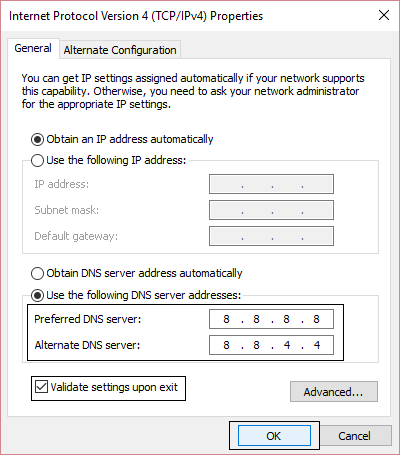
A public DNS service does not make all browsing private and may expose DNS queries to that provider. A company network may require its own resolver for internal sites.
5. Check VPN, proxy, firewall, and security software
Disconnect a VPN only if it is optional and safe to do so. In a company environment, it may be required for internal sites.
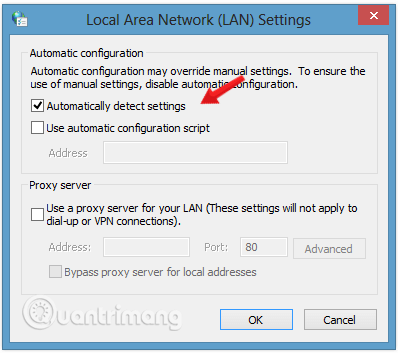
Open Windows proxy settings, or use Internet Options > Connections > LAN settings on legacy configurations.
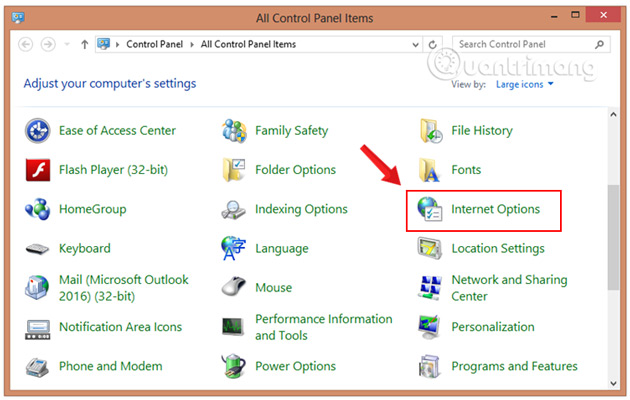
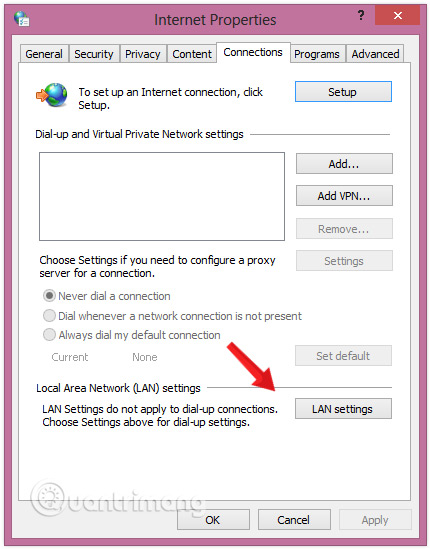
Do not blindly clear a proxy on a managed network. Remove it only if you know it was added accidentally or maliciously. Automatic detection is appropriate on many home networks but not universal.
Temporarily disabling security software can create risk and is not a first-line test. Prefer checking its logs and allow rules, or ask the administrator.
6. Run the Windows network troubleshooter
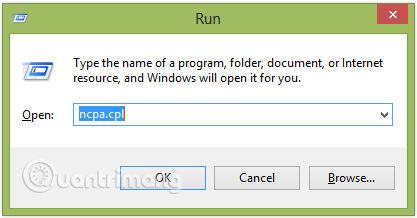
In current Windows, open Settings > System > Troubleshoot > Other troubleshooters or Network & internet > Advanced network settings, depending on version. Run the network troubleshooter and review each proposed change.
The following images show an older diagnostic path:
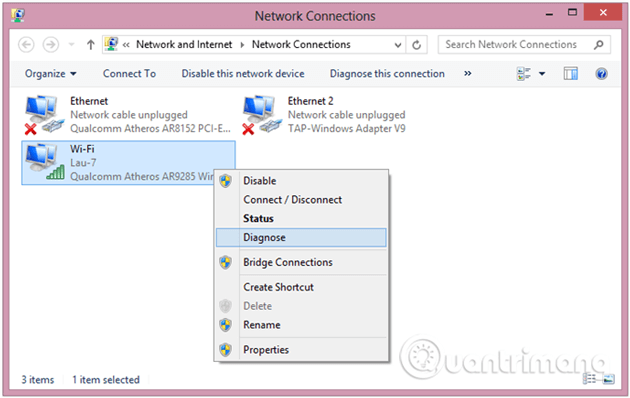
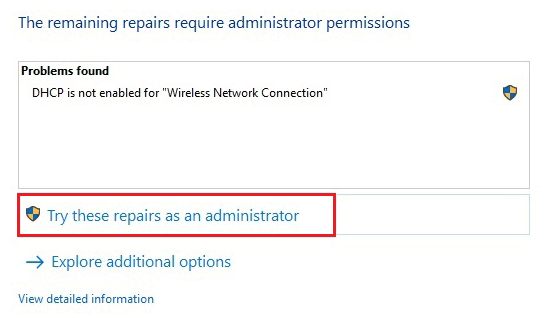
If the tool reports that DHCP is disabled, set the adapter to obtain an IP address automatically only when the network does not use a documented static configuration.
7. Reset the Windows network stack
Use an administrator Terminal or Command Prompt only after simpler checks fail:
netsh winsock reset
netsh int ip reset
ipconfig /flushdns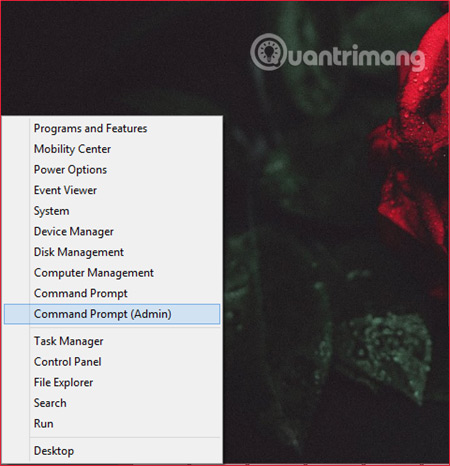
Restart Windows afterward. Do not routinely run a long sequence containing ipconfig /release on a remote machine; it can disconnect the session before renewal. A stack reset can also require reconfiguring VPN or static network settings.
8. Use tracert for diagnosis, not as a repair
Open Command Prompt:
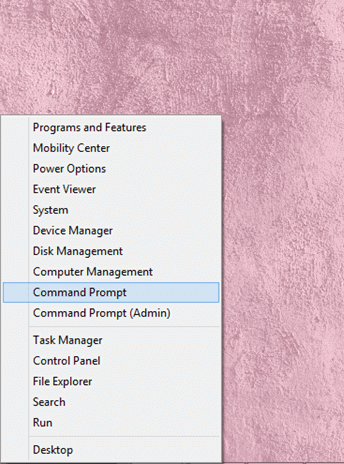
Run tracert example.com, replacing the domain with the affected site.
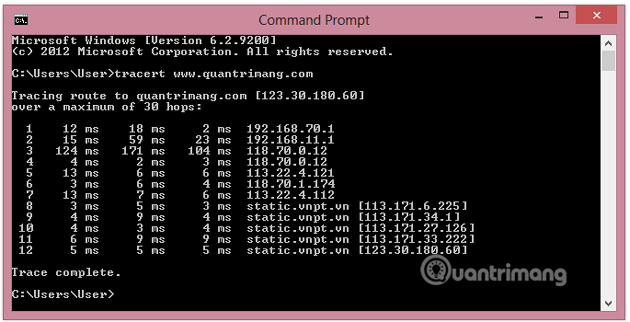
Missing hops do not always prove a fault because routers may ignore trace requests. Share the result with the network administrator or ISP when several sites fail beyond the local network.
9. Reset Chrome settings if only Chrome fails
First test Guest mode or a fresh Chrome profile. If that works, disable extensions one by one, especially VPN, proxy, filtering, and security extensions.
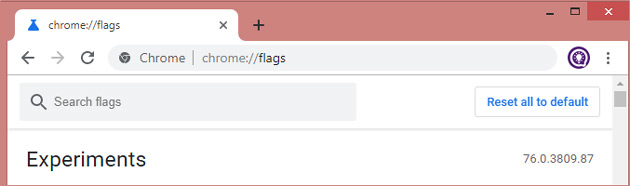
Use Settings > Reset settings > Restore settings to their original defaults. Resetting chrome://flags only clears experiments and is not the same as a full settings reset.
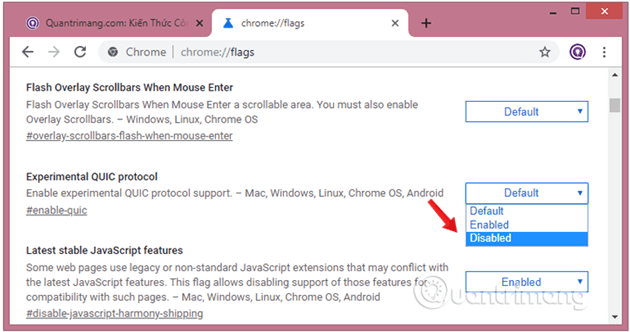
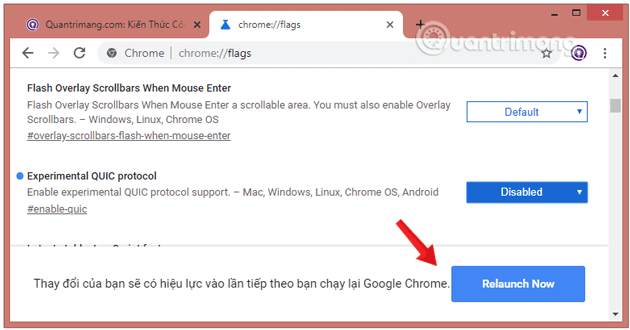
Old advice to disable Experimental QUIC is not a general fix. Flags change and can reduce security or performance.
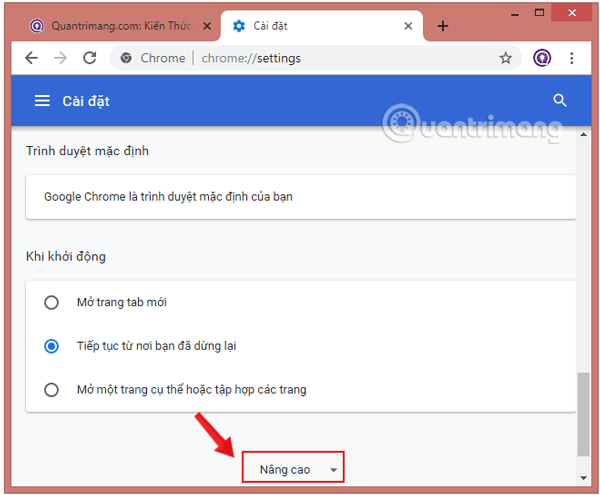
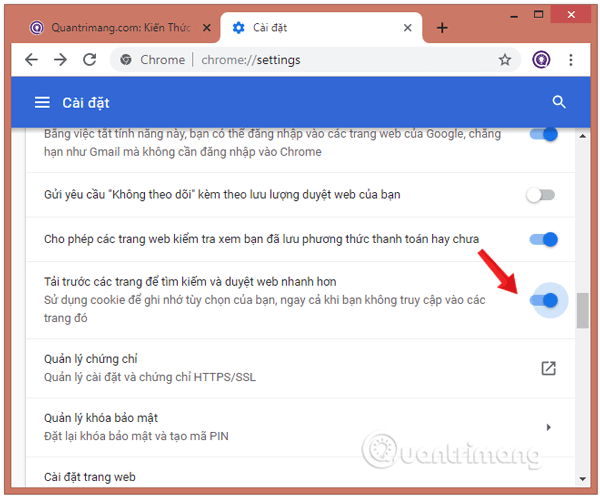
Page preloading is a performance preference, not a reliable connection-error repair.
10. Reinstall Chrome only as a last step
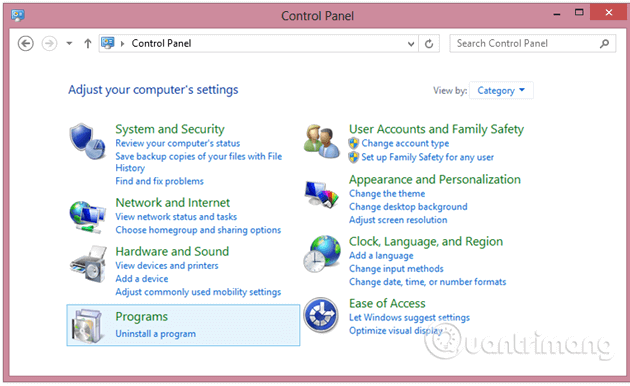
Back up or synchronize needed bookmarks and verify account recovery first. Uninstall Chrome through Windows Apps settings, restart, and reinstall it from Google’s official site.
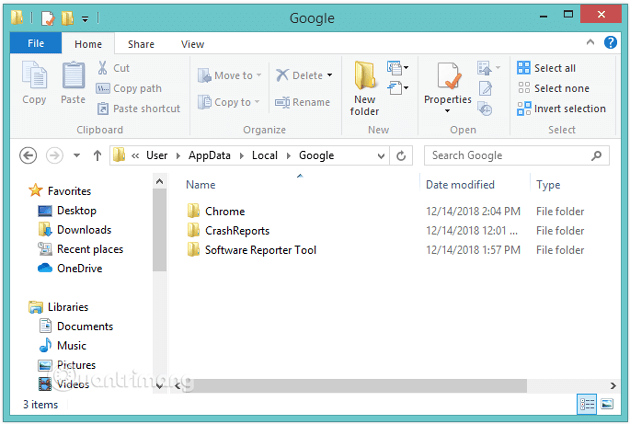
Do not delete the entire Google application-data folder as a routine fix. It may contain Chrome profiles, passwords, cookies, extensions, and data for other Google software.
If reinstalling does not help and other browsers also fail, the cause is likely the network, DNS, security policy, or website—not Chrome.
Related Articles
 Fix the 'This Site Can't Be Reached' Error in Chrome Browser7 minutes read
 How to Fix Quickly Fix the Error 'This Site Can't Be Reached' on9 minutes read
 How to Fix the Error Site Can't Be Reached on the Google Chrome Browser9 minutes read
 How to Fix This Site Can't Be Reached5 minutes read
 5 Most Effective Ways to Fix 'This Site Cannot Be Reached' Error11 minutes read
 Quickly Fix the 'Your Connection Was Interrupted' Error on Chrome6 minutes read
Reader Comments 0
Sign in with email or Google to join the discussion.