Lightroom Post-Processing Guide for Beginners
Lightroom photo editing software helps you fine-tune color, lighting, and beautify professionally. If you're new to the game, this article will guide you step-by-step through post-processing your photos in Lightroom, from white balance, adjusting brightness, to smoothing skin.
Table of Contents
Learning how to use Lightroom with basic steps such as importing photos, adjusting colors, smoothing skin and increasing sharpness. will help you create impressive photos with just a few simple steps.
Instructions for post-processing photos in Lightroom
Step 1: Import image file
In the Library module, import your photos into Lightroom. If you want, you can apply the built-in import settings, or use the dedicated shortcut keys, especially if you need to import a large number of photos.
To apply the preset import settings, on the Lightroom window, go to the panel on the right side, then go to the Apply during import tab . Go to Develop settings => User presets and click on the preset you want to apply.
After importing the image file, access the Develop module.
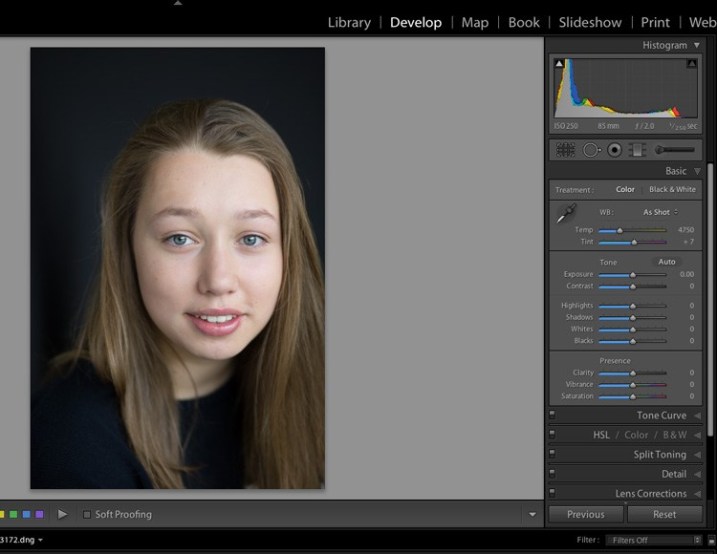
Step 2: Adjust white balance
There are several ways to adjust white balance. If your image file uses a neutral color palette, you can use the Eyedropper tool. In this tutorial, the image file does not have a neutral reference, so TipsMake will move the slider under White Balance to balance the color palette in the image file.

Step 3: Adjust the highlights and shadows
The skin tone of the model in the image file is a bit bright, the hair color and background are a bit dark. To balance the colors of the objects in the image, we need to adjust the highlights and shadows. If necessary, we can adjust these settings later.
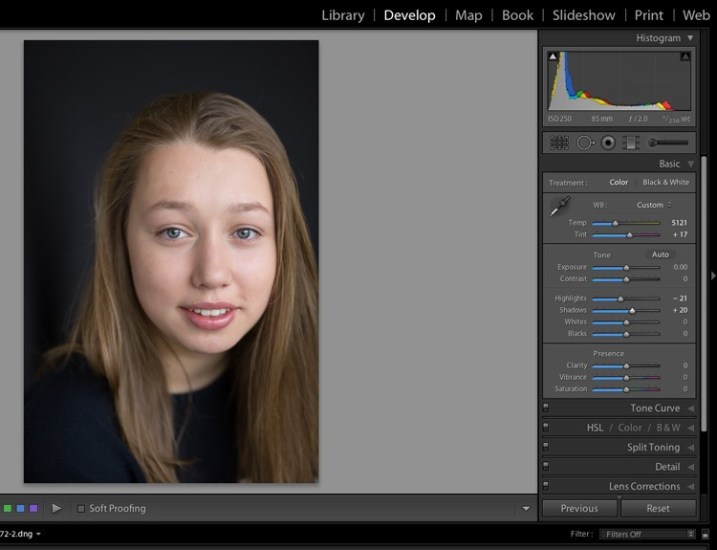
Step 4: Increase Vibrance and Saturation
Next use the sliders under the Presence tab to increase the vibrance and saturation of the image, then move the Whites slider to the right to adjust the portrait and skin tones to look more realistic.
Step 5: Crop the photo
We can crop the photo at any position we want to make it most reasonable.

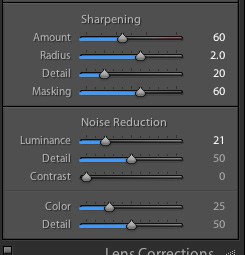
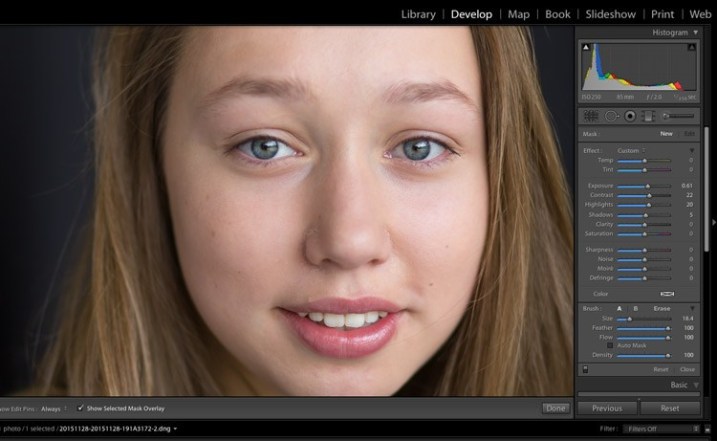
Step 6: Retouch and smooth skin
Zoom in on the skin to retouch, blur blemishes, scars, or wrinkles. Select the Brush tool and adjust any settings you want to apply. While you can use presets to retouch skin, whiten teeth, etc., these settings make the photo look unrealistic.
Adjust the Clarity slider to around -35 or -40 (Contrast to +35 and Highlights to +15 or more, this is to maintain contrast and convert the subject's face in the photo to a Flat background), Sharpness to +20. These options and settings may vary depending on the skin tone of the subject in your photo file and the type of effect you want to apply.
The example below applies the above settings to even out skin tone and make skin look brighter and smoother.
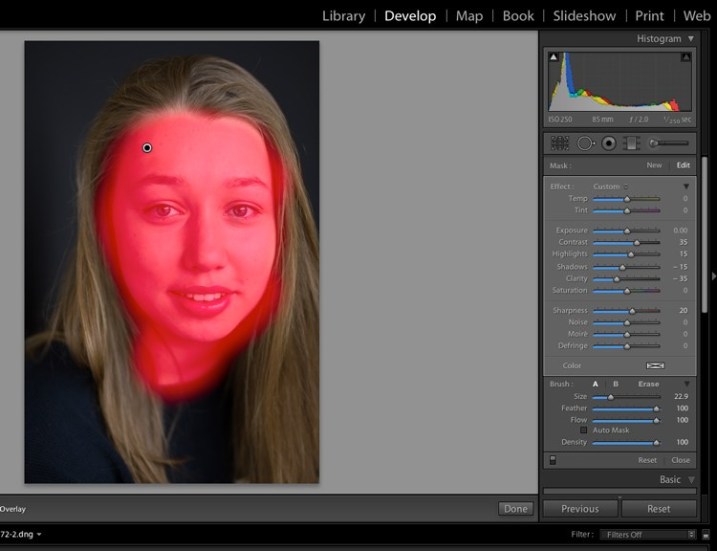
Adjusting the Clarity slider further will merge the layers, making the image completely "flat", like there are no layers, so we can increase the Contrast, increase the shadows and increase the highlights to balance it out. The Feather and Flow options stay at 100%.
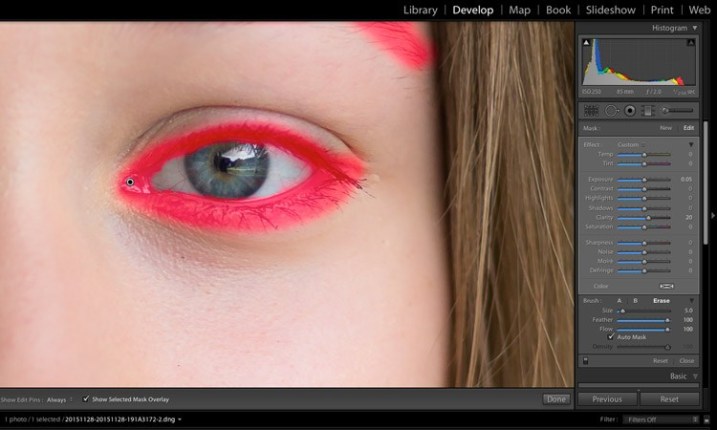
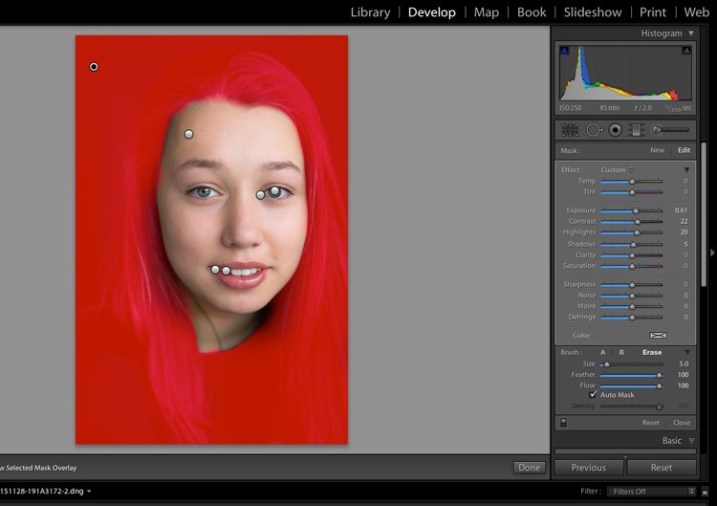
Step 7: Fine-tune the adjustments
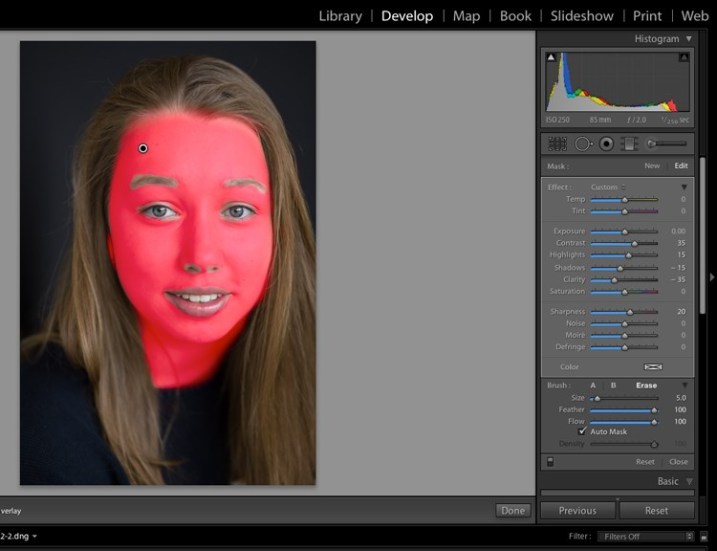
At the bottom of the image, check the Show selected mask overlay box (or use the keyboard shortcut O) to see exactly which parts of the image the Adjustment Brush is applied to. Still using the Adjustment Brush, click the erase brush tool and erase the brush effects around the eyes, mouth, and hair.
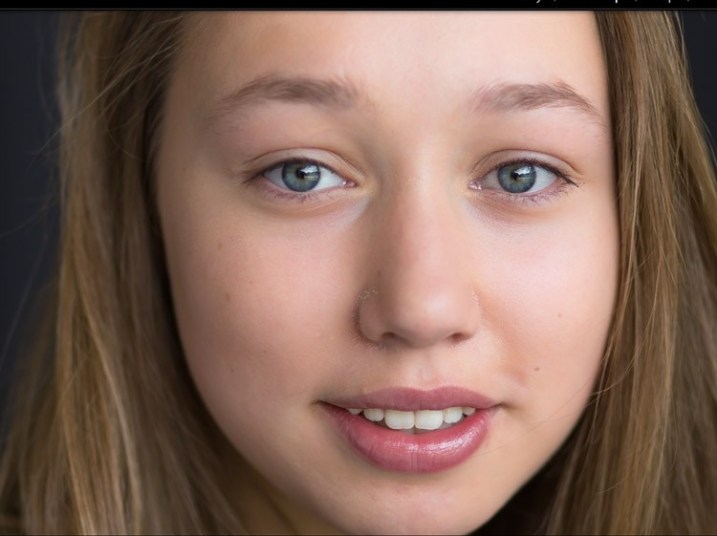
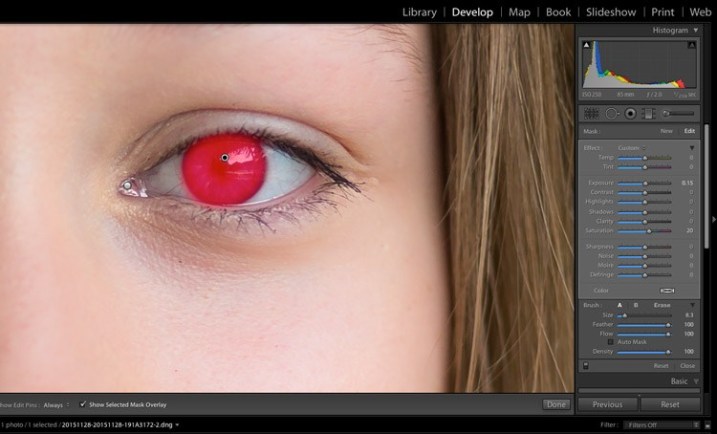
Step 8: Edit the eyes
Zoom in on the subject's face a little more, then use the Adjustment Brush to sharpen the focus and make the eyes look brighter. Note that increasing Clarity will darken other parts of the image. To balance this out, adjust the Exposure slider.
In the example below, TipsMake also increased the saturation of the iris a bit to make the model's eyes look bluer.
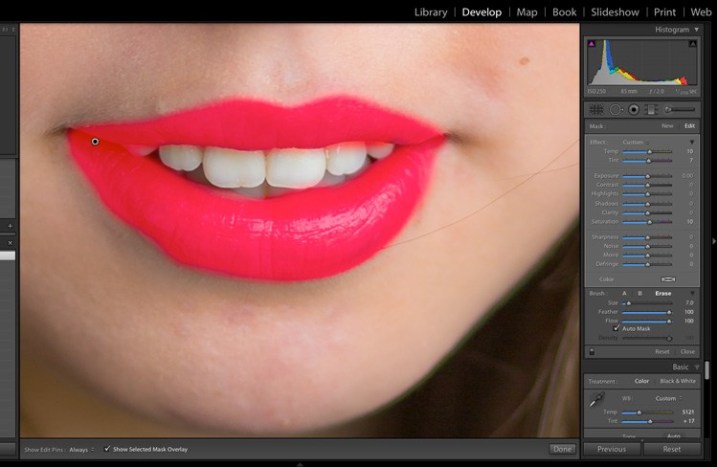
Step 9: Edit lip color
The next step is to move on to the lips of the subject in the photo. In this step we apply the same techniques as with the eyes to retouch the lips, adjusting the brush, clarity and increasing the saturation.
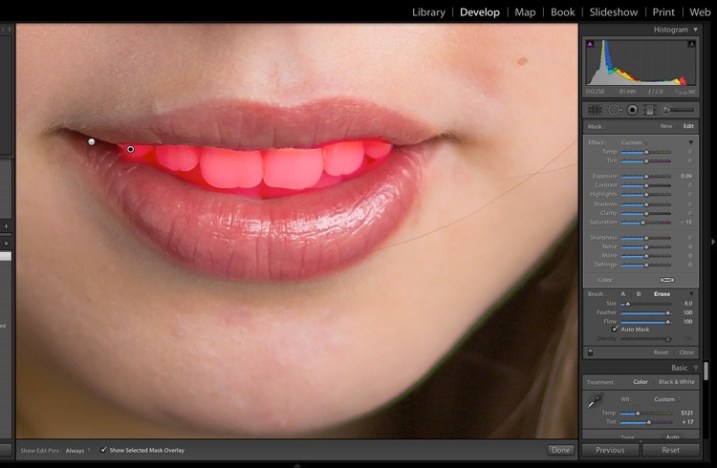
Step 10: Teeth whitening
To edit and whiten teeth, we continue to use the brush tool, reduce the % of the Saturation slider and increase the % of the Exposure tool a little.
Step 11: Edit hair and background color
The last step we need to do is to edit the hair color and background color a bit brighter to reduce the contrast between the face and the background color.
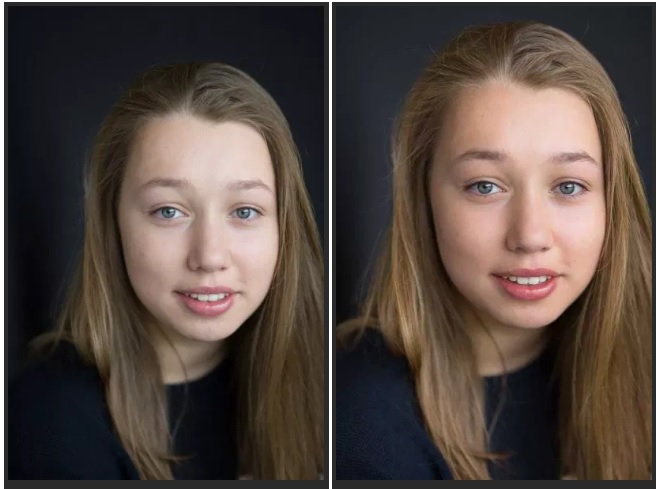
You can see the difference between the before (left) and after (right) images when edited:
Here is a detailed guide to help you post-process photos in Lightroom, from color correction, light balance to skin smoothing. If you don't know how to import photos in Lightroom or export photos with high quality, please refer to more tutorials on TipsMake to optimize your workflow.
Was this article helpful?
Your feedback helps us improve.
Related Articles
 How to post photos to Instagram directly from Adobe Lightroom3 minutes read
 Instructions on how to improve and speed up Lightroom7 minutes read
 How to add Presets to Lightroom2 minutes read
 Lightroom - Download Lightroom here4 minutes read
 Summary of shortcut Adobe Photoshop Lightroom3 minutes read
 10 Lightroom mistakes that can ruin your photos13 minutes read
Reader Comments 0
Sign in with email or Google to join the discussion.