How to Use Canva and ChatGPT to Create Mass Content Designs
ChatGPT is a useful tool for creating bulk text content, especially for social media posts that use public quotes or snippets of information. Along with ChatGPT, this tutorial will show you how the Bulk Create app works in Canva. You'll be amazed at how you can create a month's worth of content in just a few minutes.
This is a very simple process and one you will definitely want to do over and over again.
1. Get content from ChatGPT
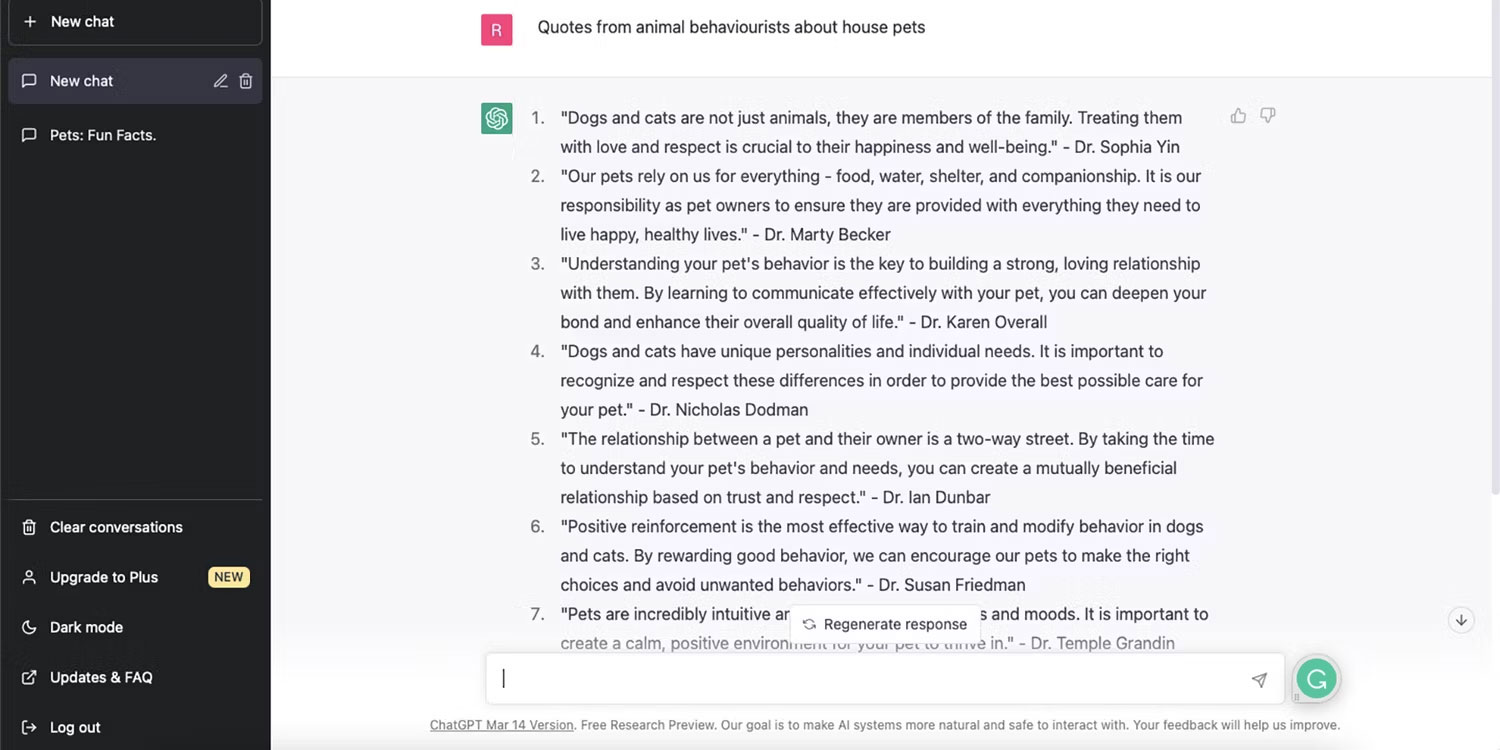
If you're having trouble coming up with content ideas, ChatGPT can save you the trouble and provide all the content you need. If you're not sure how chatbots work, check out TipsMake.com's guide on how to use ChatGPT. Sign up on the OpenAI website and create a free account. During peak times, it may take longer to create an account or receive chatbot results.
On the ChatGPT chatbot page, write the query you want to ask. Chatbots work best to gather information that you don't have, would have difficulty with, or would take too much time to research and create yourself. Some helpful ideas include:
- Write 15 facts about pets.
- Write 20 quotes about graphic design, not including product design.
- Write 10 famous lyrics from R&B songs along with the artist name.
- Tina Belcher's funniest quotes from Bob's Burgers.
Once ChatGPT generates results, read through them. One of the problems with using ChatGPT is that it sometimes generates inaccurate information. If you are creating content to provide to people, you should make sure that the content is accurate.
2. Copy text into spreadsheet
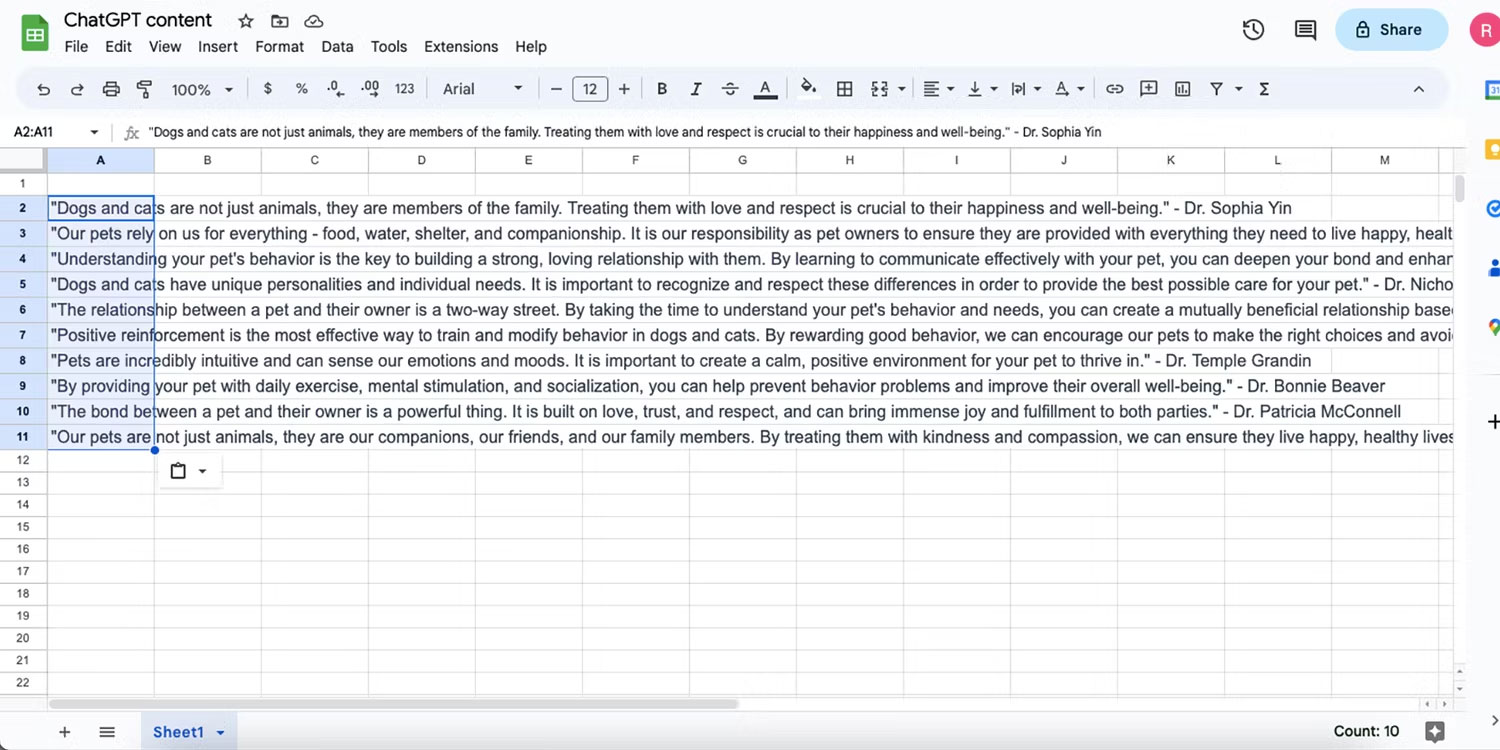
If you're a programmer, you can use the GPT extension for Sheets and Docs, or copy and paste your content into any spreadsheet program — like Microsoft Excel or Google Sheets. Then open a blank sheet.
Highlight all the text from ChatGPT and copy it using Cmd + C on Mac or Ctrl + V on Windows. Back in the spreadsheet, select cell A2. Leave the top row blank for now, you'll add labels to that row later.
Paste your content into A2 using Cmd + V on Mac or Ctrl + V on Windows. Even though you only select one box, each line of text will be imported into a new row.
3. Clean up content
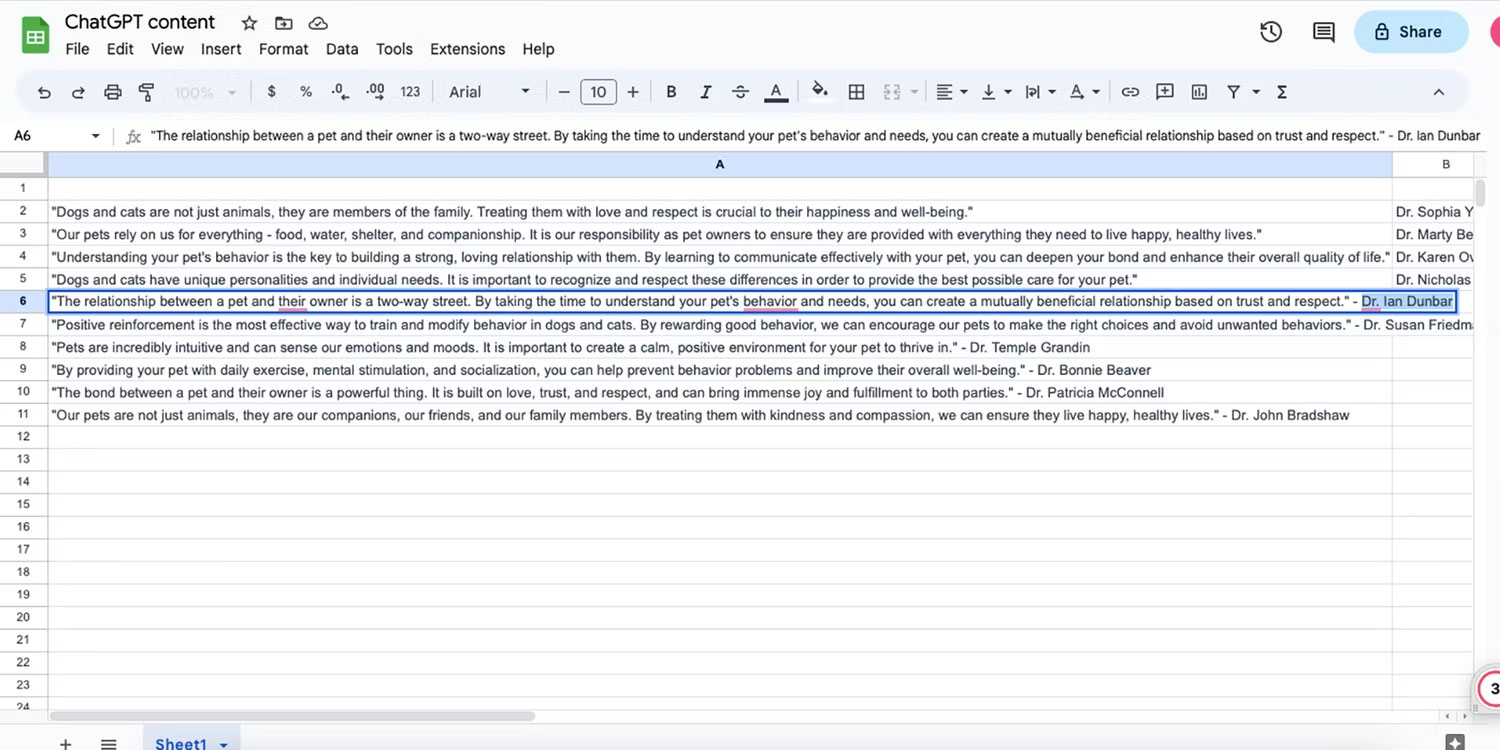
First, widen column A to the right. Hover over the connecting edge between columns A and B until the pointer changes to an arrow, then click and drag column A until you can see the end of its content within the column width.
If your generated content has attribution tags, such as quotes with the speaker's name or songs with the artist's name, remove these attributions from the end of the quotes and type or paste them into column B. Resize the columns as needed.
You can add more elements if needed, but for most social media posts, don't cram too much information.
4. Label the columns
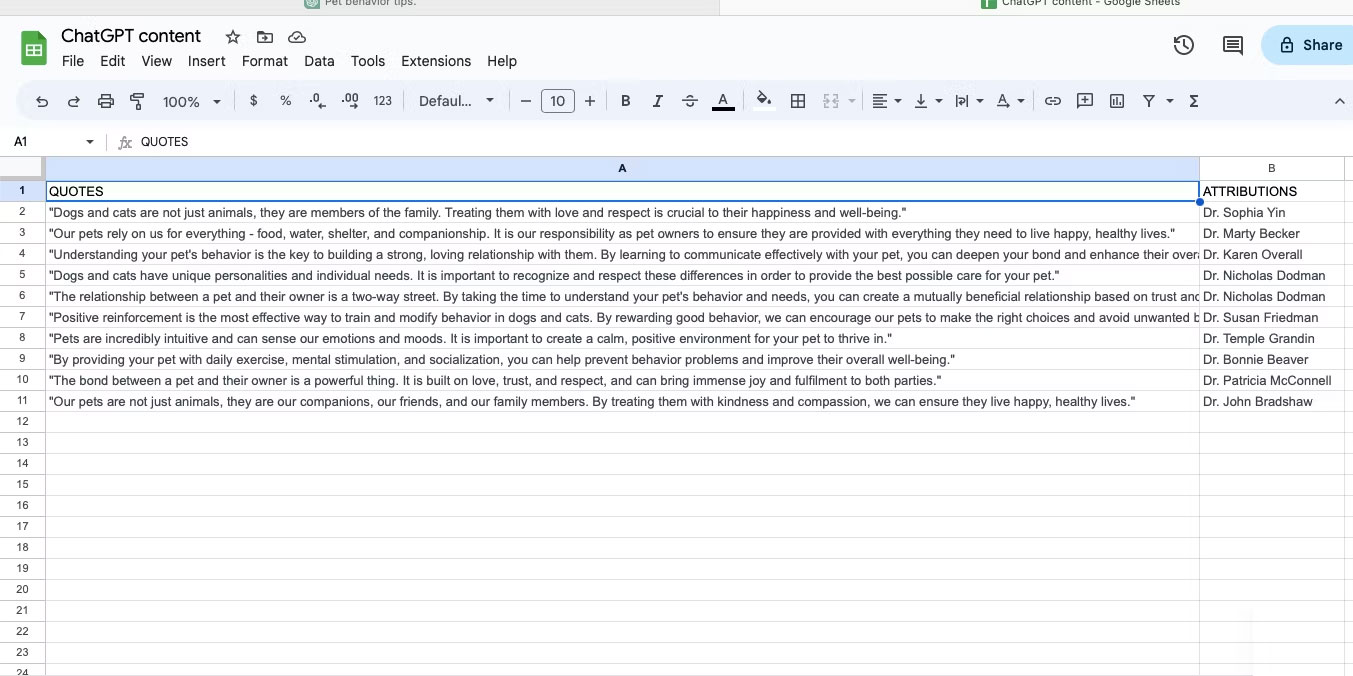
Now it's time to put labels in the first row. This allows Canva to assign your spreadsheet values to the batch generation system later.
Label A1 as 'QUOTES' or the corresponding content type, such as 'SONGS', 'PASSAGES' or 'TESTIMONIALS'. In B1 - and any other columns - label it with the content type, making sure the label is different. The article will use 'ATTRIBUTION' , but you can use 'CREDIT', 'CUSTOMER', 'ARTIST' or whatever suits your content.
5. Save the spreadsheet as a CSV file
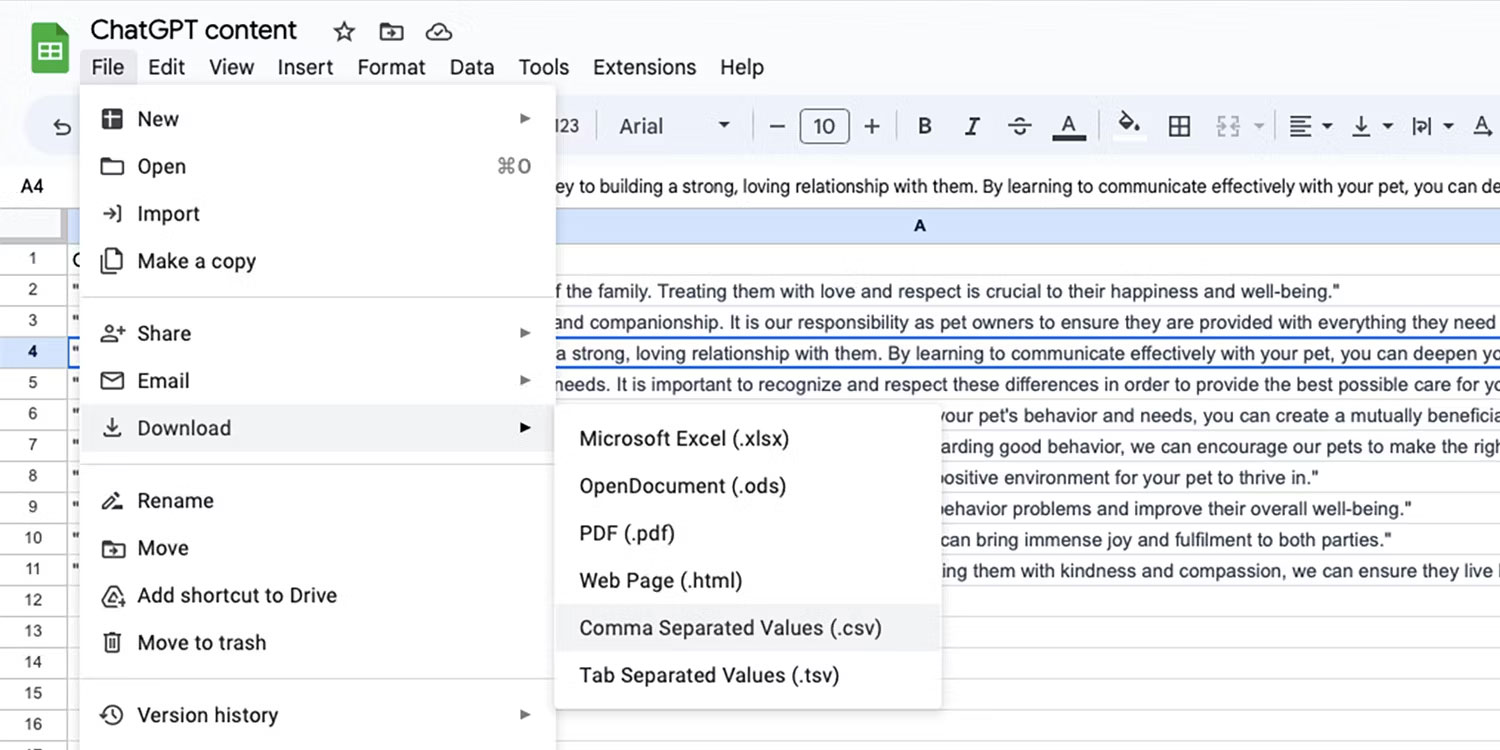
CSV stands for Comma-Separated Values which allows you to save your content in a structured table ready to be imported into other programs.
Depending on the spreadsheet software you're using, saving may work differently. If you're using Google Sheets, go to File > Download > Comma Separated Values (.csv).
For Microsoft Excel, go to File > Save as , and under File Format , select CSV UTF-8 (Comma-delimited) (.csv) . But this may be different depending on the version of Microsoft Office you're running.
6. Create a design on Canva
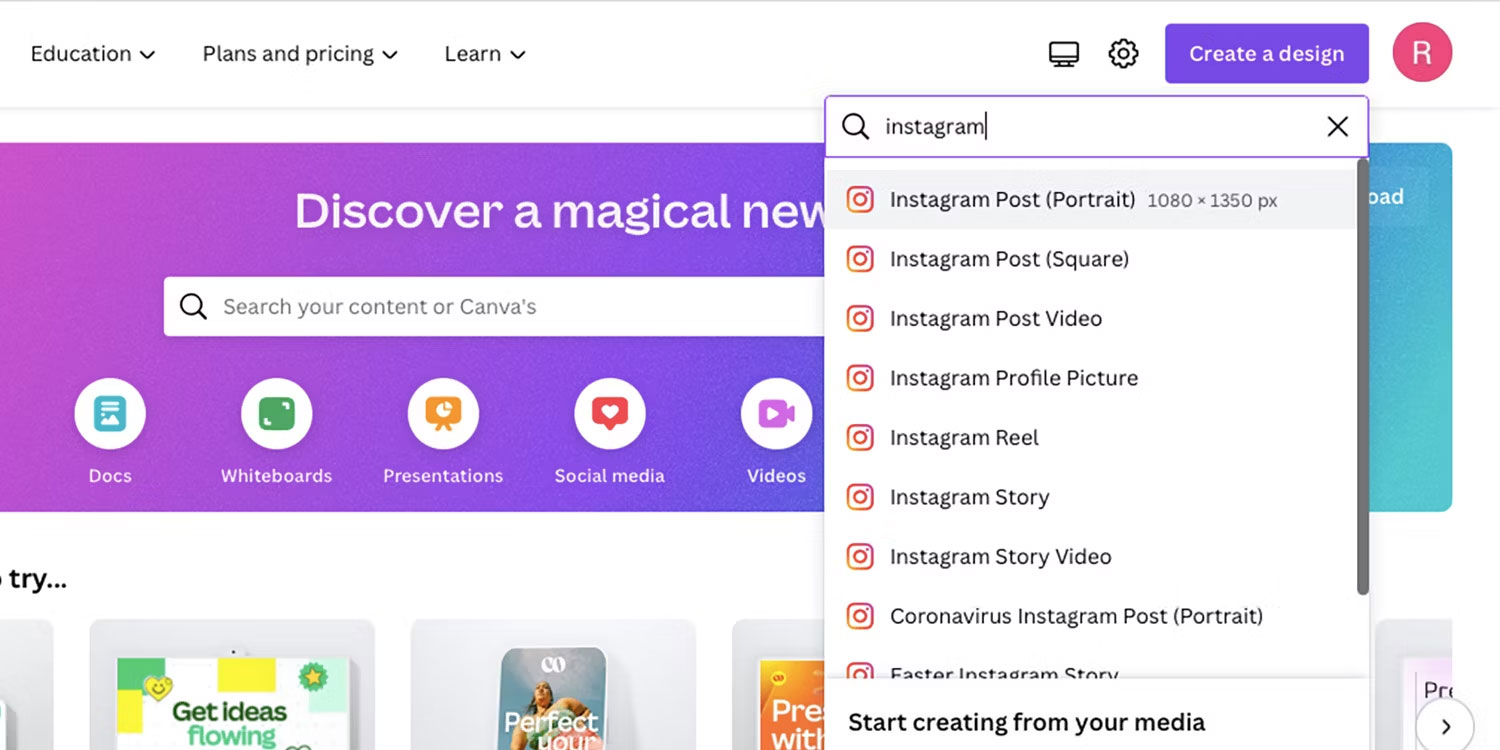
Go to Canva and choose the dimensions for your bulk design. Whether you're using a pre-made template or designing from a blank page, make sure your design isn't too crowded and has enough space for your text.
If you've already created and published Canva templates, choose one of those, or if you're designing from scratch, you can use Canva's Brand Kit feature to incorporate your branding into your design. Both of these features require a Canva Pro subscription or free trial.
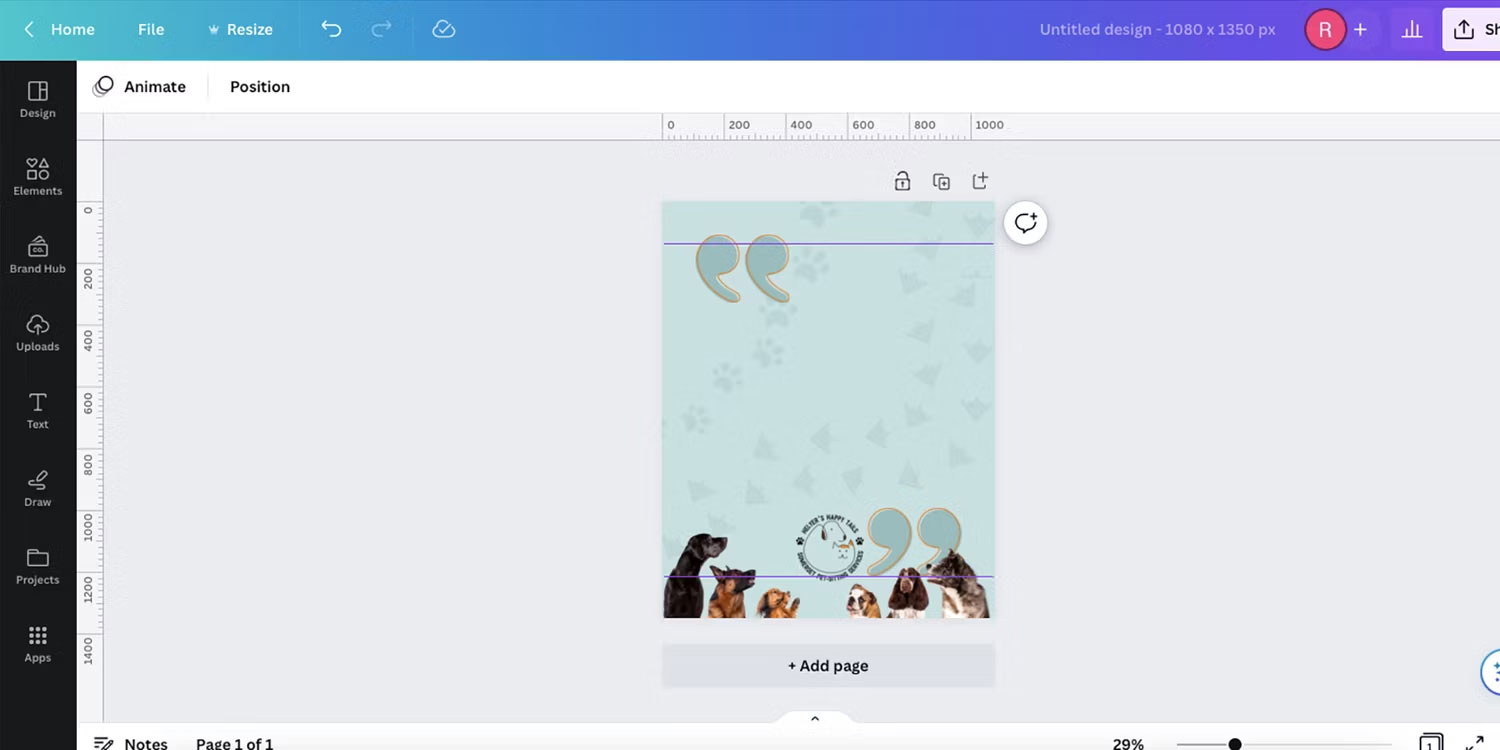
Add elements around the edges of your design, leaving enough space for text. You can add logos, images, backgrounds, or decorative patterns.
7. Add placeholders for text
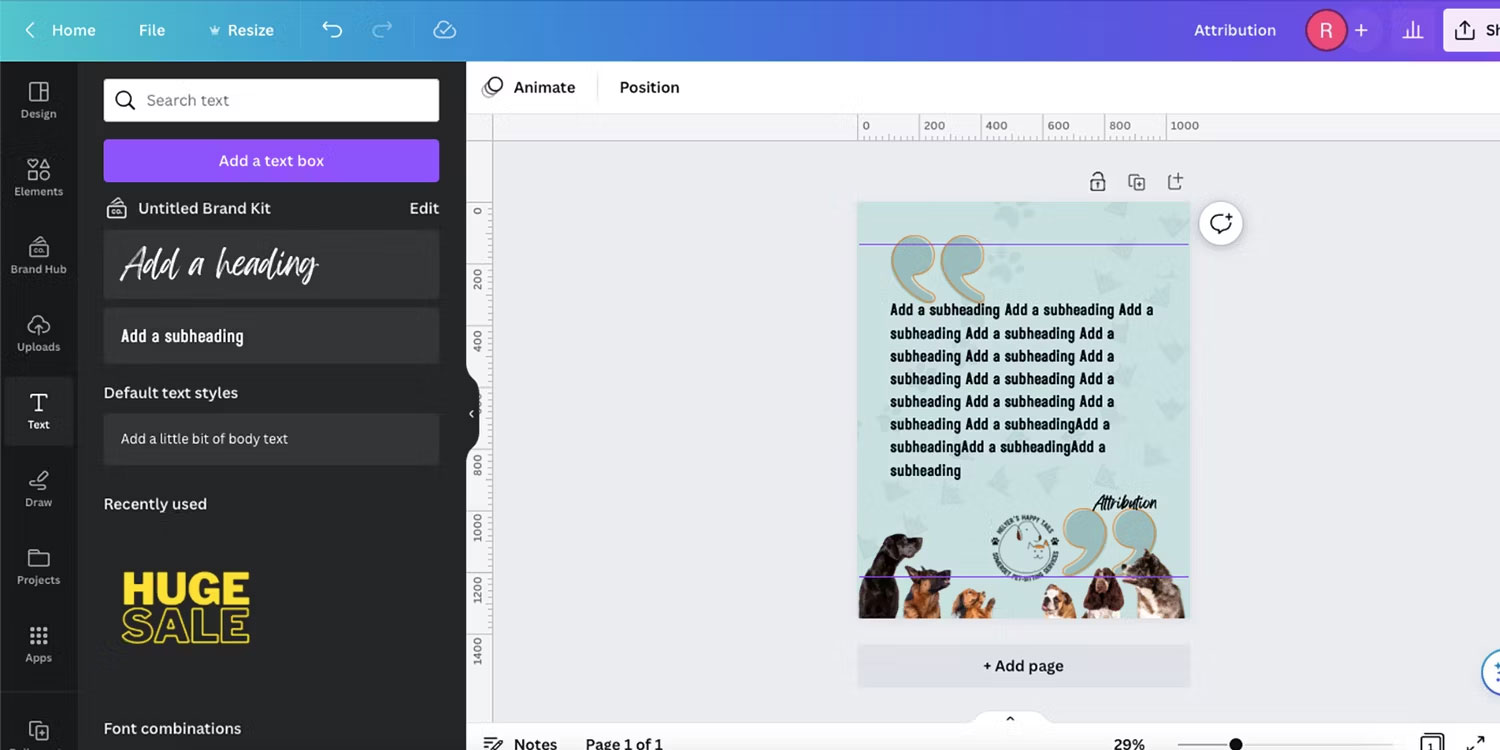
Select the Text tool and create placeholders for your labels. Place them where the text will appear on your design. Remember to provide enough space to accommodate different lengths of content.
Choose one font for quoted text and another for attribution text. Set a general font size and color, but you may need to change these after the design is created.
If you want different designs for the same content, you can create multiple design templates here. Select Add a page below your artboard to add a new design.
8. Create content in bulk
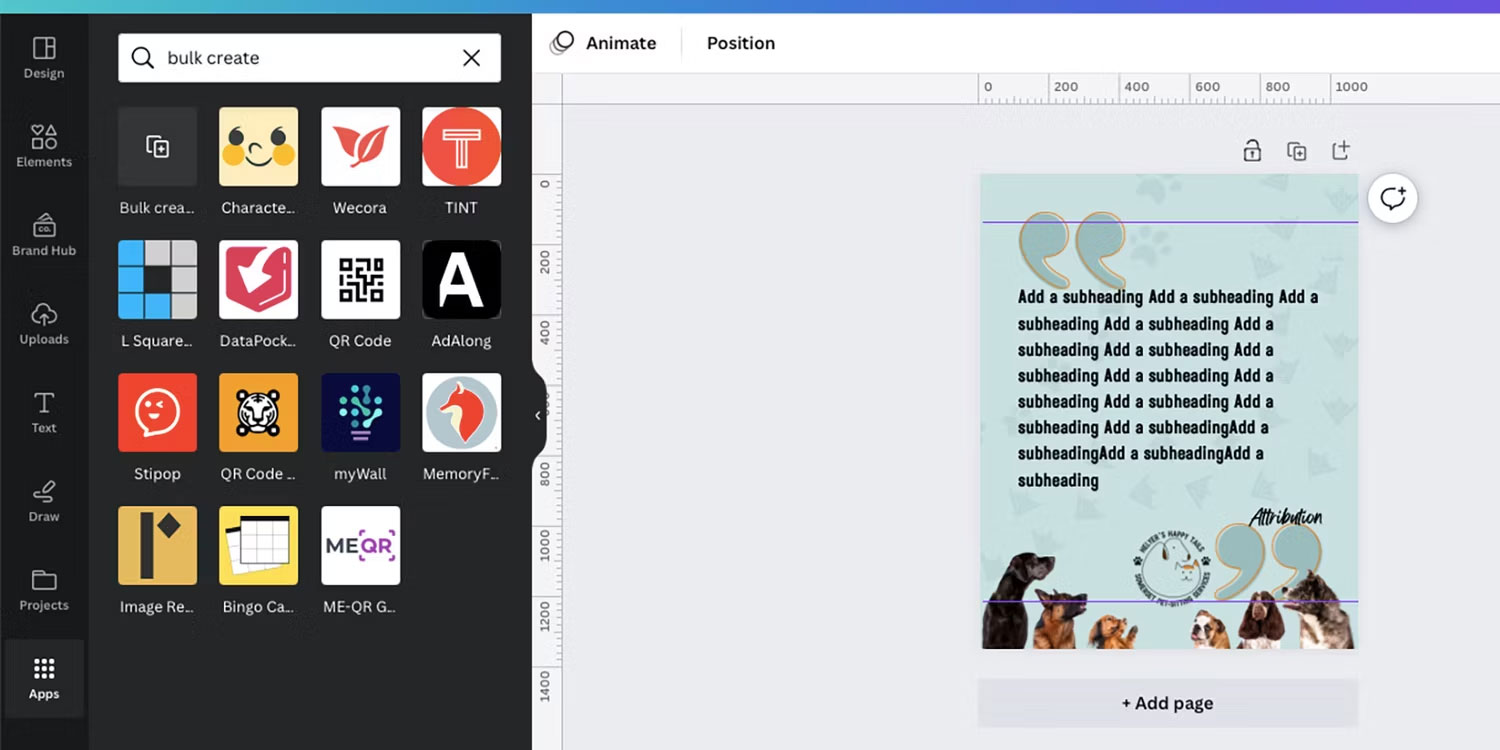
Select Apps from the left menu in Canva and type Bulk Create into the search bar. Select the Bulk Create app.
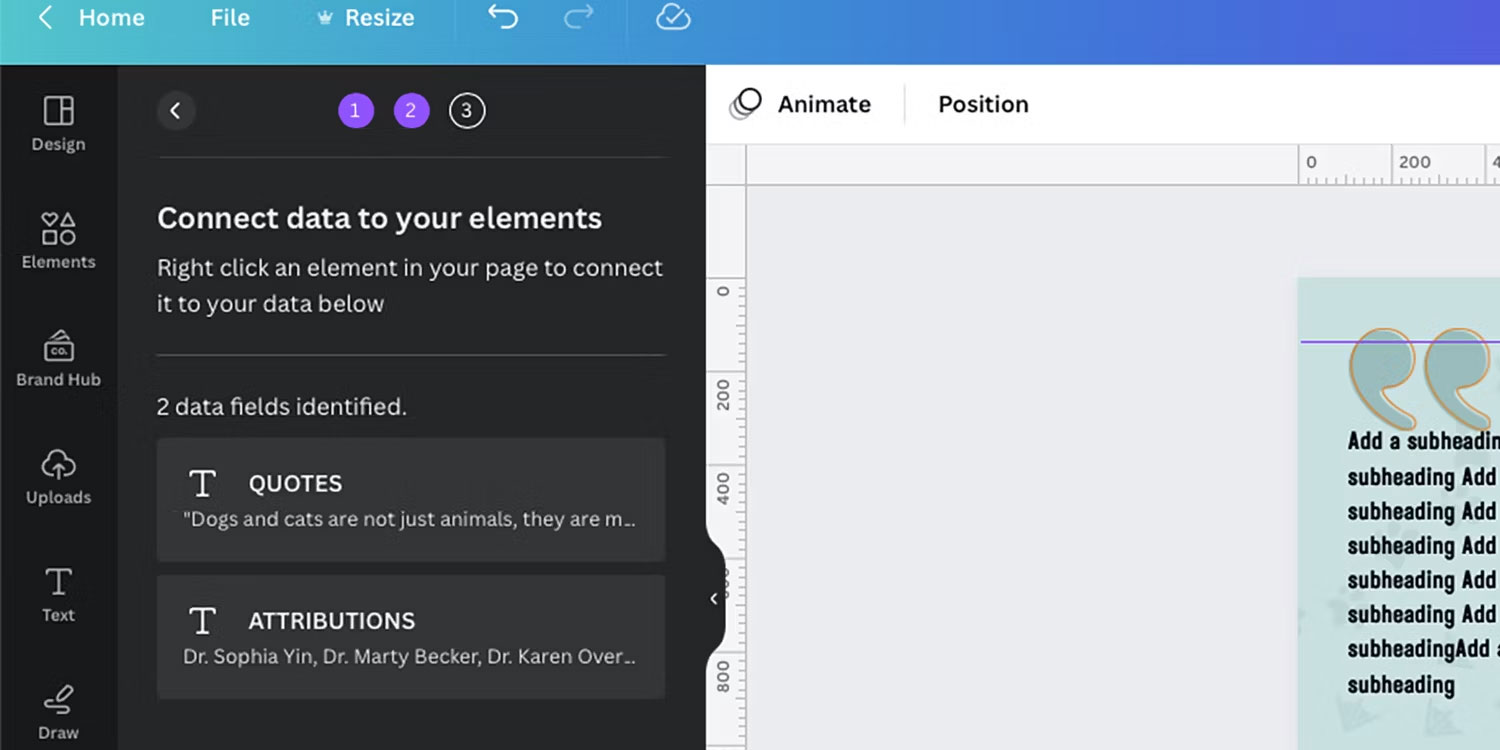
Select Upload CSV and find your saved CSV file to open it. Canva will identify your two pieces of content and split them, in this case, into a Quote piece and an Attribution piece.
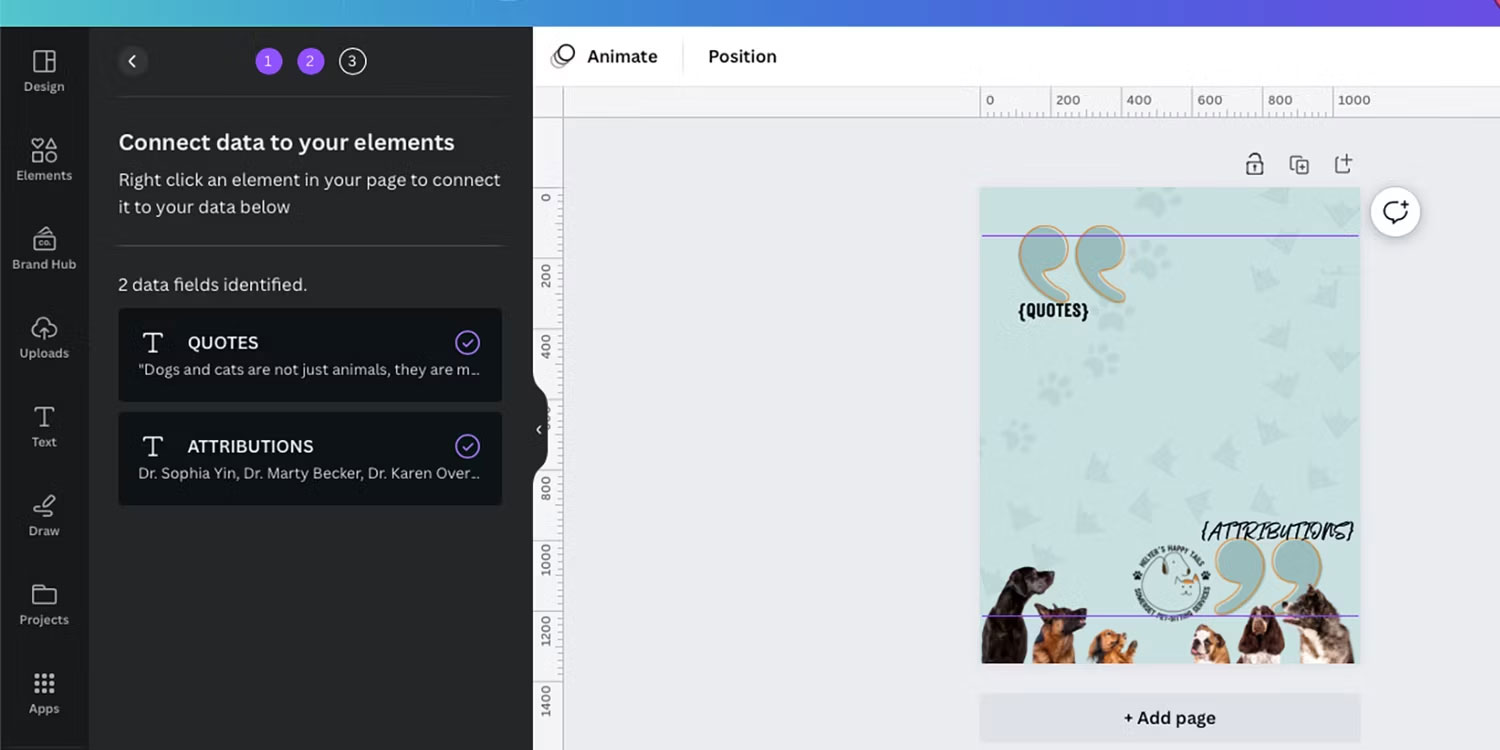
Select the placeholder text, then right-click and select Connect Data > [QUOTES] . This will import your data into Canva, indicated by the label now written in curly brackets. Do this again for the second set of content and any other content you're adding. Select Continue .
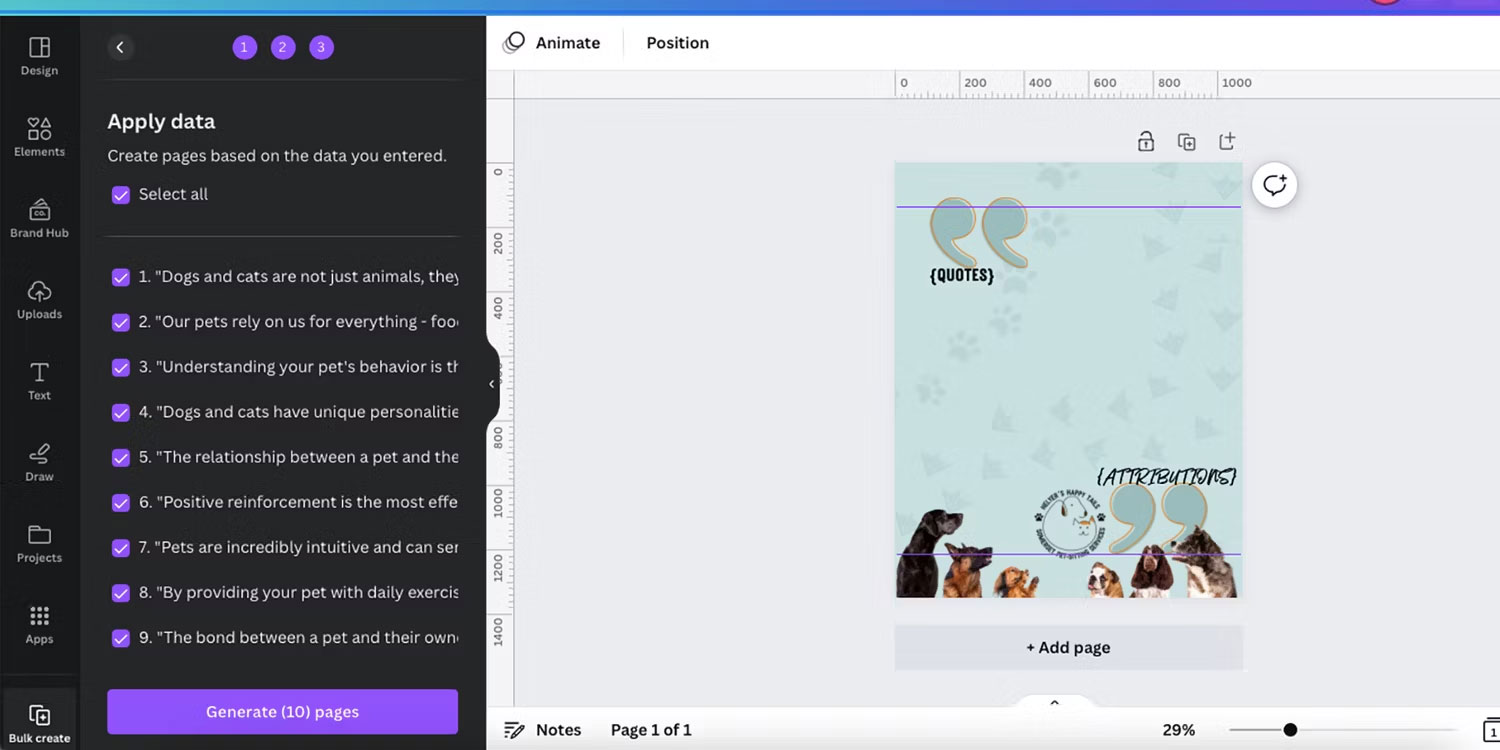
You will see a list of all the content that will be applied with checkboxes next to each item. To remove any text item, uncheck the box next to it. If you are happy with all the content, check them all and select Generate Pages . Make sure you do not have a pop-up blocker enabled as your design will open in a new tab.
9. Review and edit design
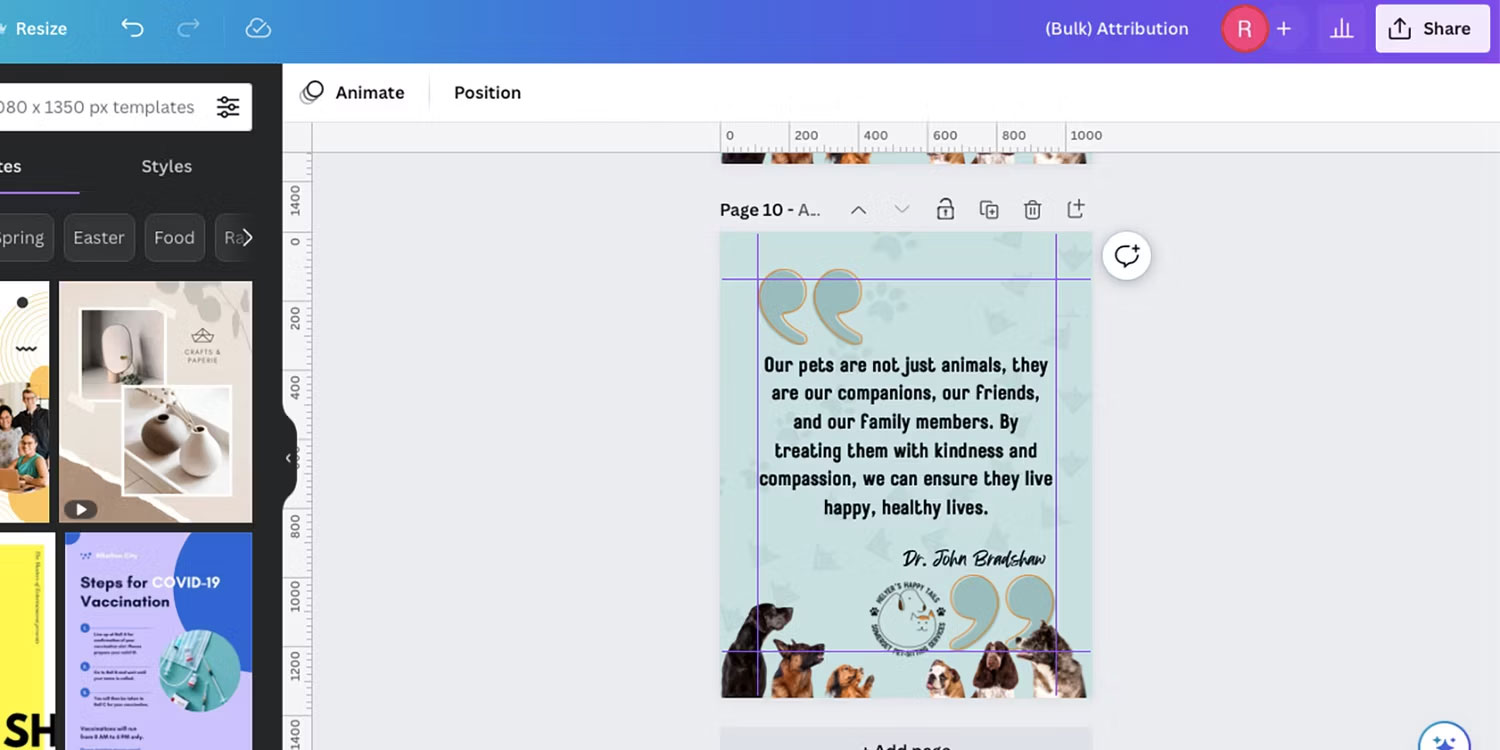
Once created, your designs appear on their own page in a new tab. Scroll to see them all. If you've applied Bulk Create to multiple designs, you'll have alternate designs for each set of text.
Now comes the most labor-intensive part of creating content in bulk. Go through each design to review and edit it. Even though they were all created to the same specifications, some of the text may not fit exactly or be aesthetically pleasing. Resize or move the text to fit each design.
At this point, you can also add emphasis to individual words with additional colors, bold or italics, or change the font for certain words or phrases. This is not possible with Bulk Create.
10. Save your batch created designs
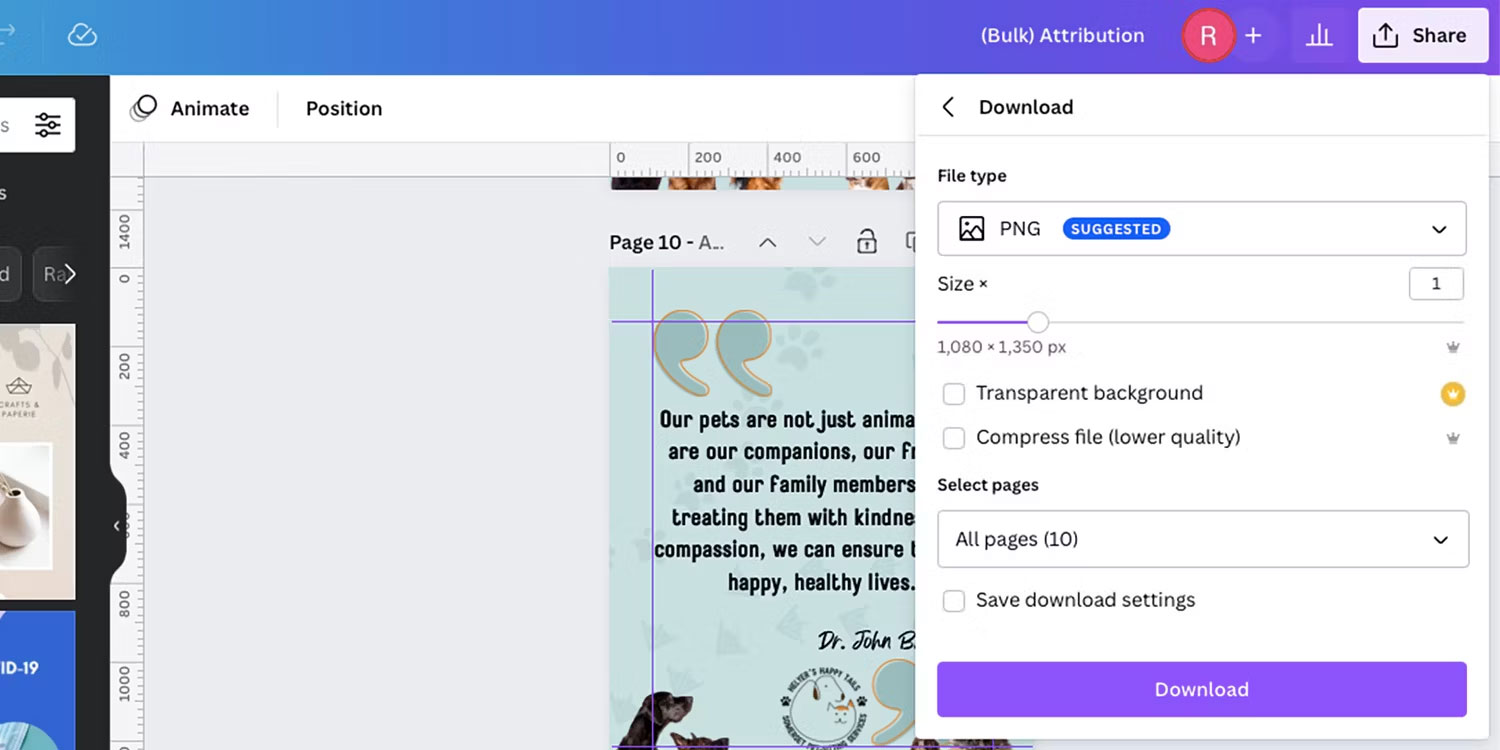
If you're happy with everything, it's time to save your design. Go to Share > Download and choose the best format for your design. PNG is recommended for the best quality, but some social media apps may not accept PNGs, or perhaps a different format would work better for your design.
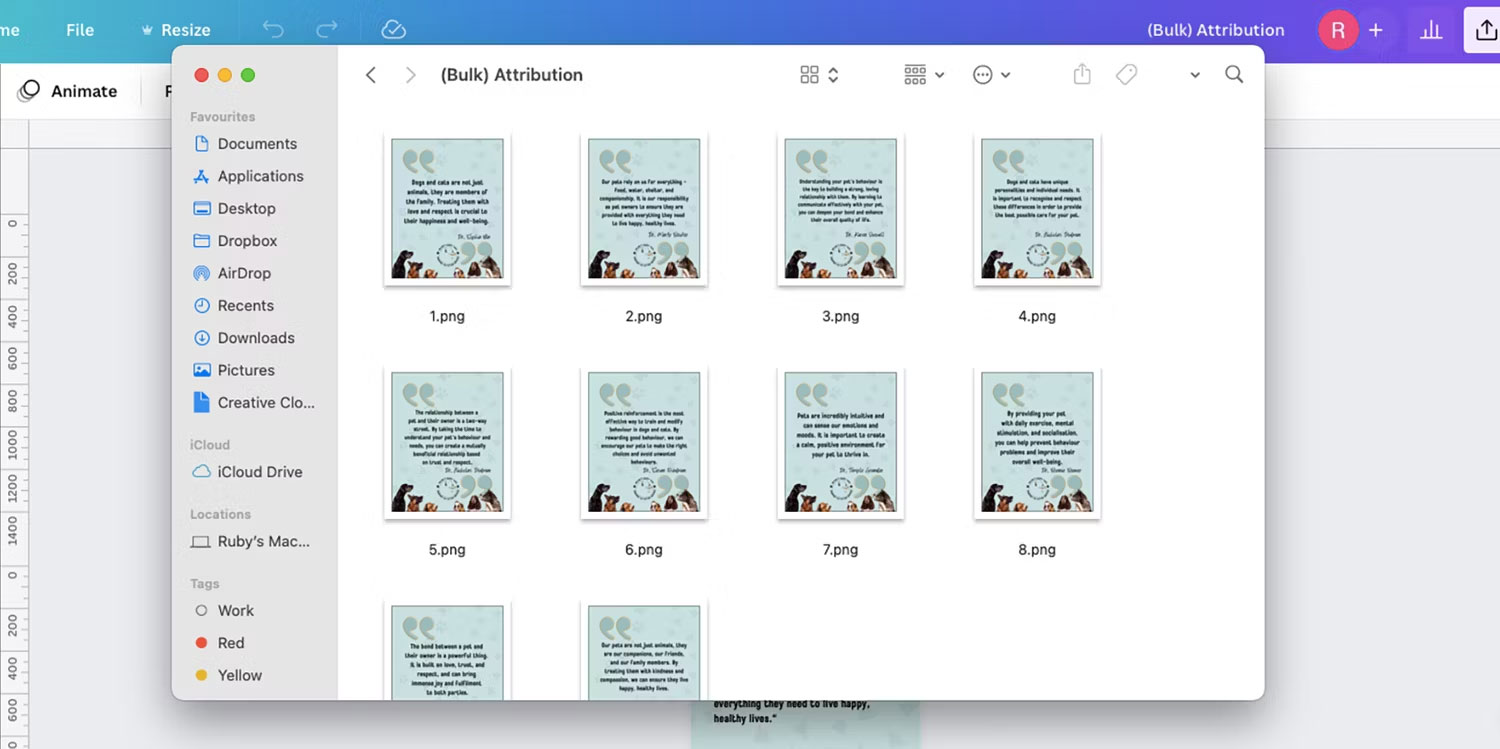
You can add your bulk content to a social media content scheduling app, like Hootsuite or Later, to save even more time and ensure regular posting. Bulk design is great for similar types of weekly or monthly posts, like motivational Mondays or monthly calendar posts.