Table of Contents
This guide provides a practical overview of Instructions on How to Use VNC Viewer Software, including its main features, benefits, limitations, and important considerations.

1. Install and set up VNC Server
In the VNC software suite is divided into two including: VNC Viewer and VNC Server. VNC Server will be installed for computers that need to be controlled and VNC Viewer will be used for control computers.
Download link: https://www. realvnc. com/en/connect/download/vnc/
Step 1: You proceed to download the software to your computer and install normally.

Step 2: After the installation is complete, select Settings (3 dashes) and select Options.

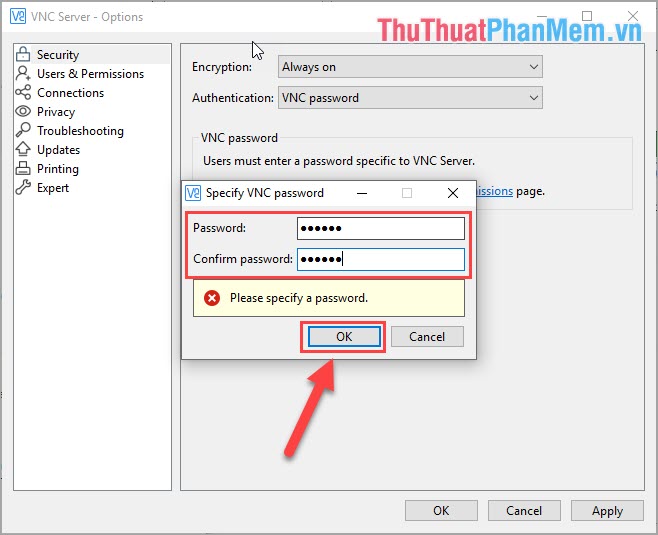
Step 3: Next, select the Security tab and select VNC Password . Finally click OK .

Step 4: You proceed to set a Password for the Server. This password when connecting to the software will require, so please remember carefully.
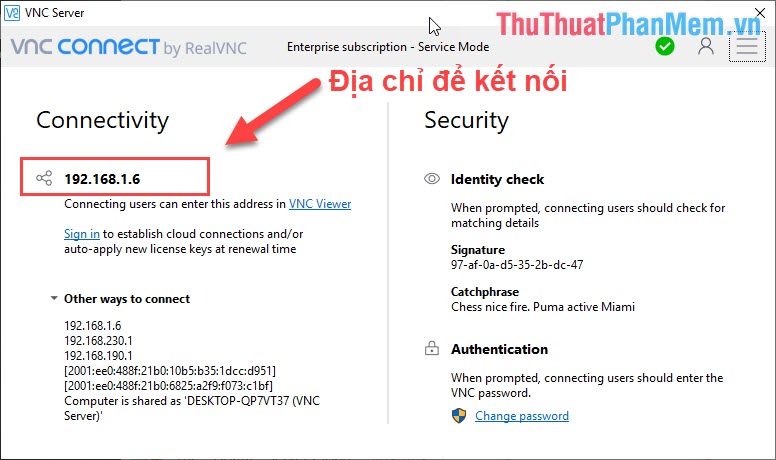
Step 5: When we finish setting up, there will be an IP address . This IP address for you to enter VNC Viewer to control.
2. How to use VNC Viewer
VNC Viewer is a software that helps you use the IP address of VNC Server to control the computer installed VNC Server.
Download link: https://www. realvnc. com/en/connect/download/viewer/
Step 1: You proceed to download the software to your computer and install normally.

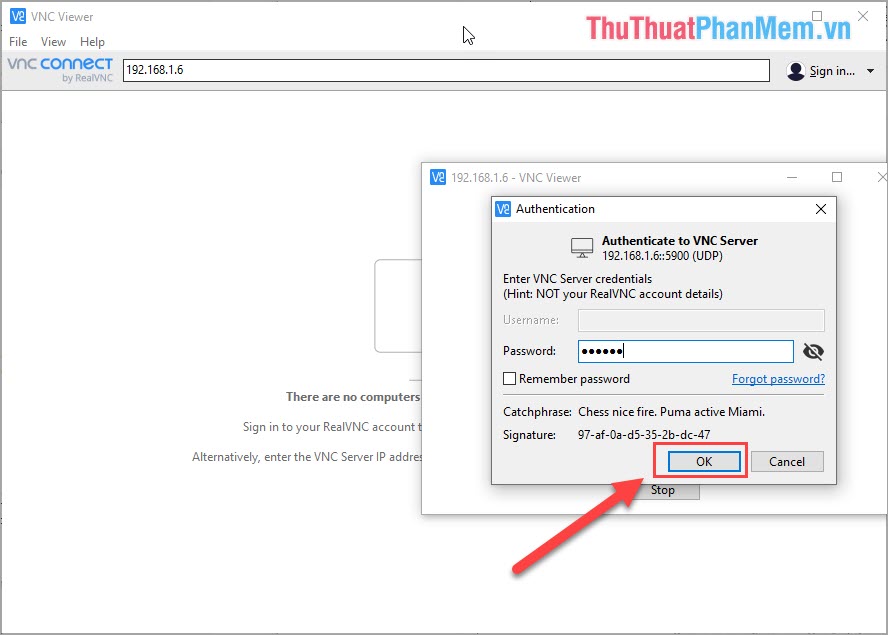
Step 2: After the installation is complete, enter the IP address of VNC Server in the box and press Enter .
Next you need to enter the password of the VNC Server that we set up in Part 1 .

Step 3: Finally, click OK to start connecting the computer.
And this is the result when using VLC Viewer to connect the computer.
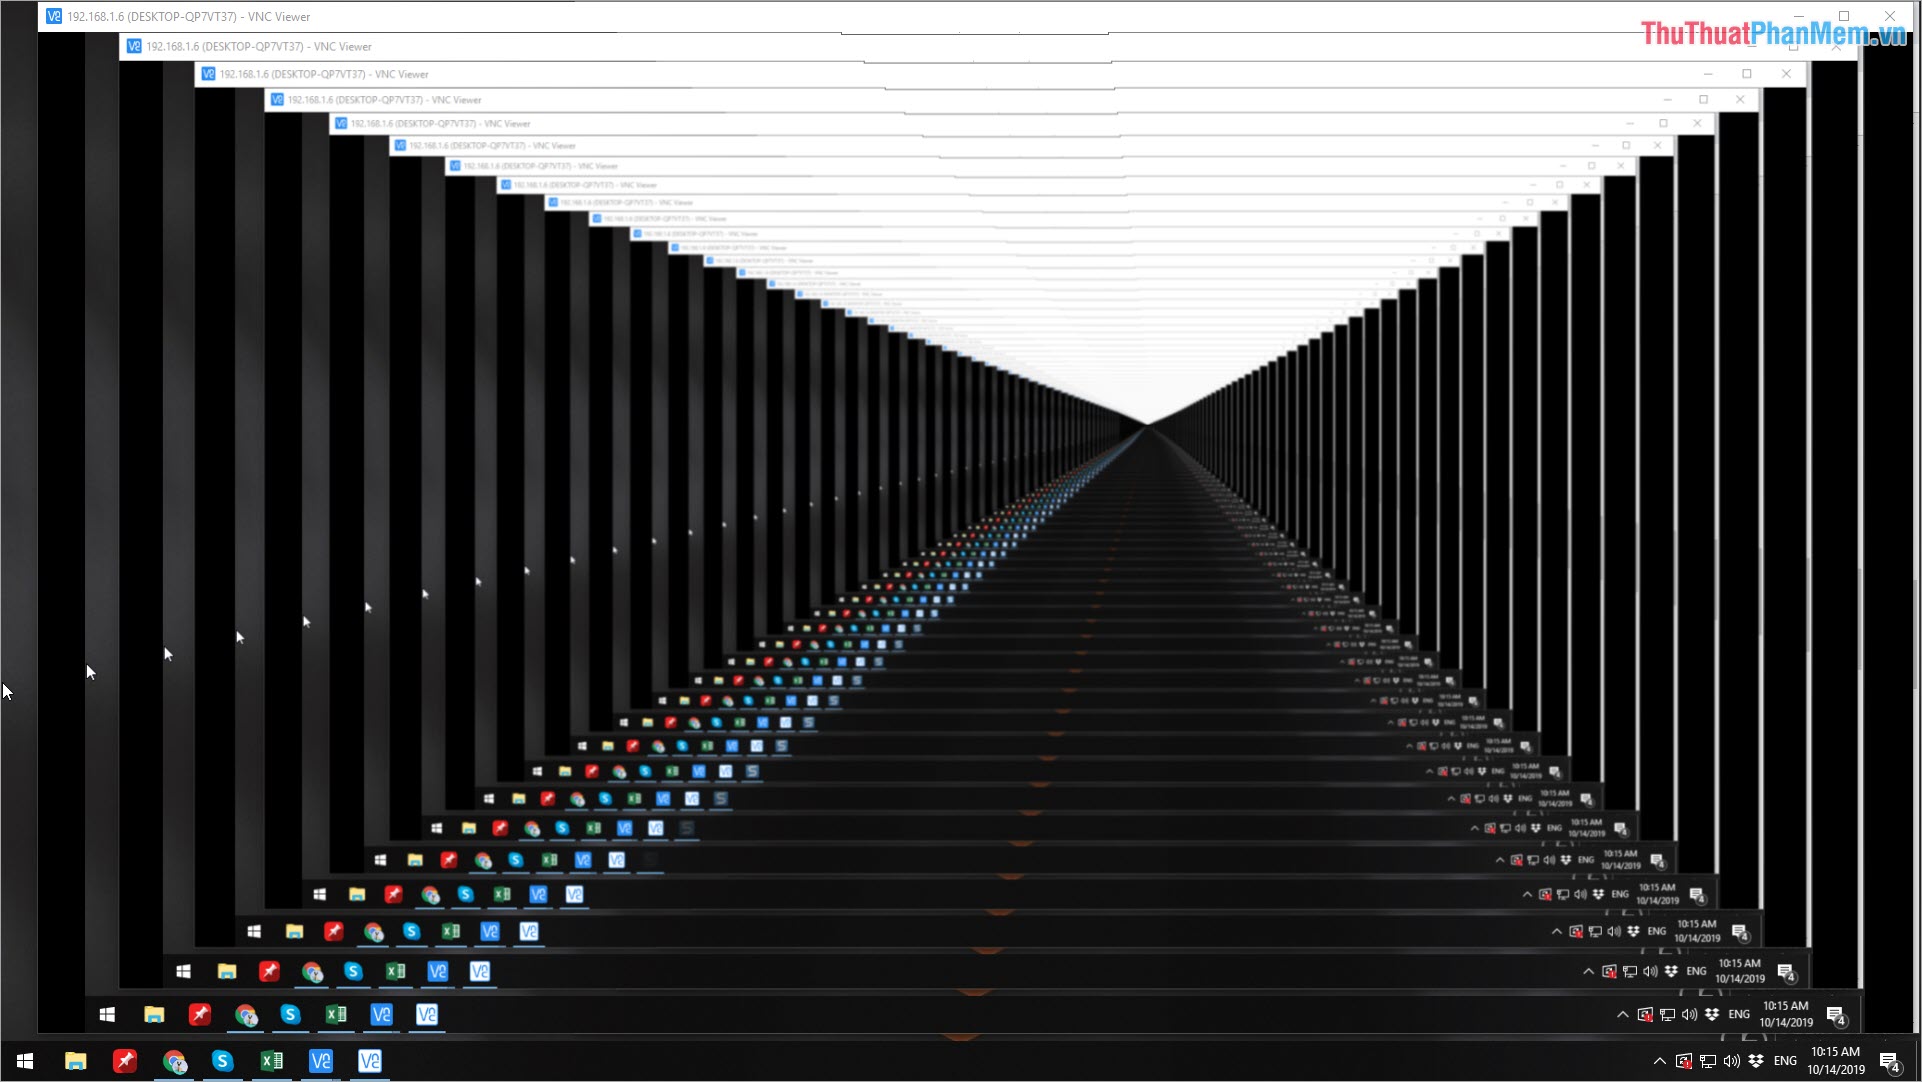
In this article, TipsMake. com uses the computer of the web to control its computer, so there will be screen duplication. For those who use other computers to control it will be normal.
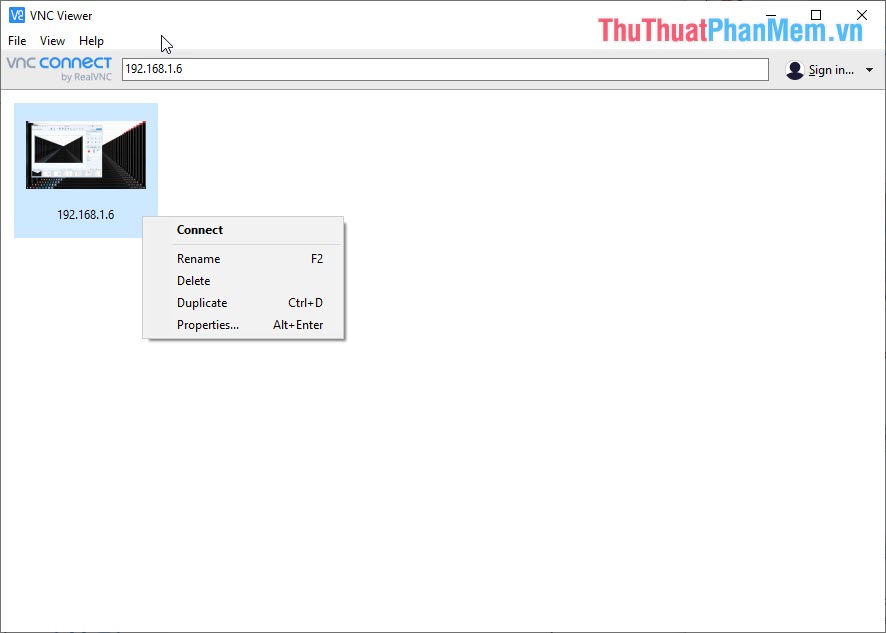
From the next connection, you just open VLC Viewer and select the computer you want to connect -> Right mouse -> Connect.
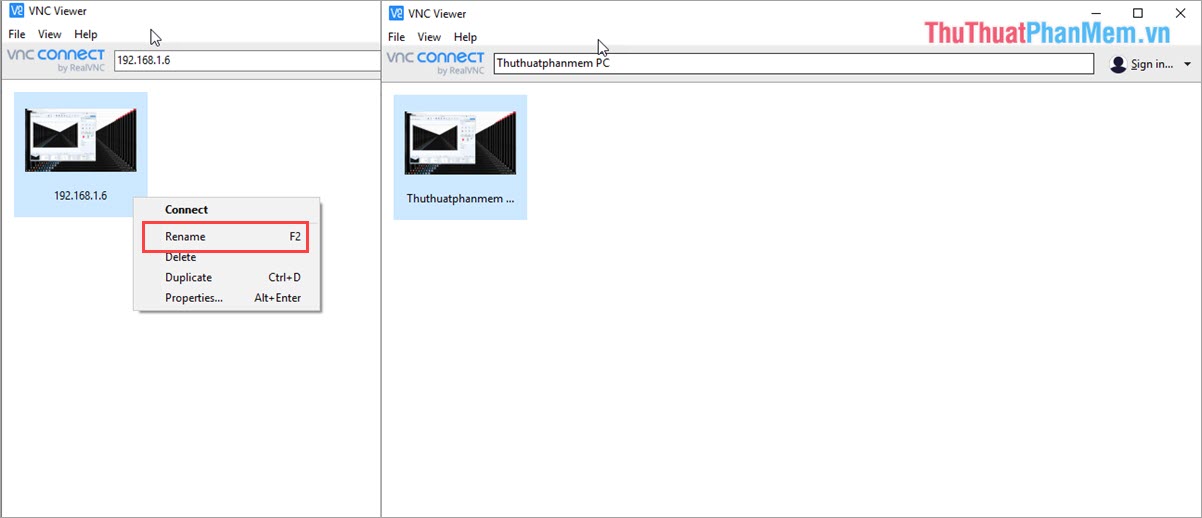
You can also rename the computer control to make it easy to distinguish by: Right - clicking -> Rename or pressing F2 .
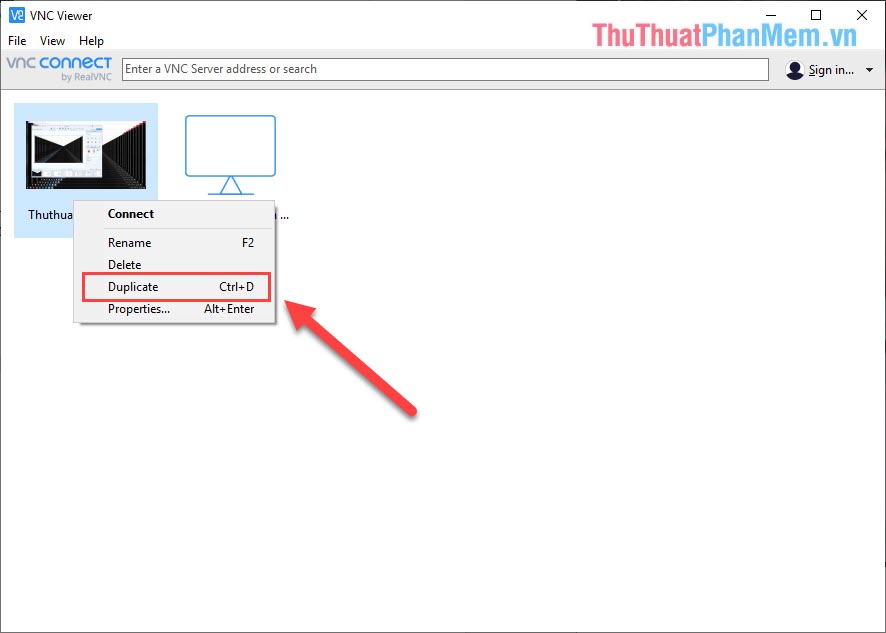
If you want to duplicate the connection window with VNC Server, then you need to do the following: Right-click -> Duplicate to duplicate the control window.
Some other settings you can customize as follows:
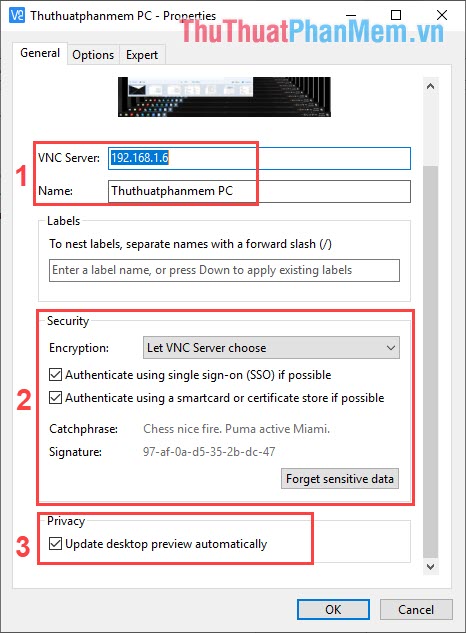
Right-click on the VNC Server control window and select Properties. (Alt + Enter).

First you will have the General window, where you can adjust the general information, basic:
- VNC Server: Customize the IP address Name: Name of VNC Server device
- Security: Security settings Encryption: Authenticate encryption using single sign-on (SSO) if possible: Confirm login only once. Authenticate using smartcard or certificate store if possible : Verify the smart card board or store certificate.
- Privacy: Privacy Update Automatically desktop preview: Automatically update the computer's preview
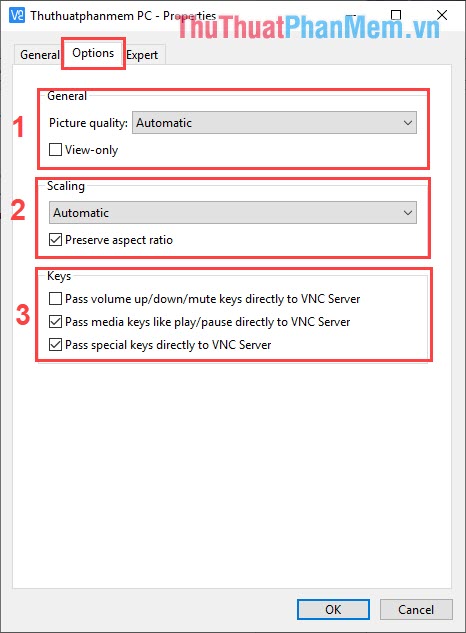
Next you have the Options window, where you adjust the parameters displayed and used:
1. Picture Quality: Picture resolution
2. Scaling: Zoom in, shrink the screen
3. Key: Control key Pass Volume up / down / mute keys directly to VNC Server: Skip the volume up, volume down, and mute keys when connected to VNC Server Pass media keys play / pause directly to VNC Server: Skip playing keys, pause multimedia when connected to VNC Server Pass special keys directly to VNC Server: Ignore special keys when connecting to VNC Server
In this article, Software Tips have shown you how to use VLC Viewer software quickly and accurately. Good luck!
FAQ
What should I know about Instructions on How to Use VNC Viewer Software?
Focus on the key features, requirements, limitations, and practical use cases explained in this guide.
How do I get the best results with Instructions on How to Use VNC Viewer Software?
Follow the recommended steps, use current software or information, confirm compatibility, and review settings before major changes.
Are there any risks or limitations?
Potential limitations depend on compatibility, data quality, cost, privacy, support, and how the product or method is used.
Related Articles
 How to Add // Remove Xps Viewer Application in Windows 103 minutes read
 Download Pdf-xchange Viewer 2.5.322.106 minutes read
 Best Photo Viewer Software on Windows 109 minutes read
 How to Use File Viewer Plus 3 to Open All File Formats8 minutes read
 How to Access Event Viewer in Windows 103 minutes read
 How to Disable Office File Viewer in Microsoft Edge3 minutes read
Reader Comments 0
Sign in with email or Google to join the discussion.