Instructions for creating mouse pointer highlights on Windows
The Cursor Highlighter application will create a highlight effect for the mouse cursor on your computer, highlighting the cursor, making it easier for you and your viewers to follow during presentations, tutorials and live streams.
Table of Contents
The Cursor Highlighter application will create a highlight effect for the mouse cursor on your computer, highlighting the cursor, making it easier for you and your viewers to follow during presentations, tutorials and live streams. The application provides different settings for you to adjust the mouse pointer highlight on your computer to suit your needs. Below are instructions for creating mouse pointer highlights on Windows.
How to highlight the mouse pointer on Windows using Cursor Highlighter
Step 1:
First, download and install the Cursor Highlighter application according to the link below.
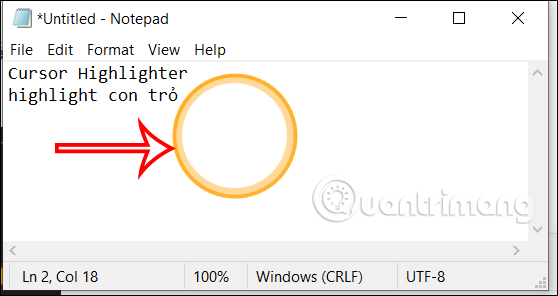
You will immediately see the mouse pointer highlighted as shown below. When you click the left mouse button it turns red, if left alone it turns yellow and the right click turns blue.
Step 2:
In the Cursor Highlighter application interface you will see many different customizations at Appearance:
- Enable cursor highlighter: Turn on or off the application's effects.
- Use accent color: Use system or custom accent color.
- Left click color: Adjust the color when left clicking.
- Right click color: Adjust the color when right-clicking.
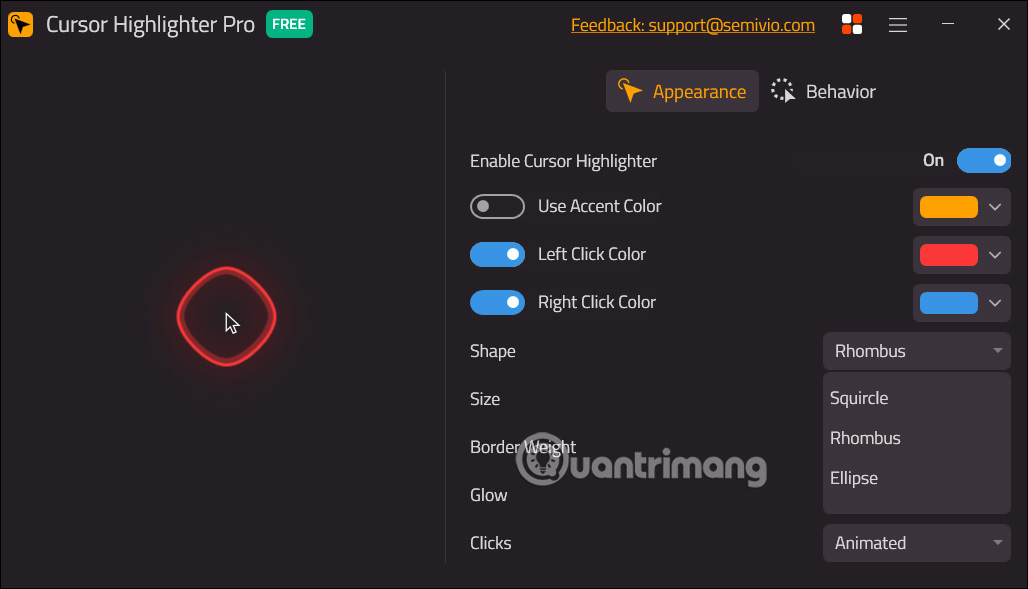
- Shape: Choose a shape for the ring surrounding the mouse cursor including rounded square, diamond and ellipse.
- Size: Choose a size for the ring.
- Border weight: Choose border thickness.
- Glow: Choose a ring light effect.
- Clicks: Choose the type of effect when clicking the mouse.
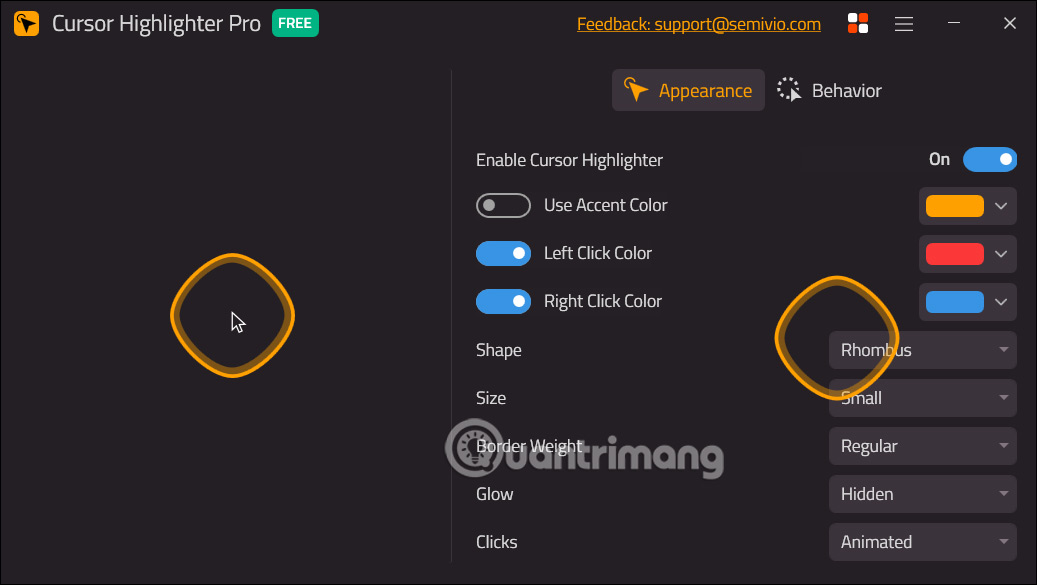
Click to select which change you want to use and you will see the cursor highlight displayed next to it for you to preview.
Step 3:
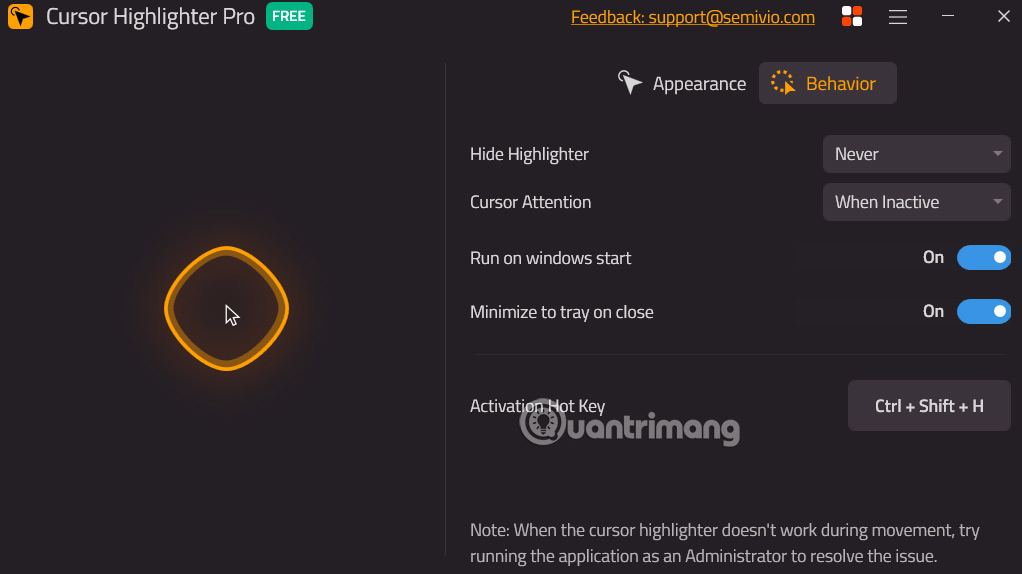
Continue clicking on the Behavior section to further edit the cursor highlight.
- Hide highlighter: Hide the effect ring when inactive, when moving or never hidden.
- Cursor attention: Enlarges the surrounding effect ring when inactive or not in use.
- Run on window start: Always use Cursor Highlighter Pro to start the computer.
- Minimize to tray on close: Minimize automatically to the system tray when closing the setup interface.
- Activation hotkey: Shortcut key Ctrl + Shift + H to turn on or off effects or set other shortcuts.
We also customize the display settings on the application's interface.
How to highlight the mouse pointer with PenAttention
1. Download PenAttention at:
http://www.math.uaa.alaska.edu/~afkjm/PenAttention/download.html2. Install the application by double clicking on the exe file.
3. Once installed, open it from the Start menu.
4. Now, right-click on the PenAttention icon on the taskbar and select Highlight settings.
5. Here, select the Highlight mouse as well as pen option .
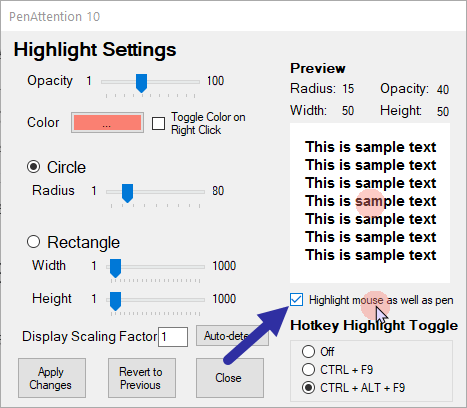
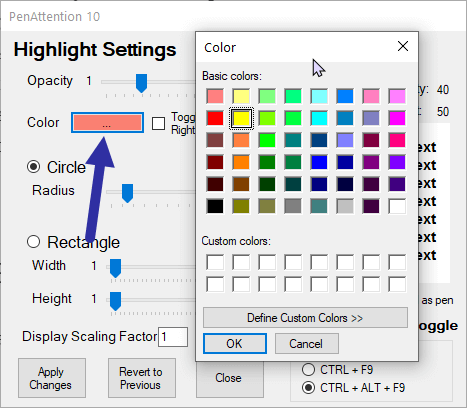
6. To change the color to yellow, click the Color box and select yellow.
7. Click the Apply changes button.
How to highlight the mouse pointer with PointerFocus
If the PenAttention app doesn't work for you, try PointerFocus.
1. Download PointerFocus.
2. Install the downloaded application.
3. Once installed, open the Start menu, search for PointerFocus and open it.
4. As soon as it opens, you will see a yellow ring around the mouse pointer.
Customize the size and color of the mouse pointer
If you don't like the default cursor highlighting, you can change it to a closed circle and reduce its size. Here's how.
1. Right-click the PointerFocus application on the taskbar and select Options.
2. Go to the Highlight cursor tab.
3. Here, set the Size value to 50 and the Circle Width value to 30.
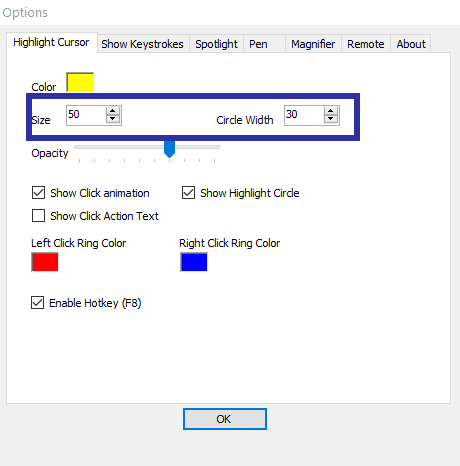
4. Click the OK button to save the changes.
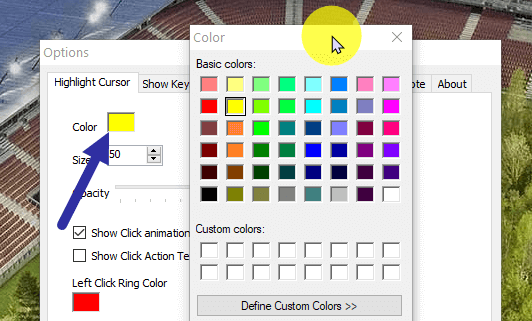
Once the changes are applied, you will see the mouse pointer highlighted by a yellow circle. If not, try other size and width settings to get the desired results.
To change the highlight color, click the color box next to the Color option.
You can quickly turn cursor highlighting on or off by right-clicking the taskbar icon and selecting the Highlight cursor option or pressing the key F8on your keyboard.
Note : PointerFocus is a paid application. However, you can use it for free as long as it is not for commercial purposes. The only drawback is that the app displays an upgrade prompt every 5 minutes.
How to highlight the mouse pointer over the Yellow Circle Cursor
If you don't want to install any software just to highlight the mouse pointer, you need to create a new cursor scheme in Windows.
1. Download Yellow Circle Cursor at:
http://www.rw-designer.com/cursor-detail/720392. Open the Start menu, search for Mouse settings and open it.
3. On the right page, scroll down and click the Additional mouse options link .
4. Go to the Pointers tab.
5. Here, select the Normal Select option and click the Browse button.
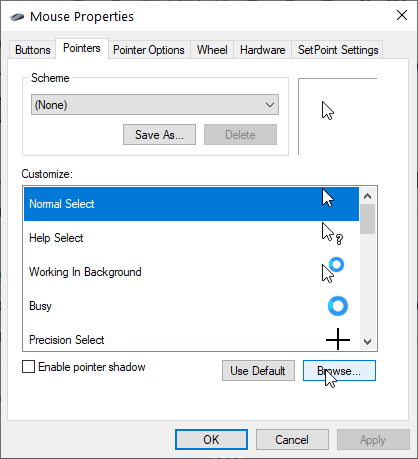
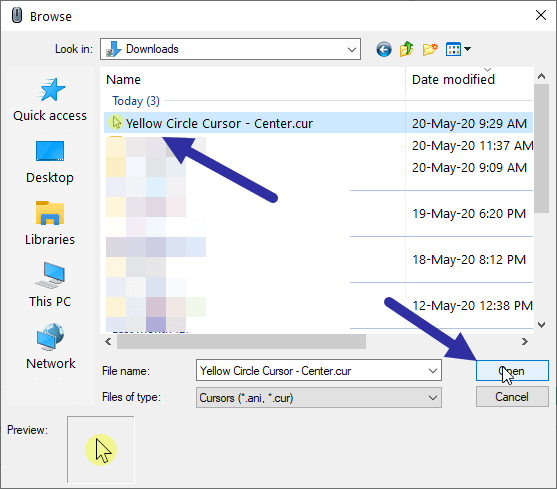
6. Go to where you saved the downloaded cursor, select it and click Open.
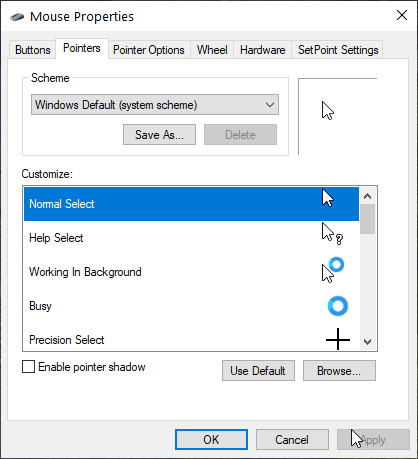
7. The pointer will be added to Pointers. Click the Save as button.
8. Name the cursor style to whatever you want and click OK.
9. Now, click the Apply > OK button .
As soon as you do that, Windows will activate the new mouse pointer.
To return to the default mouse pointer, open Pointers and select the Windows Default (system scheme) option from the drop-down menu and save the changes.
Refer to the article: How to add mouse effects in videos on Camtasia for another way to customize the mouse pointer.
Was this article helpful?
Your feedback helps us improve.
Related Articles
 How to change the mouse pointer on Windows 11 with many styles and colors2 minutes read
 Instructions to change mouse cursor on Windows 112 minutes read
 How to fix the mouse pointer disappearing on Windows 104 minutes read
 How to change the mouse pointer size and style in Windows 113 minutes read
 How to create a yellow circle around the mouse cursor on Windows5 minutes read
 Instructions to customize the mouse pointer in Windows4 minutes read
Reader Comments 0
Sign in with email or Google to join the discussion.