Installing Microsoft SQL Server on Ubuntu
You may not know this, but Microsoft is quite supportive of the open-source community. Proof of this is that some Microsoft software is available on Linux, including .NET and SQL. Below, TipsMake will guide you on how to install Microsoft SQL Server on Ubuntu.
If your purpose is testing, you can refer to the article on how to install Ubuntu in VMware and then follow the steps below from TipsMake to install Microsoft SQL Server on Ubuntu to ensure you don't encounter any serious problems during the process.
Request
- The device you want to install SQL on must have at least 4GB of RAM.
- Your computer must be running Ubuntu 16.04 or 16.10.
Install SQL
Make sure your Ubuntu computer is updated:
sudo apt-get update && sudo apt-get upgrade && sudo apt-get dist-upgrade
Then add the SQL repository:
curl https://packages.microsoft.com/keys/microsoft.asc | sudo apt-key add -
Register a Microsoft Ubuntu repo:
curl https://packages.microsoft.com/config/ubuntu/16.04/mssql-server.list | sudo tee /etc/apt/sources.list.d/mssql-server.list
Update the repository:
sudo apt-get update
Install SQL:
sudo apt-get update
The above command will begin installing SQL:

Run the following setup command to complete the Microsoft SQL Server installation process on Ubuntu:
sudo /opt/mssql/bin/mssql-conf setup
Then press Y to accept the terms of the agreement.
Next, enter your SA account password.
The above steps will complete the installation process.
Open port 1433 on Ubuntu Firewall:
sudo ufw allow 1433

Connect to the server using the command-line utility.
To connect to the server using the command-line utility, you must have the mssql-tools package. To install the mssql-tools package on Ubuntu, run the following command in the Terminal window:
curl https://packages.microsoft.com/keys/microsoft.asc | sudo apt-key add -
Register a repository with Microsoft:
curl https://packages.microsoft.com/config/ubuntu/16.04/prod.list | sudo tee /etc/apt/sources.list.d/msprod.list
Update the source and install the package using the command:
sudo apt-get update && sudo apt-get install mssql-tools unixodbc-dev
Add mssql-tools to the bash path:
echo 'export PATH="$PATH:/opt/mssql-tools/bin"' >> -/.bash_profile
echo 'export PATH="$PATH:/opt/mssql-tools/bin"' >> -/.bashrc source -/.bashrc
To connect to the database, you use the command:
sqlcmd -S localhost ( or the IP address of the server ) -U SA
And you will be prompted to enter your SA account password.
To create the database, enter the command:
CREATE DATABASE testdb;
GO
To view the database on the server, enter the command:
SELECT Name from sys.Databases;
GO
To end a session, simply type QUIT . The syntax is quite similar to MySQL.
Connect to the server using Microsoft Management Studio
To manage servers on a Windows 10 computer, you can use Microsoft Management Studio.
Download and install Microsoft Management Studio here: Download Microsoft Management Studio
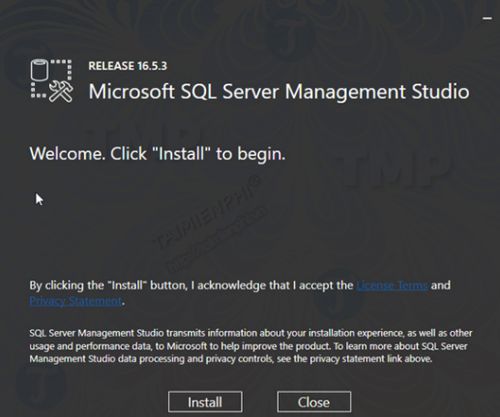
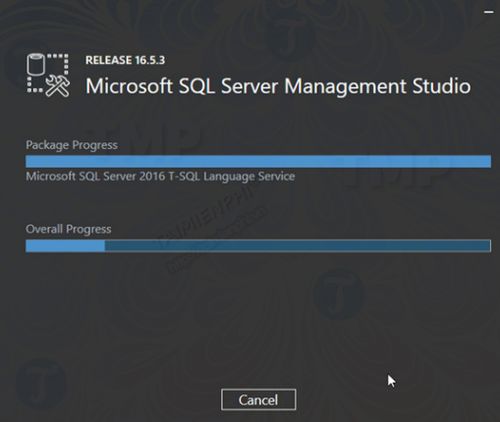
The installation process can be fast or slow depending on your computer's configuration.
After the installation process is complete, find and open Microsoft SQL Server Management Studio. Enter the IP address in the Ubuntu name field , select SQL Server Authentication from the Authentication menu . Enter your SA account username and password there.
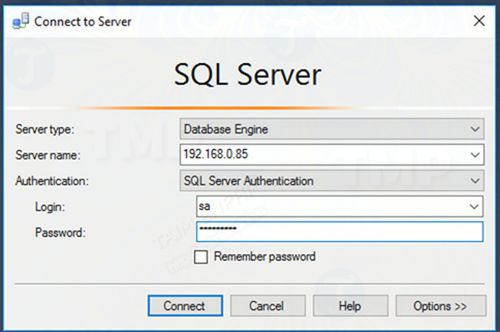
You have now successfully connected to the server.

Above, TipsMake has guided you on how to install Microsoft SQL Server on Ubuntu. While you can only install Microsoft SQL Server on Ubuntu, you can install other software with just a few simple steps. You can also refer to how to install Java on Ubuntu for more detailed instructions. Any questions or comments are welcome in the comments section below the article.
Was this article helpful?
Your feedback helps us improve.
Related Articles
 What is the difference between Ubuntu Desktop and Ubuntu Server?4 minutes read
 How to install desktop/GUI environment in Ubuntu Server4 minutes read
 Ubuntu Server Upgrade Steps5 minutes read
 Instructions for installing Ubuntu Web Server on remote host5 minutes read
 Instructions for installing Windows Fonts on Ubuntu2 minutes read
 How to install Plex media server on Ubuntu 19.046 minutes read
Reader Comments 0
Sign in with email or Google to join the discussion.