How to use Windows Virtual Desktop effectively
Virtual desktops are a handy way to combine multiple workspaces in Windows 10. There are a number of ways to quickly switch between virtual desktops, including some lesser-known keyboard shortcuts. TipsMake.com.com will cover them all in the following article.
Table of Contents
Having multiple apps for different projects always makes it hard to focus. It's even worse when working on a single monitor—so much time is wasted arranging and resizing windows. Luckily, this built-in Windows feature changes everything.
Windows Virtual Desktop will change the way you work
Before discovering Windows Virtual Desktop, many people struggled with a cluttered desktop and wasted time searching for the right window. It was frustrating to have to hold Alt + Tab and squint at the screen all day long to arrange dozens of windows.
Although they had heard about Windows Virtual Desktop when it first launched on Windows 10, they never tried it until they moved to Windows 11 and spent some time learning about its features.

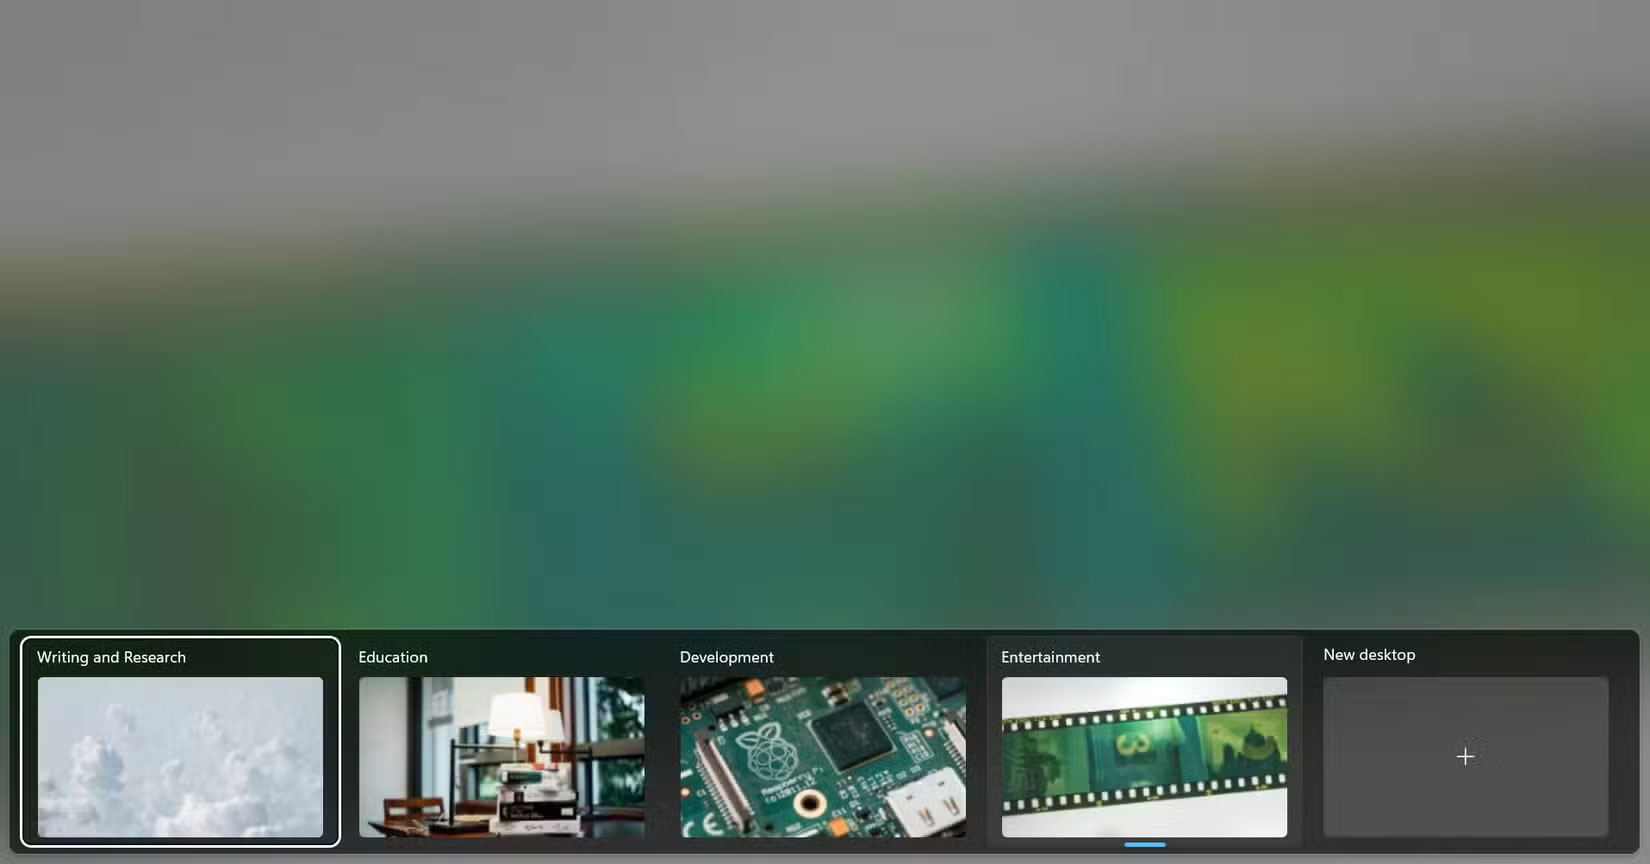
Fast forward to today and Virtual Desktops has become one of my favorite time-saving features on Windows. With it, you can create dedicated workspaces for different tasks or interests, such as writing and research, education, programming, and entertainment.
This simple separation allows you to focus on one task at a time. When you switch to the writing screen, you only see the apps, tools, and folders relevant to your current task. This not only helps you stay focused, but also lets you navigate a much smaller set of apps for each workspace.
And with Windows 11 now able to assign different backgrounds to each monitor, you can choose a soothing image for your writing space and a bright image for your study screen. You no longer need to minimize or close programs to see what you're doing, and everything stays neatly grouped.
How to use virtual desktops effectively
Windows Virtual Desktop is a simple management tool that doesn't take long to learn. Here's how you can use Virtual Desktop effectively:
Create and switch between virtual desktops
To get started with Windows Virtual Desktop, you'll need to know the basics first. Here's how you can create desktops and switch between virtual desktops:
- Press the Windows key + Tab on your keyboard. This opens Task View and shows all your virtual desktops and windows.
- To create a virtual desktop, click New desktop at the bottom of Task View .
- To switch between virtual desktops, press Ctrl + Windows Key + Left/Right Arrow Key to go left or right.
That's it! Now you know the basics of virtual desktops, but there are a few things you can do to improve them.
Understand more advanced control functions
In addition to the basic functionality, Windows Virtual Desktop offers a number of additional controls that can significantly improve your multitasking capabilities. Here are some examples:
- Pin apps across multiple desktops : If you need certain apps to be accessible across all virtual desktops, you can pin them everywhere. To do this, open Task View ( Windows Key + Tab ), right-click the desired app window, and select Show this window on all desktops . This ensures that essential tools remain available, no matter which desktop you're working on.
- Move windows between virtual desktops : To move an open window to another virtual desktop, open Task View, then drag the desired window to the desktop you selected. Alternatively, right-click the window, select Move to , and select the target desktop.
- Customize Task View : You can customize the Task View interface to better suit your preferences. For example, you can choose to show windows from all your desktops on the Taskbar or limit them to the current desktop. Navigate to Settings > System > Multitasking to adjust these options in the Desktops section .
Although small, taking the time to learn about these controls will give you better control over your virtual desktops in the long run.
Customize virtual desktops
As mentioned earlier, it is a good idea to use different workspaces for different tasks and interests. To make it easier to identify each task, you need to customize each space so that they look distinct. Here is how to do it:
- Rename the desktop by opening Task View ( Alt + Tab ).
- Right click on the desktop and select Rename . Give it a suitable name.
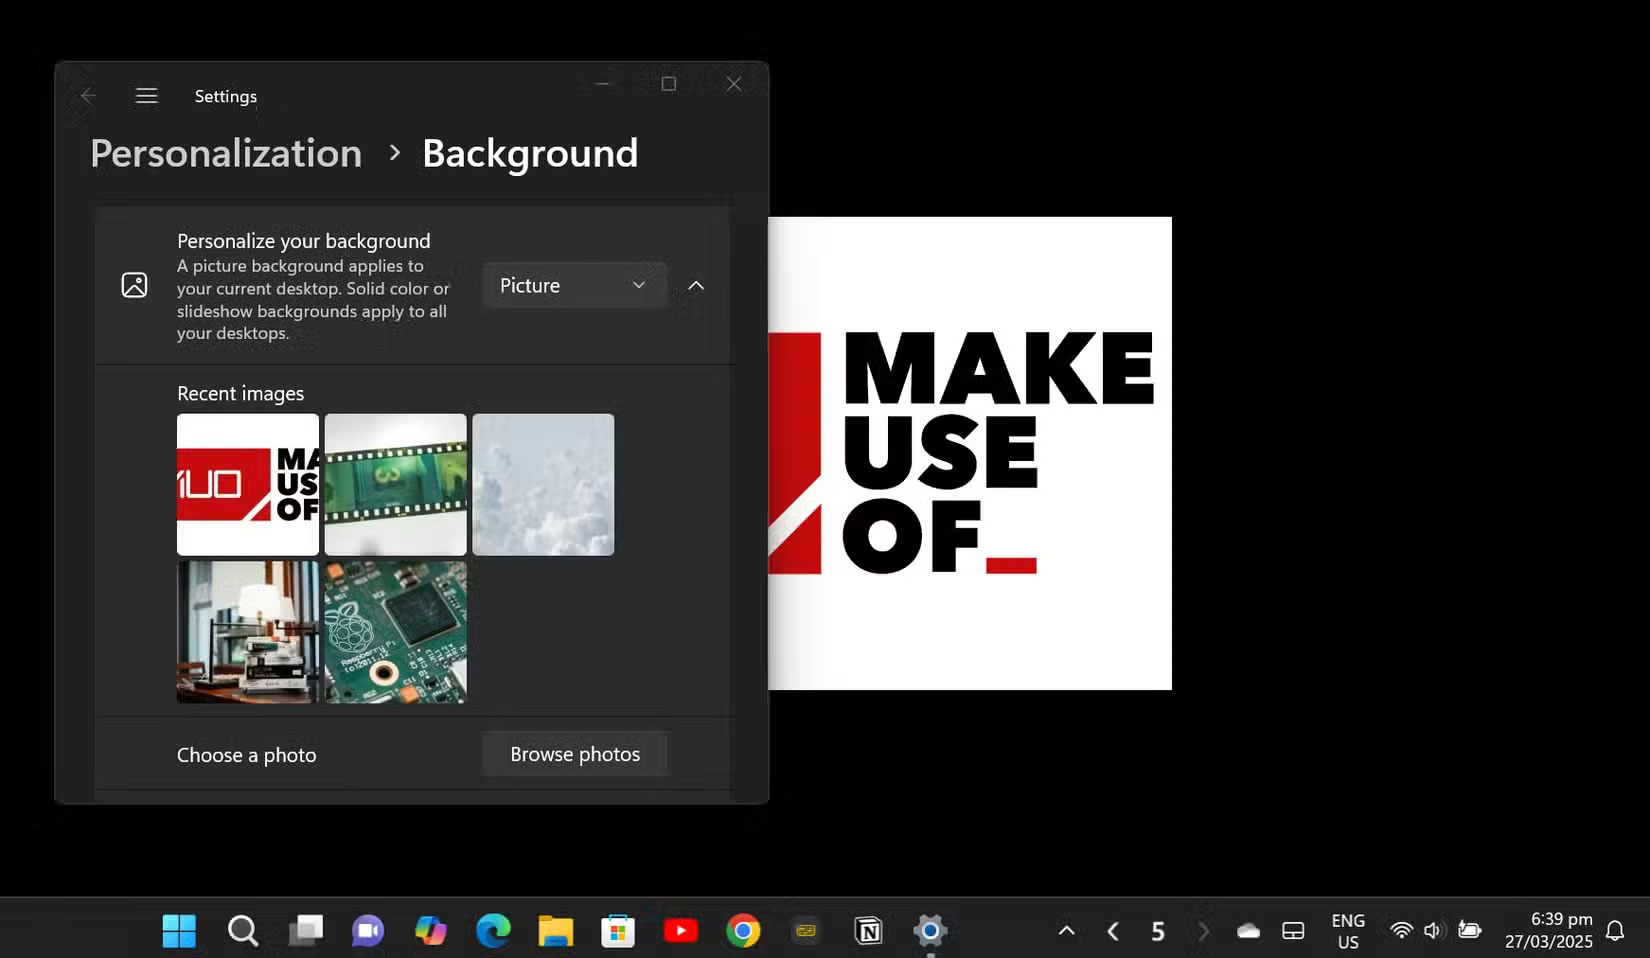
If you're using Windows 11, you can also change the wallpaper of each virtual desktop.
- Open Task View
- Right click on the desired desktop and select Choose background to change the image.
Try to use images that are closely related to the tasks assigned to each virtual desktop. You can also choose images that evoke a specific emotion to help you get into the right frame of mind for the task at hand.
For example, use a serene image for a writing space, a dramatic wallpaper for watching shows and movies, and a regular Windows wallpaper for personal or everyday tasks.
Using Snap Layouts and Snap Groups
Snap Layouts is one of the features that Windows excels at. It also pairs well with Virtual Desktops because it allows you to arrange your windows in a more efficient desktop.
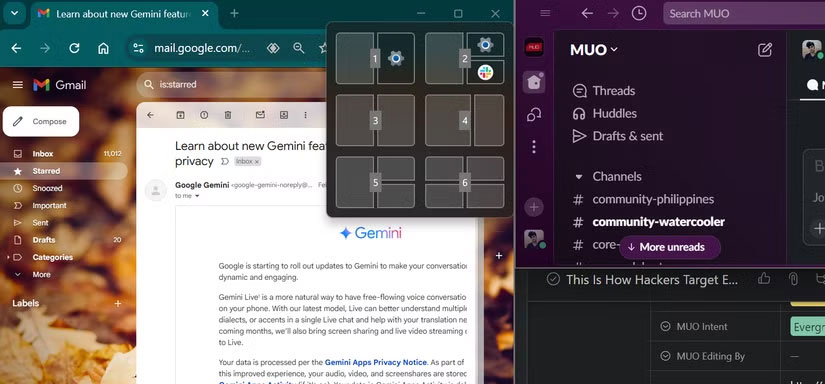
- Snap Layouts : Hover over an active window's maximize button or press Windows key + Z to see available layouts. Choose a profile to neatly arrange multiple windows on your desktop.
- Snap Groups : After arranging windows using Snap Layouts, Windows remembers these combinations as Snap Groups. You can switch between different groups seamlessly, enhancing multitasking on virtual desktops.
By creating separate desktops for different projects, you can now work faster and with less stress. If you're having any specific issues, now's the time to really try Windows Virtual Desktop.
See also:
- How to rename virtual desktops in Windows 10
Was this article helpful?
Your feedback helps us improve.
Related Articles
 How to rename virtual desktop in Windows 102 minutes read
 How to use Virtual Desktop on Windows 10?6 minutes read
 Already able to test Windows 11 on Azure Virtual Desktop2 minutes read
 How to use virtual desktop on Windows 115 minutes read
 How to open a file or an application on a virtual Windows 10 Desktop?5 minutes read
 Google officially introduces the virtual desktop feature on Chrome OS3 minutes read
Reader Comments 0
Sign in with email or Google to join the discussion.