How to Use Photo Booth on a Mac
This wikiHow teaches how to use the Photo Booth application on your Mac, which allows you to take single pictures, sequences of pictures, or videos and then apply fun effects to them. Connect a camera to your Mac (if necessary). Many Macs...
Table of Contents
Part 1 of 5:
Starting Photo Booth
-
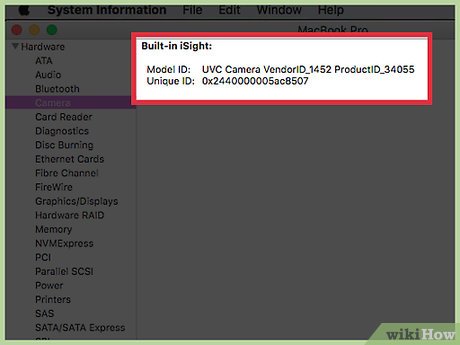 Connect a camera to your Mac (if necessary). Many Macs come with a webcam built-in, but you can install your own if your Mac doesn't have one or you want a higher-quality camera.
- Most webcams simply need to be plugged in to a USB port and they're good to go, as long as they're Mac compatible.
-
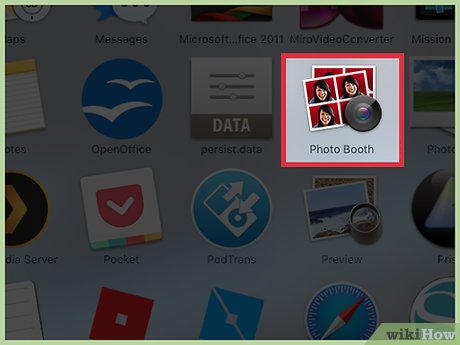 Open Photo Booth. There are a couple ways you can quickly open Photo Booth:
- Click the Go menu from the desktop and select Applications. Find Photo Booth in the Applications folder.
- Click the Search button in your menu bar, type photo booth, and press ⏎ Return.
-
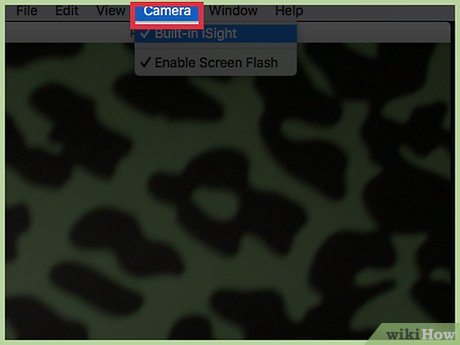 Click the Camera menu. If you have multiple cameras installed, you'll need to select the one you want to use with Photo Booth.
 -
 Click the camera you want to use. You'll see a list of all of your connected cameras. After selecting a camera, you should see the image from it in the Photo Booth window.
Part 2 of 5:
Taking a Single Picture
-
 Line up your shot in the Photo Booth window. You'll see the image from your webcam in the Photo Booth window. Move yourself or your webcam until your shot is lined up correctly.
 -
 Click the Single Picture button. You can find this in the bottom-left corner of the Photo Booth window, and it is typically selected by default.
 -
 Click the Camera button. The countdown will begin at the bottom of the screen.
 -
 Take your picture. When the countdown completes, the screen will flash and your picture will be taken.
Part 3 of 5:
Taking a Series of Pictures
-
 Click the Four Pictures button. You'll see this in the lower-left corner of the Photo Booth window. The button looks like four small squares arranged in a grid.
 -
 Line up your shot. You'll be taking four pictures in succession, with a few seconds in between to change poses. Make sure your camera is properly lined up in the Photo Booth window.
 -
 Click the Camera button. This is in the bottom-center of the window.
 -
 Strike a pose and wait for the countdown. You'll see the countdown at the bottom of the screen.
 -
 Change poses for each picture. You'll see the screen flash each time a picture is taken. Four pictures will be taken altogether.
Part 4 of 5:
Applying Effects
-
 Click the Effects button. You can apply effects to a picture you've just taken, or you can select an effect before taking a picture.
 -
 Click the ◀ and ▶ buttons to see more options. You'll see these at the bottom of the screen. Clicking these buttons will change pages and display more effects.
 -
 Click the effect you want to apply. You'll see a preview of each effect in the menu.
 -
 Click and drag the slider to adjust the effect (if possible). If the effect you chose can be adjusted, you'll see a slider appear. This allows you to change the strength of the effect.
 -
 Select a background from the list of effects. At the end of the list, you'll see backgrounds with silhouettes on them. These allow you to apply special backgrounds or effects to your body.
 -
 Move out of the frame. Photo Booth will need to detect what is the background so that it can properly apply the effect. You'll need to move completely out of the frame for it to work.
- Make sure there's nothing moving in your background either. This will work best with a solid background, but should work well as long as nothing is moving.
-
 Move back into the frame once the background has been detected. You'll see that the effect you chose has been applied to your body.
Part 5 of 5:
Saving and Exporting
-
 Drag a photo from the timeline to quickly save it. After taking a photo or video, you'll see it appear as a thumbnail at the bottom of the window. You can click and drag this to your desktop or any open folder to quickly save it.
 -
 Select a photo and click Share. The Share button looks like a square with an arrow coming out the top. This will open the Share menu.
- Click an item in the Share menu to choose how you want to share it. You can add it as an email attachment, send it in iMessage, or use any third-party apps that support sharing.
-
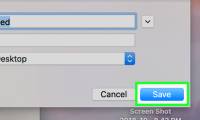
 Click File → Export to save images. If you want to select where an image is saved, or change the format, you can use the Export menu.
- Browse for where you want the file to be saved, give the file a name and choose the format, then click Export.
-
 Find your Photo Booth photos. Your Photo booth photos are stored in your Pictures library:
- Click the Finder button in your Dock.
- Click the Pictures folder.
- Find the Photo Booth Library package file.
- Right-click the file and select "Show Package Contents."
- Open the Pictures folder in the Photo Booth Library and then find your pictures.
Was this article helpful?
Your feedback helps us improve.
Related Articles
 How to Make a Movie of Yourself on a Mac11 minutes read
 The moment of Steve Jobs's rare humor2 minutes read
 Download Photo! Editor 1.1: Multifunctional photo editor5 minutes read
 How to enable Photo Stream on iPhone, iPad4 minutes read
 Top 6 best mobile photo printers 20197 minutes read
 How to edit Live Photos on iOS 114 minutes read
Reader Comments 0
Sign in with email or Google to join the discussion.