How to use Morphing morphing techniques in Photoshop
One of the editing features that you can perform on your photos in Adobe Photoshop is Morphing. This tool allows you to deform the image into whatever shape you want.
One of the editing features that you can perform on your photos in Adobe Photoshop is Morphing. This tool allows you to distort objects on the image or the entire image into any shape or form you want.
The tool is quite easy to use and if you have never tried it before, go to step 1 below to start using Morphing morphing techniques in Adobe Photoshop.
Step 1:
Launch Adobe Photoshop. Do this by double-clicking the shortcut icon on the desktop or by opening it from the list of applications installed on the computer.
Step 2:
Open an image file. Click the File button in the upper left corner of the window on the menu bar and select Open from the pop-up menu that appears.
Use the Explorer window and navigate to the location on the computer where the image you want to edit is located. Click Open once you've selected the image to open it in Photoshop.
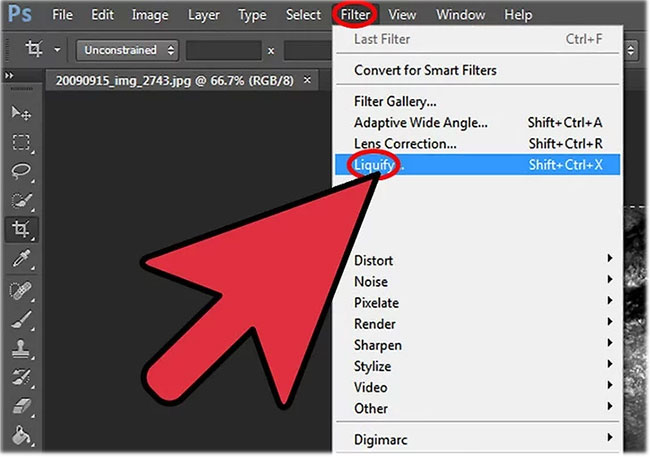
Step 3:
Select the Liquify tool . Click Filter along the menu bar at the top and select the Liquify filter from the pop-up menu that appears.
Step 4:
Left click the area you want to apply Morphing morphing technique. Use the mouse cursor (now a circle) and left click on the area on the image you want to transform.
You can also drag the cursor over the image to transform the areas of the image that the cursor passes over.
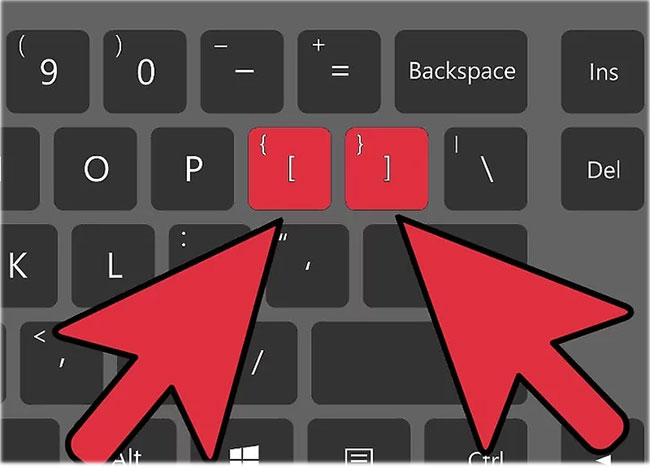
Step 5:
Adjust the cursor size. You can adjust the size of the circle pointer by clicking [ to reduce its size and ] to increase the size.
Step 6:
Close the Liquify tool . Click OK in the upper left corner of the window after you are done using the Liquify tool .
Step 7:
Save the changes. Click the File button again, but this time, select Save from the menu that appears to save the changes you have made to the image.
Was this article helpful?
Your feedback helps us improve.
Related Articles
 10 things to know about Mask in Photoshop6 minutes read
 How to use Photoshop CS5 - Part 25: Remove automatic background images with Photoshop Action3 minutes read
 How to use Photoshop CS5 - Part 5: Photo editing7 minutes read
 How to master Digital Coloring techniques in Photoshop11 minutes read
 Do you want to learn Adobe Photoshop tips within 1 minute? Take a look at these tutorial videos2 minutes read
 Young man has a close relationship with many famous people thanks to ... Photoshop resources3 minutes read
Reader Comments 0
Sign in with email or Google to join the discussion.