How to use Google Backup & Sync backup tool
This day to be able to store data, reduce the amount of resources occupied on computers, cloud storage services such as Google Drive, Google Photos, OneDrive, . are the first choice for users. And in June 2017, Google again released a new backup and sync tool called Backup and Sync, also known as Google's Backup and Sync.
Google's Backup and Sync tool can backup and sync all data on your computer to your personal Google account. You will not need to use Google Drive, or Google Photos on your computer, if you have Backup and Sync installed, because it can replace the storage capacity of these two services. So how to backup and synchronize data with Google Backup and Sync? Follow the tutorial below of Network Administrator.
Step 1:
First of all, we will download Google's Backup and Sync tool according to the link below.
- Download Backup & Sync for Windows
- Download Backup & Sync for Mac
Step 2:
Next, click on the .exe file to proceed with the installation. During the installation of Backup and Sync, the computer needs a stable Internet connection to download the data. The program installation process will take place automatically.

Step 3:
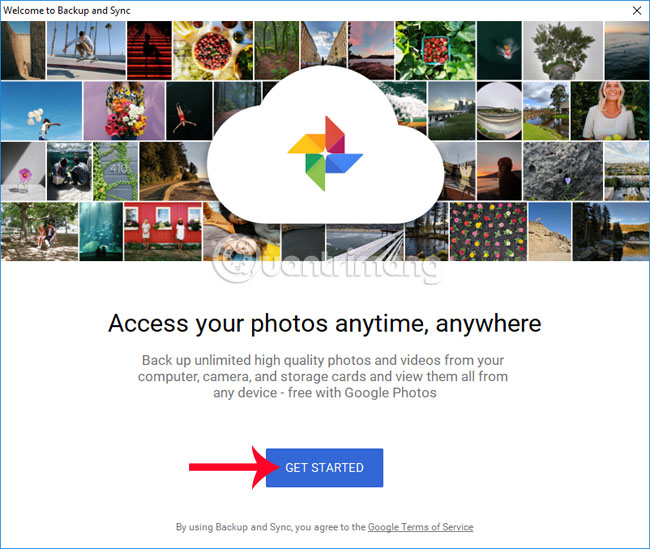
The interface starts using the tool as shown below, press Get Started . At the same time, you will see on the computer interface three more tools Google Slides, Google Docs and Google Sheets appear.
Step 4:
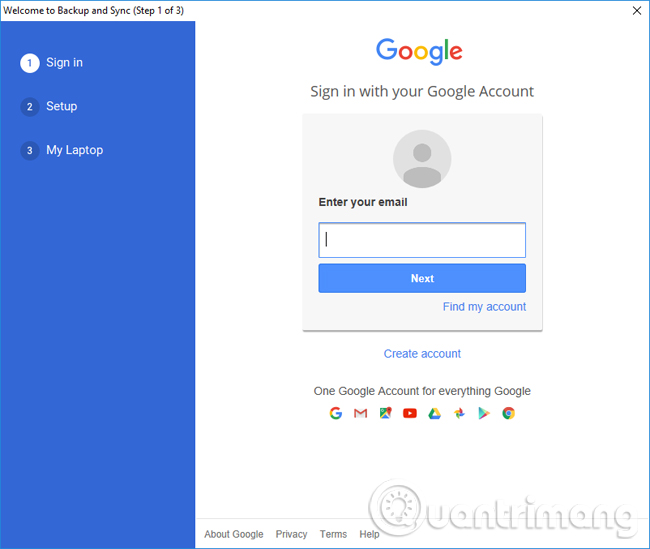
The first time we use Google's Backup and Sync, we need to fulfill the requirements of the 3 steps. The first step is to log in to your personal Google account .
Step 5:
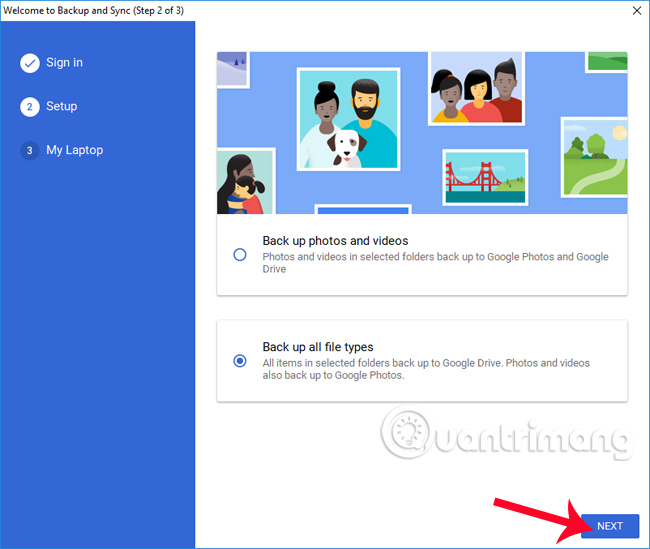
In the next step, Google's Backup and Sync will ask you which data backup options you choose, only backup your photos and videos (Back up photos and videos) or back up all data (Back up all files types).
As mentioned, Backup and Sync has the ability to back up all data, so we'll choose Backup and Sync, to back up all data on the computer. If you just want to back up photos and videos, then you can choose Back up photos and videos.
Then click Next to proceed to the next step.
Step 6:
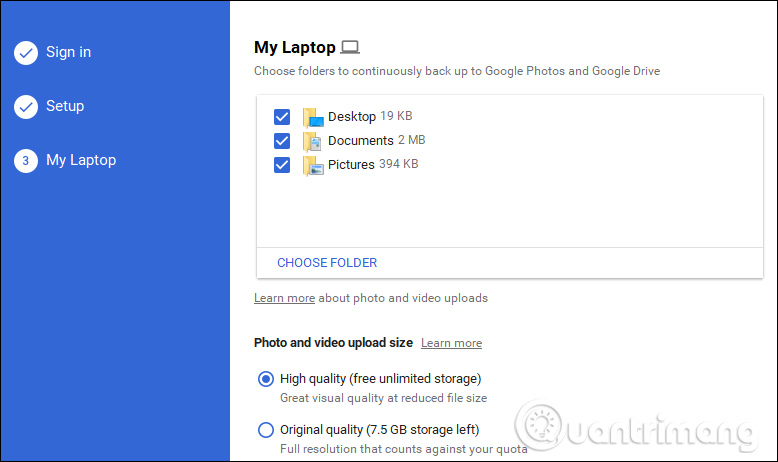
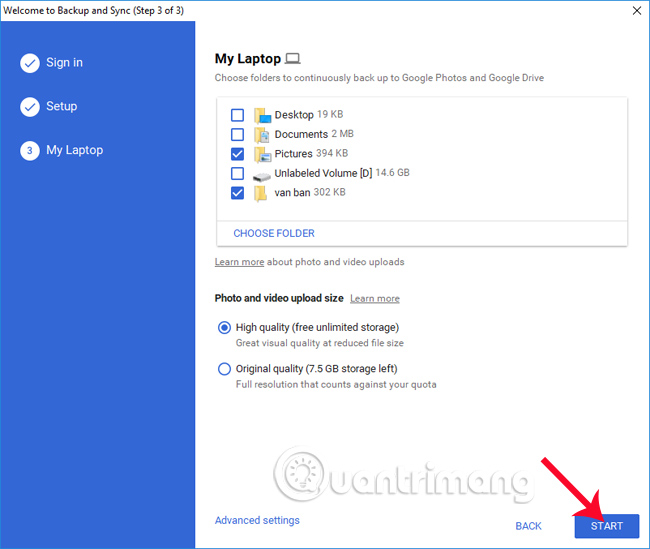
Finally, the interface synthesizes all data on the computer, along with the capacity for data storage folders. Select the folders, image and video quality in the upload size Photo and video to backup and sync. Click Choose Folder to open more folders.
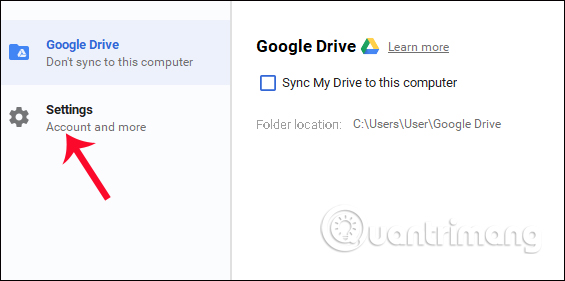
If you just want to back up data to Google Drive, but don't want to sync back, click Advanced settings .

Switching to the new dialog box interface, we will uncheck the Sync My Drive to this computer . Then click Settings to open more settings.
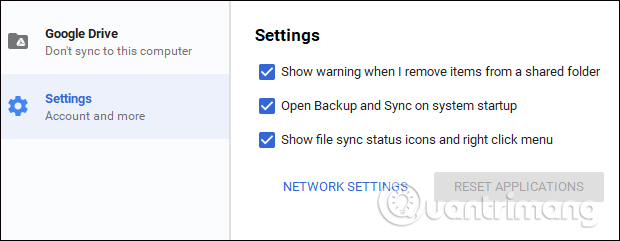
In the Settings section, there are 3 more options:
- Hiển thị một cảnh báo khi I gỡ bỏ các mục từ một thư mục chung: alert when deleting data in the folder being shared.
- Open Backup and Sync on system startup: Open Google's Backup and Sync on the list of autostart tasks every time you open your computer.
- Show files sync status icons and right click menu: display data synchronization status information when right-clicking on the application icon in the Taskbar.
If you want to use any option, we just need to select it to activate it. Click OK at the bottom to return to the first interface.
Finally, when the backup setup is complete for the Backup and Sync tool, press the Start button below to make the tool perform the task.
Step 7:
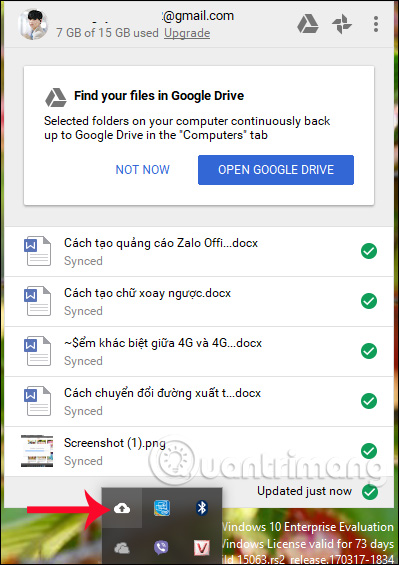
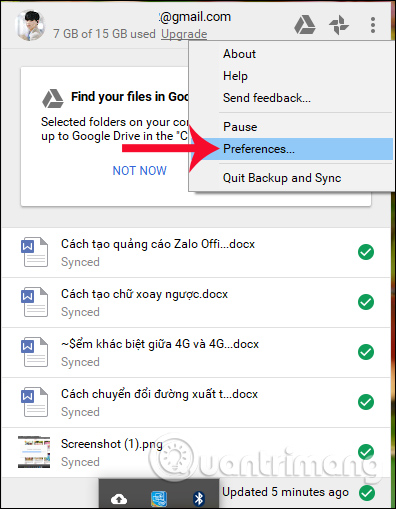
Soon the backup job will be carried out. When you click on the Taskbar, or the system tray, you will see the program icon. Attached is the window interface that shows the backup process of Backup and Sync.
Step 8:
To make adjustments to settings for Backup and Sync, click the 3 dots icon in the upper right corner of the window and select Preferences .
Step 9:
Next in the setup interface, users will see the option to Use devices & SD cards .
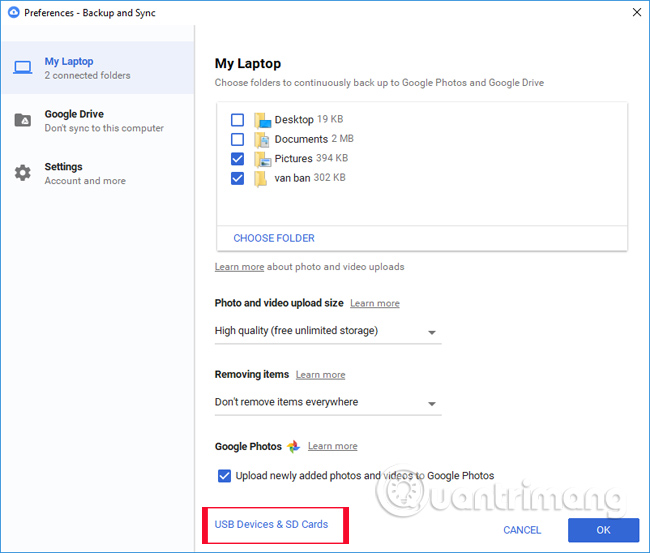
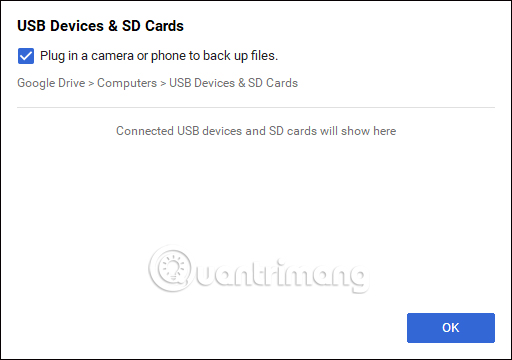
Backup and Sync adds the option to automatically back up data from USB or SD memory card when users connect to the computer. And you will be asked if you want to back up data.
Check synced data and folders to Google Drive
Step 1: First go to the folder you have synced to Google Drive, if you see the folders, files highlighted in green means that the data has been completed uploading to Google Drive, and if See the icon of the 2 rotating arrow sign, which means that the file, folder is still in sync.
After completing the data synchronization on Google Drive, please log in to your Google Drive account and select Computer> Laptop .
Here you will see synchronized folders, as well as files synced via Backup & Sync .
If you want to stop automatic data synchronization, turn on the Backup and Sync from Google tool in the Start menu.
Next, right-click the Backup and Sync Google icon, select the three-dot icon, and then click Preferences .
In the Backup and Sync Google Drive window, you can leave the selected folders that you do not want to sync to Google Drive.
Then click OK, then there will be a notice board showing that the folder you have selected will be stopped syncing, click Continue to finish.
The above is a tutorial on how to use the new backup tool Google Backup and Sync, backup and sync all data on your computer to your Google account. You will not need to install additional Google Drive or Google Photos applications to conduct data backup as before anymore.
I wish you all success!


