Table of Contents
By default, Microsoft has enabled password-protected sharing, which requires anyone who accesses a file, folder, or printer shared with you to enter a username and password. While this is secure, it can be quite inconvenient, especially when using it at home or on a personal computer. If you find this setting unnecessary, follow the article below to disable password-protected sharing on Windows 11.
Turn off password sharing security via Control Panel
Step 1:
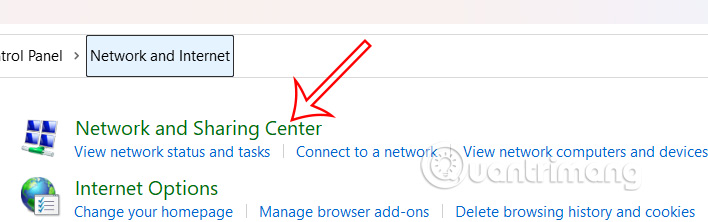
Open Control Panel then click Network and Internet -> Network and Sharing Center as shown below.
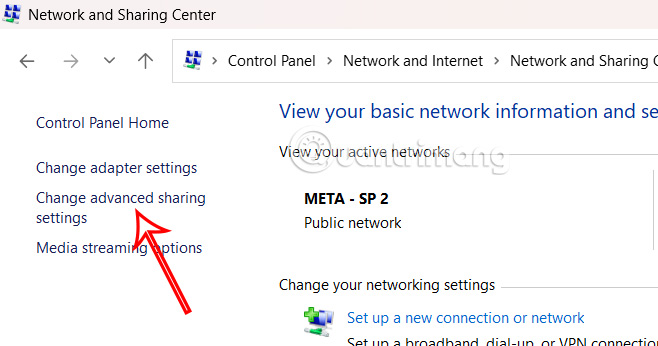
Continue to select Change advanced sharing settings on the left side of the interface.
Step 2:
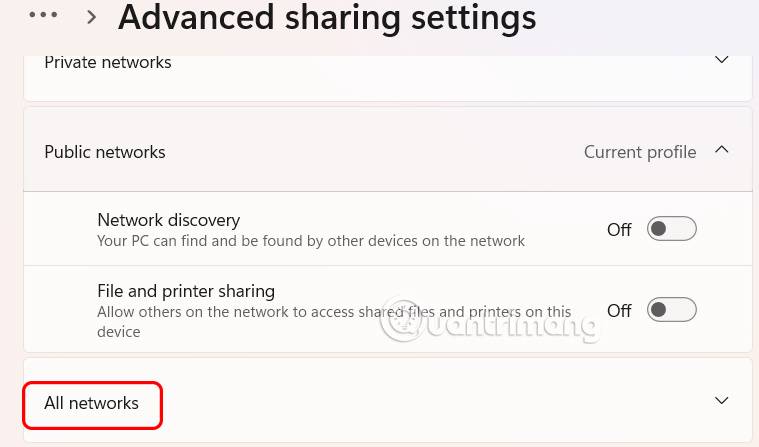
Switch to the Settings interface, we select All networks to proceed with adjustment.
Step 3:
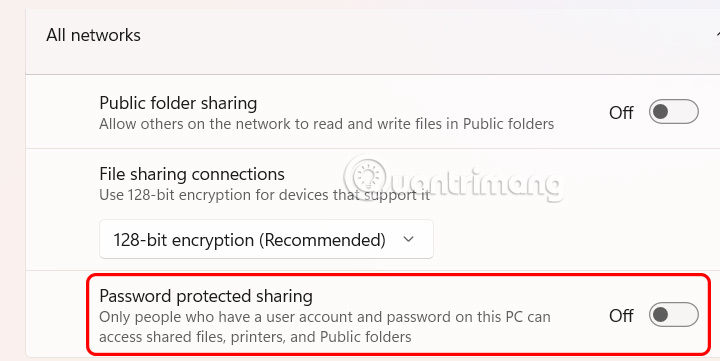
Now the user sees that the default password protected sharing mode is enabled on the computer.
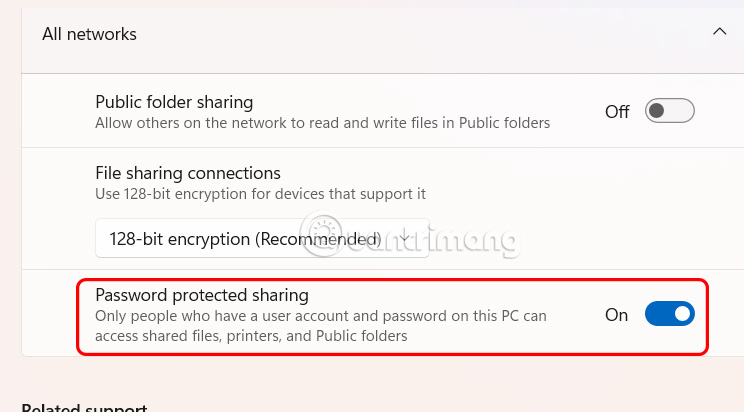
Then you just need to turn this mode off to not ask for a password when receiving data.
Using Registry Editor on Windows 11
Step 1:
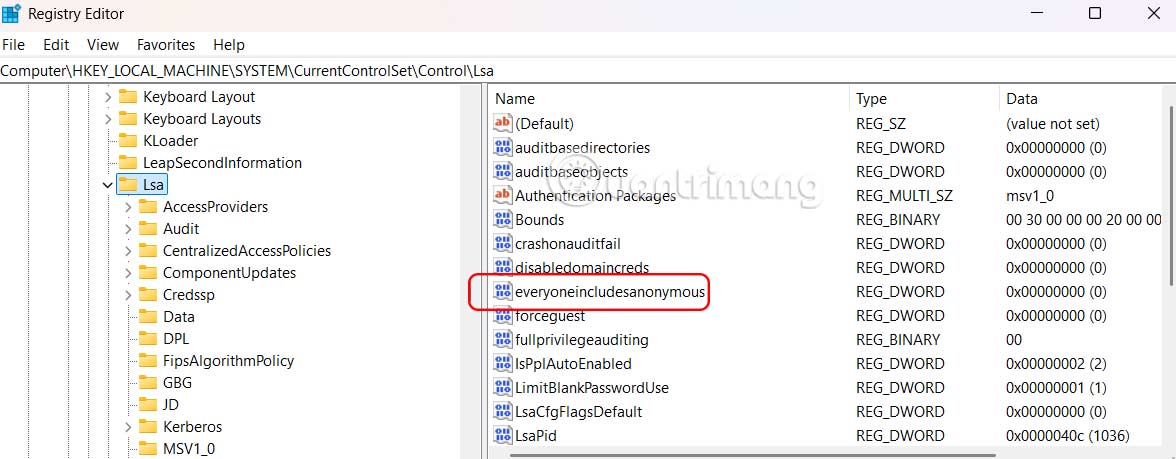
First, type regedit in the Run dialog box to access the Registry Editor on your computer. Then, access the path HKEY_LOCAL_MACHINESYSTEMCurrentControlSetControlLsa and then look to the side and double-select the value everyoneincludeanonymous.
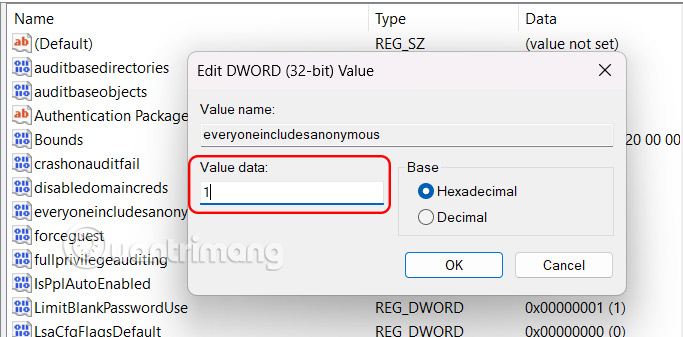
Now you will change the value to 1 and press Ok to save.
Step 2:
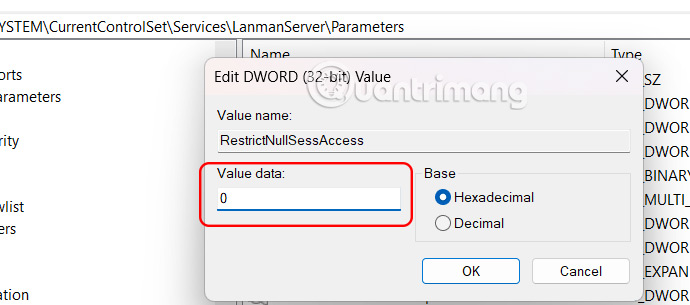
Next, you access the path HKEY_LOCAL_MACHINESYSTEMCurrentControlSetServicesLanmanServerParameters.
Look to the side and select the restrictnullsessaccess value to make adjustments.
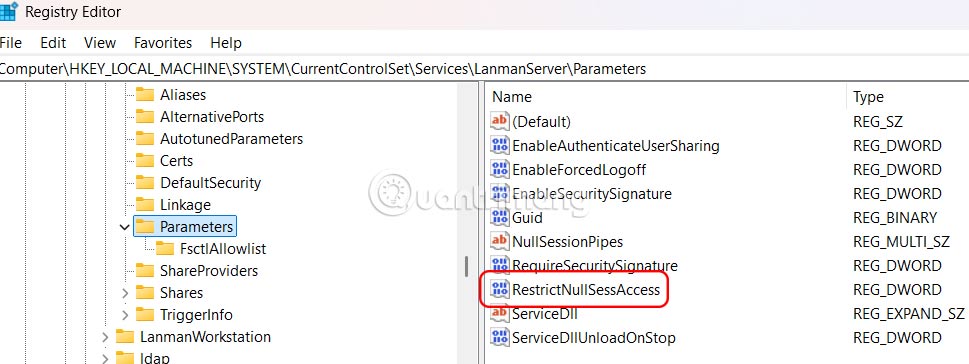
Now you will enter the value 0 as shown below.
Once disabled, malware on your network can exploit the shares. Without your login credentials, anyone on your Wi-Fi can access your shared folders. If you're on a public network, you shouldn't disable this setting.
Final Thoughts
Following the steps in order and checking version-specific settings should make it easier to Turn Off Password Sharing Security in Windows 11. If an option looks different, verify the device, app, or operating-system version before changing additional settings.
FAQ
What is the best way to Turn Off Password Sharing Security in Windows 11?
Start with the requirements described in the article and follow the steps in order. By default, Microsoft has enabled password-protected sharing, which requires anyone who accesses a file, folder, or printer shared with you to enter a username and password.
What should you know about Turn off password sharing security via Control Panel?
Open Control Panel then click Network and Internet -> Network and Sharing Center as shown below.
What should you do if the instructions do not match your screen?
Check the device, software version, account permissions, and regional settings. Interfaces can change after updates, so use the closest matching option and consult the official support documentation when necessary.
Related Articles
 Turn Off Win 10 Password When Logging in on the Computer: Complete Overview7 minutes read
 Password Security: Check the Security of the Password3 minutes read
 Turn Off Windows 10 Password When Logging in for Only 10 Seconds5 minutes read
 How to Setting a Password for a Word Document3 minutes read
 How to Turn Off Location Positioning on iOS 114 minutes read
 How to Turn Off Multi-Device Sharing on Windows 112 minutes read
Reader Comments 0
Sign in with email or Google to join the discussion.