Table of Contents
Learn how to turn off moving photos in Google photos with clear steps, practical tips, and troubleshooting guidance for a reliable result.
What are moving photos in Google Photos?
From Android 15 onwards, most advanced Android cameras automatically create still images with motion effects.
When you take a photo, your phone records a short video clip lasting a few seconds, and this video comes to life in Google Photos for Android. As soon as you open the photo in Google Photos for Android or the web, you can play that short video by tapping the Motion button to turn it on or off.
How to turn off moving photos on Google Photos
Step 1
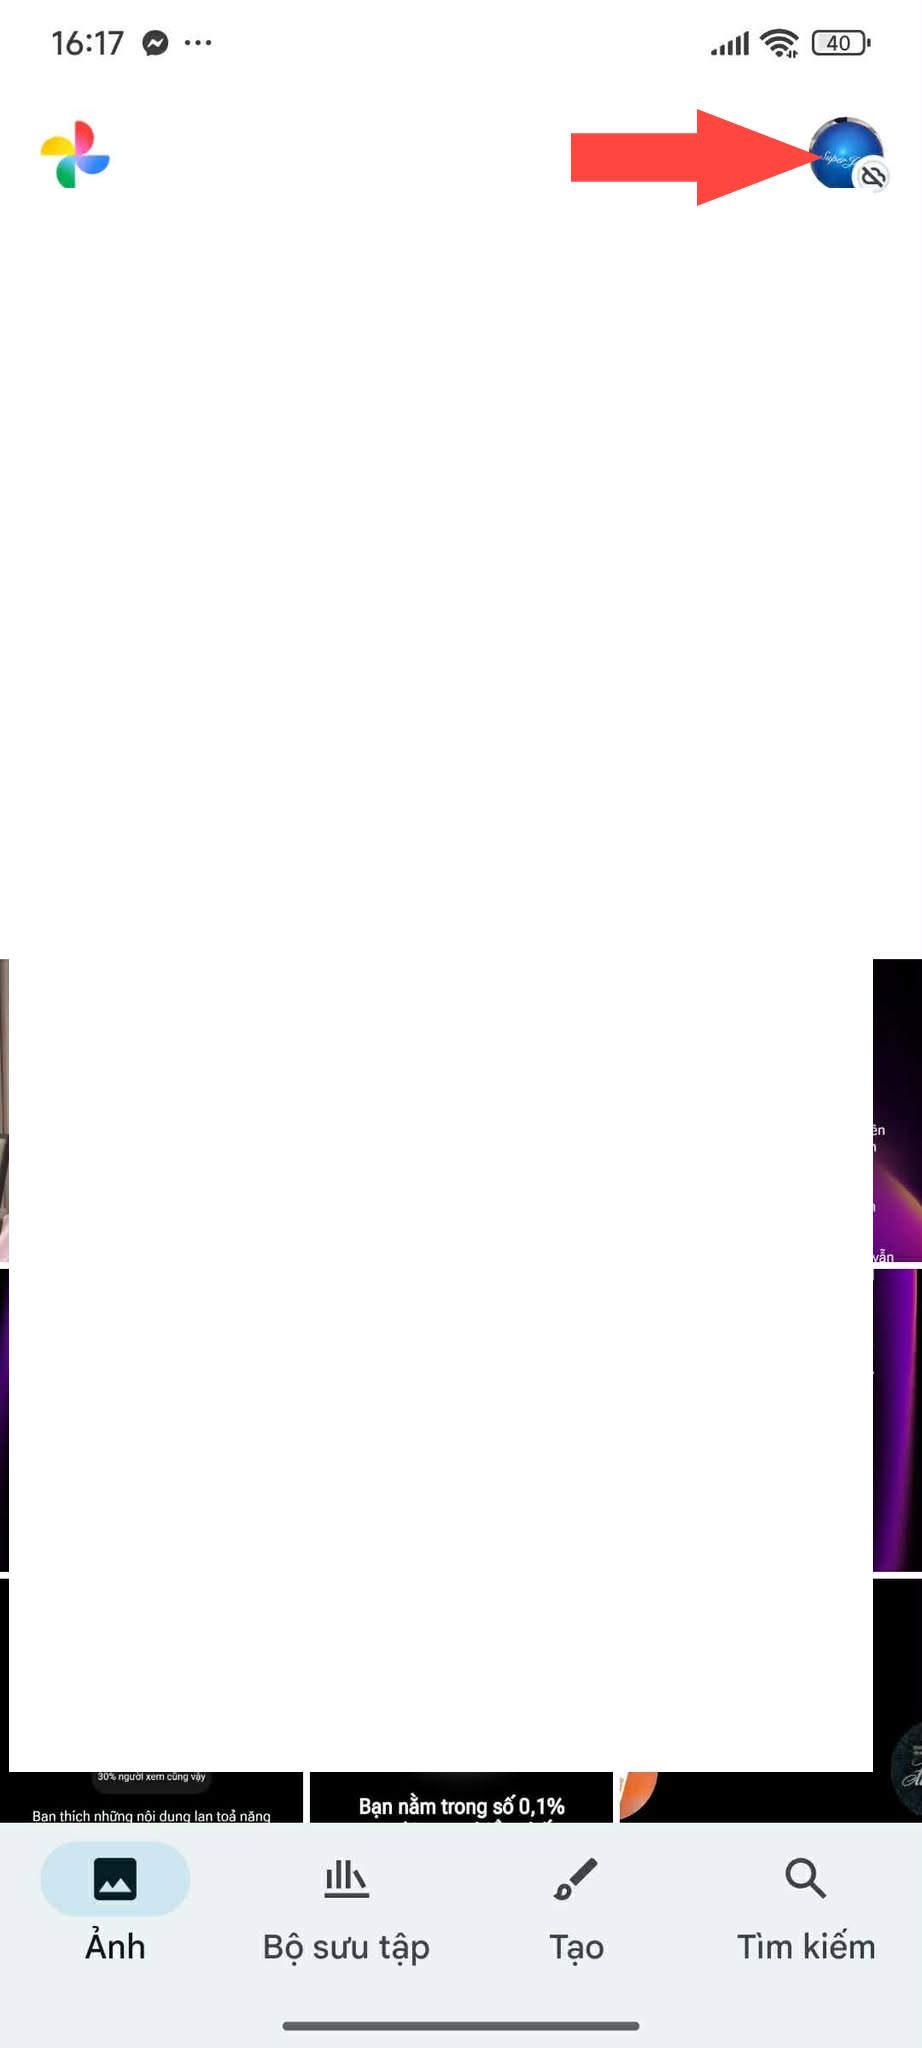
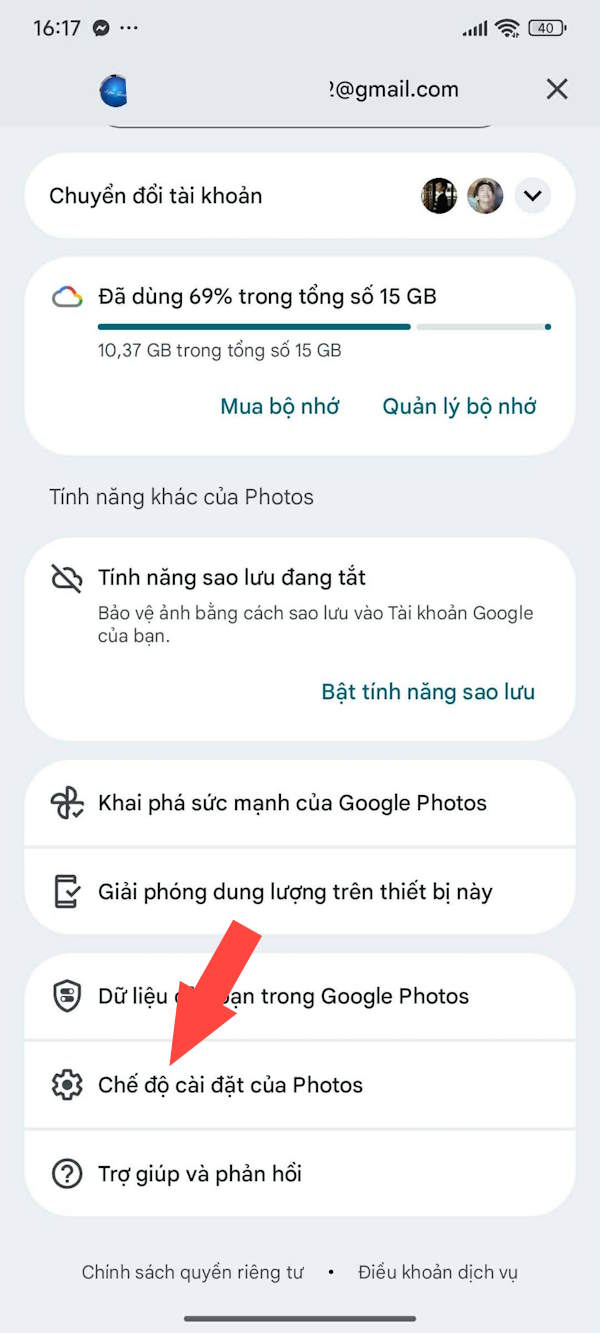
On the Google Photos interface, tap your profile picture, then select Photos Settings in the bottom corner of the interface.
Step 2
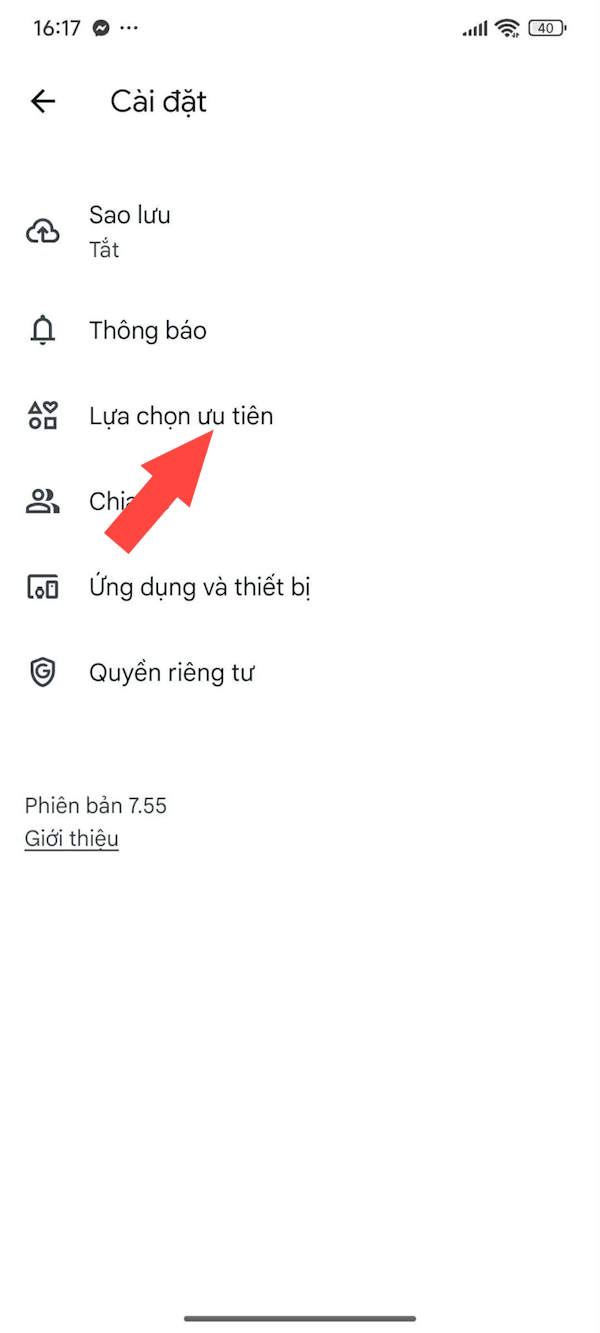
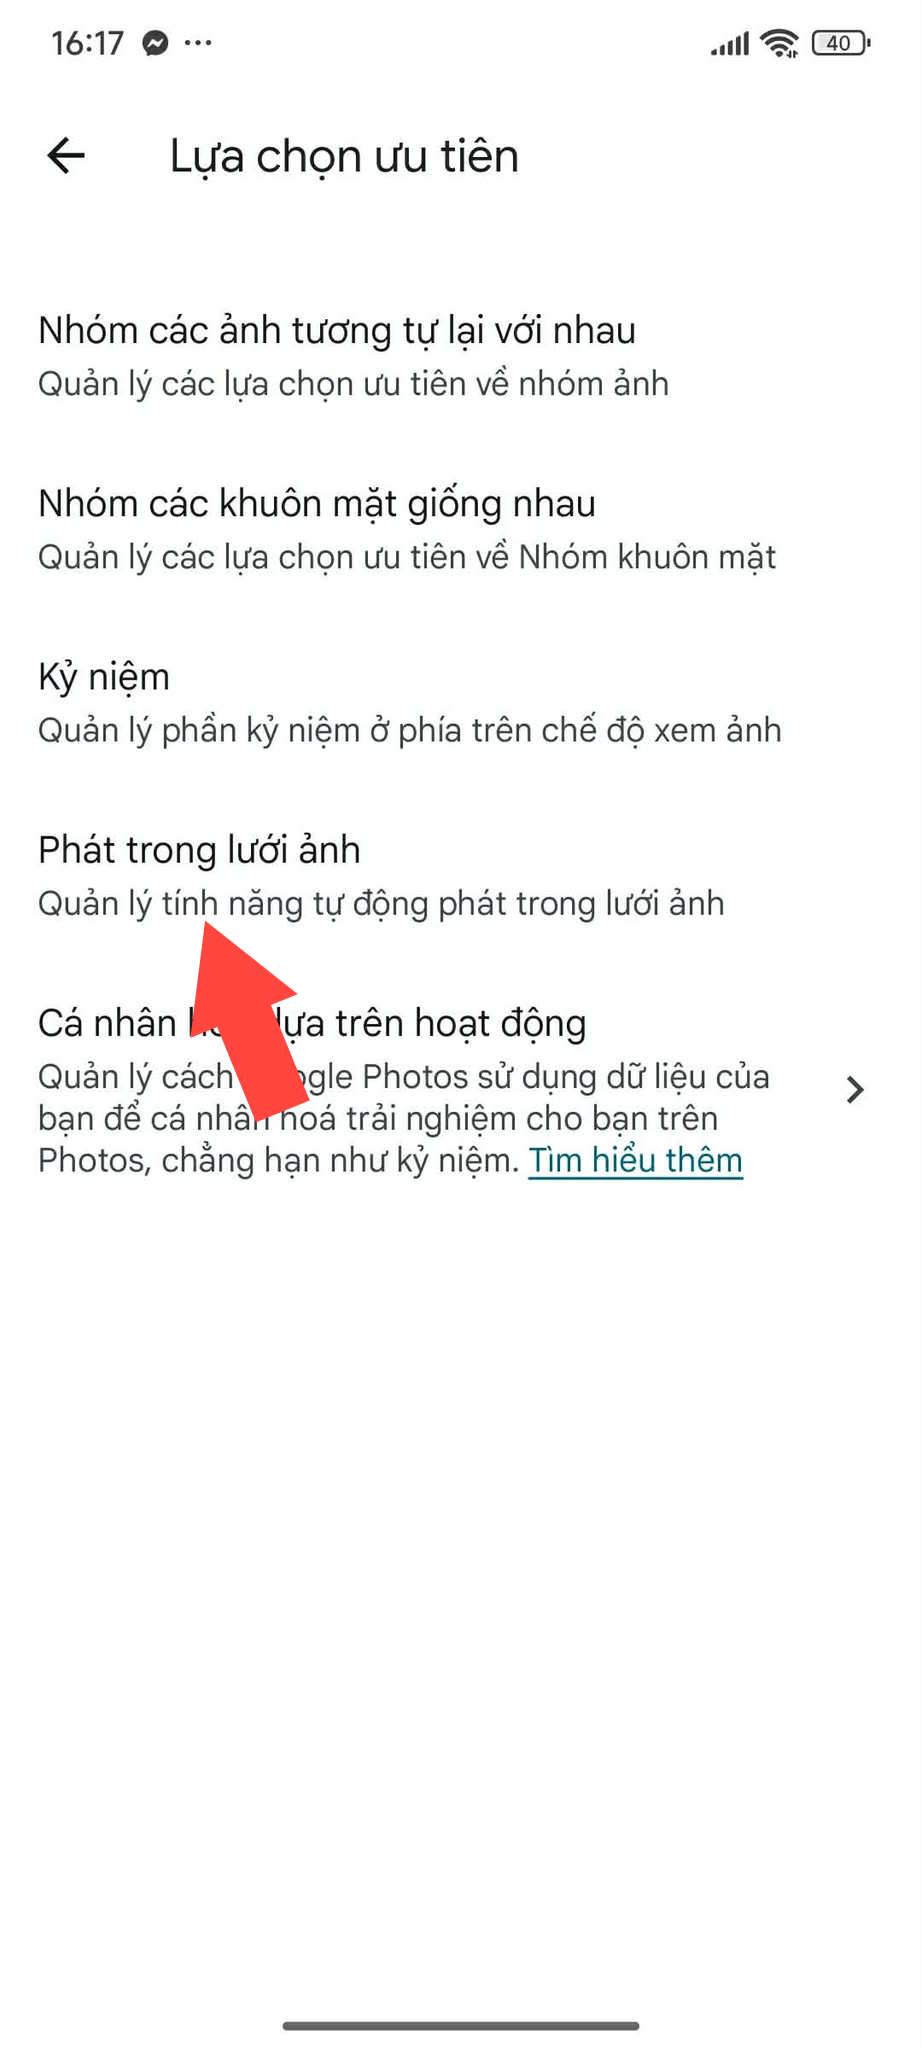
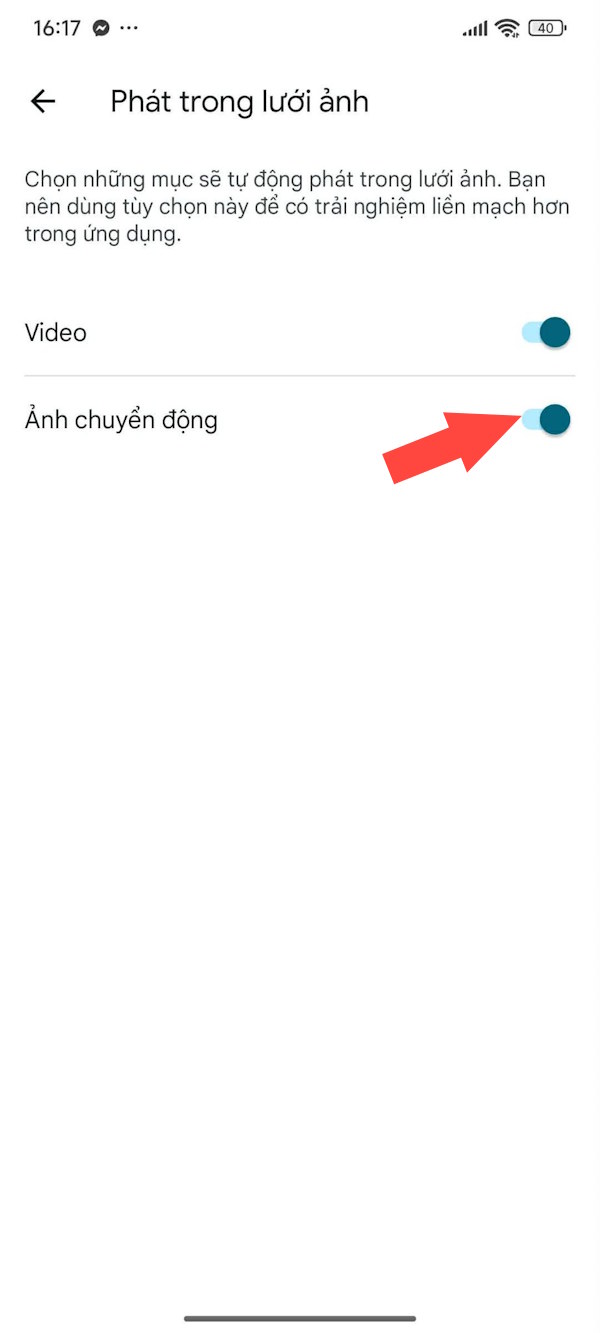
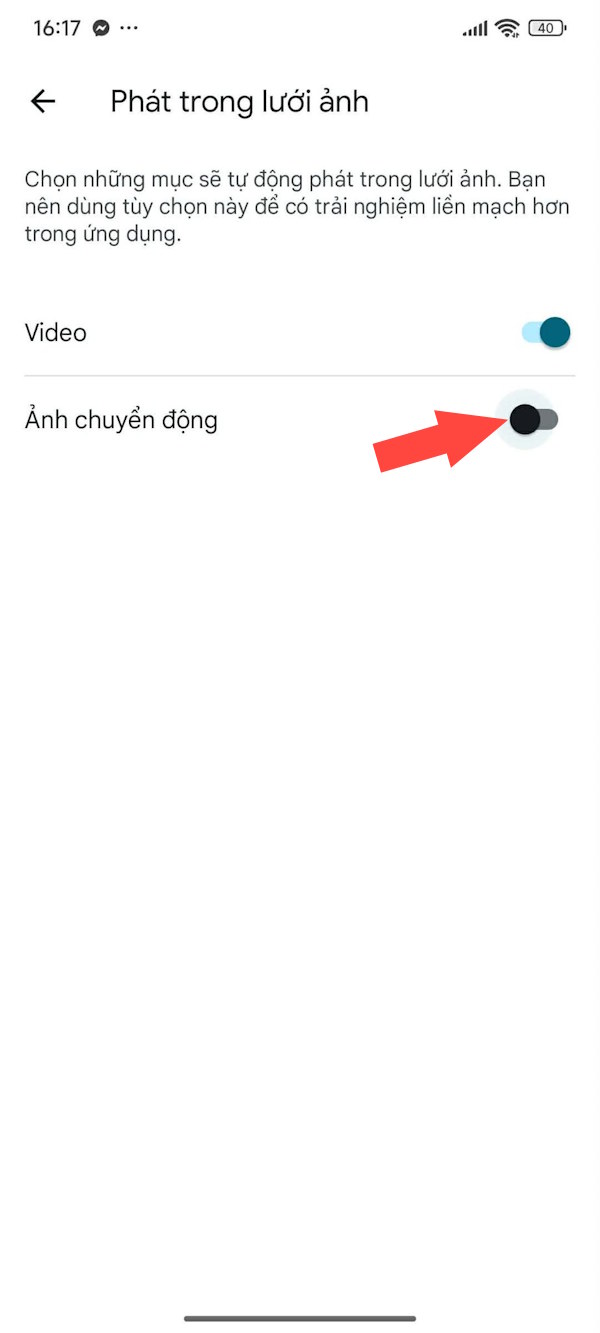
In the new list, the user clicks on the "Preference Selection" setting . On the new interface, we click on the "Play" option in the image grid to make adjustments.
Step 3
Here you will see that the Motion Picture mode is enabled by default. You just need to turn off the Motion Picture setting.
Final Thoughts
Use this guide as a practical checklist for how to turn off moving photos in google photos. Work through the steps in order, verify each result, and adjust the options to match your needs.
FAQ
What do you need before following this How to Turn Off Moving Photos in Google Photos guide?
Review the required tools, accounts, settings, or materials mentioned in the article. Learn how to turn off moving photos in Google photos with clear steps, practical tips, and troubleshooting guidance for a reliable result.
What are the main steps for how to turn off moving photos in google photos?
Follow the sections in order, especially What are moving photos in Google Photos?, How to turn off moving photos on Google Photos, Step 1. Complete each step before continuing and verify the result as you go.
What should you do if the process does not work as expected?
Recheck the prerequisites, update the relevant app or service, review the settings, and repeat the step that caused the issue. Use any troubleshooting notes included in the guide.
Related Articles
 History Comes to Life in These Photos, Thanks to Google's AI5 minutes read
 Google Photos: Complete Guide and Key Details6 minutes read
 How to Turn Off Automatic Saving of Screenshots to Google Photos2 minutes read
 5 Annoying Features on Google Photos You Should Turn Off Immediately6 minutes read
 6 Annoying Google Photos Features You Should Turn Off5 minutes read
 Google Photos Integrates Veo 3: Upgraded AI Photo-to-video Feature4 minutes read
Reader Comments 0
Sign in with email or Google to join the discussion.