How to turn off Mcafee Windows 11
If you need to disable or remove Mcafee from Windows 11, to reduce system resources and avoid conflicts with other software, or simply do not need to use it, then follow this article, TipsMake.com will guide you how to disable Mcafee in the most detailed and easy-to-understand way.

How to turn off Mcafee on Windows 11
Mcafee is a popular antivirus software, which is often pre-installed on many Windows devices to protect users from online threats such as viruses, malware, and cyber attacks.
However, Mcafee does not always meet the needs of users. If you need to disable or remove this software, or switch to a more suitable security solution, then do the following.
1. Instructions to Turn Off Mcafee LiveSafe
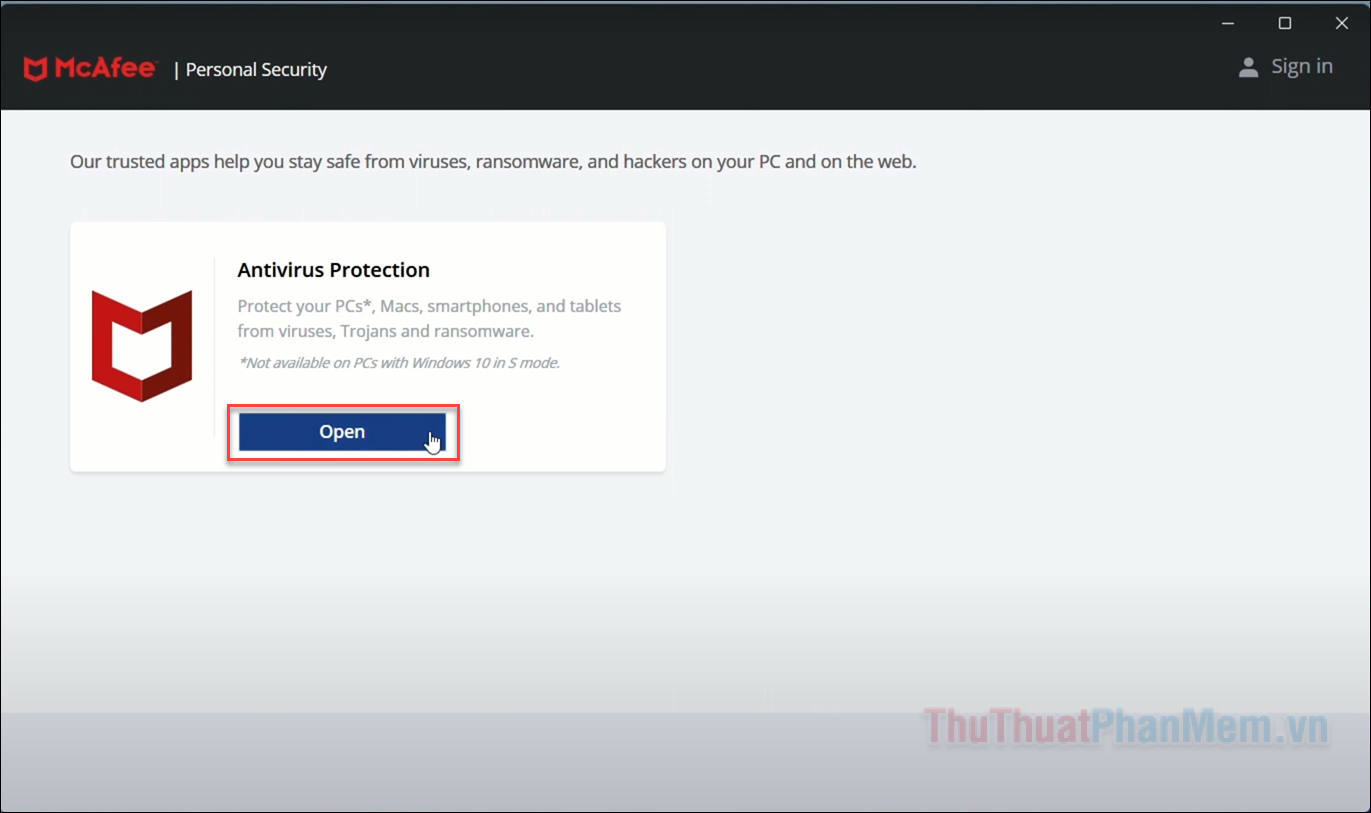
Step 1 : Search for McAfee in the search bar, then open the McAfee Personal Security result .

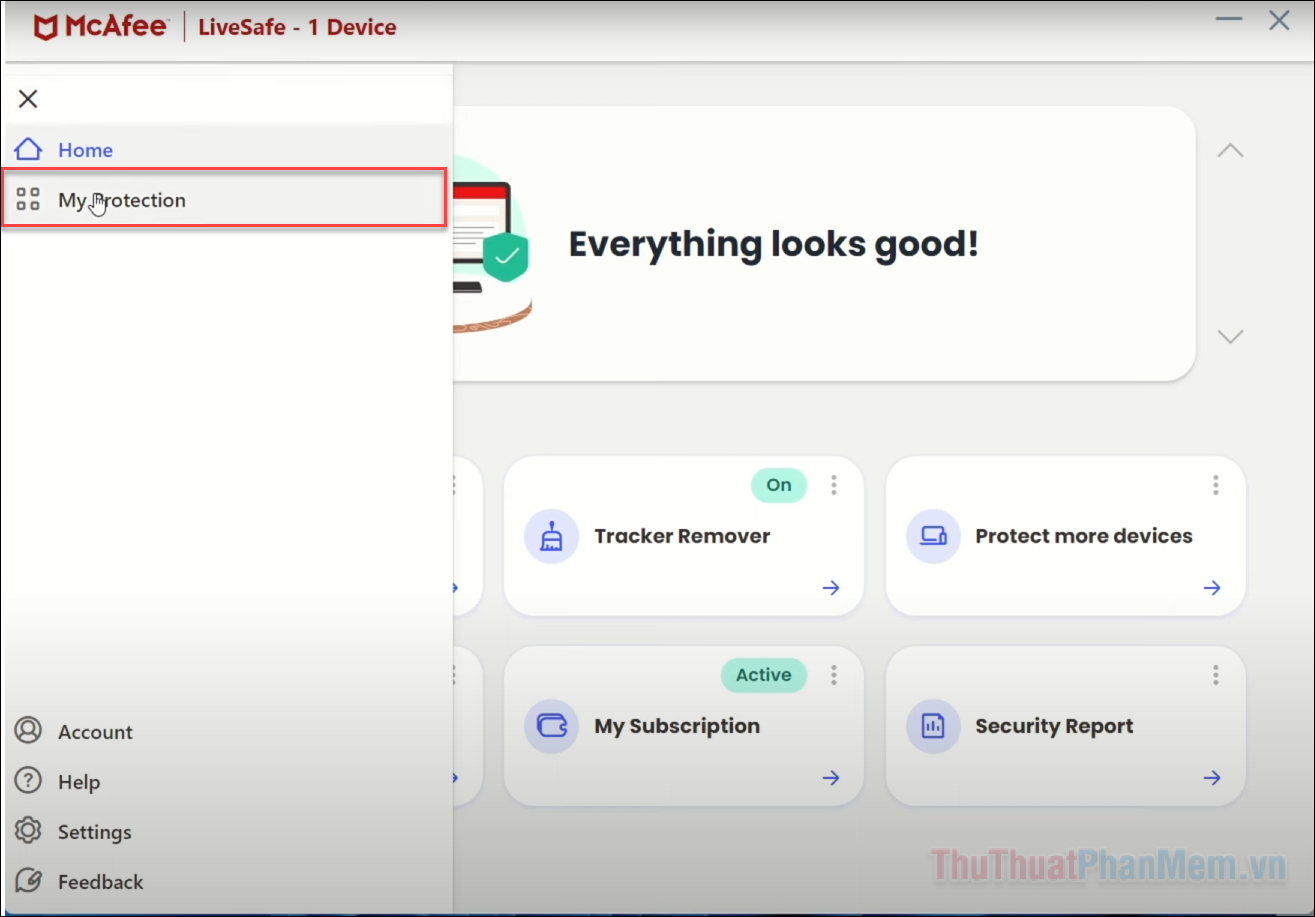
Step 2 : On the main screen of the application, click on the menu icon on the left, select My Protection .
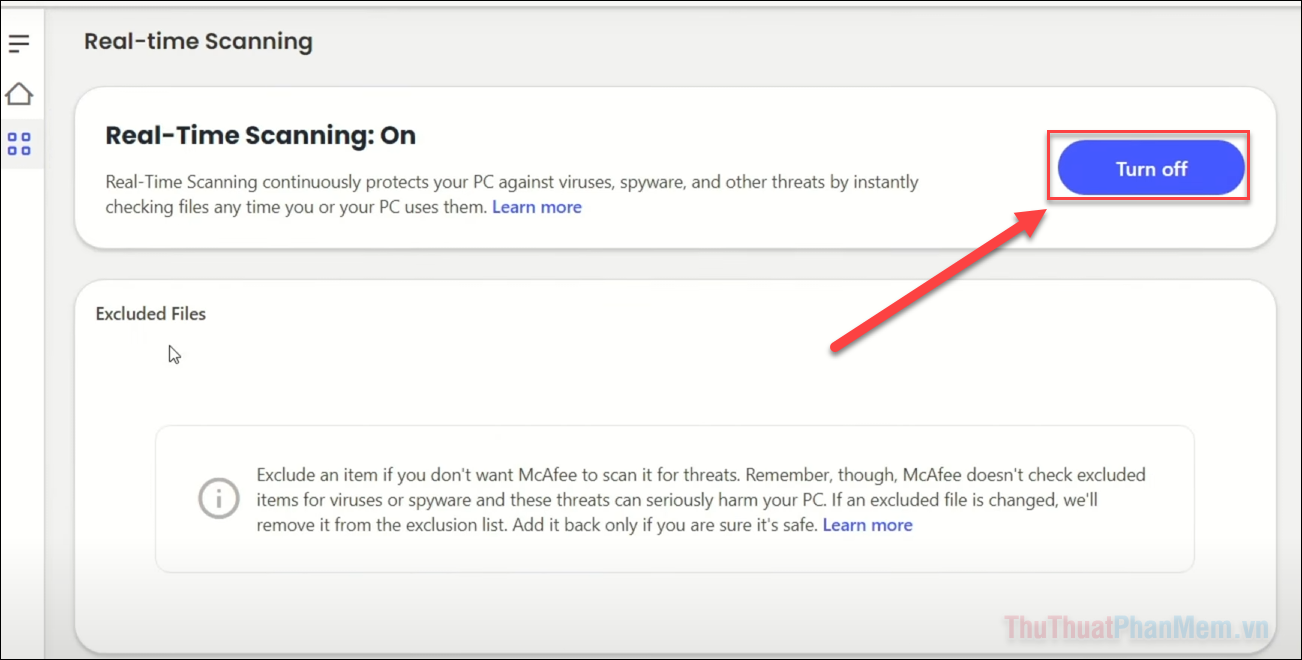
Step 3 : In the Real-Time Scanning window , click the Turn off button to disable the real-time scanning feature.
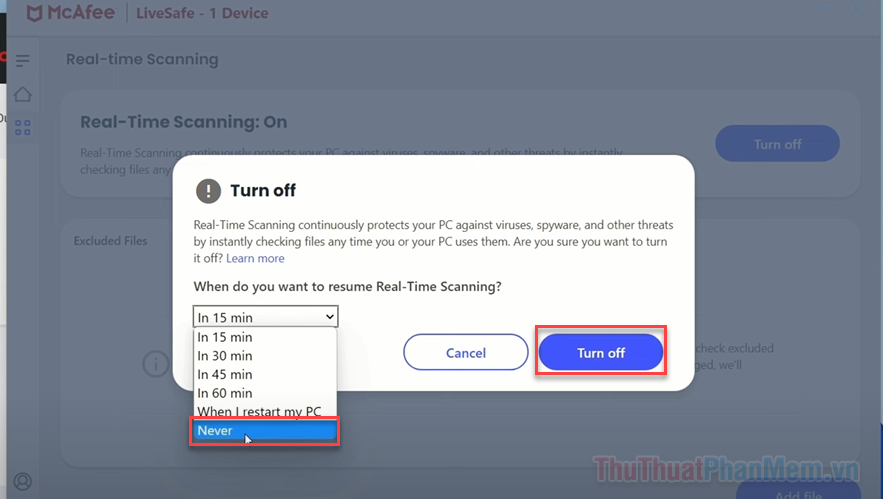
Step 4 : At this point, you will see a message appear asking you to select the time to re-enable the Real-Time Scanning function . To turn it off completely, select Never from the drop-down menu >> Then, click Turn off to confirm.
Step 5 : Next, right-click on the Mcafee icon again, select Change settings >> And select Firewall .
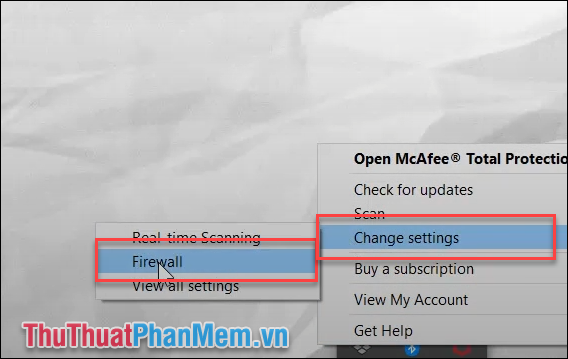
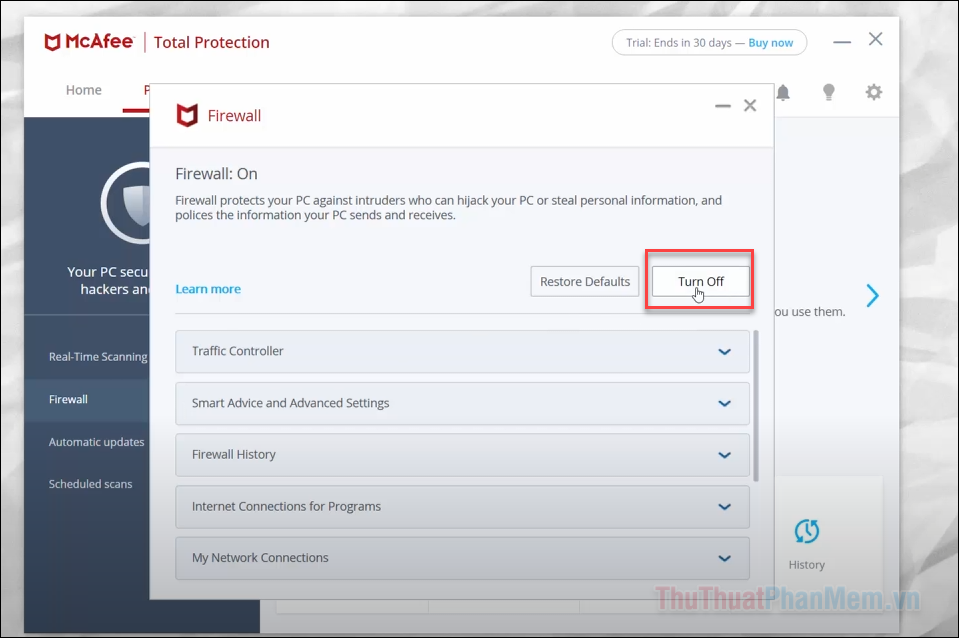
Step 6 : In the Firewall window , click the Turn off button to turn off Mcafee firewall.
Step 7 : As with Real-Time Scanning, you will be asked when you want the firewall to automatically reactivate.
Select Never to turn it off completely >> Then click Turn off to confirm.
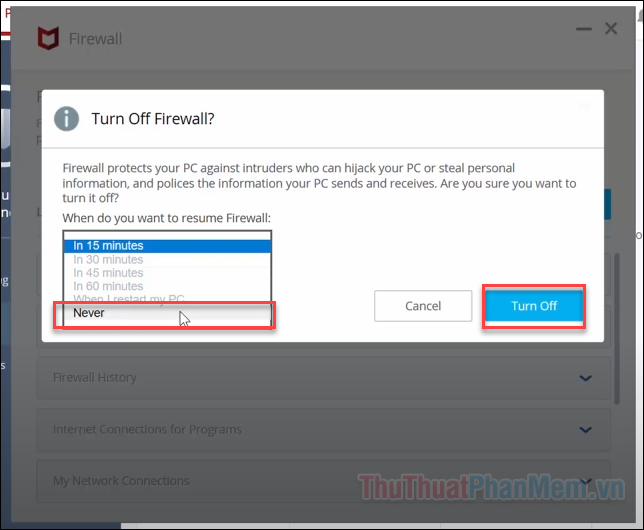
By performing the above steps, you have temporarily disabled Mcafee AntiVirus and Firewall. To re-enable these features, you need to perform the same steps and select Turn on when necessary.
2. Instructions to Turn Off Mcafee WebAdvisor
The following steps will help you temporarily disable McAfee WebAdvisor (or SiteAdvisor) on your browser, preventing it from interfering with your computer's web browsing activities.
Step 1 : Open the web browser you are using such as: Google Chrome, Microsoft Edge or Firefox.
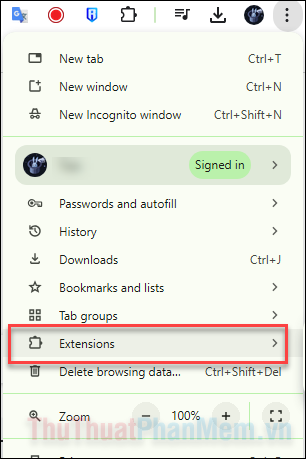
Step 2 : Click on the three dots or three dashes menu icon in the upper right corner of the browser window.
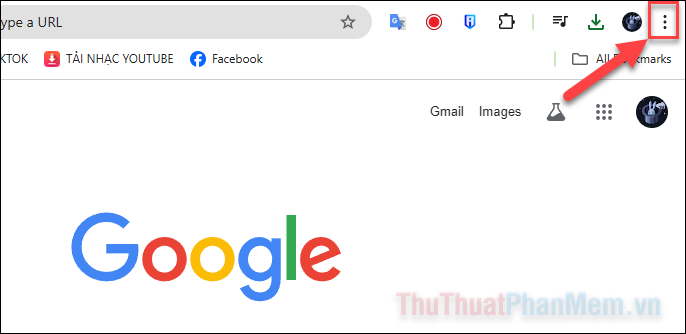
Step 3 : In the menu that appears, select Extensions or Add - ons .
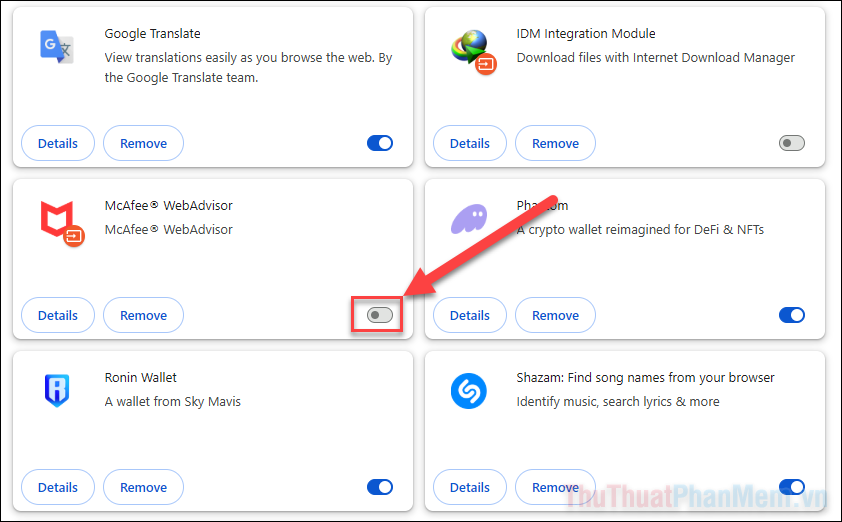
Step 4 : Then, find the McAfee WebAdvisor or SiteAdvisor extension in the list of extensions, then select Disable to turn off this extension .
Disabling or uninstalling McAfee on Windows 11 can help your computer run smoother and reduce software conflicts when you no longer need to use it. If you decide to uninstall McAfee, you should make sure that your computer has installed other suitable security software. Hopefully the instructions in this article will help you easily solve your needs quickly and effectively. Thank you for reading the article.