Coding is not as difficult as you think
Once you learn and actually try it out for yourself, you will find that encryption is incredibly easy to use and incredibly practical for everyday life.
Table of Contents
The whole concept of coding used to be intimidating to many people with all the technical jargon. But once you learn about it and actually try it out for yourself, you'll find that coding is incredibly easy to use and incredibly practical for everyday life.
Quickly encrypt archives with 7-Zip
7-Zip is free, reliable, and comes standard on most Windows computers. Encrypting files with it is much easier than you might think, and you can now use it whenever you want to keep your files and documents private before archiving or sending them to someone.
Here's how. Right-click the file or folder you want to protect, then select 7-Zip > Add to archive . In the pop-up window, change the archive format from ZIP to 7z. The 7z format offers stronger security and advanced encryption than the default ZIP format.

Next, set a password. Make sure it's at least 12 characters long, with a mix of uppercase and lowercase letters, numbers, and symbols. A strong password is important. Remember, no matter how good your encryption is, a weak password can break it.
Check the Encrypt file names box . This feature not only hides the contents of your file, but also the file name. If you leave this feature unchecked, other people will still be able to see the file name, even if they can't open it.

The encryption method is set to AES-256 by default, which is the same standard used by government agencies. This method is proven and doesn't slow things down.
After clicking OK , 7-Zip will create an encrypted archive in the same folder as the original files. This usually only takes a few seconds. Always test your encrypted archives by trying to open them, just to make sure you remember your password and everything is working properly.
For added security, never send the encrypted file and the password through the same channel. If you email someone the archive, share the password over the phone or text message as well. That way, even if someone intercepts the email, they won't be able to access the files.
Once you get used to it, encrypting with 7-Zip becomes a breeze. It's a simple way to keep your files truly private.
Encrypt flash drives with BitLocker
Now that you know how to encrypt your hard drive with BitLocker, you'll also need to encrypt your flash drives, since you've probably lost dozens of them over the years. These little devices are easy to lose, and you don't want someone accidentally rummaging through your personnel files. BitLocker, which is built into Windows, turns out to be the easiest way to keep everything on your drive safe.
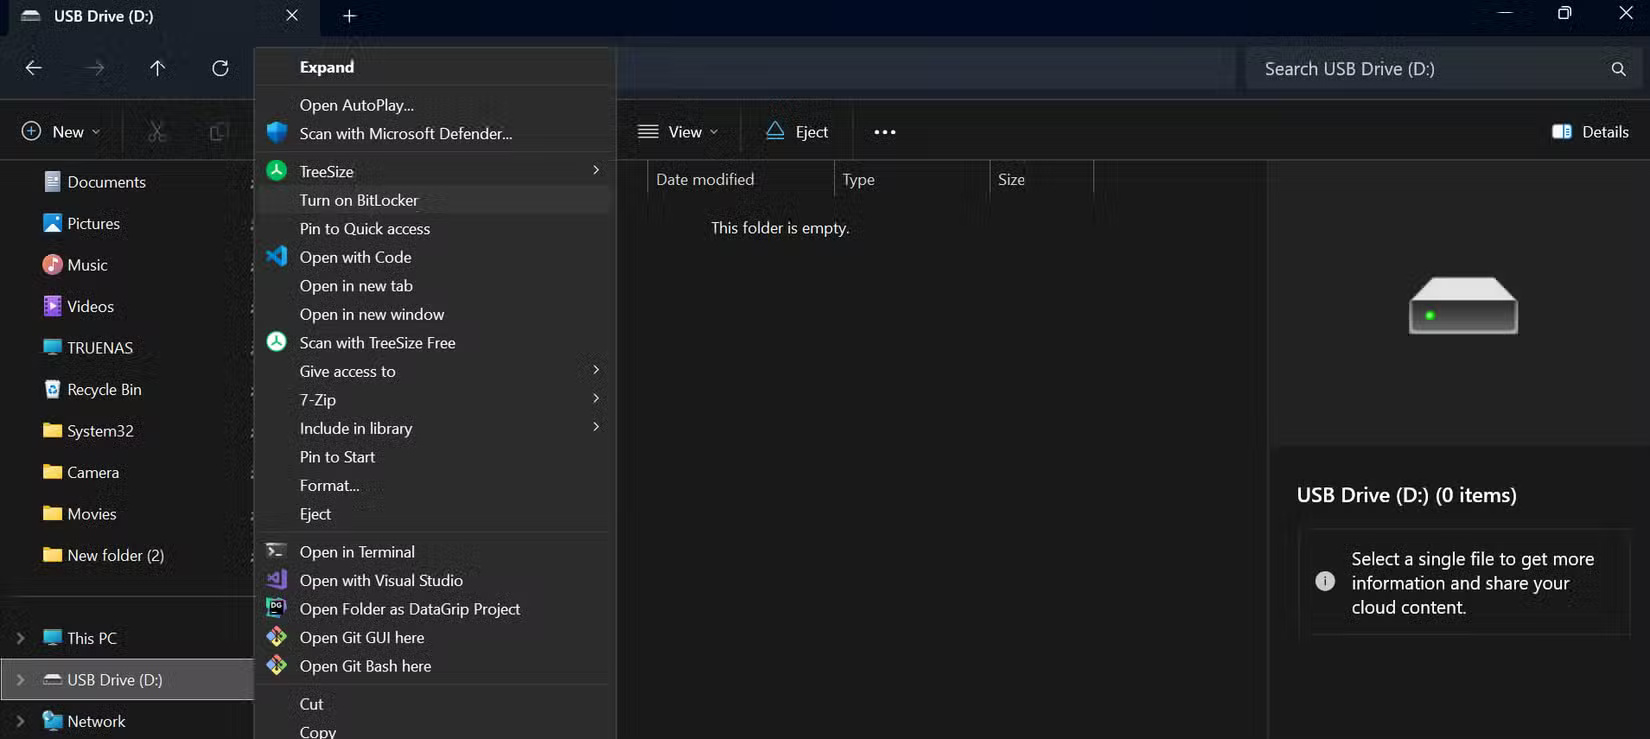
Setting up BitLocker is pretty simple. Plug in your flash drive and open File Explorer . Then, right-click the drive and select Turn on BitLocker . On Windows 11, you sometimes have to click Show more options to see this option.
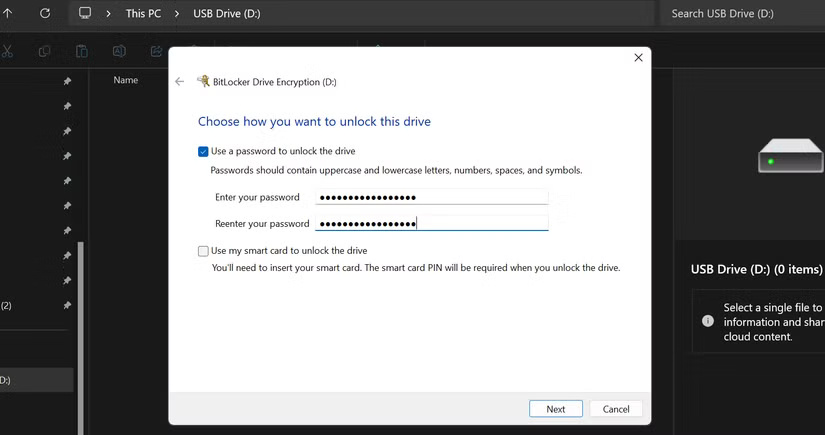
BitLocker prepares the drive for encryption, which usually only takes a minute or two. It then asks you to set a password. Use a strong, unique password that is different from the passwords you use for the rest of your accounts. Since you'll have to enter this password every time you unlock the drive, make sure it's something you can remember but still difficult to guess.
Next, BitLocker will ask you where you want to save your recovery key. This key is very important. If you forget your password, the recovery key is the only way to get your files back. Save the key in a safe location, such as cloud storage or a printout stored at home.
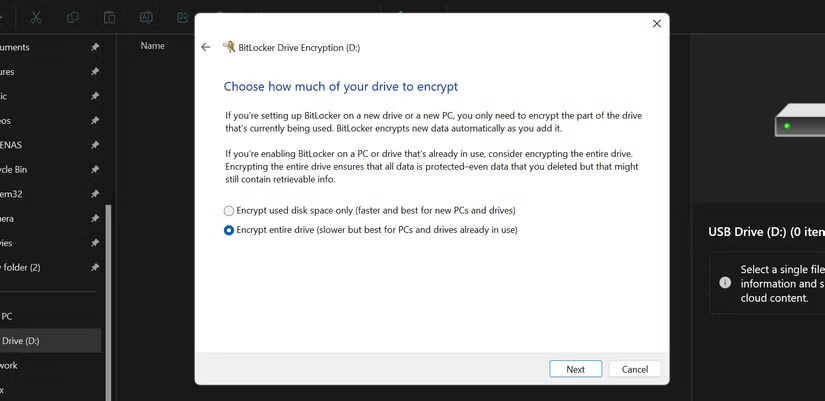
BitLocker then lets you choose which part of the drive to encrypt. For new drives, choose to encrypt only the used space, as this is faster. If the drive already has files, choose to encrypt the entire drive to ensure that no data is left unprotected.
How to encrypt email with PGP
When you want your messages to be completely secure, even from email providers, use PGP encryption with Kleopatra . There are other ways to send PGP encrypted emails on Linux, but if you're on Windows, you might want to opt for Kleopatra. It takes a little more work to set up, but once you get the hang of it, the process is simple and gives you true end-to-end privacy.
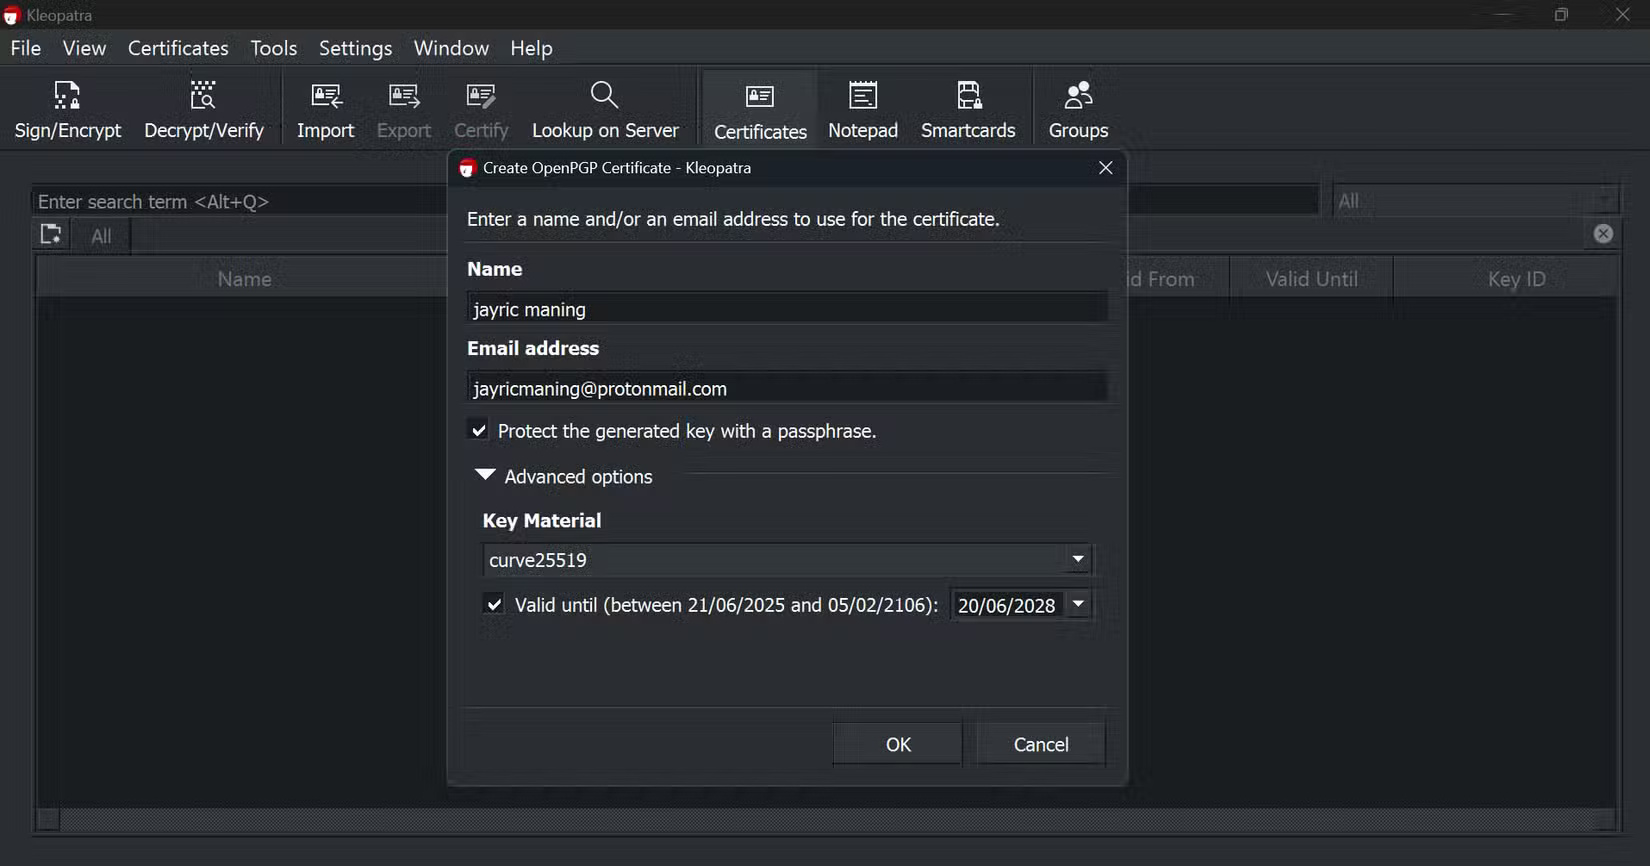
First, download and install the Gpg4win package, which includes Kleopatra. Once you open Kleopatra, create your own key pair by entering your name, email, and a strong password. Kleopatra generates two keys for you: a Public key that you can share with anyone who wants to send you encrypted messages, and a Private key that you must keep safe on your computer.
When you want to send an encrypted message, you usually write it in Notepad. Then, in Kleopatra, click the Sign/Encrypt button and select the text file containing your message. Check the Encrypt with password box and enter the password you will share with the recipient. After clicking Encrypt, Kleopatra will create a new PGP encrypted file.
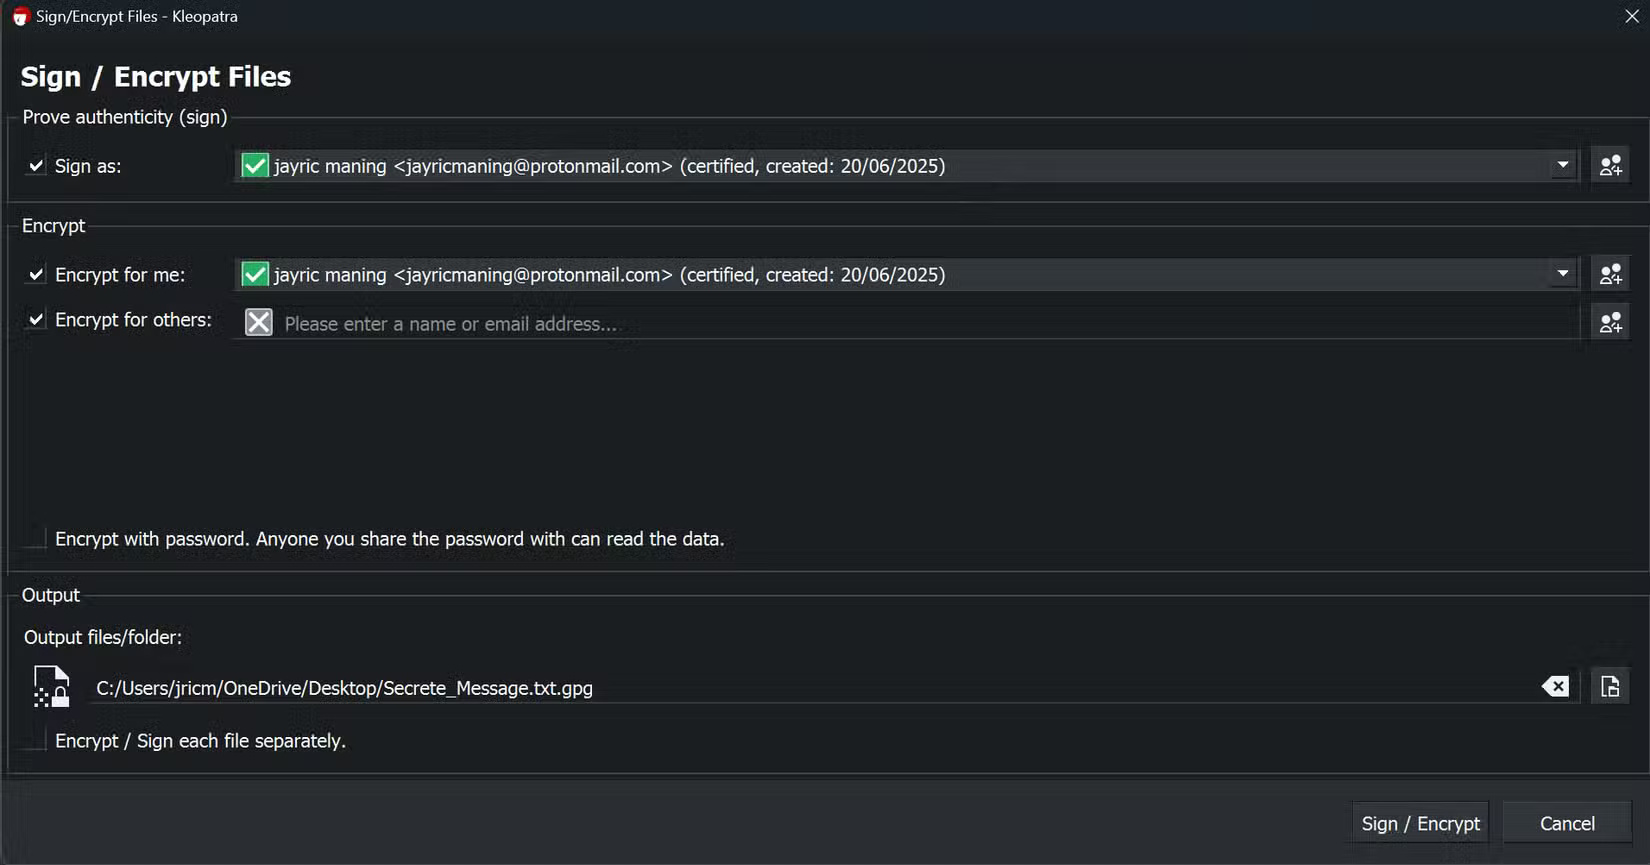
You can send this encrypted file via email. To open the file, the recipient only needs Kleopatra and the password you set. They right-click on the PGP file, select Open with Kleopatra , and enter the password. Kleopatra then decrypts the file and displays the original message.
Was this article helpful?
Your feedback helps us improve.
Related Articles
 What is VVC (Versatile Video Coding)?5 minutes read
 How to get your kids excited about coding5 minutes read
 'Vibe coding': When AI begins writing software instead of humans.6 minutes read
 How to write basic code with Grok23 minutes read
 How to Develop an Interest in Coding7 minutes read
 How to Prepare for a Coding Interview9 minutes read
Reader Comments 0
Sign in with email or Google to join the discussion.