How to turn a Raspberry Pi 4 into an Edge Gateway
If you're planning to transfer large amounts of data to the cloud, you can improve performance and response time by using the Raspberry Pi as the Edge Gateway..
If you're planning to transfer large amounts of data to the cloud, you can improve performance and response time by using the Raspberry Pi as the Edge Gateway (a network access point for devices, to communicate with services). cloud service).
EdgeX Foundry is a platform that you can use to build custom Internet of Things (IoT) solutions, by consuming and processing data from various smart devices and sensors on the network itself. home automation.
In this article, you will find a way to effectively record your data by converting the Raspberry Pi 4 into the connection point between the cloud and all sensors, smart devices, and network controllers.
Things to prepare
To accomplish this, you will need:
- Raspberry Pi 4
- SD card
- A laptop or desktop computer to download an Ubuntu system image
- The power cable is compatible with the Raspberry Pi
- Ethernet cable
- Micro HDMI cable
- External screen
- External keyboard and a way to attach it to a Raspberry PI
- Mouse (optional) or you can use the trackpad on an external keyboard
Flash Ubuntu for Raspberry Pi
To turn a Raspberry Pi into an Edge Gateway, you'll need Ubuntu 19.10. Later versions of Ubuntu may also support EdgeX Foundry, but setting up Raspberry Pi as Edge Gateway will be a bit different.
In this tutorial, the article will flash the Ubuntu system image using the free balenaEtcher application.
1. Visit the Ubuntu website and download the 64-bit version of Ubuntu 19.10 for Raspberry Pi 4.
2. Insert an SD card into the computer.
3. Launch the Etcher application.
4. In Etcher, click Select image and then select the newly downloaded Ubuntu file.
5. Click Select target , then select the target boot media, in this case SD card.
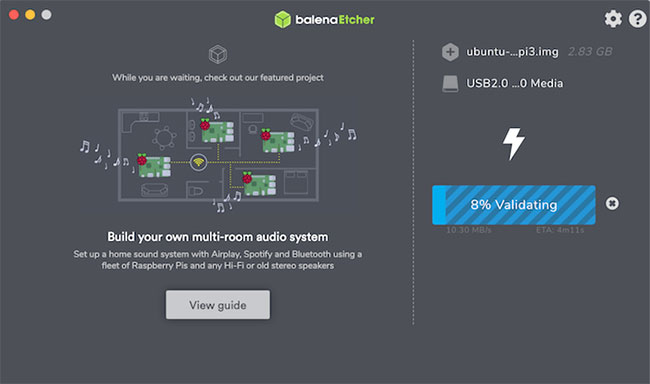
Etcher will now flash the system image to the SD card.
Boot Raspberry Pi into Ubuntu
You are now ready to boot your Raspberry Pi.
1. Remove the SD card from the computer and insert the card into the Raspberry Pi.
2. Attach the monitor to the Raspberry Pi with the micro HDMI cable.
3. Attach the keyboard to the Raspberry Pi device.
4. Attach an Ethernet cable to the Raspberry Pi.
5. Plug the Raspberry Pi into a power source. The device will automatically boot.
6. When Ubuntu is launched for the first time, there will be a prompt to enter your username and password. The default username and password for Ubuntu 19.10 is 'ubuntu'.
7. When prompted, create a new password.
Now, go to the Terminal to enter all the commands needed to turn a Raspberry Pi into an Edge Gateway.
Install EdgeX Foundry
To install the EdgeX Foundry platform, run the following command in Terminal:
sudo snap install edgexfoundry
Ubuntu will now download the EdgeX Foundry snap, which contains all the services needed to run EdgeX, including the EdgeX core, support and security reference services, plus Consul, Kong, MongoDB and Vault.
All work of EdgeX can be done in the web user interface (UI). To download this front end, enter the following command in Terminal:
sudo snap install edgex-ui-go --channel=latest/beta
After the download is completed, launch the web browser and enter the following URL:
http://((your-raspberry-pir-url):4000/
For example, the IP address of Raspberry Pi in the article is 192.168.1.45, so this address provides the following URL:
http://192.168.1.45:4000/
If the Raspberry Pi's IP address is unknown, access it with the following Terminal command:
hostname -I
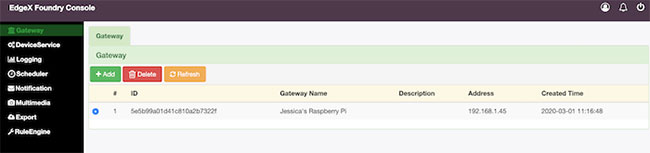
Once this URL is loaded, you will be taken to the EdgeX Foundry Console.
Turn your Raspberry Pi into an Edge Gateway
Log in to the console with the default username and password, both of which are 'admin' .

To turn a Raspberry Pi into an Edge Gateway:
1. In the Console menu on the left, select Gateway.
2. Create a new port by clicking Add.
3. Name your port and add a description.
4. Enter the IP address of the Raspberry Pi device.
5. Click Submit.
The Raspberry Pi will now appear in the Console, ready for use.