How to transfer space from drive D to drive C on Windows 11
Transferring capacity from drive D to drive C on Windows 11 is an effective solution when drive C is full, affecting computer performance. In this article, Software Tips will guide you on how to transfer capacity between partitions safely and accurately.
Table of Contents
Transferring capacity from drive D to drive C on Windows 11 is an effective solution when drive C is full, affecting computer performance. In this article, Software Tips will guide you on how to transfer capacity between partitions safely and accurately.
1. What is the purpose of transferring capacity from drive D to drive C on Win 11?
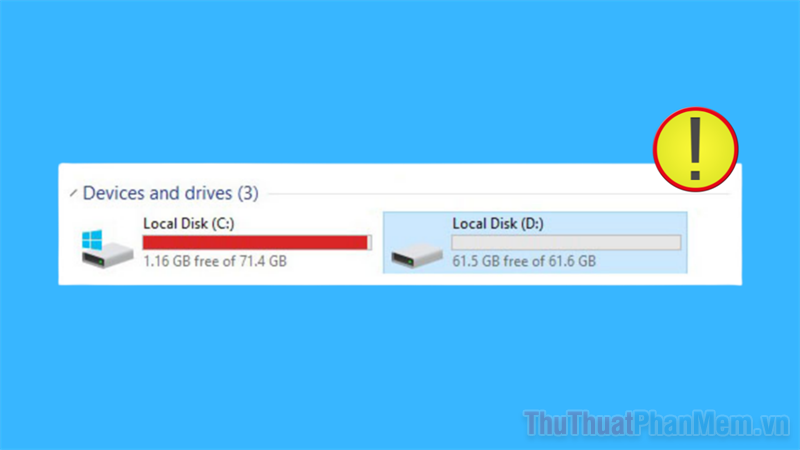
During the process of using Windows computers, we cannot avoid the storage drives being full, full, red due to too many applications installed and files generated during use. Normally, drive C will be the drive that is often filled up the fastest on Win 11 computers because software, documents, and data always target this drive for storage. In order to overcome this problem, users need to expand the capacity of drive C to have more storage space for other data in the future.
Increasing the capacity of drive C is an effective solution to install new software and help the computer operate stably during use. However, not everyone knows how to upgrade the capacity of drive C on the computer effectively and accurately. To solve the capacity of drive C, you need to determine the following hardware information:
Case 1: Drive C: and drive D: share the same physical drive
In the case where drive C: and drive D: are on the same physical drive, divided from a single hard drive, users can easily transfer capacity and share capacity between the two hard drives quickly through the drive management tool on Windows 11.
For example : Your computer uses a 500GB SSD hard drive, this hard drive is partitioned into drive C: with a capacity of 200GB and drive D: with a capacity of 300GB, then you can quickly transfer more capacity from drive D: to drive C:.
Case 2: Drive C: and drive D: are not on the same physical drive
In case your computer uses drive C: and drive D: on two different physical drives, you cannot transfer capacity back and forth between these two drives. In this case, you need to upgrade the physical hard drive of drive C: to increase storage capacity.
For example : Your computer uses 2 physical drives, 1 with a capacity of 120GB as drive C: and 1 with a capacity of 180GB as drive D:, then you will not be able to increase the capacity of drive C: by transferring more capacity from drive D:. To solve this problem, you should replace the physical hard drive with a higher capacity and reinstall Windows.
2. How to transfer capacity from drive D to drive C on Windows 11
In case the C: and D: storage drives are on the same physical drive, we will transfer capacity through the management tool as follows:
Step 1 : Open Search on the toolbar and enter the keyword Create and format hard disk partitions to set up the drive on your computer.

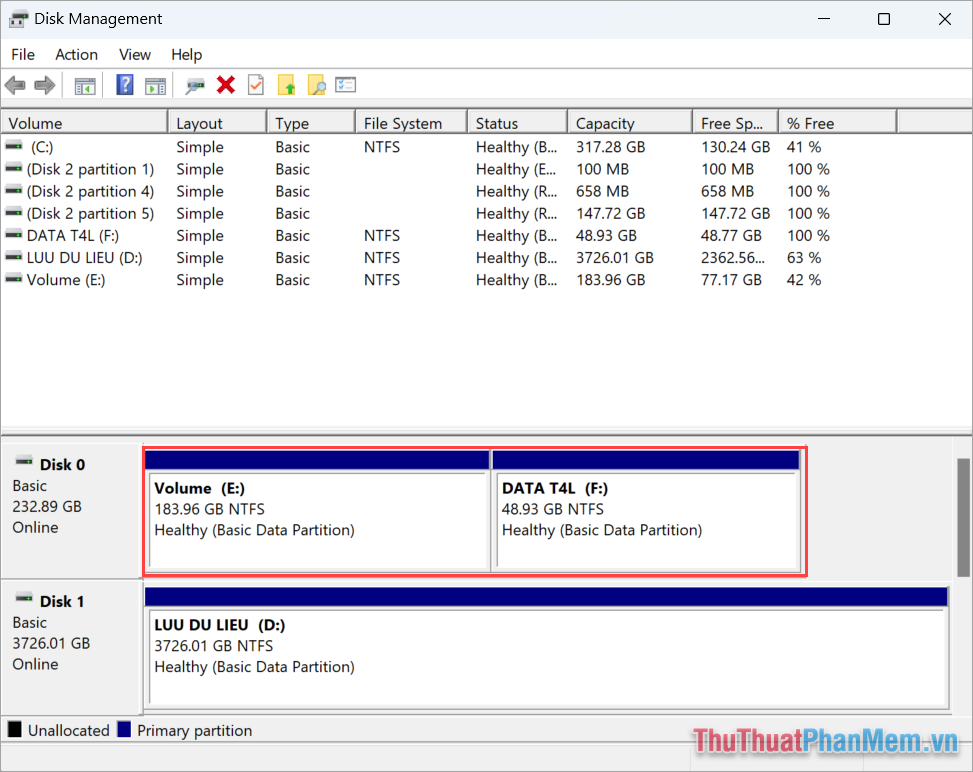
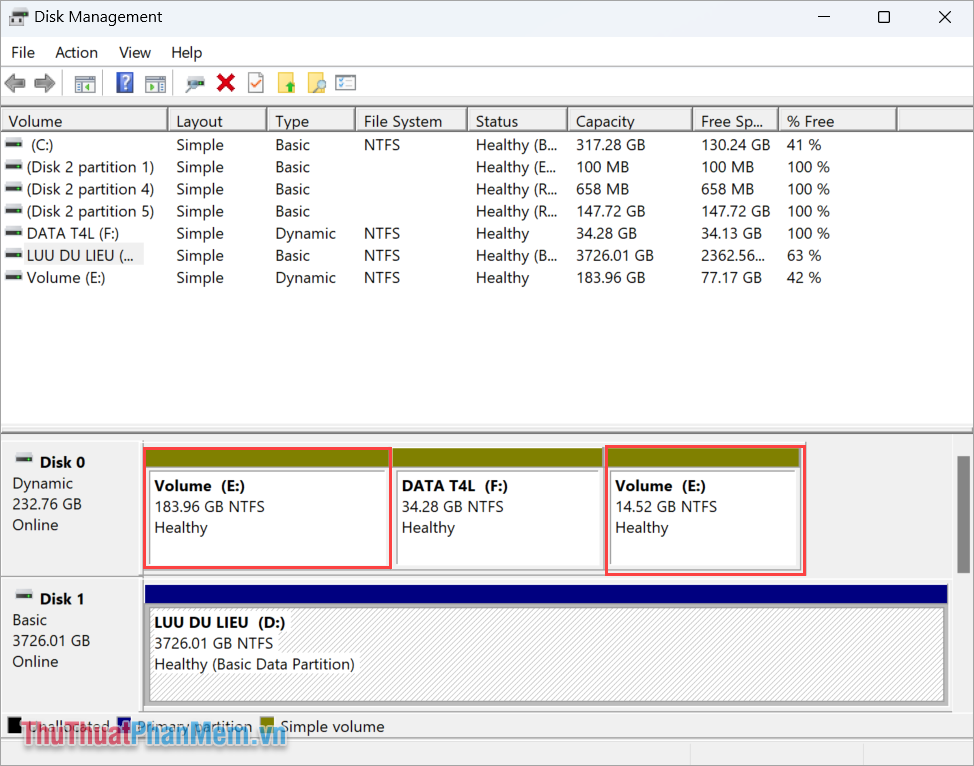
Step 2 : In the Disk Management window, you need to locate the drive to transfer capacity on Windows 11.
If both storage drives are on the same physical drive, you will see both drives in the same horizontal row (like in the image).
In this article, Software Tips will guide you how to do it with drive E: and drive F:, for drive C: and drive D: you do the same.
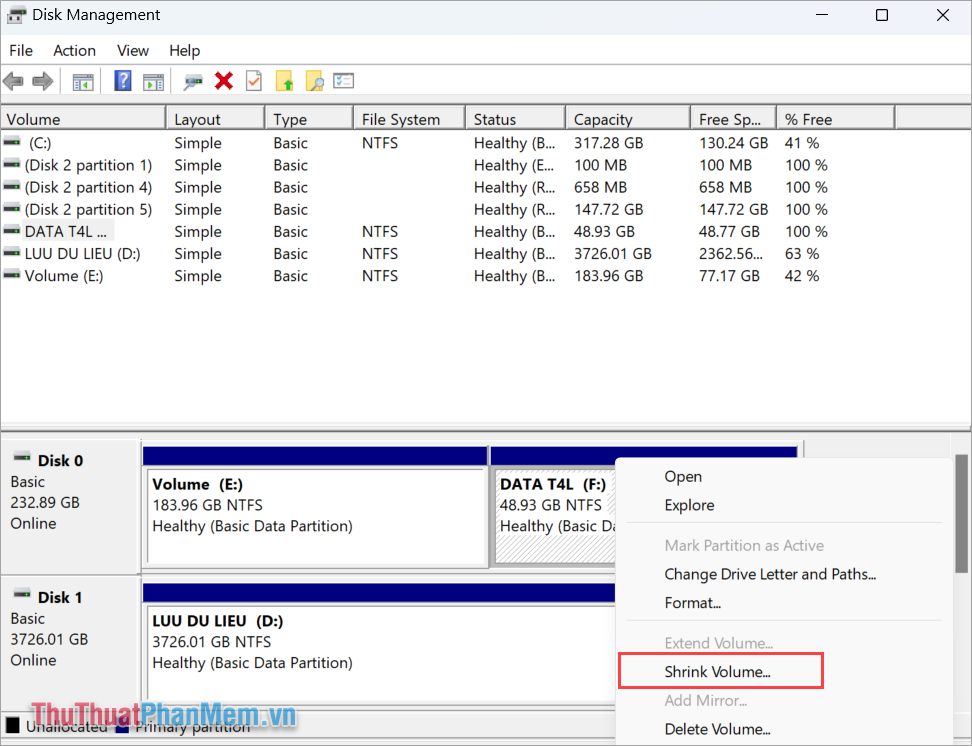
Step 3 : You determine the drive that needs to share free space to the drive that needs to receive more space. Right-click on the drive that needs to be shared and select Shrink Volume …
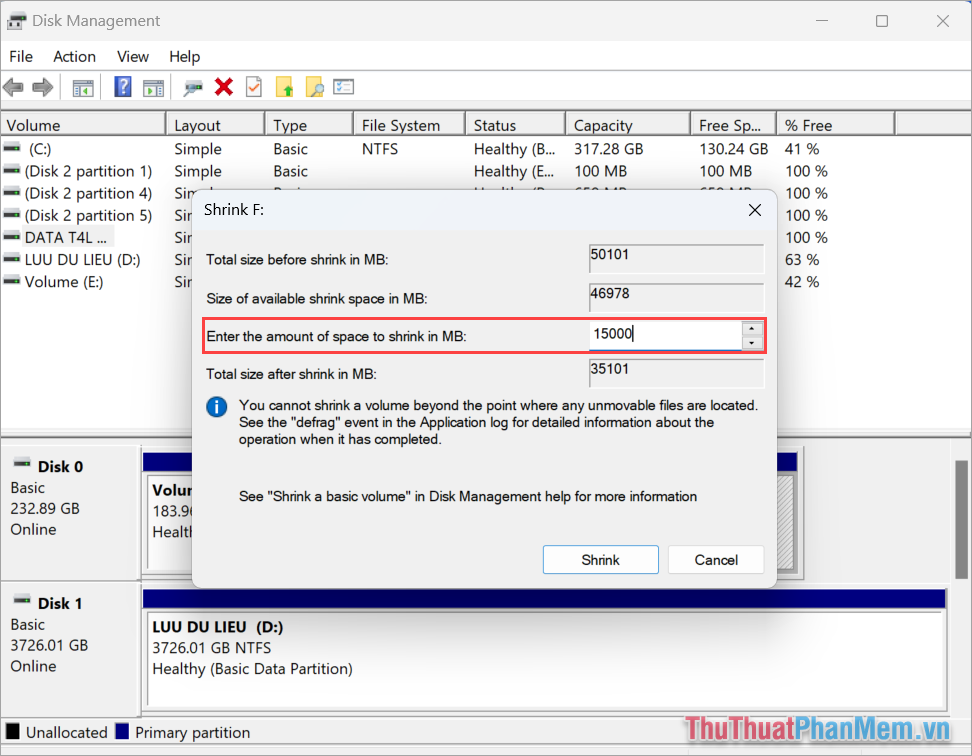
Step 4 : In the capacity sharing window, enter the capacity value you want to share in the Enter the amount of space to shrink in MB: (Unit: MB) field .
- 1GB = 1024MB
- 10GB = 10,240MB
After entering the capacity value you want to share, select Shrink to complete cutting the free space on the drive.
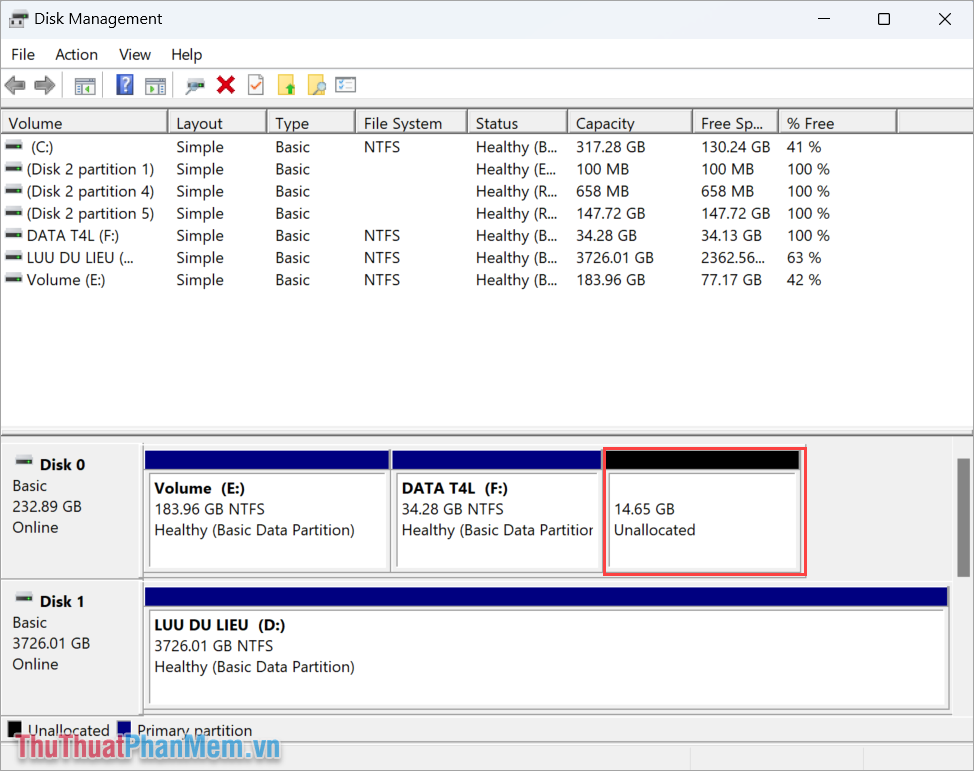
Step 5 : At this point, you will see an additional black storage drive partition and displayed as Unallocated . This is an empty drive after being cut out from the shared capacity drive.
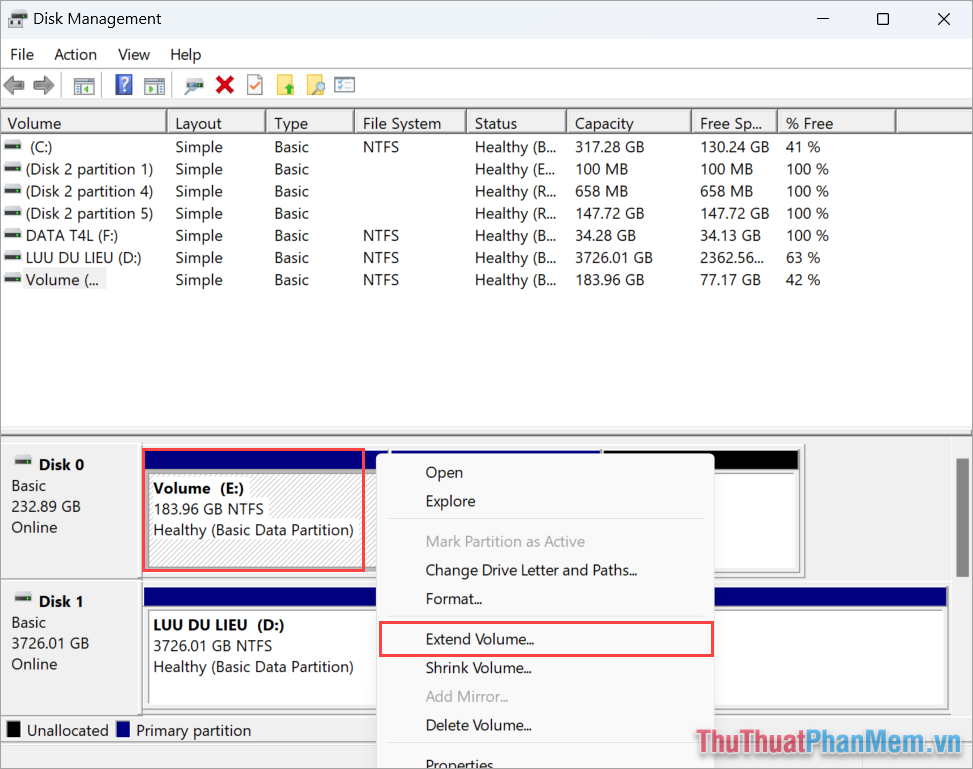
Step 6 : Now, you need to select the drive to receive additional capacity and right-click and select Extend Volume …
Step 7 : In the Extend Volume Wizard window, select the drive that needs to be merged with the original drive in the Selected section and click Next .
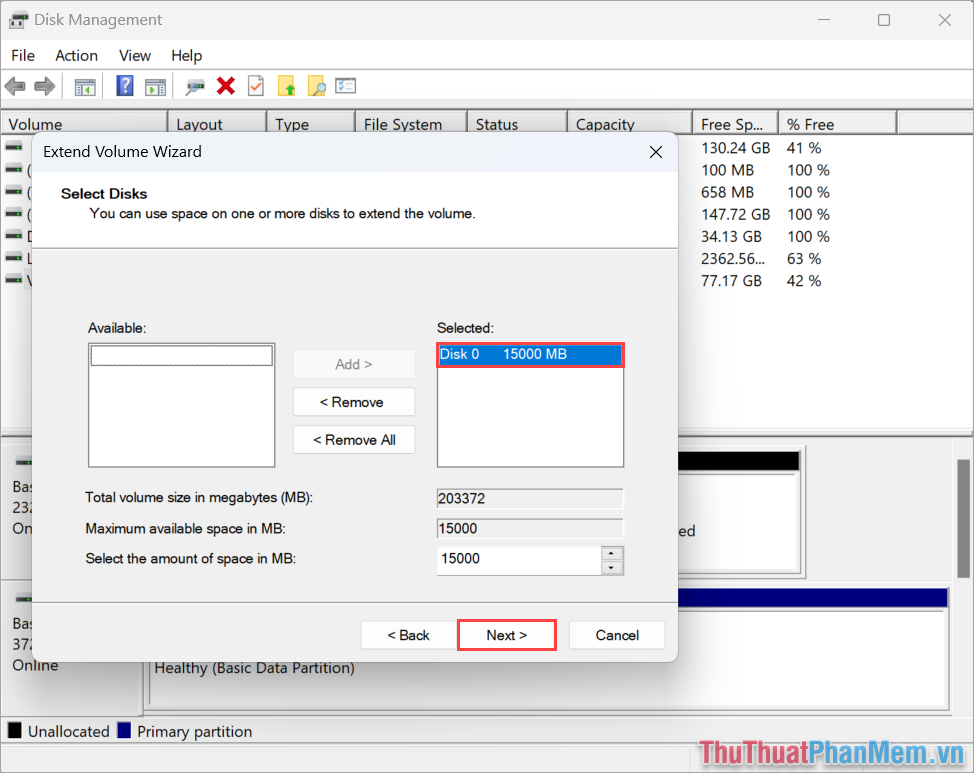
Step 8 : At this point, the system will automatically merge the two drives you selected into one to expand storage capacity. At this point, you will see both disk partitions displaying the same drive name.
Step 9 : Now, you just need to open This PC to check the hard drive capacity after performing the capacity transfer. The drive now has a change in capacity.

In this article, Software Tips has shared with you how to transfer capacity from drive D to drive C on your computer quickly and effectively. Have a nice day!
Was this article helpful?
Your feedback helps us improve.
Related Articles
 How to transfer free space from one drive to another in Windows 105 minutes read
 How to transfer free space from one partition to another in Windows 106 minutes read
 Why should you move games to Dev Drive in Windows?5 minutes read
 How to Transfer OS to SSD on PC or Mac15 minutes read
 Steps to free up Google Drive space3 minutes read
 How to clean and recover space on C drive Windows 107 minutes read
Reader Comments 0
Sign in with email or Google to join the discussion.