How to save Excel file to PDF format
Suppose for some reason that you want to save the Excel file to PDF format, for example so that other users cannot edit the file, . but do not know how to do it. Refer to the following article to learn how to save Excel files to PDF format.
Step 1. Site setup
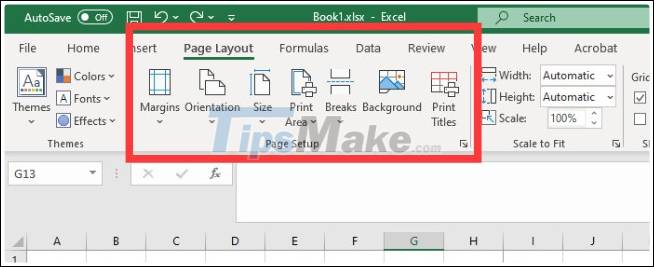
If you are using Office 2008 or higher versions, go to the Page Layout tab . Here you will see a number of options under the Page Setup section , including:
- Margins : Sets the amount of space between the document and the edges of the printed page.
- Orientation : choose to print your document horizontally or vertically on paper size.
- Size : sets the size of the document page.
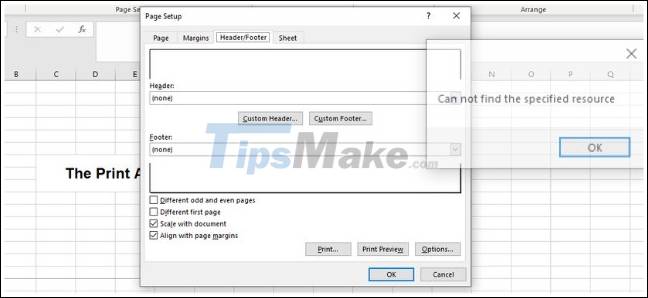
Alternatively, you can also set the header and footer for your document by clicking the arrow icon in the bottom right corner of Page Setup, then clicking the Header / Footer tab . Click Customize to customize the header and footer.
If you want to change the print background, click the Background button on the Page Setup window. Choose any image on your computer or on a cloud storage service to set it as the background image for the entire worksheet.
Step 2: Select the print area
The next step you need to do is determine the print area, the Excel file to convert to PDF format.
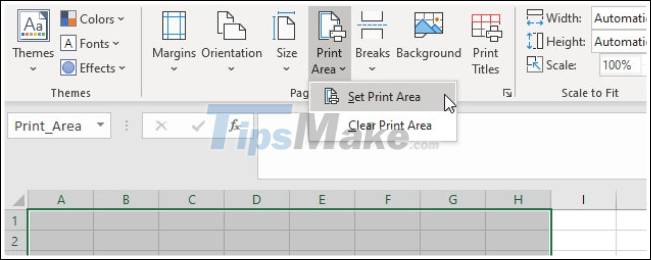
To select the print area, the first way is to click and drag to select the cells in the Excel file you want to print, then click Page Setup => Print Area => Set Print Area. At this point on the screen you will see a thin gray border around the entire print area.
Alternatively, you can also manually enter cells by clicking the arrow icon in the bottom left corner, choosing Sheets => Print Area.
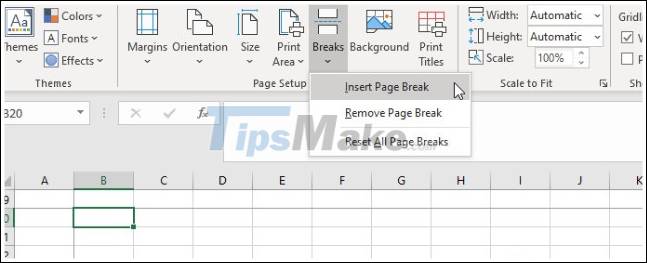
Similar to Word, in Excel you can also create page breaks to segment different tables. Go to the cell where you want to break the page, click the Page Layout tab on the Ribbon, choose Page Setup => Page Breaks => Insert Page Break to break the page.
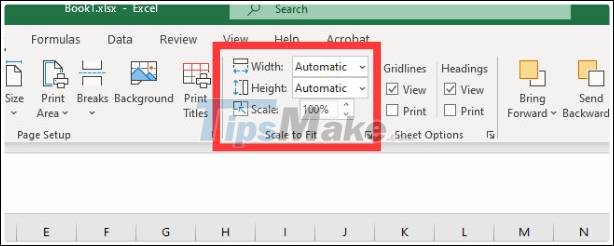
The next step is to set the Scale to Fit option . On the right side of the Page Setup window, you will see 3 options including: Width, Height and Scale .
The Width and Height options allow you to set the number of worksheet rows and columns. The Scale option determines the size of the entire print area.
Step 3: Sheet options
To access the Sheet Options options , click the arrow icon in the bottom left corner of the Sheet Options section .
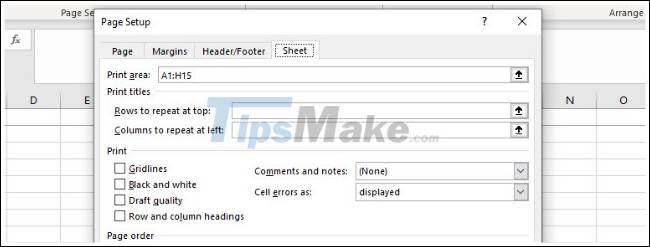
Here are the options and settings you can customize in the menu:
- Print Titles: Freezes rows and columns on the worksheet.
- Gridlines : This option allows users to set whether or not to display gridlines between cells.
- Headings: This option allows adding headers, headers.
- Comments, Notes, and Errors : Displays comments, notes, and error warnings embedded in the document.
- Print Order : set which documents to print first, which documents to print later.
Also in this menu you can access the window Print Preview to print preview. Or the fastest way to open the Print Preview door is to press Ctrl + P.
Step 4: Save or print the Excel file in PDF format
After having formatted an Excel document or file, you can choose to print or save the Excel file as PDF. To save an Excel file as a PDF, on the Save As dialog box, choose PDF from the Save as type menu . Alternatively, you can choose Export => Export to XPS / PDF.
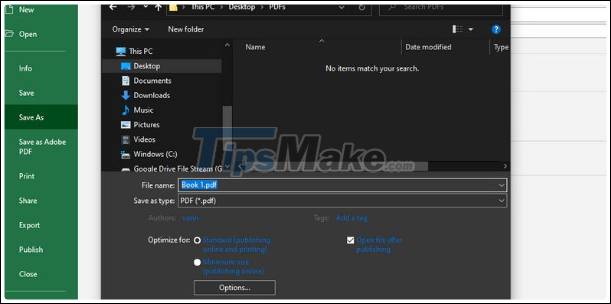
Click Options to select the printing area:
- Selection : selects to print the current cells you have selected.
- Active Sheets: select to print the current sheet.
- Entire Workbooks: select all workbooks in the current Excel file.
- Table: prints the current workbook that you create in Excel.
To print the Excel file in PDF format, click Microsoft Print to PDF from the menu. Note, click Print to see the preview, make sure all the settings are correct.

TipsMake's above article has just guided you how to save Excel file to PDF format. Hope the above tip will be useful to you. Good luck.