How to run Windows applications on Linux with Vineyard
Linux is a great operating system, there are tons of reasons to switch to Linux, from saving money to learning new skills or simply supporting the open source community.
However, when switching from Windows to Linux, certain programs will stop working. Wine is an application compatibility layer that allows users to run Windows applications on Linux or Mac. Using parts of Wine software like PlayOnLinux or Vineyard makes it easier to install and run Windows applications.
What is vineyard?
Vineyard is a collection of libraries and tools used to run Windows programs on Linux. The goal of the project is to simplify the integration of Wine into computers. Basically, Vineyard provides a visual means to set up Wine on Linux, allowing integration with GNOME desktops.
Vineyard has a utility called Vineyard Preference to set Wine, keeping the default Wine configuration separate from other Wine profiles.
It also includes Nautilus Wine. Extension for GNOME's default file manager allows configuration with the properties window. Vineyard uses Python Wine, so it allows interaction with Wine registration database. Moreover, users can easily control Wine components including library, theme and drive.
How to install Vineyard for Linux
First, visit the Vineyard project website and select daily build version or stable build version. Daily build versions are experimental versions, and stable build versions are older stable versions.
Because Vineyard needs to be installed via PPA, so open a terminal window (Ctrl + Alt + T) and run:
- 4 quick access to a Terminal in Linux
sudo sh -c 'add-apt-repository ppa: cybolic / vineyard-testing && apt update; apt install vineyard '
Also, if you are using the old PPA, add the following line to add a stable PPA:
sudo sh -c 'add-apt-ppa repository: cybolic / ppa && apt update; apt install vineyard '
After that, a message appears asking if the user wants to install the latest version of Vineyard. Press Enter to continue, or Ctrl + C to cancel. You will then notice a message explaining how much disk space will be used and asking if you want to continue. Press Y to continue, or N to cancel. Since Vineyard requires Wine, it is best to install beta packages from Wine PPA. Enter the following command line:
sudo sh -c 'add-apt-repository ppa: ubuntu-wine / ppa && apt update; apt install wine '
When the installation is complete, you will see a message about setting up Vineyard.

Set up Vineyard
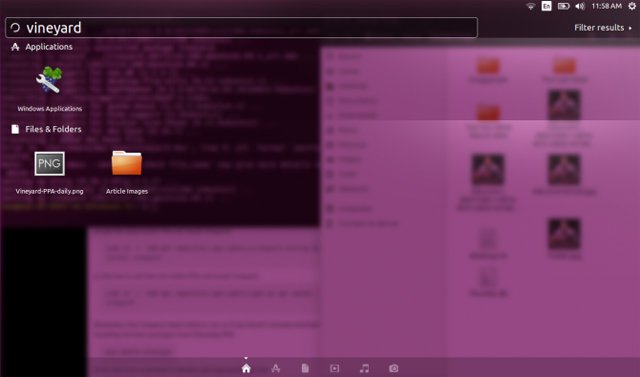
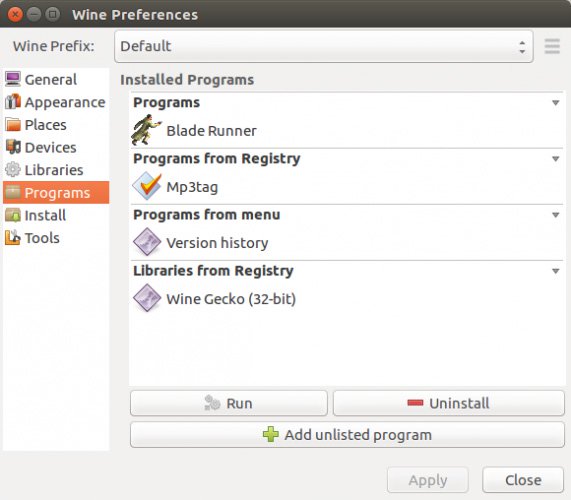
Once the Vineyard has been installed, open the application. A " Wine Preferences " screen appears with several options. On the left bar, you will see:
- General
- Appearance
- Places
- Devices
- Libraries
- Programs
- Install
- Tools
Under General, Vineyard allows users to choose Windows version from Windows 2.0 to Windows 10. Appearance provides surface changes, such as options to display Linux window frames or anti-aliasing. In addition, Vineyard allows setting up program behavior. You can set the program window to open in a virtual desktop, and specify the screen size.
Places shows the drives and folders to add and delete paths to programs or devices. Vineyard has automatic detection feature. Devices use to select video and audio and Programs automatically pulls previously installed Windows applications.

In the Install tab, you will find a list of Windows applications that can be installed directly from Vineyard without downloading.
Vineyard is very easy to use. Just add PPA, follow the instructions to install the program and open it. You will run Windows applications on Linux immediately.
I wish you all success!
See more:
- How to run Windows applications in Linux
- Ways to install Microsoft Excel on Linux
- How to install Windows on Linux with Wine-doors
You should read it
- ★ Instructions for installing Windows software on Linux with PlayOnLinux
- ★ Run Windows applications on Linux, macOS and other platforms
- ★ How to use Zsh (or other Shells) on Windows 10?
- ★ Instructions for installing Kali Linux on Windows 10 are easier than ever
- ★ How to install Windows Game on Linux with Winepak