Table of Contents
This updated guide examines How to Add Interesting Graphics to Images Posted on Social and organizes the essential facts, background, and practical takeaways in clear American English.
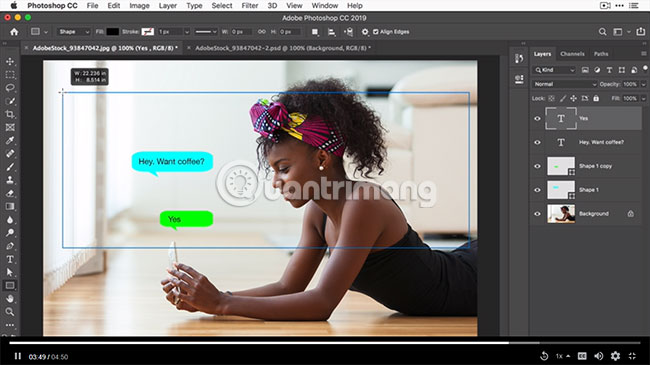
Create text bubbles
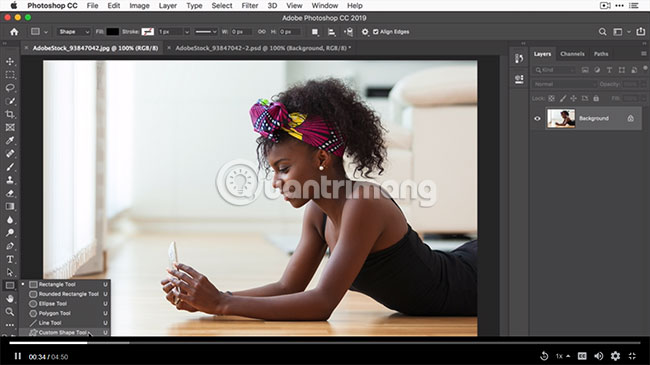
2. In the Options bar , click the Shape field to open the Shape Picker tool.
3. In the Shape Picker , click the gear icon, select the Talk Bubbles category and select the shape you want.

4. Drag inside the image to create a text bubble. This automatically creates a Shape layer containing this object.
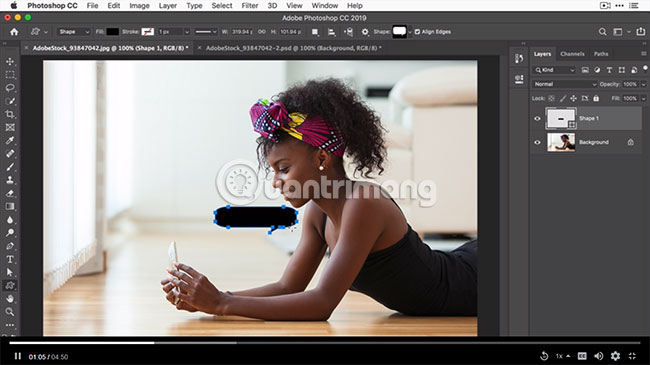
5. In the Options bar , click the Fill field and choose a color for the text bubble.

6 Select the Move tool in the Toolbar and drag to move the text bubble into place.
7 Choose Edit> Transform Path> Flip horizontal to flip the text bubble.
Create another text bubble
1. In the Layers panel , right-click on the Shape layer and select Duplicate Layer.
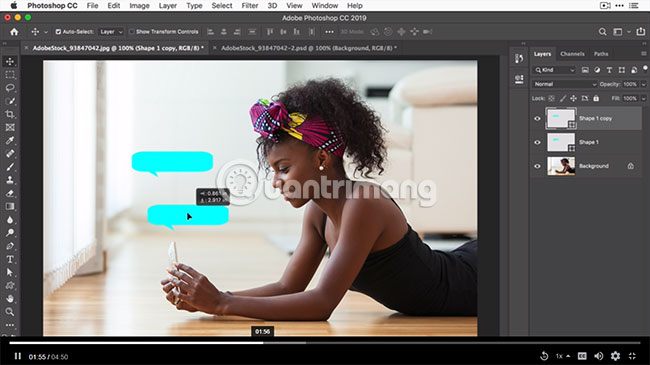
2. With the second Shape layer selected in the Layers panel , select the Move tool in the Toolbar. In the picture, drag to move the second text bubble.
3. Reselect the Custom Shape tool in the Toolbar, click the Fill field and select the color for the second text bubble.
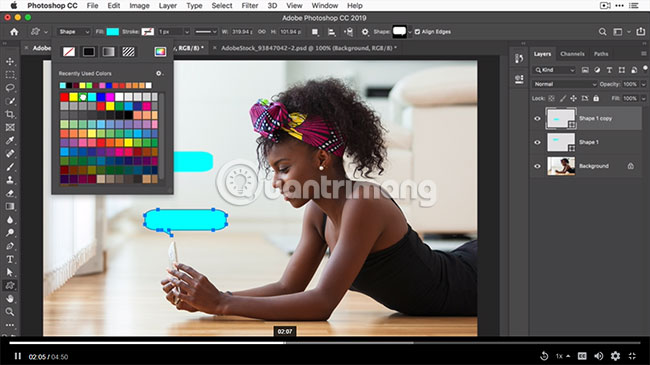
4. Select Edit> Free Transform Path or pressCmd+T(MacOS) orCtrl+T(Windows). In the image, drag the anchor points on the second text bubble to change its size. Click outside the text bubble to apply the change.
Tip : Objects you create with the Shape tool are vector objects, so their edges are very smooth. You can resize and transform them as many times as you like without compromising image quality.
5. Select the Horizontal Type tool in the Options bar and add text on each text bubble.
Create frames around part of the image
1. Select Rectangle tool in Toolbar.
2. Drag inside the image to create a rectangle.
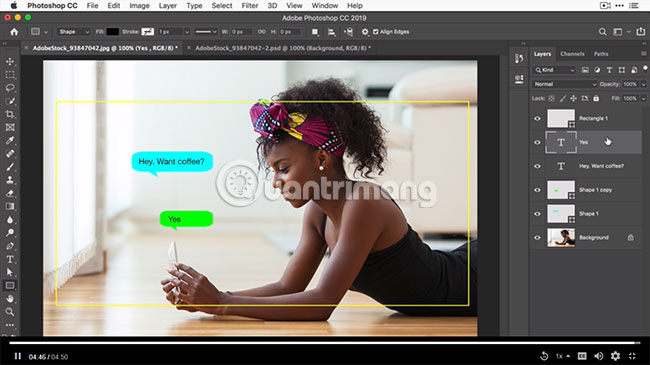
3. In the Properties panel , click the Color field and select the No Fill icon. Click on the Stroke field and choose a color. Drag the Size slider to set the size for the stroke. Strokes around empty objects look like frames around a part of an image.
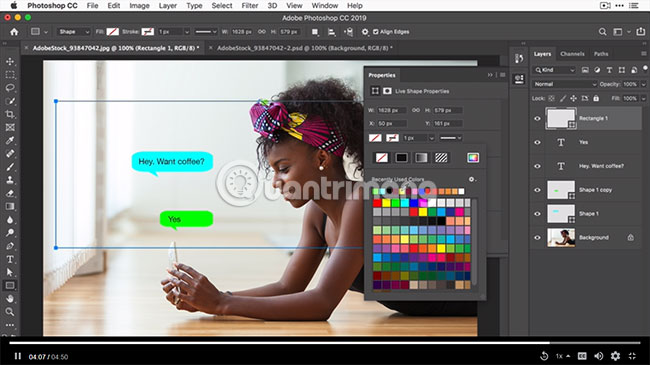
4 Choose Edit> Free Transform or pressCmd+T(MacOS) orCtrl+T(Windows). In the image, drag the anchor points on the object to change its size. PressEnterorReturnto apply this change.
Tip : To hide the blue path from the view, select another layer or other tool.
Save your product
1. Choose File> Save as to save a copy of the image in PSD format with the layers preserved. You can edit them in the future if needed.
2. Select File> Save as again to save the copy of the image in JPEG or PNG format and post it to the social network.
Hope you are succesful.
FAQ
What is How to Add Interesting Graphics to Images Posted on Social about?
It provides a structured overview of Photoshop, explains the main context, and highlights practical takeaways for readers.
Why does this topic matter?
Understanding the main concepts helps readers evaluate the issue, avoid common mistakes, and make better-informed decisions.
How should readers use this information?
Use the guidance as a practical starting point, confirm details that may have changed, and follow current product, safety, or security recommendations.
Related Articles
 These Are 5 Interesting Social Networks for Those Who Want to Give up Facebook5 minutes read
 Create and Work with Vector Graphics in Photoshop15 minutes read
 9 Misunderstand About Social Networks7 minutes read
 Top 10 Social Networks to Replace Facebook (Part 2)8 minutes read
 How to Save High Quality Images in Photoshop: Complete Guide9 minutes read
 What Are Social Networks: What Is Social Networking?4 minutes read
Reader Comments 0
Sign in with email or Google to join the discussion.