How to map WebDAV drives in Windows 10
Web Authoring Authoring and Versioning (WebDAV) is an HTT extension, providing a collaborative way to edit and manage files on remote web servers. In this article we will learn how to map WebDAV drives in Windows 10 so you can access files remotely directly in File Explorer.
- 7 best file management software for Windows to replace File Explorer
To connect to the WebDAV folder in Windows 10, you will need the WebDAV website URL, WebDAV account login and shortcut or connection name. All three of this information will allow you to map WebDAV by mounting its directory into a mapped drive so you can view, edit or delete files from the remote web server using your computer.
- How to map network drives in Windows 10
- How to map network drives with Command Prompt in Windows
- Map OneDrive as a network drive in Windows 10
How to map WebDAV drives in Windows 10
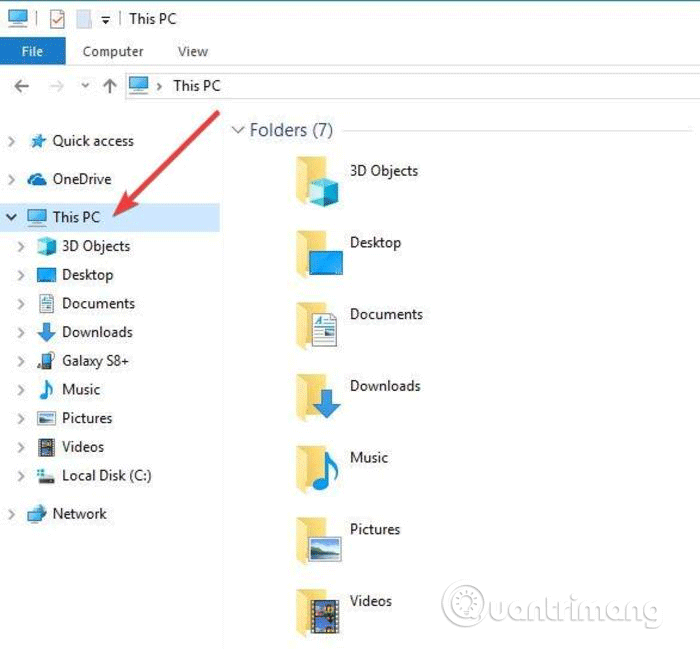
Step 1 . Open File Explorer on your computer and right-click This PC .
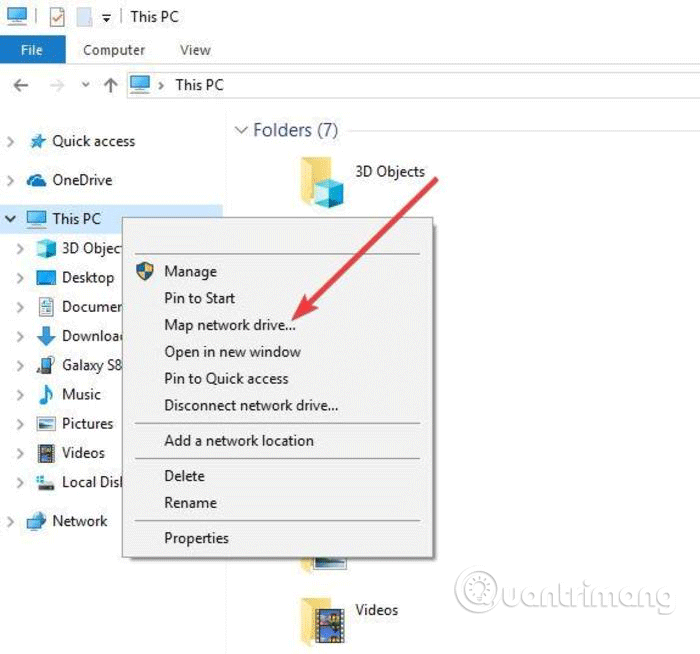
Step 2 . Click on Map network drive .
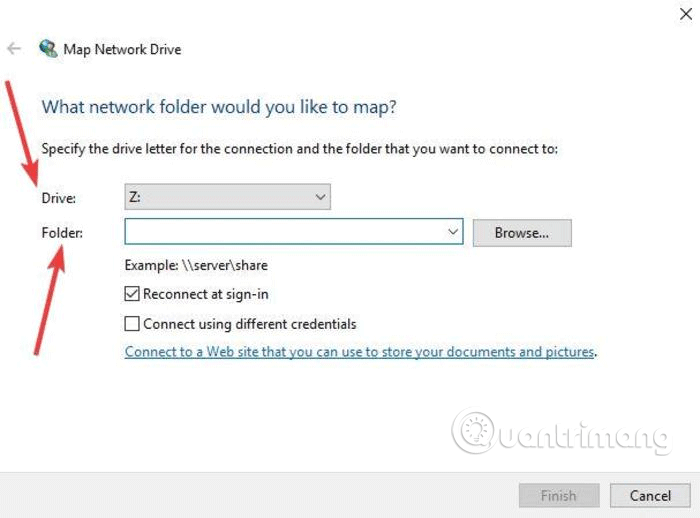
Step 3 . In the new dialog box, enter the drive letter you want to map to and the folder you will add or edit WebDAV files on your local computer.
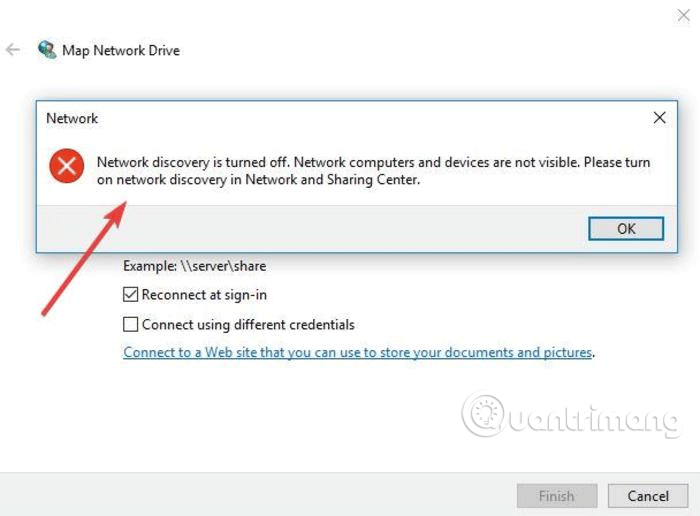
4. If you click on the Browse option, next to Folder and receive the message below, turn on Network discovery in the Network and Sharing Center , then proceed to the next step.
Step 5. Select the option Reconnect at sign-in and Connect using different credentials . The Reconnect at sign-in option allows recovering WebDaV connection when restarting the computer.
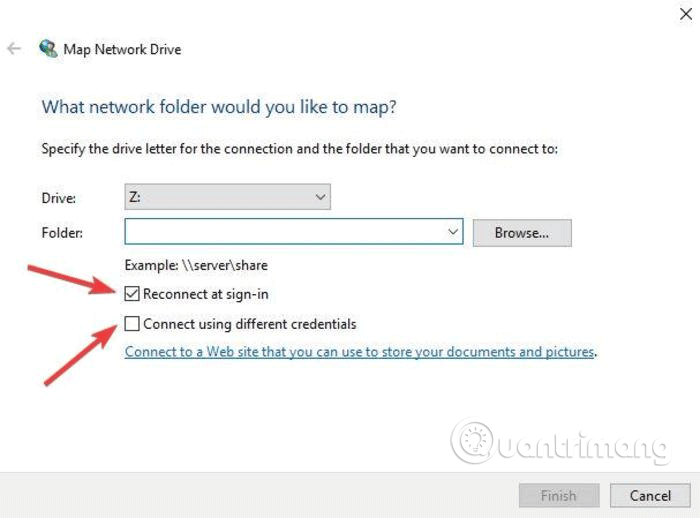
Step 6 . Click on the link to a web site that you can use to store your documents and pictures .
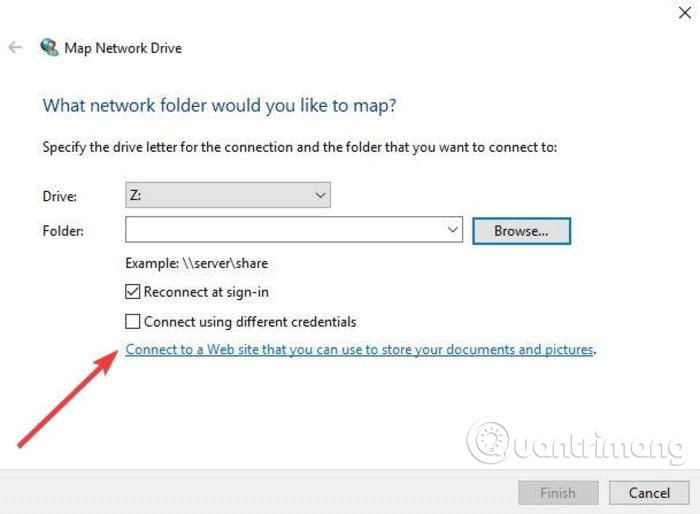
Step 7 . Click Next .
Step 8 . Now, click Choose a custom network location .
Step 9 . Click Next .
Step 10 . Enter your domain URL in the Internet or Network address field with the WebDAV directory at the end.
Step 11 . Enter your WebDAV username and password.
Step 12. Click OK . The Type a name option for this network location has been filled out automatically, but if you want, you can change it.
Step 13 . Click Next and then click Finish .
On File Explorer, the WebDAV folder will be displayed as a mapped drive. Now you can add, edit or delete files and folders via File Explorer.
Could not connect to WebDAV folder
Note: If you have trouble connecting to the WebDAV folder, update the Basic Authentication Level in the Windows Registry.
Step 1 . Right-click on Start and select Run .
Step 2 . Type regedit and press Enter to open the Windows Registry Editor.
Step 3 . Go to directory path:
HKEY_LOCAL_MACHINESYSTEMCurrentControlSetServicesWebClientParameters
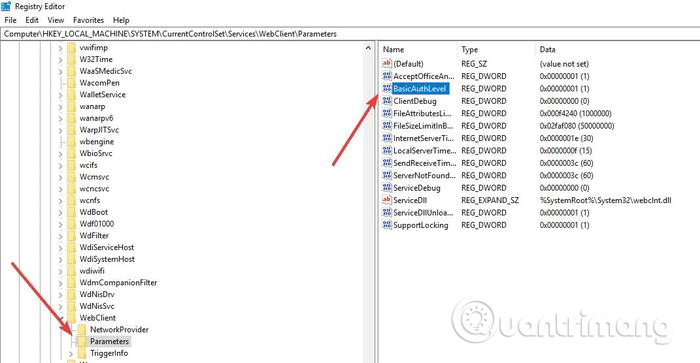
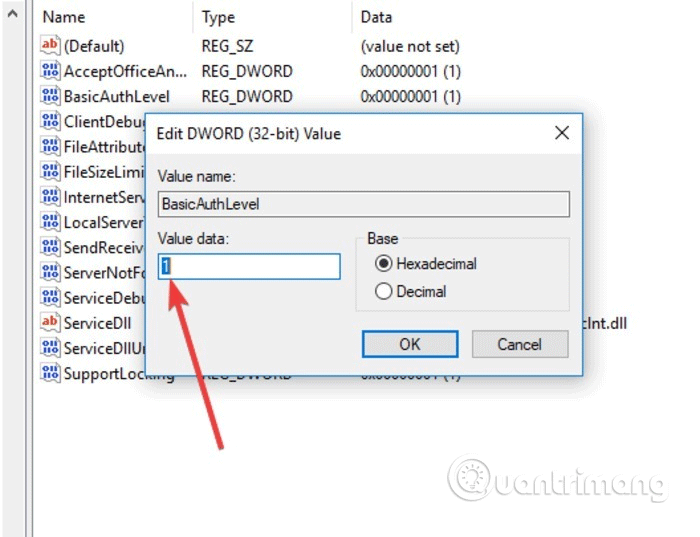
Step 4 . Find the value Basic BasicAuthLevel . By default, the value is set to 2, but if not this value, right-click and choose Modify , then change to 2.
So you know how to map a WebDAV drive on Windows 10. Have you done it successfully!