Set up WebDAV with Apache2 on Mandriva 2010.1 Spring
In the following article, we will present the basic steps to set up WebDAV system with Apache2 on the Mandriva 2010.1 Spring server platform ...
QuanTriMang - In the following article, we will present the basic steps to set up WebDAV system with Apache2 on the Mandriva 2010.1 Spring server platform . The concept of WebDAV - Web-based Distributed Authoring and Versioning , is a combination of extended functions of the HTTP protocol, allowing users to edit data directly on the Apache server, so skip the download / upload step. via FTP.
Preliminary note:
In this test, we use the Mandriva 2010.1 Spring server operating system with the IP address 192.168.0.100
WebDAV installation:
First, we need to update the database for the installation packages as follows:
urpmi.update -a
Apache installation and Apache WebDAV module:
urpmi apache apache-mod_dav
Next, open the file / etc / httpd / conf / httpd.conf and remove the comment outside the three LoadModule lines (note that it should be deleted at the end because otherwise Apache will report an error: available in the apache- mod_dav package ):
en /etc/httpd/conf/httpd.conf
[.]
LoadModule dav_module modules / mod_dav.so
[.]
LoadModule dav_fs_module modules / mod_dav_fs.so
LoadModule dav_lock_module modules / mod_dav_lock.so
[.]
Restart Apache:
/etc/init.d/httpd restart
Create Virtual Host:
Here, we will create the default Apache vhost file in the directory / var / www / web1 / web . And to do this, you need to add the default vhost information to the end of the file / etc / httpd / conf / httpd.conf . Let's start by creating the directory / var / www / web1 / web and set the monitoring permissions for the Apache user account and the group ( apache ) for that directory:
mkdir -p / var / www / web1 / web
chown apache: apache / var / www / web1 / web
Add vhost to the end of / etc / httpd / conf / httpd.conf :
en /etc/httpd/conf/httpd.conf
[.]
NameVirtualHost *: 80
ServerAdmin webmaster @ localhost
DocumentRoot / var / www / web1 / web /
Options Indexes MultiViews
AllowOverride None
Order allow, deny
allow từ tất cả
Reload Apache with the following command:
/etc/init.d/httpd reload
Customize WebDAV Virtual Host:
Here, we will create a WebDAV password file /var/www/web1/passwd.dav with the test account (the parameter -c has a file creation function if it does not already exist):
htpasswd -c /var/www/web1/passwd.dav test
The system will ask you to enter a password for the test account (please note that the -c parameter should not be used if the file / var / www / web1 / passwd.dav is available, otherwise you will lose all account stored in that file). Next, change the permissions of the file / var / www / web1 / passwd.dav so that only the root account and members of the apache group can access:
chown root: apache /var/www/web1/passwd.dav
chmod 640 /var/www/web1/passwd.dav
Next step, edit the vhost information at the end of the file /etc/httpd/conf/httpd.conf and add the following lines:
en /etc/httpd/conf/httpd.conf
[.]
Alias / webdav / var / www / web1 / web
DAV On
AuthType Basic
AuthName "webdav"
AuthUserFile /var/www/web1/passwd.dav
Require hợp lệ-user
[.]
After editing, the final vhost file will look like this:
[.]
NameVirtualHost *: 80
ServerAdmin webmaster @ localhost
DocumentRoot / var / www / web1 / web /
Options Indexes MultiViews
AllowOverride None
Order allow, deny
allow từ tất cả
Alias / webdav / var / www / web1 / web
DAV On
AuthType Basic
AuthName "webdav"
AuthUserFile /var/www/web1/passwd.dav
Require hợp lệ-user
And reload Apache:
/etc/init.d/httpd reload
Check WebDAV:
The next step is to install the cadaver - WebDAV's command-line client application:
urpmi cadaver
To check whether WebDAV is working, type the following command:
cadaver http:/// localhost / webdav /
The system will require the account name, fill in the test and the corresponding password. If there is no problem, the account will be assigned permissions, which means that WebDAV is fully stable. Type quit to exit WebDAV shell:
[root @ server1 administrator] # cadaver http:/// localhost / webdav /
Authentication required for webdav on server `localhost ':
Username: test
Password:
dav: / webdav /> quit
Kết nối đến `localhost 'closed.
[root @ server1 administrator] #
Configure Windows XP Client to connect to WebDAV shared items:
On a Windows XP-based computer, select My Network Places on the desktop and Add a Network Place from the Network Tasks menu (in the left pane):
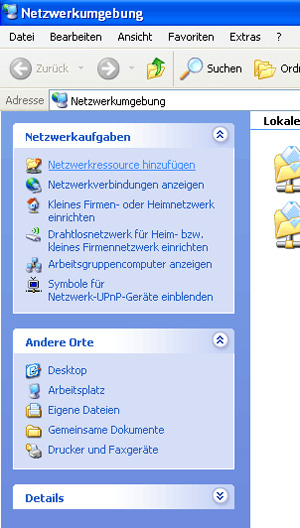
The Windows XP computer here has a German interface so the display language is somewhat different
The Add Network Place Wizard control panel appears, click Next :

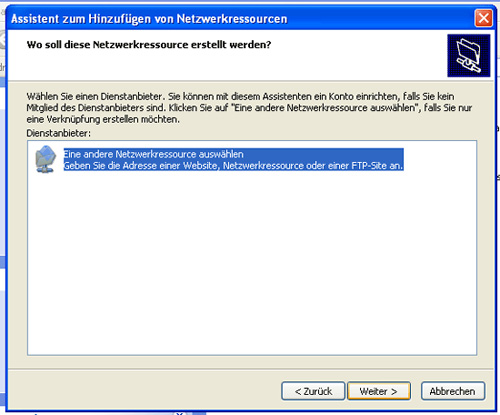
Select Choose another network location and Next :
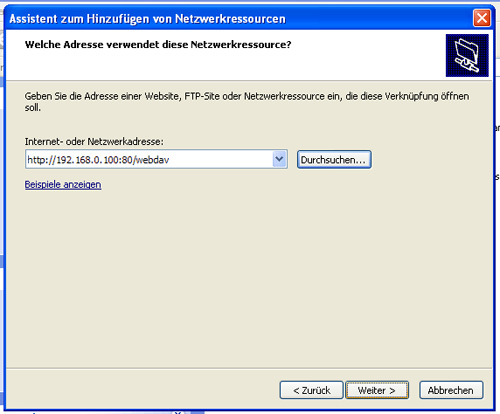
Fill in the information http://192.168.0.100:80/webdav in the Location section and click Next :
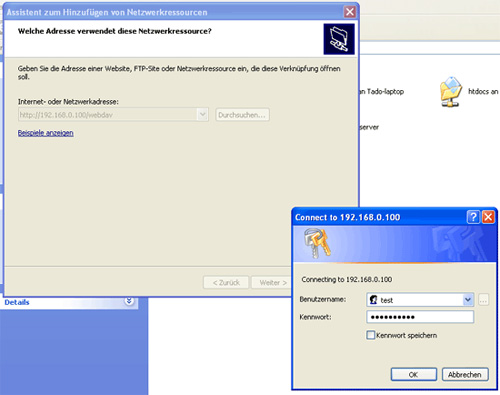
Log in with the test account and the password you just created in the previous step:
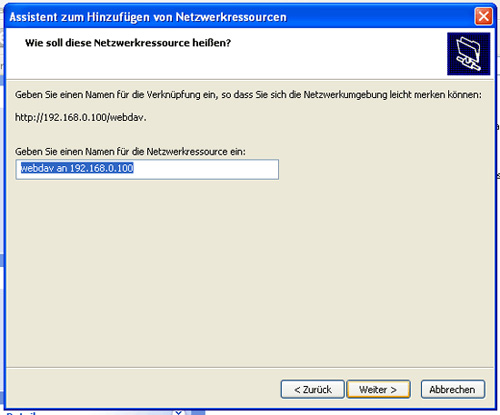
Continue to enter the name of the WebDAV folder:
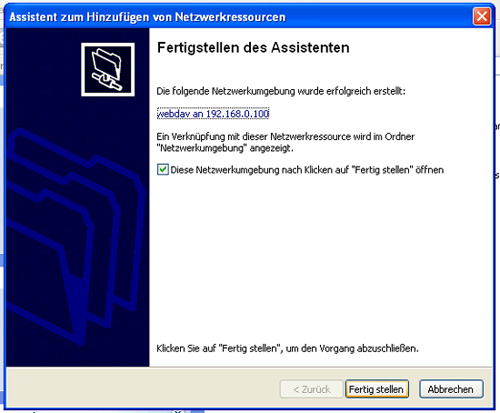
To open a new connection, leave the selection in the Open this network place box when I click Finish and click Finish :
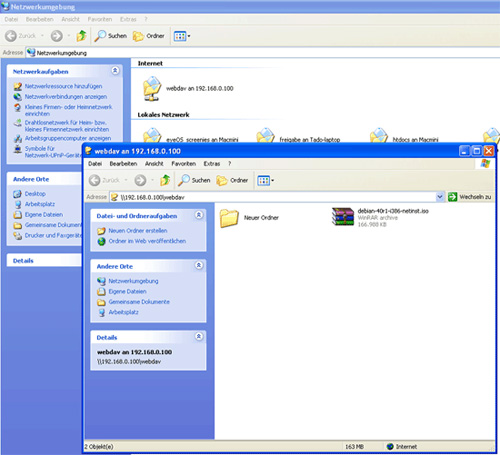
The WebDAV folder will be opened later, the user can access and use the shared resources in / var / www / web1 / web , and will see the WebDAV sharing icon in My Network Places:
Configure Linux Client (GNOME) to connect to WebDAV shared resources:
If you want to create a connection from WebDAV to GNOME desktop system, select Places> Connect to Server .:

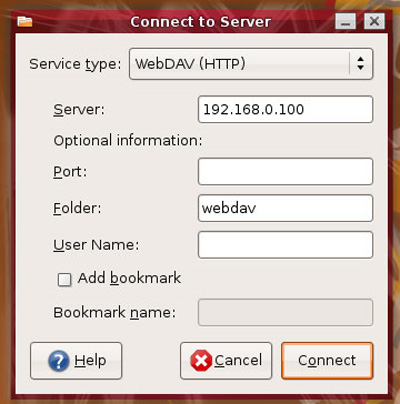
In the Service type section, select WebDAV (HTTP) and fill in the Server box (here is 192.168.0.100 ) and Folder (here is webdav ), not fill in the User Name box , then click Connect :
Next, the system will ask for the account information, you fill in the test and password, then click Next :

In some cases, you will receive the following error message:
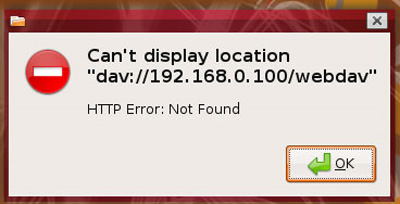
But the WebDAV shared folder still appears on the desktop, you can ignore the above error message:

Once you have completed the above steps without any problems or errors, you have successfully set up WebDAV system with Apache2 on the Mandriva 2010.1 Spring server operating system. Good luck!
Some references: WebDAV, Apache and Mandriva.
Was this article helpful?
Your feedback helps us improve.
Related Articles
 How to map WebDAV drives in Windows 104 minutes read
 Close-up of the screen coordinates to the charm of the spring-producing robots1 minutes read
 Instructions for delaying updating Windows 10 Spring Creators Update in 365 days4 minutes read
 How to make delicious traditional spring rolls5 minutes read
 Windows 10 Spring Creators postponed the launch date due to trouble2 minutes read
 Guide to plug unique spring bud buds to play Tet5 minutes read
Reader Comments 0
Sign in with email or Google to join the discussion.