How to lock USB ports on Windows 7/8/10
Locking USB ports on your Windows computer will help protect your data more securely, preventing others from borrowing your computer and potentially spreading viruses when they plug in USB drives or any other external storage devices. Below are some ways to disable USB ports on your computer or laptop..
USB ports are a common way for viruses to infect computers today. However, if you rarely use USB ports or don't want others to use them on your computer, you can lock the USB ports.

How to disable USB ports on a Windows computer
Lock USB ports on Windows computers by:
1. Disabling Autorun
2. Through BIOS
3. Through Registry
4. Through Device Manager
5. Using software
Instructions on how to lock USB ports on Windows
1. Lock USB ports on Windows by disabling Autorun.
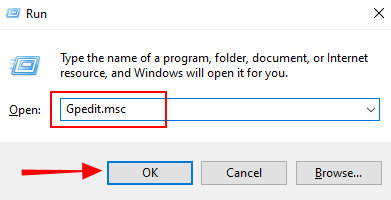
Step 1: Press the Windows + R key combinationto open the Run command window, then type Gpedit.msc into it.
Step 2: Select Computer Configuration (1) => Administrative Templates (2) => Windows Components (3)
(If using Windows XP, select Computer Configuration => Administrative Templates => System)
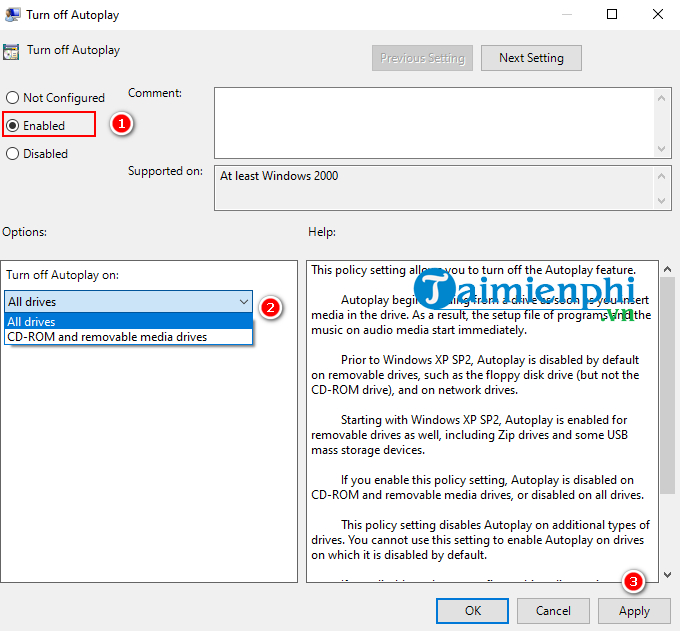
Next, select Autoplay Policies (4) -> In the Details panel , double-click on Turn off Autoplay (5) .

Step 3: Click Enabled , then in the Turn off Autoplays dialog box, click All drivers to disable Autorun on all drives.
2. Lock USB ports on your computer via BIOS.
Refer to the instructions on how to access BIOS here -> access Advanced Settings or Onboard Devices (the order may vary depending on the motherboard).
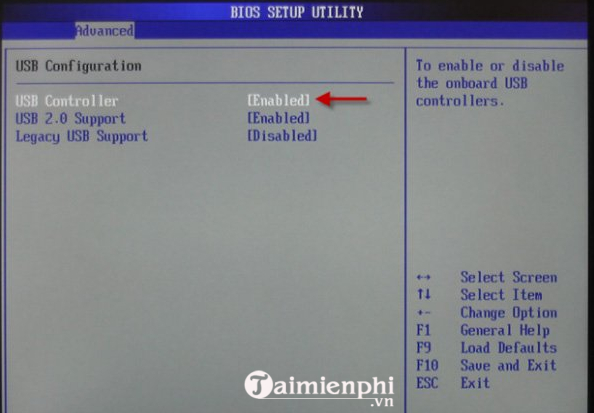
In USB Configuration , change Enable to Disable , then press F10 to save the changes and restart the system.
3. Lock USB ports via Registry
The steps are similar on both Windows 7 and Windows 8 computers :
Step 1 : Press the Windows + R keys on your keyboard to open the Run dialog box . In the Run dialog box, type Regedit and press Enter.

Step 2 : In the Registry Editor window, navigate to the following path.
HKEY_LOCAL_MACHINESYSTEMCurrentControlSetServicesUSBSTOR
Then, in the right-hand column, find the Start section.
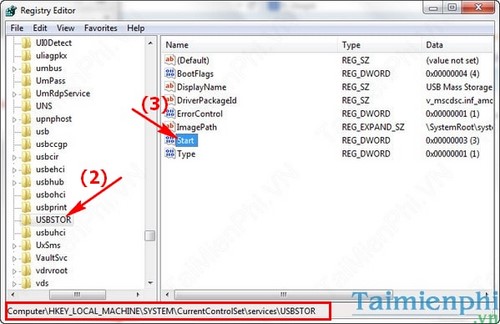
Step 3 : Double-click on the Start menu . A dialog box will appear; enter the value 4 in the Value data field and click OK.
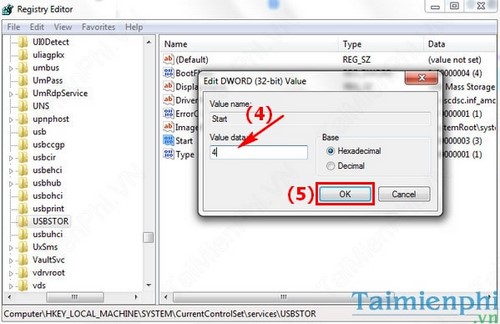
Close the window, and from now on, when you plug a USB drive into your computer, the computer will no longer recognize your USB drive.
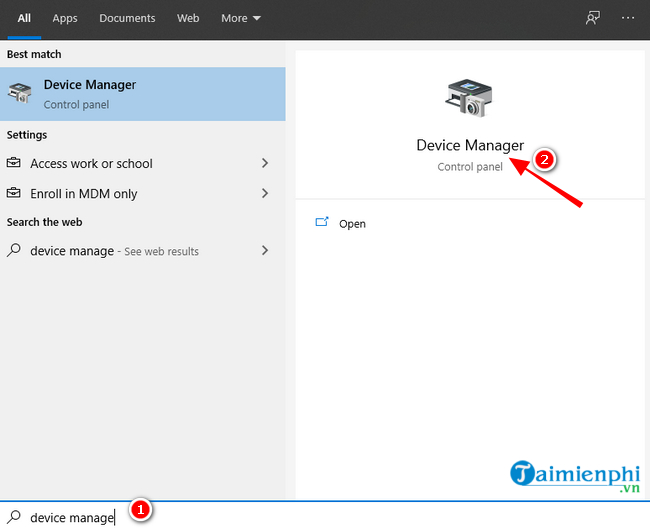
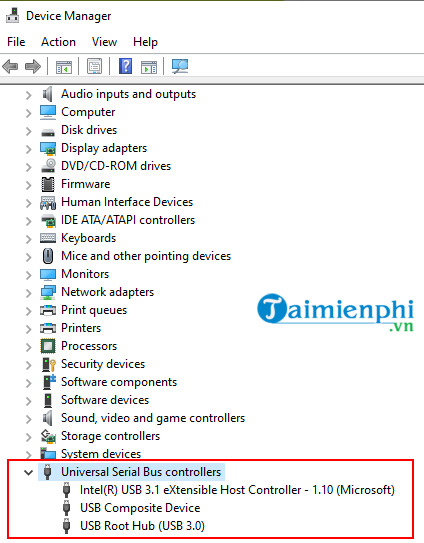
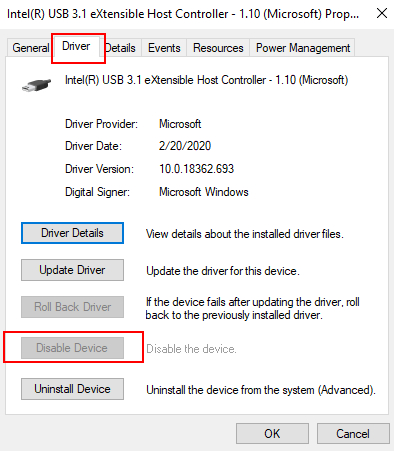
4. Lock USB ports via Device Manager
Step 1: Type "device manager" into the Search box on the Start Menu, then select Device manager .
Step 2: Select Universal Serial Bus Controllers (USB).
Step 3: Select the USB port you want to disable -> USB Root -> select the Driver tab -> select Disable.
5. Lock USB ports using software.
You can download the USB Disabler Pro software here.
With these simple steps, you can lock the USB ports on your Windows 7/8 computer. Additionally, if you encounter any errors while using a USB drive, you can refer to other troubleshooting tips.